在【数据整合】Kettle 应用之一 介绍、安装中我们已经介绍了如何安装Kettle工具。现在我们开始使用Kettle。
Kettle应用场景
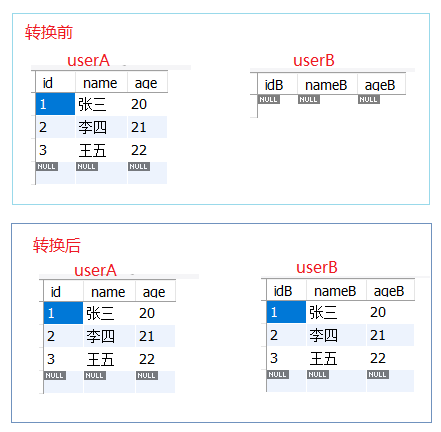
- 示例1:将数据源A库中的某张表的数据插入到数据库B中。
- 示例2:将数据源A库中的某张表的数据插入更新到数据库B中。
- 示例3:将数据源A库中的某张表或某几个表中的字段合并后的数据插入到数据库B中。
- 示例4:将数据源A库中的某两张或多张表级联查询的数据插入到数据库B中的一张表中
在此,我们主要对示例1进行说明。
为方便演示,我们在数据库A和数据库B中分别创建表userA和表userB。最终目标为将数据表userA中的数据插入到数据表userB中。
create database testA;
use testA;
create table `userA`(
    `id`int(10) primary key,
    `name` varchar(50),
    `age` int(3)
)ENGINE=InnoDB DEFAULT CHARSET=utf8;
insert into userA values(1,'张三',20);
insert into userA values(2,'李四',21);
insert into userA values(3,'王五',22);

create database testB;
use testB;
create table `userB`(
    `idB`int(10) primary key,
    `nameB` varchar(50),
    `ageB` int(3)
)ENGINE=InnoDB DEFAULT CHARSET=utf8;
操作步骤
1、运行软件,进入主界面。点击左上角的 文件 → 新建 → 转换新建一个转换,并保存,转换的后缀名为ktr。

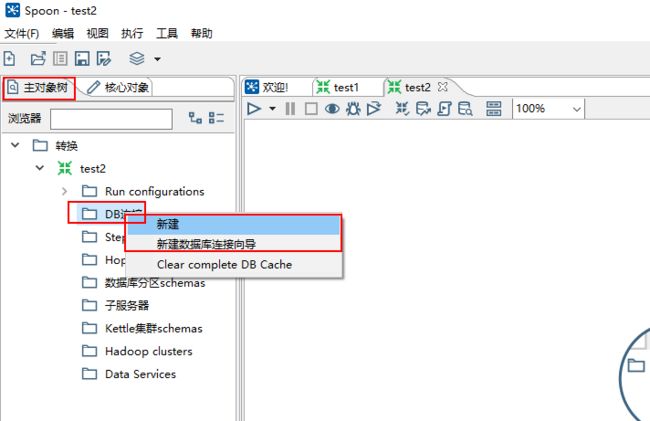
2、点击面板左侧的 主对象树 ,选择 DB连接 右键,选择 新建 或 新建数据库连接向导 分别创建对数据库A和数据库B的连接。


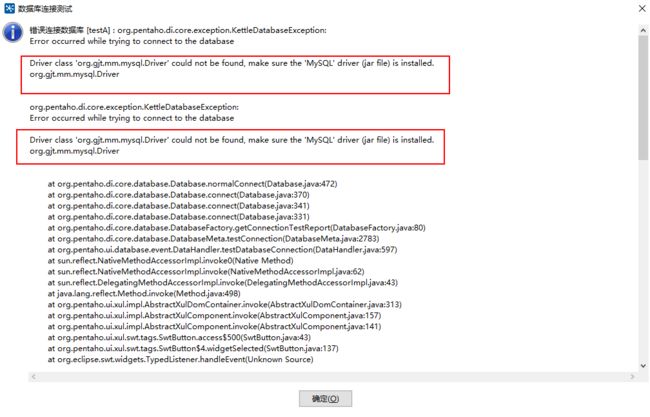
注意: 如果在点击测试连接时出现下图所示错误,检查我们的安装目录下的lib中是否有对应数据库连接的jar包文件(如mysql的jar文件:mysql-connector-java-5.1.6-bin.jar),下载对应的jar,放到lib文件夹下,重启kettle软件,即可。
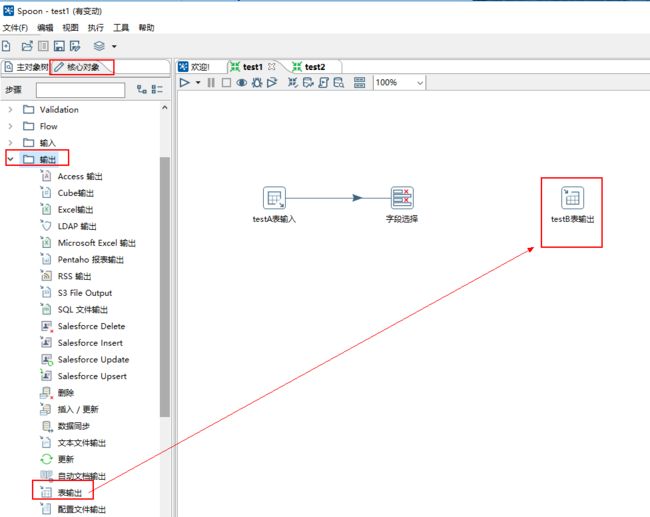
3、点击面板左侧的 核心对象 ,选择 输入文件夹下的 表输入 并把它拖到右侧的编辑区中。

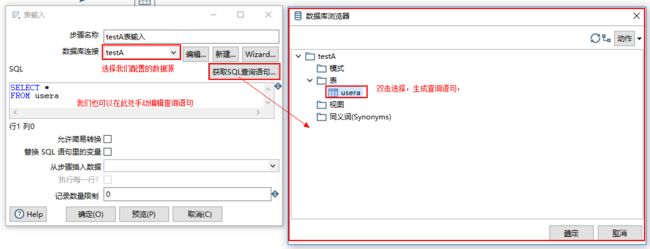
4、双击编辑区的“表输入”图标,编辑数据输入源。
5、点击面板左侧的 核心对象 ,选择 转换文件夹下的 字段选择 并把它拖到右侧的编辑区中。
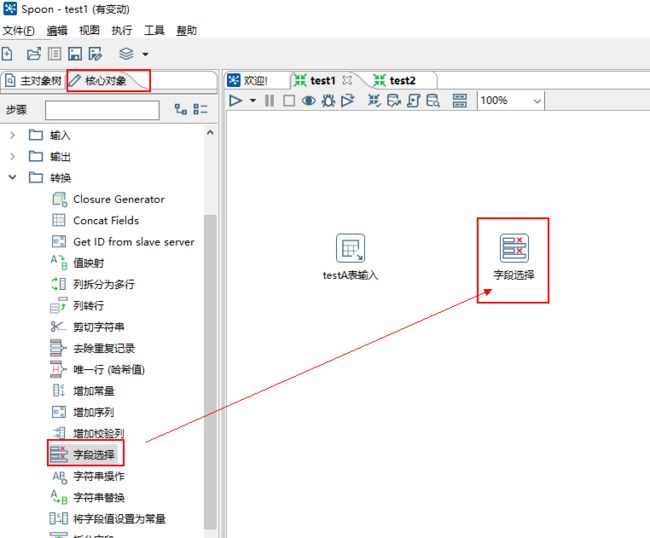
6、按住 shift 同时鼠标从 “testA表输入”到“字段选择”画一条连接线。

7、双击编辑区的“字段选择”,选择“元数据”面板,点击右侧“获取改变的字段”,将自动列出输入表中所有字段。根据要抽取的目标表中的字段名,给每一个输入字段修改为对应的输出字段。
注意:此时必须在Encoding栏中选择输出库的编码格式

8、点击面板左侧的 核心对象 ,选择 输出文件夹下的 表输出 并把它拖到右侧的编辑区中,按住 shift 划线连接 “字段选择”。

9、双击编辑区的“表输出”图标,编辑数据输出目标。
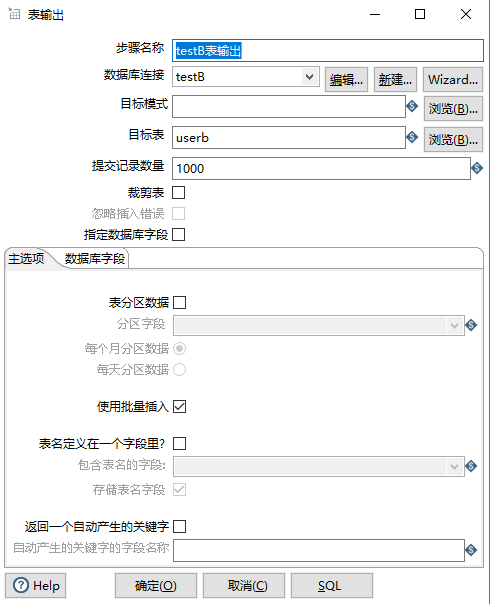
10、然后勾选 指定数据库字段 ,选择 数据库字段 ,点击 输入字段映射,映射输入输出关系。

注意:如果在点击 输入字段映射 时,提示如下错误:
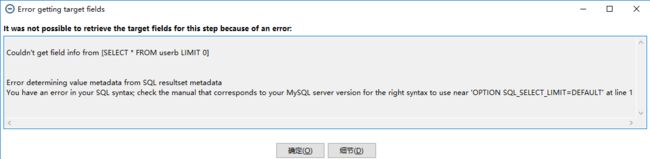
检查我们的数据库驱动jar包版本 mysql-connector-java-5.1.6-bin.jar , 因为测试数据库版本为 MySQL 6.3 , 而使用此版本的数据库驱动包,会在创建数据库连接的时候发送测试语句 SET OPTION SQL_SELECT_LIMIT=DEFAULT , 但是5.6及以后的版本都不再支持SET...,此时,我们只需要将驱动版本升级,只需要将数据库驱动版本修改为5.1.22以上即可。
11、因为我们在“字段选择”中修改了每个输入字段对应的输出字段的名称,此处,我们点击 猜一猜 ,将会自动根据字段近似度自动匹配映射关系。

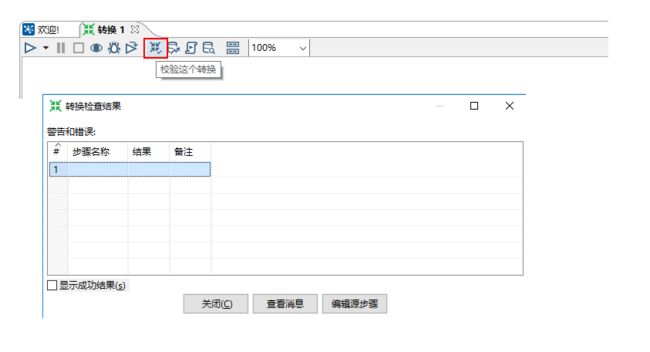
12、到这里,我们最简单的一个提取数据的转换已经建立完成了,点击“校验这个转换”,Kettle会校验并给出简单的报告。没有任何问题。
13、点击“运行这个转换”,选择“本地执行”,点击“启动”来执行这个转换。

14、转换成功后,我们可以在控制台中看到如下信息。检查本地数据库,数据库A的userA表中的数据已经全部被导入到了数据库B的userB表中。

注:此示例只适用于目标表为空,或者目标表与源表没有主键冲突的情况
上一篇: Kettle入门之一 介绍、安装
下一篇: Kettle入门之三 Kettle定时任务(GUI)