nginx基础详解
Nginx web基础
一、Nginx介绍
1.Nginx概述
Nginx是一个开源且高性能、可靠的Http Web服务、代理服务。
开源: 直接获取源代码
高性能: 支持海量并发
可靠: 服务稳定
2.Nginx特点
1)高性能、高并发
Nginx支持很高的并发,Nginx在处理大量并发的情况下比其他服务要快
2)轻量且高扩展性
#轻量
1.功能模块少 (源代码仅保留核心模块代码,其余代码模块化 (易读,便于二次开发,对于开发人员非常友好
2.高扩展性
需要什么模块在安装什么模块,不需要全部安装,并且还支持第三方模块
3)高可靠性
只要不离谱,几乎不会出现问题,其他web服务器需要每隔一段时间进行重启,nginx不需要,nginx宕机时间是99999级别(服务器连续运行一年最多宕机5-6分钟)
4)支持热部署
nginx可以在运行期间,进行更新迭代,代码部署
5)大多数公司都在用nginx
1.Nginx技术成熟,具备的功能是企业最常使用而且最需要的
2.适合当前主流架构趋势, 微服务、云架构、中间层
3.统一技术栈, 降低维护成本, 降低技术更新成本
6)Nginx使用的是Epool网络模型
Nginx采用Epool网络模型,Apache采用Select模型
Select: 当用户发起一次请求,select模型就会进行一次遍历扫描,从而导致性能低下。
Epool: 当用户发起请求,epool模型会直接进行处理占用资源少,效率高效,并无连接限制。
7)性能全面
其他的web服务
nginx:占用资源少,nginx支持的插件多,根据不同模块可自定义nginx
apache:httpd,最早起使用的web服务,性能不高,操作难
IIS:Windows下的web服务
lighttpd:是一个德国人领导的开源web服务软件,其根本目的是提供一个专门针对高性能网站,安全快速兼容性好并且灵活的webserver环境,具有非常低的内存开销,CPU占用率低,效能好,以及丰富的模块
tengine:由淘宝根据nginx开发的,在nginx的基础上,针对大访问量网站的需求,添加了很多功能与特性
openresty-nginx:OpenResty是一个基于 Nginx 与 Lua 的高性能 Web 平台,其内部集成了大量精良的 Lua 库、第三方模块以及大多数的依赖项。用于方便地搭建能够处理超高并发、扩展性极高的动态 Web 应用、Web 服务和动态网关。
GWS:gogle web server
BWS:百度 web server
后端服务器:
Tomcat
Resin
weblogic
Jboss
二、Nginx应用场景

静态服务器:不需要服务器做特殊处理的资源,(html、图片、音频、视频)
代理服务器:将一个服务请求转移给另一个服务
安全服务器:nginx做安全需要lua脚本语言配合使用
安装nginx可以参考我之前写的文章
https://editor.csdn.net/md/?articleId=115080570](https://editor.csdn.net/md/?articleId=115080570)这里就不一一赘述了
1)启动服务
1.方法一:
[root@web01 ~]# systemctl start nginx
如果启动不了查看端口是否被占用
[root@web01 html]# netstat -lntp | grep 80
[root@web01 html]# systemctl stop httpd
2.方法二:
[root@web01 ~]# nginx
2)检查启动
1.方式一
[root@web01 ~]# systemctl status nginx
2.方式二:
[root@web01 ~]# ps -ef | grep nginx
3.方式三:
[root@web01 ~]# netstat -lntp | grep 80
4.方式四:
直接访问网站 http://192.168.1.7/
5.方式五
[root@web01 ~]# curl 192.168.1.7
6.方式六:
[root@web01 ~]# nginx -v
3)nginx常用命令
1.nginx启动
1)方法一:
[root@web01 ~]# systemctl start nginx
2)方法二:
[root@web01 ~]# nginx
#注意:使用什么方式启动的,就使用对应的方式关闭
2.nginx停止
1)方法一:
[root@web01 ~]# systemctl stop nginx
2)方法二:
[root@web01 ~]# nginx -s stop
3.nginx重启
1)方法一:
[root@web01 ~]# systemctl restart nginx
4.nginx重载,重新加载配置文件
1)方法一:
[root@web01 ~]# systemctl reload nginx
2)方法二:
[root@web01 ~]# nginx -s reload
5.加入开机自启
[root@web01 ~]# systemctl enable nginx
#Centos6:
启动:nginx
service nginx start
/etc/init.d/nginx start
加入开机自启:
chkconfig nginx on
三、Nginx服务添加模块
一、安装时添加模块
#创建用户
[root@web02 ~]# groupadd www -g 666
[root@web02 ~]# useradd www -u 666 -g 666 -s /sbin/nologin -M
#cd到nginx的目录(这个是自己下载后解压的地址)
cd /opt/nginx-1.18.0

#配置模块在命令行输入以下代码
./configure --prefix=/usr/local/nginx --user=www --group=www --without-http_gzip_module --with-compat --with-file-aio --with-threads --with-http_addition_module --with-http_auth_request_module --with-http_dav_module --with-http_flv_module --with-http_gunzip_module --with-http_gzip_static_module --with-http_mp4_module --with-http_random_index_module --with-http_realip_module

#根据提示安装缺少的库,我这里缺少PCRE、OPENssl
[root@web02 nginx-1.18.0]# yum install -y pcre pcre-devel
[root@web02 nginx-1.18.0]# yum install -y openssl openssl-devel

#编译安装
[root@web02 nginx-1.18.0]# make && make install

#配置环境变量
[root@web02 nginx-1.18.0]# vim /etc/profile
#将此段内容粘贴在文件尾部
NGINX_HOME=/usr/local/nginx/sbin
PATH=$PATH:$NGINX_HOME
export PATH

#重载/etc/profile文件
[root@web02 nginx-1.18.0]# source /etc/profile

#检测是否配置成功
[root@web02 nginx-1.18.0]# nginx -V
nginx version: nginx/1.18.0
built by gcc 4.8.5 20150623 (Red Hat 4.8.5-44) (GCC)
configure arguments: --prefix=/usr/local/nginx-1.18.0 --user=www --group=www --without-http_gzip_module --with-compat --with-file-aio --with-threads --with-http_addition_module --with-http_auth_request_module --with-http_dav_module --with-http_flv_module --with-http_gunzip_module --with-http_gzip_static_module --with-http_mp4_module --with-http_random_index_module --with-http_realip_module
#(此处已经配置完成,模块添加完毕)

#重启nginx服务
[root@web02 nginx-1.18.0]# systemctl start nginx
二、已经安装过的nginx添加模块
1.生成模块
[root@web02 nginx-1.16.1]# ./configure --prefix=/usr/local/nginx-1.18-new --user=www --group=www --without-http_gzip_module --with-compat --with-file-aio --with-threads --with-http_addition_module --with-http_auth_request_module --with-http_dav_module --with-http_flv_module --with-http_gunzip_module --with-http_gzip_static_module --with-http_mp4_module --with-http_random_index_module --with-http_realip_module --with-http_secure_link_module --with-http_slice_module --with-http_ssl_module --with-http_stub_status_module --with-http_sub_module --with-http_v2_module --with-mail --with-mail_ssl_module --with-stream --with-stream_realip_module --with-stream_ssl_module --with-cc-opt='-O2 -g -pipe -Wall -Wp,-D_FORTIFY_SOURCE=2 -fexceptions -fstac
-protector-strong --param=ssp-buffer-size=4 -grecord-gcc-switches -m64 -mtune=generic -fPIC' --with-ld-opt='-Wl,-z,relro -Wl,-z,now -
2.安装依赖
[root@web02 nginx-1.16.1]# yum install -y openssl openssl-devel

3.再生成一次
[root@web02 nginx-1.16.1]# ./configure --prefix=/usr/local/nginx-1.18-new --user=www --group=www --without-http_gzip_module --with-compat --with-file-aio --with-threads --with-http_addition_module --with-http_auth_request_module --with-http_dav_module --with-http_flv_module --with-http_gunzip_module --with-http_gzip_static_module --with-http_mp4_module --with-http_random_index_module --with-http_realip_module --with-http_secure_link_module --with-http_slice_module --with-http_ssl_module --with-http_stub_status_module --with-http_sub_module --with-http_v2_module --with-mail --with-mail_ssl_module --with-stream --with-stream_realip_module --with-stream_ssl_module --with-cc-opt='-O2 -g -pipe -Wall -Wp,-D_FORTIFY_SOURCE=2 -fexceptions -fstac
-protector-strong --param=ssp-buffer-size=4 -grecord-gcc-switches -m64 -mtune=generic -fPIC' --with-ld-opt='-Wl,-z,relro -Wl,-z,now -pie'

4.清理之前的配置与编译结果
[root@web02 ~]# cd nginx-1.18.0/
[root@web02 nginx-1.18.0]# rm -rf Makefile

5.安装
[root@web02 nginx-1.16.1]# make && make install

6.重做软连接
[root@web02 ~]# ln -s /usr/local/nginx-1.16.1-new /usr/local/nginx

7.重启服务
[root@web02 nginx-1.16.1]# systemctl restart nginx
#若遇到nginx启动失败可以通过cat /var/log/messages解决问题


8.检查是否安装模块
[root@web02 nginx-1.18.0]# nginx -V
nginx version: nginx/1.18.0
built by gcc 4.8.5 20150623 (Red Hat 4.8.5-44) (GCC)
configure arguments: --prefix=/usr/local/nginx-1.18.0 --user=www --group=www --without-http_gzip_module --with-compat --with-file-aio --with-threads --with-http_addition_module --with-http_auth_request_module --with-http_dav_module --with-http_flv_module --with-http_gunzip_module --with-http_gzip_static_module --with-http_mp4_module --with-http_random_index_module --with-http_realip_module
#(此处已经配置完成,模块添加完毕)
四、Nginx相关文件
1.Nginx主配置文件
| 路径 | 类型 | 作用 |
|---|---|---|
| /etc/nginx/nginx.conf | 配置文件 | nginx主配置文件 |
| /etc/nginx/conf.d/default.conf | 配置文件 | 默认网站配置文件 |
2.Nginx代理相关参数文件
| 路径 | 类型 | 作用 |
|---|---|---|
| /etc/nginx/fastcgi_params | 配置文件 | Fastcgi代理配置文件 |
| /etc/nginx/scgi_params | 配置文件 | scgi代理配置文件 |
| /etc/nginx/uwsgi_params | 配置文件 | uwsgi代理配置文件 |
3.Nginx编码相关配置文件
| 路径 | 类型 | 作用 |
|---|---|---|
| /etc/nginx/win-utf | 配置文件 | Nginx编码转换映射文件 |
| /etc/nginx/koi-utf | 配置文件 | Nginx编码转换映射文件 |
| /etc/nginx/koi-win | 配置文件 | Nginx编码转换映射文件 |
| /etc/nginx/mime.types | 配置文件 | Content-Type与扩展名 |
4.Nginx管理相关命令
| 路径 | 类型 | 作用 |
|---|---|---|
| /usr/sbin/nginx | 命令 | Nginx命令行管理终端工具 |
| /usr/sbin/nginx-debug | 命令 | Nginx命令行与终端调试工具 |
5.Nginx日志相关目录与文件
| 路径 | 类型 | 作用 |
|---|---|---|
| /var/log/nginx | 目录 | Nginx默认存放日志目录 |
| /etc/logrotate.d/nginx | 配置文件 | Nginx默认的日志切割 |
nginx配置文件
Nginx主配置文件/etc/nginx/nginx.conf是一个纯文本类型的文件,整个配置文件是以区块的形式组织的。一般,每个区块以一对大括号{}来表示开始与结束。
Nginx主配置文件整体分为三块进行学习,分别是CoreModule(核心模块),EventModule(事件驱动模块),HttpCoreModule(http内核模块)
配置文件内容
[root@web01 nginx]# cat /usr/local/nginx/conf/nginx.conf
################核心模块###########################
########################核心模块########################
#指定启动用户
user www;
#nginx的worker进程的数量
worker_processes  1;
#指定错误日志存放路径以及记录的级别debug/info/notice/warn/error/emerg

error_log  /var/log/nginx/error.log warn;
#error_log  logs/error.log  notice;
#error_log  logs/error.log  info;

#指定pid文件
pid        /usr/local/nginx/logs/nginx.pid;

######################事件驱动模块############################
events {

    #每个worker工作进程的最大连接数
    worker_connections  1024;
}

#####################http内核模块###########################
http {

    #包含nginx可识别的文件类型
    include       mime.types;

    #当nginx不识别文件类型的时候,默认下载
    default_type  application/octet-stream;
    #指定日志格式,日志格式起个名字
    log_format  main  '$remote_addr - $remote_user [$time_lst" '
                      '$status $body_bytes_sent "$http_refe
                      '"$http_user_agent" "$http_x_forwarde
    #指定访问日志存储路径与格式
    access_log  /var/log/nginx/access.log  main;
    #高效传输
    sendfile        on;
    #tcp_nopush     on;

    #开启长连接
    #keepalive_timeout  0;
    keepalive_timeout  65;

    #开启压缩
    #gzip  on;
    #包含网站的配置文件
    include /usr/local/nginx/conf.d/*.conf;
    #一个server表示一个网站
    #server {

        #监听端口
        #listen       80;
        #网站提供的域名
        #server_name  localhost;

        #charset koi8-r;
        #匹配、控制访问的网站站点
        #location / {

            #指定站点目录
            #root   html;
            #指定默认访问的页面
            #index  index.html index.htm;
        #}

        #error_page  404              /404.html;

        # redirect server error pages to the static page /50
        #
        #error_page   500 502 503 504  /50x.html;
        #location = /50x.html {

            #root   html;
        #}

       #
        #location ~ \.php$ {

        #    proxy_pass   http://127.0.0.1;
        #}

        #    root           html;
        #    fastcgi_pass   127.0.0.1:9000;
        #    fastcgi_index  index.php;
        #    include        fastcgi_params;
        #}

        # concurs with nginx's one
        #
        #location ~ /\.ht {

        #    deny  all;
        #}
    #}


    #
    #server {

    #    listen       8000;
    #    listen       somename:8080;
    #    server_name  somename  alias  another.alias;

    #    location / {

    #        root   html;
    #        index  index.html index.htm;
    #    }
    #}


    # HTTPS server
    #
    #server {

    #    listen       443 ssl;
    #    server_name  localhost;

    #    ssl_certificate      cert.pem;
    #    ssl_certificate_key  cert.key;

    #    ssl_session_cache    shared:SSL:1m;
    #    ssl_session_timeout  5m;

    #    ssl_ciphers  HIGH:!aNULL:!MD5;
    #    ssl_prefer_server_ciphers  on;

    #    location / {

    #        root   html;
    #        index  index.html index.htm;
    #    }
    #}

}
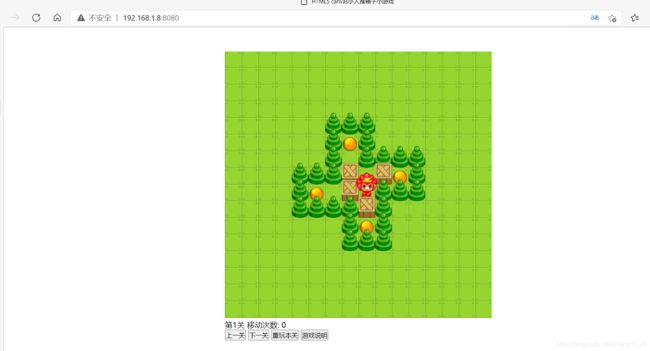
六、搭建小游戏
1.编写史上最简单配置
[root@web02 ~]# vim /usr/local/nginx/conf.d/tuixiangzi.conf
server{

    listen 90;
    server_name localhost;

    location / {

    #文件路径最好不要有中文,和空格
	root /code/tuixiangzi;
	index index.html;
    }
}
2.创建站点目录
[root@web02 ~]# mkdir /code/tuixiangzi -p
3.上传代码包
[root@web02 ~]# cd /code/tuixiangzi
#将Windows上的压缩包拖入Linux目录
[root@web02 code]# rz -E
rz waiting to receive.
#解压拖入的压缩包
[root@web02 code]# unzip tuixiangzi.zip
#改名
[root@web02 code]# mv HTML5\ canvas小人推箱子小游戏 tuixiangzi
#测试nginx环境是否成功,若显示ok,重启nginx即可
#创建用户
[root@web02 ~]# groupadd www -g 666
[root@web02 ~]# useradd www -u 666 -g 666 -s /sbin/nologin -M
[root@web02 code]# nginx -t
nginx: the configuration file /usr/local/nginx/conf/nginx.conf syntax is ok
nginx: configuration file /usr/local/nginx/conf/nginx.conf test is successful
#重启nginx
[root@web02 code]# systemctl restart nginx
再在浏览器输入你的ip与对应的端口号即可如下图: