使用Google Colab训练模型
Google Colab
一、简介
谷歌推出的一个免费GPU服务器,官方对其的说明是:
Colaboratory是一个研究项目,可免费使用。
Colaboratory 旨在帮助传播机器学习培训和研究成果,它是一个 Jupyter 笔记本环境,不需要进行任何设置就可以使用,并且完全在云端运行可以方便的使用Keras,TensorFlow,PyTorch等框架进行深度学习应用的开发。虚拟机配置T4 GPU,12G内存,39G硬盘空间。但是自己查看配置还是显示K80 GPU,可能因为这个

· 支持Python2.7和Python 3.6

二、使用
1、前期准备
(1)谷歌浏览器
(2)一个谷歌账号
(3) Google Colab:https://colab.research.google.com
Google Colab官方文档:https://research.google.com/colaboratory/local-runtimes.html
谷歌云盘:https://drive.google.com
2、查看硬件信息
显示出你所使用的所有硬件
from tensorflow.python.client import device_lib
device_lib.list_local_devices()
查看CPU信息
!cat /proc/cpuinfo
查看内存信息
!cat /proc/meminfo
查看版本信息
!cat /proc/version
查看设备
!cat /proc/devices
查看GPU
!/opt/bin/nvidia-smi
3、库的安装
Colab自带了Tensorflow、Matplotlib、Numpy、Pandas等深度学习基础库,如果还需要其他依赖,如Keras,需要自己安装,安装命令如下:
!pip install keras
4、运行代码
首先在左上角修改 -> 笔记本设置 ->硬件加速器 设置为GPU

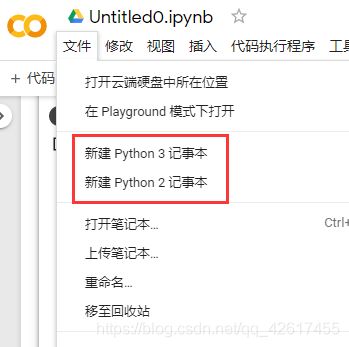
方式一:使用记事本
新建一个Python记事本,写入代码,直接运行(与Jupyter的使用类似)
eg.示例代码
from __future__ import print_function

import keras

from keras.datasets import mnist

from keras.models import Sequential

from keras.layers import Dense, Dropout, Flatten

from keras.layers import Conv2D, MaxPooling2D

from keras import backend as K


batch_size = 128

num_classes = 10

epochs = 12


\# input image dimensions

img_rows, img_cols = 28, 28


\# the data, shuffled and split between train and test sets

(x_train, y_train), (x_test, y_test) = mnist.load_data()


if K.image_data_format() == 'channels_first':

x_train = x_train.reshape(x_train.shape[0], 1, img_rows, img_cols)

x_test = x_test.reshape(x_test.shape[0], 1, img_rows, img_cols)

input_shape = (1, img_rows, img_cols)

else:

x_train = x_train.reshape(x_train.shape[0], img_rows, img_cols, 1)

x_test = x_test.reshape(x_test.shape[0], img_rows, img_cols, 1)

input_shape = (img_rows, img_cols, 1)


x_train = x_train.astype('float32')

x_test = x_test.astype('float32')

x_train /= 255

x_test /= 255

print('x_train shape:', x_train.shape)

print(x_train.shape[0], 'train samples')

print(x_test.shape[0], 'test samples')


\# convert class vectors to binary class matrices

y_train = keras.utils.to_categorical(y_train, num_classes)

y_test = keras.utils.to_categorical(y_test, num_classes)


model = Sequential()

model.add(Conv2D(32, kernel_size=(3, 3),

   activation='relu',

   input_shape=input_shape))

model.add(Conv2D(64, (3, 3), activation='relu'))

model.add(MaxPooling2D(pool_size=(2, 2)))

model.add(Dropout(0.25))

model.add(Flatten())

model.add(Dense(128, activation='relu'))

model.add(Dropout(0.5))

model.add(Dense(num_classes, activation='softmax'))


model.compile(loss=keras.losses.categorical_crossentropy,

  optimizer=keras.optimizers.Adadelta(),

  metrics=['accuracy'])


model.fit(x_train, y_train,

 batch_size=batch_size,

 epochs=epochs,

 verbose=1,

 validation_data=(x_test, y_test))

score = model.evaluate(x_test, y_test, verbose=0)

print('Test loss:', score[0])

print('Test accuracy:', score[1])
方式二:利用Google Drive
step1:Google Drive
如果要跑自己的数据集就需要先把项目和数据集上传到Google Drive
可以直接把文件夹拖进去
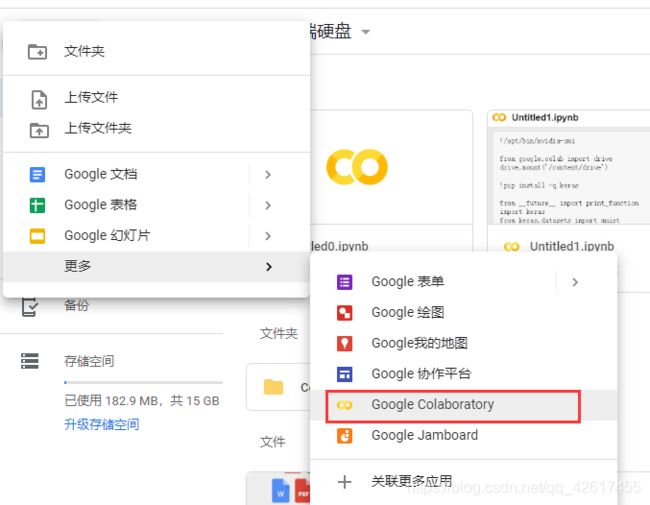
或者新建一个文件,第一次用Google Drive需要在关联更多应用里关联Google Colaboratory
step2:加载Google Drive
from google.colab import drive drive.mount('/content/drive')
或者在左侧文件栏中点击装载Goole云端硬盘,自动生成上述代码后运行;

点击运行后会生成一个链接,点进去登录云盘,把验证码复制过来,输入之后enter
step3:切换当前文件夹
在左侧栏中找到项目存放路径,运行以下代码:
import os
os.chdir(your_path)
eg.
import os
os.chdir("/content/drive/My Drive/Colab Notebooks/test_Mnist")

step4:运行代码
! python your_filename
eg. ! python HelloMnist.py
方式三:连接到本地的Jupyter服务器
具体可参考Colab官方文档: https://research.google.com/colaboratory/local-runtimes.html
step1:打开本地Jupyter,安装并启用jupyter_http_over_ws扩展程序(一次性);
输入代码:
!pip install jupyter_http_over_ws !jupyter serverextension enable *--py jupyter_http_over_ws

step2:以管理员身份运行Anaconda Prompt,输入命令:(port对应的端口号是自定义的)
jupyter notebook --NotebookApp.allow_origin='https://colab.research.google.com' --port=8899 --NotebookApp.port_retries=0

然后会弹出Jupyter的新界面,注意使用的浏览器切换成谷歌
step3 :在Colab右上角选择连接到本地代码执行程序,输入自定义的端口号:

补充:使用Pytorch
输入以下代码,运行后会输出一个链接,点击进入visdom,如果不行,修改URL,将https, 修改为http便可
! npm install -g localtunnel  # 8097是自己设置的端口号,可修改为自己要用的端口号
 get_ipython().system_raw('python3 -m pip install visdom')
 get_ipython().system_raw('python3 -m visdom.server -port 8097 >> visdomlog.txt 2>&1 &')
 get_ipython().system_raw('lt --port 8097 >> url.txt 2>&1 &')

 import time
 time.sleep(5)
 ! cat url.txt
 import visdom
 time.sleep(5)
 vis = visdom.Visdom(port='8097')
 print(vis)
 time.sleep(3)
 vis.text('testing')
 ! cat visdomlog.txt
三、优缺点对比
优点:
1、最大的优点就是免费;
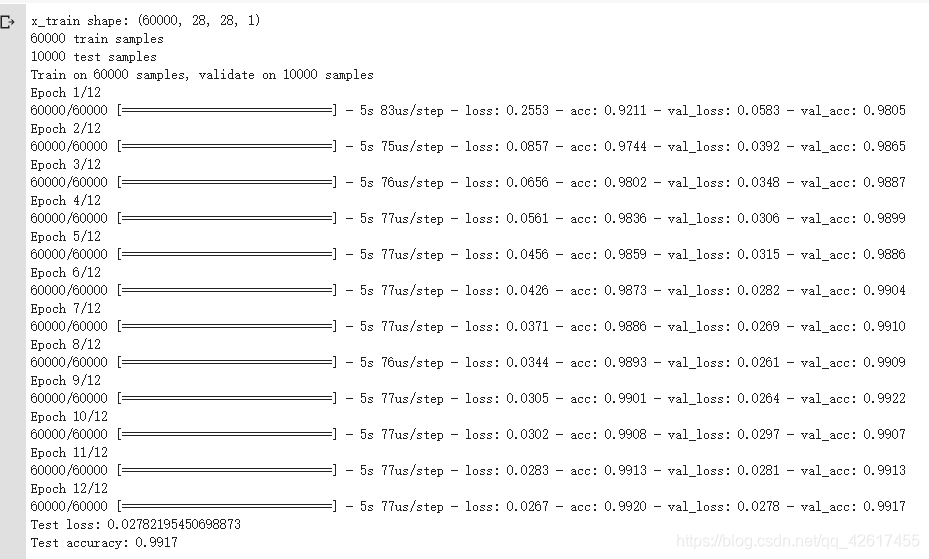
2、运行速度快;
按照方式一运行代码,Google Colab运行速度(一次迭代时间):5s
按照方式二运行,速度明显变慢,我还没找到原因

本地运行速度(一次迭代时间):
最慢:349s
![]()
最快:257s
![在这里插入图片描述](https://img-blog.csdnimg.cn/20200211114800853.png
缺点:
1、最多只能运行12小时,时间一到就会清空VM上所有数据。这包括我们安装的软件,包括我们下载的数据,存放的计算结果。
2、可能是因为用的人多,会出现断开连接的情况。