- JSON 与 AJAX
Auscy
jsonajax前端
一、JSON(JavaScriptObjectNotation)1.数据类型与语法细节支持的数据类型:基本类型:字符串(需用双引号)、数字、布尔值(true/false)、null。复杂类型:数组([])、对象({})。严格语法规范:键名必须用双引号包裹(如"name":"张三")。数组元素用逗号分隔,最后一个元素后不能有多余逗号。数字不能以0开头(如012会被解析为12),不支持八进制/十六进制
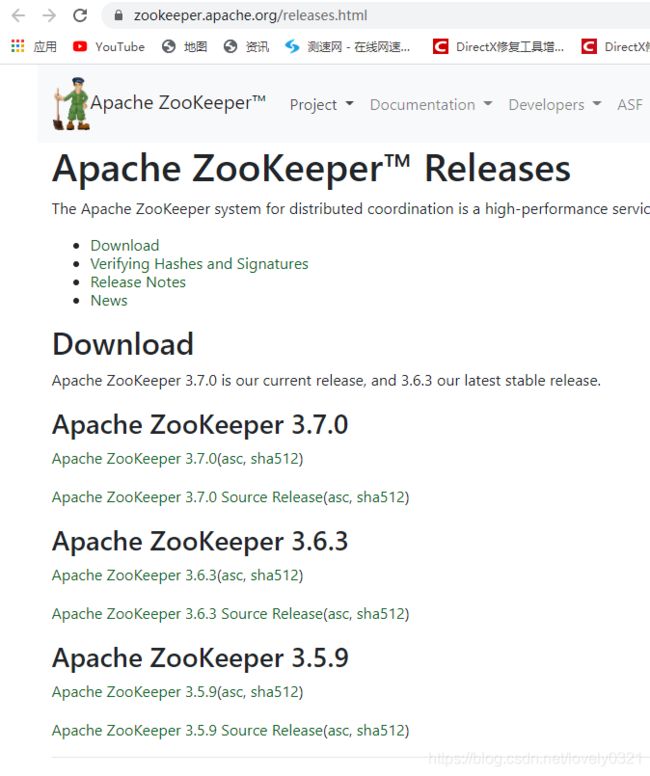
- k8s:安装 Helm 私有仓库ChartMuseum、helm-push插件并上传、安装Zookeeper
云游
dockerhelmhelm-push
ChartMuseum是Kubernetes生态中用于存储、管理和发布HelmCharts的开源系统,主要用于扩展Helm包管理器的功能核心功能集中存储:提供中央化仓库存储Charts,支持版本管理和权限控制。跨集群部署:支持多集群环境下共享Charts,简化部署流程。离线部署:适配无网络环境,可将Charts存储在本地或局域网内。HTTP接口:通过HTTP协议提供服务,用户
- 上位机知识篇---SD卡&U盘镜像
常用的镜像烧录软件balenaEtcherbalenaEtcher是一个开源的、跨平台的工具,用于将操作系统镜像文件(如ISO和IMG文件)烧录到SD卡和USB驱动器中。以下是其使用方法、使用场景和使用注意事项的介绍:使用方法下载安装:根据自己的操作系统,从官方网站下载对应的安装包。Windows系统下载.exe文件后双击安装;Linux系统若下载的是.deb文件,可在终端执行“sudodpkg-
- JavaScript 树形菜单总结
Auscy
microsoft
树形菜单是前端开发中常见的交互组件,用于展示具有层级关系的数据(如文件目录、分类列表、组织架构等)。以下从核心概念、实现方式、常见功能及优化方向等方面进行总结。一、核心概念层级结构:数据以父子嵌套形式存在,如{id:1,children:[{id:2}]}。节点:树形结构的基本单元,包含自身信息及子节点(若有)。展开/折叠:子节点的显示与隐藏切换,是树形菜单的核心交互。递归渲染:因数据层级不固定,
- 精通Canvas:15款时钟特效代码实现指南
烟幕缭绕
本文还有配套的精品资源,点击获取简介:HTML5的Canvas是一个用于绘制矢量图形的API,通过JavaScript实现动态效果。本项目集合了15种不同的时钟特效代码,帮助开发者通过学习绘制圆形、线条、时间更新、旋转、颜色样式设置及动画效果等概念,深化对Canvas的理解和应用。项目中的CSS文件负责时钟的样式设定,而JS文件则包含实现各种特效的逻辑,通过不同的函数或类处理时间更新和动画绘制,提
- 深入剖析OpenJDK 18 GA源码:Java平台最新发展
想法臃肿
本文还有配套的精品资源,点击获取简介:OpenJDK18GA作为Java开发的关键里程碑,提供了诸多新特性和改进。本文章深入探讨了OpenJDK18GA源码,揭示其内部机制,帮助开发者更好地理解和利用这个版本。文章还涵盖了PatternMatching、SealedClasses、Records、JEP395、JEP406和JEP407等特性,以及HotSpot虚拟机、编译器、垃圾收集器、内存模型
- Java大厂面试实录:谢飞机的电商场景技术问答(Spring Cloud、MyBatis、Redis、Kafka、AI等)
Java大厂面试实录:谢飞机的电商场景技术问答(SpringCloud、MyBatis、Redis、Kafka、AI等)本文模拟知名互联网大厂Java后端岗位面试流程,以电商业务为主线,由严肃面试官与“水货”程序员谢飞机展开有趣的对话,涵盖SpringCloud、MyBatis、Redis、Kafka、SpringSecurity、AI等热门技术栈,并附详细解析,助力求职者备战大厂面试。故事设定谢
- 【超硬核】JVM源码解读:Java方法main在虚拟机上解释执行
HeapDump性能社区
java开发语言后端jvm
本文由HeapDump性能社区首席讲师鸠摩(马智)授权整理发布第1篇-关于Java虚拟机HotSpot,开篇说的简单点开讲Java运行时,这一篇讲一些简单的内容。我们写的主类中的main()方法是如何被Java虚拟机调用到的?在Java类中的一些方法会被由C/C++编写的HotSpot虚拟机的C/C++函数调用,不过由于Java方法与C/C++函数的调用约定不同,所以并不能直接调用,需要JavaC
- 算法学习笔记:17.蒙特卡洛算法 ——从原理到实战,涵盖 LeetCode 与考研 408 例题
在计算机科学和数学领域,蒙特卡洛算法(MonteCarloAlgorithm)以其独特的随机抽样思想,成为解决复杂问题的有力工具。从圆周率的计算到金融风险评估,从物理模拟到人工智能,蒙特卡洛算法都发挥着不可替代的作用。本文将深入剖析蒙特卡洛算法的思想、解题思路,结合实际应用场景与Java代码实现,并融入考研408的相关考点,穿插图片辅助理解,帮助你全面掌握这一重要算法。蒙特卡洛算法的基本概念蒙特卡
- Java大厂面试故事:谢飞机的互联网音视频场景技术面试全纪录(Spring Boot、MyBatis、Kafka、Redis、AI等)
来旺
Java场景面试宝典JavaSpringBootMyBatisKafkaRedis微服务AI
Java大厂面试故事:谢飞机的互联网音视频场景技术面试全纪录(SpringBoot、MyBatis、Kafka、Redis、AI等)互联网大厂技术面试不仅考察技术深度,更注重业务场景与系统设计能力。本篇以严肃面试官与“水货”程序员谢飞机的对话,带你体验音视频业务场景下的Java面试全过程,涵盖主流技术栈,并附详细答案解析,助你面试无忧。故事场景设定谢飞机是一名有趣但技术基础略显薄弱的程序员,这次应
- 【前端】jQuery数组合并去重方法总结
在jQuery中合并多个数组并去重,推荐使用原生JavaScript的Set对象(高效简单)或$.unique()(仅适用于DOM元素,不适用于普通数组)。以下是完整解决方案:方法1:使用ES6Set(推荐)//定义多个数组constarr1=[1,2,3];constarr2=[2,3,4];constarr3=[3,4,5];//合并数组并用Set去重constmergedArray=[...
- php 高并发下日志量巨大,如何高效采集、存储、分析
贵哥的编程之路(热爱分享 为后来者)
PHP语言经典程序100题php开发语言
1.问题背景高并发系统每秒产生大量日志(如访问日志、错误日志、业务日志等)。单机写入、存储、分析能力有限,容易成为瓶颈。需要支持实时采集、分布式存储、快速检索与分析。2.主流架构方案一、分布式日志采集架构[应用服务器(PHP等)]|v[日志采集Agent(如Filebeat、Fluentd、Logstash)]|v[消息队列/缓冲(如Kafka、Redis、RabbitMQ)]|v[日志存储(如E
- MySQL Explain 详解:从入门到精通,让你的 SQL 飞起来
引言:为什么Explain是SQL优化的“照妖镜”?在Java开发中,我们常常会遇到数据库性能瓶颈的问题。一条看似简单的SQL语句,在数据量增长到一定规模后,可能会从毫秒级响应变成秒级甚至分钟级响应,直接拖慢整个应用的性能。此时,你是否曾困惑于:为什么这条SQL突然变慢了?索引明明建了,为什么没生效?到底是哪里出了问题?答案就藏在MySQL的EXPLAIN命令里。EXPLAIN就像一面“照妖镜”,
- Linux/Centos7离线安装并配置MySQL 5.7
有事开摆无事百杜同学
LInux/CentOS7linuxmysql运维
Linux/Centos7离线安装并配置MySQL5.7超详细教程一、环境准备1.下载MySQL5.7离线包2.使用rpm工具卸载MariaDB(避免冲突)3.创建系统级别的MySQL专用用户二、安装与配置1.解压并重命名MySQL目录2.创建数据目录和配置文件3.设置目录权限4.初始化MySQL5.配置启动脚本6.配置环境变量三、启动与验证1.启动MySQL服务2.获取初始密码3.登录并修改密码
- Java特性之设计模式【责任链模式】
Naijia_OvO
Java特性java设计模式责任链模式
一、责任链模式概述顾名思义,责任链模式(ChainofResponsibilityPattern)为请求创建了一个接收者对象的链。这种模式给予请求的类型,对请求的发送者和接收者进行解耦。这种类型的设计模式属于行为型模式在这种模式中,通常每个接收者都包含对另一个接收者的引用。如果一个对象不能处理该请求,那么它会把相同的请求传给下一个接收者,依此类推主要解决:职责链上的处理者负责处理请求,客户只需要将
- Linux操作系统磁盘管理
CZZDg
linux运维服务器
目录一.硬盘介绍1.硬盘的物理结构2.CHS编号3.磁盘存储划分4.开机流程5.要点6.磁盘存储数据的形式二.Linux文件系统1.根文件系统2.虚拟文件系统3.真文件系统4.伪文件系统三.磁盘分区与挂载1.磁盘分区方式2.分区命令3.查看与识别命令4.格式化命令5.挂载命令四.LVM逻辑卷1.概述2.管理命令五.磁盘配额1.概述usrquota:支持对用户的磁盘配额grpquota:支持对组的磁
- 日历插件-FullCalendar的详细使用
老马聊技术
JavaScript前端javascript
一、介绍FullCalendar是一个功能强大、高度可定制的JavaScript日历组件,用于在网页中显示和管理日历事件。它支持多种视图(月、周、日等),可以轻松集成各种框架,并提供丰富的事件处理功能。二、实操案例具体代码如下:FullCalendar日期选择body{font-family:Arial,sans-serif;margin:20px;}#calendar{max-width:900
- Kafka系列之:Dead Letter Queue死信队列DLQ
快乐骑行^_^
KafkaKafka系列DeadLetterQueue死信队列DLQ
Kafka系列之:DeadLetterQueue死信队列DLQ一、死信队列二、参数errors.tolerance三、创建死信队列主题四、在启用安全性的情况下使用死信队列更多内容请阅读博主这篇博客:Kafka系列之:KafkaConnect深入探讨-错误处理和死信队列一、死信队列死信队列(DLQ)仅适用于接收器连接器。当一条记录以JSON格式到达接收器连接器时,但接收器连接器配置期望另一种格式,如
- tcpdump交叉编译
weixin_45673259
tcpdump测试工具网络
1.下载路径官网:https://www.tcpdump.org/2.编译解压:tar-xflibpcap-1.10.4.tar.xztar-xftcpdump-4.99.4.tar.xz编译libpcap./configure--host=mips-v720s229-linux--target=mips-v720s229-linuxCC=/opt/A1/mips-gcc720-uclibc229
- 消息中间件巡检
搬砖小常
消息中间件运维笔记RocketMQkafka中间件巡检运维
除资源使用情况外,消息中间件RocketMQ、kafka还可以巡检哪些?一、RocketMQ巡检1、检查broker写入耗时是否有压力2、检查brokerbusy的数量与频率3、主题发送TPS、发送错误率巡检4、从节点消费情况检查5、集群各broker消息流转情况巡检二、Kafka巡检1、检查是否有分区发生ISR频繁扩张收缩2、检查分区leader选举值是否处于正常水平3、检查controller
- react-native android 环境搭建
环境:macjava版本:Java11最重要:一定要一定要一定要react涉及到很多的依赖下载,gradle和react相关的,第一次安装环境时有外网环境会快速很多。安装nodejs安装react-nativenpminstallreact-native-clinpminstallreact-native创建一个新项目react-nativeinitfirstReact替换gradle下载源rep
- Java 调用 HTTP 接口的 7 种方式:全网最全指南
Java调用HTTP接口的7种方式:全网最全指南在开发过程中,调用HTTP接口是最常见的需求之一。本文将详细介绍Java中7种主流的调用HTTP接口的方式,包括每种工具的优缺点和完整代码实现。1.使用RestTemplateRestTemplate是Spring提供的同步HTTP客户端,适用于传统项目。尽管从Spring5开始被标记为过时,它仍然是许多开发者的首选。示例代码importorg.sp
- Java三年经验程序员技术栈全景指南:从前端到架构,对标阿里美团全栈要求
可曾去过倒悬山
java前端架构
Java三年经验程序员技术栈全景指南:从前端到架构,对标阿里美团全栈要求三年经验是Java程序员的分水岭,技术栈深度决定你成为“业务码农”还是“架构师候选人”。本文整合阿里、美团、滴滴等大厂招聘要求,为你绘制可落地的进阶路线。一、Java核心:从语法糖到JVM底层三年经验与初级的核心差异在于系统级理解,大厂面试常考以下能力:JVM与性能调优内存模型(堆外内存、元空间)、GC算法(G1/ZGC适用场
- 【Linux内核模块】Linux内核模块程序结构
byte轻骑兵
#嵌入式Linux驱动开发实战linux运维服务器
如果你已经写过第一个"HelloWorld"内核模块,可能会好奇:为什么那个几行代码的程序能被内核识别?那些module_init、MODULE_LICENSE到底是什么意思?今天咱们就来扒一扒内核模块的程序结构,搞清楚一个合格的内核模块到底由哪些部分组成,每个部分又承担着什么角色。目录一、内核模块的"骨架":最简化结构解析二、头文件:内核模块的"说明书"2.1最常用的三个头文件2.2按需添加的其
- javascript高级程序设计第3版——第12章 DOM2与DOM3
weixin_30687587
javascript数据结构与算法ViewUI
12章——DOM2与DOM3为了增强D0M1,DOM级规范定义了一些模块。DOM2核心:为不同的DOM类型引入了一些与XML命名空间有关的方法,还定义了以编程方式创建Document实例的方法;DOM2级样式:针对操作元素的样式而开发;其特性总结:1.每个元素都有一个关联的style对象,可用来确定和修改行内样式;2.要确定某个元素的计算样式,可使用getComgetComputedStyle()
- LVM逻辑卷扩容
目录1.逻辑卷的简介2.逻辑卷的概念3.相关命令4.建立逻辑卷1.逻辑卷的简介1.LVM是逻辑卷管理(LogicalVolumeManager)的简称,它是Linux环境下对磁盘分区进行管理的一种机制,LVM是建立在硬盘和分区之上的一个逻辑层,来提高磁盘分区管理的灵活性。2.LVM最大的特点就是可以对磁盘进行动态管理。使用了LVM管理分区,动态的调整分区的大小,标准分区是做不到的。2.逻辑卷的概念
- Rocky Linux 8.5/CentOS 8 安装Wine
chen_teacher
linux运维服务器
RockyLinux8.5/CentOS8安装Wine首先配置EPEL镜像配置方法安装Wine首先配置EPEL镜像EPEL(ExtraPackagesforEnterpriseLinux),是由FedoraSpecialInterestGroup维护的EnterpriseLinux(RHEL、CentOS)中经常用到的包。下载地址:https://mirrors.aliyun.com/epel/相
- Java设计模式实战:高频场景解析与避坑指南
mckim_
笔记学习java设计模式
引言设计模式是软件开发的基石,但许多开发者面对23种模式时容易陷入“学完就忘”或“滥用模式”的困境。本文从工业级项目视角出发,精选10种高频设计模式,结合真实代码案例与主流框架应用,帮你建立模式思维,拒绝纸上谈兵。一、创建型模式:告别new的暴力美学1.工厂方法模式(FactoryMethod)核心痛点:对象创建逻辑散落各处,难以统一管理。场景案例:电商平台需要支持多种支付方式(支付宝、微信、银联
- JavaScript 基础09:Web APIs——日期对象、DOM节点
梦想当全栈
JavaScriptjavascript前端开发语言
JavaScript基础09:WebAPIs——日期对象、DOM节点进一步学习DOM相关知识,实现可交互的网页特效能够插入、删除和替换元素节点。能够依据元素节点关系查找节点。一、日期对象掌握Date日期对象的使用,动态获取当前计算机的时间。ECMAScript中内置了获取系统时间的对象Date,使用Date时与之前学习的内置对象console和Math不同,它需要借助new关键字才能使用。1.实例
- 系统迁移从CentOS7.9到Rocky8.9
我有两台阿里云上的服务器是CentOS7.9,由于CentOS7已经停止支持,后续使用的话会有安全漏洞,所以需要尽快迁移,个人使用的话目前兼容性好的还是RockyLinux8,很多脚本改改就能用了。一、盘点系统和迁移应用查看当前系统发行版版本cat/etc/os-release盘点迁移清单服务器应用部署方式docker镜像来源v1wordpressdockerdockerhubv1zdirdock
- mondb入手
木zi_鸣
mongodb
windows 启动mongodb 编写bat文件,
mongod --dbpath D:\software\MongoDBDATA
mongod --help 查询各种配置
配置在mongob
打开批处理,即可启动,27017原生端口,shell操作监控端口 扩展28017,web端操作端口
启动配置文件配置,
数据更灵活
- 大型高并发高负载网站的系统架构
bijian1013
高并发负载均衡
扩展Web应用程序
一.概念
简单的来说,如果一个系统可扩展,那么你可以通过扩展来提供系统的性能。这代表着系统能够容纳更高的负载、更大的数据集,并且系统是可维护的。扩展和语言、某项具体的技术都是无关的。扩展可以分为两种:
1.
- DISPLAY变量和xhost(原创)
czmmiao
display
DISPLAY
在Linux/Unix类操作系统上, DISPLAY用来设置将图形显示到何处. 直接登陆图形界面或者登陆命令行界面后使用startx启动图形, DISPLAY环境变量将自动设置为:0:0, 此时可以打开终端, 输出图形程序的名称(比如xclock)来启动程序, 图形将显示在本地窗口上, 在终端上输入printenv查看当前环境变量, 输出结果中有如下内容:DISPLAY=:0.0
- 获取B/S客户端IP
周凡杨
java编程jspWeb浏览器
最近想写个B/S架构的聊天系统,因为以前做过C/S架构的QQ聊天系统,所以对于Socket通信编程只是一个巩固。对于C/S架构的聊天系统,由于存在客户端Java应用,所以直接在代码中获取客户端的IP,应用的方法为:
String ip = InetAddress.getLocalHost().getHostAddress();
然而对于WEB
- 浅谈类和对象
朱辉辉33
编程
类是对一类事物的总称,对象是描述一个物体的特征,类是对象的抽象。简单来说,类是抽象的,不占用内存,对象是具体的,
占用存储空间。
类是由属性和方法构成的,基本格式是public class 类名{
//定义属性
private/public 数据类型 属性名;
//定义方法
publ
- android activity与viewpager+fragment的生命周期问题
肆无忌惮_
viewpager
有一个Activity里面是ViewPager,ViewPager里面放了两个Fragment。
第一次进入这个Activity。开启了服务,并在onResume方法中绑定服务后,对Service进行了一定的初始化,其中调用了Fragment中的一个属性。
super.onResume();
bindService(intent, conn, BIND_AUTO_CREATE);
- base64Encode对图片进行编码
843977358
base64图片encoder
/**
* 对图片进行base64encoder编码
*
* @author mrZhang
* @param path
* @return
*/
public static String encodeImage(String path) {
BASE64Encoder encoder = null;
byte[] b = null;
I
- Request Header简介
aigo
servlet
当一个客户端(通常是浏览器)向Web服务器发送一个请求是,它要发送一个请求的命令行,一般是GET或POST命令,当发送POST命令时,它还必须向服务器发送一个叫“Content-Length”的请求头(Request Header) 用以指明请求数据的长度,除了Content-Length之外,它还可以向服务器发送其它一些Headers,如:
- HttpClient4.3 创建SSL协议的HttpClient对象
alleni123
httpclient爬虫ssl
public class HttpClientUtils
{
public static CloseableHttpClient createSSLClientDefault(CookieStore cookies){
SSLContext sslContext=null;
try
{
sslContext=new SSLContextBuilder().l
- java取反 -右移-左移-无符号右移的探讨
百合不是茶
位运算符 位移
取反:
在二进制中第一位,1表示符数,0表示正数
byte a = -1;
原码:10000001
反码:11111110
补码:11111111
//异或: 00000000
byte b = -2;
原码:10000010
反码:11111101
补码:11111110
//异或: 00000001
- java多线程join的作用与用法
bijian1013
java多线程
对于JAVA的join,JDK 是这样说的:join public final void join (long millis )throws InterruptedException Waits at most millis milliseconds for this thread to die. A timeout of 0 means t
- Java发送http请求(get 与post方法请求)
bijian1013
javaspring
PostRequest.java
package com.bijian.study;
import java.io.BufferedReader;
import java.io.DataOutputStream;
import java.io.IOException;
import java.io.InputStreamReader;
import java.net.HttpURL
- 【Struts2二】struts.xml中package下的action配置项默认值
bit1129
struts.xml
在第一部份,定义了struts.xml文件,如下所示:
<!DOCTYPE struts PUBLIC
"-//Apache Software Foundation//DTD Struts Configuration 2.3//EN"
"http://struts.apache.org/dtds/struts
- 【Kafka十三】Kafka Simple Consumer
bit1129
simple
代码中关于Host和Port是割裂开的,这会导致单机环境下的伪分布式Kafka集群环境下,这个例子没法运行。
实际情况是需要将host和port绑定到一起,
package kafka.examples.lowlevel;
import kafka.api.FetchRequest;
import kafka.api.FetchRequestBuilder;
impo
- nodejs学习api
ronin47
nodejs api
NodeJS基础 什么是NodeJS
JS是脚本语言,脚本语言都需要一个解析器才能运行。对于写在HTML页面里的JS,浏览器充当了解析器的角色。而对于需要独立运行的JS,NodeJS就是一个解析器。
每一种解析器都是一个运行环境,不但允许JS定义各种数据结构,进行各种计算,还允许JS使用运行环境提供的内置对象和方法做一些事情。例如运行在浏览器中的JS的用途是操作DOM,浏览器就提供了docum
- java-64.寻找第N个丑数
bylijinnan
java
public class UglyNumber {
/**
* 64.查找第N个丑数
具体思路可参考 [url] http://zhedahht.blog.163.com/blog/static/2541117420094245366965/[/url]
*
题目:我们把只包含因子
2、3和5的数称作丑数(Ugly Number)。例如6、8都是丑数,但14
- 二维数组(矩阵)对角线输出
bylijinnan
二维数组
/**
二维数组 对角线输出 两个方向
例如对于数组:
{ 1, 2, 3, 4 },
{ 5, 6, 7, 8 },
{ 9, 10, 11, 12 },
{ 13, 14, 15, 16 },
slash方向输出:
1
5 2
9 6 3
13 10 7 4
14 11 8
15 12
16
backslash输出:
4
3
- [JWFD开源工作流设计]工作流跳跃模式开发关键点(今日更新)
comsci
工作流
既然是做开源软件的,我们的宗旨就是给大家分享设计和代码,那么现在我就用很简单扼要的语言来透露这个跳跃模式的设计原理
大家如果用过JWFD的ARC-自动运行控制器,或者看过代码,应该知道在ARC算法模块中有一个函数叫做SAN(),这个函数就是ARC的核心控制器,要实现跳跃模式,在SAN函数中一定要对LN链表数据结构进行操作,首先写一段代码,把
- redis常见使用
cuityang
redis常见使用
redis 通常被认为是一个数据结构服务器,主要是因为其有着丰富的数据结构 strings、map、 list、sets、 sorted sets
引入jar包 jedis-2.1.0.jar (本文下方提供下载)
package redistest;
import redis.clients.jedis.Jedis;
public class Listtest
- 配置多个redis
dalan_123
redis
配置多个redis客户端
<?xml version="1.0" encoding="UTF-8"?><beans xmlns="http://www.springframework.org/schema/beans" xmlns:xsi=&quo
- attrib命令
dcj3sjt126com
attr
attrib指令用于修改文件的属性.文件的常见属性有:只读.存档.隐藏和系统.
只读属性是指文件只可以做读的操作.不能对文件进行写的操作.就是文件的写保护.
存档属性是用来标记文件改动的.即在上一次备份后文件有所改动.一些备份软件在备份的时候会只去备份带有存档属性的文件.
- Yii使用公共函数
dcj3sjt126com
yii
在网站项目中,没必要把公用的函数写成一个工具类,有时候面向过程其实更方便。 在入口文件index.php里添加 require_once('protected/function.php'); 即可对其引用,成为公用的函数集合。 function.php如下:
<?php /** * This is the shortcut to D
- linux 系统资源的查看(free、uname、uptime、netstat)
eksliang
netstatlinux unamelinux uptimelinux free
linux 系统资源的查看
转载请出自出处:http://eksliang.iteye.com/blog/2167081
http://eksliang.iteye.com 一、free查看内存的使用情况
语法如下:
free [-b][-k][-m][-g] [-t]
参数含义
-b:直接输入free时,显示的单位是kb我们可以使用b(bytes),m
- JAVA的位操作符
greemranqq
位运算JAVA位移<<>>>
最近几种进制,加上各种位操作符,发现都比较模糊,不能完全掌握,这里就再熟悉熟悉。
1.按位操作符 :
按位操作符是用来操作基本数据类型中的单个bit,即二进制位,会对两个参数执行布尔代数运算,获得结果。
与(&)运算:
1&1 = 1, 1&0 = 0, 0&0 &
- Web前段学习网站
ihuning
Web
Web前段学习网站
菜鸟学习:http://www.w3cschool.cc/
JQuery中文网:http://www.jquerycn.cn/
内存溢出:http://outofmemory.cn/#csdn.blog
http://www.icoolxue.com/
http://www.jikexue
- 强强联合:FluxBB 作者加盟 Flarum
justjavac
r
原文:FluxBB Joins Forces With Flarum作者:Toby Zerner译文:强强联合:FluxBB 作者加盟 Flarum译者:justjavac
FluxBB 是一个快速、轻量级论坛软件,它的开发者是一名德国的 PHP 天才 Franz Liedke。FluxBB 的下一个版本(2.0)将被完全重写,并已经开发了一段时间。FluxBB 看起来非常有前途的,
- java统计在线人数(session存储信息的)
macroli
javaWeb
这篇日志是我写的第三次了 前两次都发布失败!郁闷极了!
由于在web开发中常常用到这一部分所以在此记录一下,呵呵,就到备忘录了!
我对于登录信息时使用session存储的,所以我这里是通过实现HttpSessionAttributeListener这个接口完成的。
1、实现接口类,在web.xml文件中配置监听类,从而可以使该类完成其工作。
public class Ses
- bootstrp carousel初体验 快速构建图片播放
qiaolevip
每天进步一点点学习永无止境bootstrap纵观千象
img{
border: 1px solid white;
box-shadow: 2px 2px 12px #333;
_width: expression(this.width > 600 ? "600px" : this.width + "px");
_height: expression(this.width &
- SparkSQL读取HBase数据,通过自定义外部数据源
superlxw1234
sparksparksqlsparksql读取hbasesparksql外部数据源
关键字:SparkSQL读取HBase、SparkSQL自定义外部数据源
前面文章介绍了SparSQL通过Hive操作HBase表。
SparkSQL从1.2开始支持自定义外部数据源(External DataSource),这样就可以通过API接口来实现自己的外部数据源。这里基于Spark1.4.0,简单介绍SparkSQL自定义外部数据源,访
- Spring Boot 1.3.0.M1发布
wiselyman
spring boot
Spring Boot 1.3.0.M1于6.12日发布,现在可以从Spring milestone repository下载。这个版本是基于Spring Framework 4.2.0.RC1,并在Spring Boot 1.2之上提供了大量的新特性improvements and new features。主要包含以下:
1.提供一个新的sprin