react redux使用
一、redux基本使用
创建项目
没有环境先安装:
$ npm install -g create-react-app
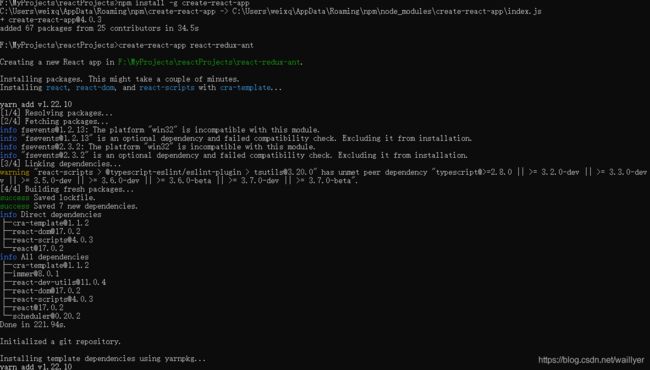
创建项目
create-react-app react-redux-ant
安装 redux
yarn add redux --save
在src目录下新建目录store和index.js和reducer.js
新建目录reducers,和reducer.js
reducer.js中定义数据
//reducer.js
const  defaultState  = {

    number:0,
    userInfo:{

        name:'wxq'
    }
}


export default (state = defaultState,action)=> {

    return state
}
store/store.js引入createStore方法
import {
     createStore} from 'redux'
import reducer from "../reducers/reducer";


const store  = createStore(reducer)//创建仓库

export  default  store //暴露store
入口文件使用store,其他组件可以拿到数据
import store from "./store";

ReactDOM.render(
    <App store= {
     store} />,
  document.getElementById('root')
);
组件使用
props.store.getState()//获取数据
import React from 'react'

export  default  function Index(props) {

    console.log("props",props)
    console.log("props",props.store.getState())
    const {
      number } = props.store.getState()
    return <div>
        <h1>count组件</h1>
        <h1>count:{
     number}</h1>
    </div>
}
store值的修改
   const add = ()=>{

        props.store.dispatch({
     type:'ADD',data:1})//通过dispatch函数触发reducer的action
    }
import React from 'react'
import store from "../../store";

export  default  function Index(props) {

    console.log("props",props)
    console.log("props",props.store.getState())
    const {
      number } =props. store.getState()
    const add = ()=>{

        props.store.dispatch({
     type:'ADD',data:1})
    }
    return <div>
        <h1>count组件</h1>
        <h1>count:{
     number}</h1>
        <button onClick={
     add}>+1</button>
        <button>-1</button>
    </div>
}
//reducer.js
const  defaultState  = {

    number:0,
    userInfo:{

        name:'wxq'
    }
}


export default (state = defaultState,action)=> {


    switch (action.type) {

        case 'ADD':
            console.log(state)
            return {
     ...state,number:state.number += action.data}
        default :
            return state
    }
    return state
}
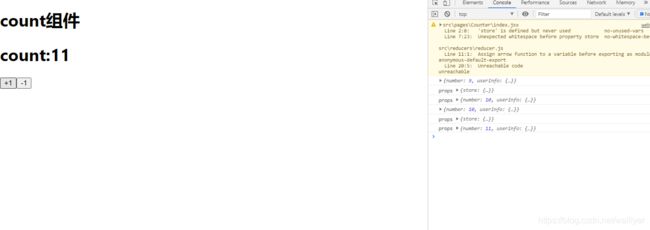
数据修改完成,进行数据个更新,通过store的订阅功能进行更新,也就是组件需要重新赋值一次数据,利用store中subscribe()函数进行发布订阅
import React from 'react';
import ReactDOM from 'react-dom';
import './index.css';
import App from './App';
import store from "./store";
ReactDOM.render(
    <App store= {
     store} />,
  document.getElementById('root')
);
store.subscribe(()=>{

    ReactDOM.render(
    <App store= {
     store} />,
    document.getElementById('root')
);
})


// If you want to start measuring performance in your app, pass a function
// to log results (for example: reportWebVitals(console.log))
// or send to an analytics endpoint. Learn more: https://bit.ly/CRA-vitals
// reportWebVitals();
二、 redux使用流程进阶(根据数据类型划分模块)
在项目中根据不同类型数据进行模块划分,可以使代码清晰明了,方便维护
在reducers文件夹建一个reducers.js来管理分片的reducers
//建立一个总的reducers来管理分片的reducers
//管理分片的reducers我们需要借助redux中的一个工具combineReducers
//reducers.js
//建立一个总的reducers来管理分片的reducers
//管理分片的reducers我们需要借助redux中的一个工具combineReducers

import {
      combineReducers }  from 'redux';
import counter from './counter/index'


const reducers = combineReducers( {

    // 其中为分片式的reducers
    counter
})

export default reducers;
三、 redux使用过程代码优化
1.我们需要使用一个工具(react-redux)对redux进行代码优化
2.需要在组件的最外层套上Provider组件,并为其传入store
3.利用connect将需要使用store相关api的组件变成容器组件嵌套UI组件的模式
4.connect方法的返回值是一个函数,这个函数接收到UI组件之后会返回一个容器组件,容器内部已经嵌套了UI组件
5.Provider组件会利用context上下文将自己属性中store传递给自己的子级组件,而容器组件会取得context上面的store相关的api
6.我们可以在connect函数中传入mapStateToProps/mapDispatchToProps参数来掌控容器组件给UI组件传递属性的过程
7.mapStateToProps的作用:
- 将store中的state传递到UI组件的属性上
- 值为一个函数,接收到的就是store中的state
- 返回值是什么,UI组件的属性上就有什么
- 并且,因为容器组件中已经做好了store.subscribe的处理,所以一旦store中的状态变化,
容器组件就马上能得知,就会重新给UI组件传入新的数据
8.mapDispatchToProps的作用:
- 可以将能使用到dispatch的一些方法传递到UI组件上
- 值为一个函数,接收到的就是store中的dispatch
- 返回什么,UI组件的属性上就有什么
优化流程
1、安装react-redux
yarn add react-redux
2、首先我们在最大的组件外添加一个标签,并将store模块作为属性值引入
import React from 'react';
import ReactDOM from 'react-dom';
import './index.css';
import App from './App';
import store from "./store";
import {
Provider} from 'react-redux'
ReactDOM.render(
< Provider
store = {
store} >
< App />
< /Provider>
,
document.getElementById('root')
)
;
// store.subscribe(()=>{
// ReactDOM.render(
// 3、 组件内
export default connect( state => state)(Index)
import React from 'react'
import  {
      connect } from 'react-redux'
//从redux中引入一个方法用于将actionCreators中的方法进行绑定
import {
      bindActionCreators } from 'redux'
import  actionCreators from  '../../reducers/counter/actionCreators'
const Index =  function Index(props) {

    console.log("props",props)
    const {
      number } =props.counter;
    const add = ()=>{

     const  dd =   props.add()
        console.log(dd)

    }
    return <div>
        <h1>count组件</h1>
        <h1>count:{
     number}</h1>
        <button onClick={
     add}>+1</button>
        <button>-1</button>
    </div>
}

export  default  connect( state => state,dispatch => bindActionCreators(actionCreators,dispatch) )(Index)
//actionCreators.js代码
import * as type from './type';
const actionCreators={


    add(){

        //创建动作
        const action = {

            type:type.ADD,
        }
        return action
    }
}

export default actionCreators;
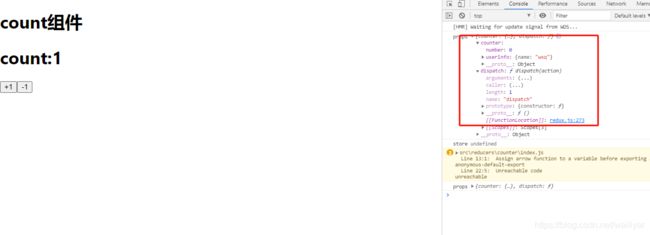
初步修改之后,可以看到props中打印是这样的,依然可以正常使用

5、redux中数据交互如何解决
我们使用上述方法管理数据很简单
但是有一点小问题,如果我们有了异步操作,比如我们会先执行一个ajax调用之后再去更改状态的话,这个异步动作,没有地方放了
我们不能把异步动作放到组件中,因为UI组件只负责使用数据,如果有其他的异步代码,让UI组件组件不纯粹
理论上来说放到actionCreator的方法中最合适,但是,因为actionCreator目前只是专注于创建action和返回action,无法放入异步操作;
针对这个问题我们可以用redux的中间件redux-thunk来解决;
1.安装redux-thunk
yarn add redux-thunk
2.在创建store的时候使用中间件
import {
     createStore,applyMiddleware } from 'redux'
import reducer from "../reducers/reducers";

import thunk from 'redux-thunk'
const store  = createStore(reducer,applyMiddleware(thunk))//创建仓库

export  default  store //暴露store


)
3这个时候,actionCreator的方法就可以返回一个能接收到dispatch的一个函数,我们可以在这个函数中进行异步操作之后,将actionCreator创建好的action给发送
//actionCreators.js代码
import * as type from './type';
const actionCreators={


    add(){

        //创建动作
        const action = {

            type:type.ADD,
        }
        return action
    },
    getInfo () {
     //异步数据的请求方式
        //进行数据交互
        /*
          actionCreators中用于数据交互的方法必须要有返回值,返回值是一个函数,函数接收一个参数,这个参数就是dispatch
        */
        return dispatch  => {

            fetch('/data.json')
                .then(res => res.json())
                .then(data => {

                    // 动作的创建
                    const action = {

                        type:type.GET_INFO,
                        payload:data,
                    }
                    // 动作的发送
                    dispatch (action)
                })

        }
    }

}

export default actionCreators;
进阶umi和dva实战
下一篇文章:umi和dva实战


