一:安装
- yum安装编译nginx需要的包
yum -y install pcre pcre-devel zlib zlib-devel openssl openssl-devel
- zlib: 为nginx提供gzip模块,需要zlib库支持
- pcre: 为支持地址重写rewrite功能
- openssl:为nginx提供ssl功能
- 创建nginx用户组和用户
useradd nginx -s /sbin/nologin -M
- 下载nginx源码包,将源码包放到/usr/local/src/目录下
- 下载页面:
http://nginx.org/en/download.html - 1.10.2 下载地址
http://nginx.org/download/nginx-1.10.2.tar.gz
- 进入nginx源码目录,编译安装
tar -xf /usr/local/src/nginx-1.10.2.tar.gz
cd /usr/local/src/nginx-1.10.2
./configure \
--prefix=/usr/local/nginx \
--with-pcre \
--with-http_sub_module \
--with-http_realip_module \
--with-http_gzip_static_module \
--with-http_stub_status_module \
--with-http_ssl_module \
--user=nginx \
--group=nginx
make && make install
- 修改目录权限
chown nginx.nginx -R /usr/local/nginx/
Nginx 启动脚本
Nginx 日志轮替脚本
Nginx 配置文件详解
-
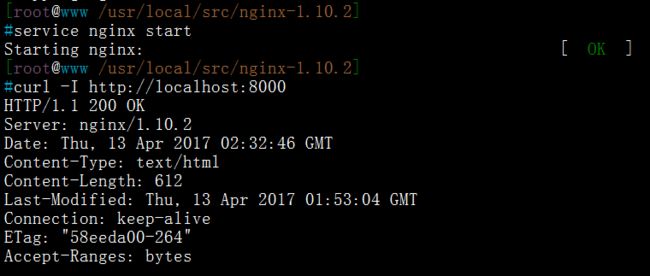
测试成功
二:正向代理
- server 端
server {
    # 配置DNS解析IP地址,比如 Google Public DNS,以及超时时间(5秒)
    resolver 8.8.8.8;    # 必需
    resolver_timeout 5s;

    # 监听端口
    listen 4444;

    access_log  /tmp/proxy.access.log;

    location / {
        # 配置正向代理参数
        proxy_pass $scheme://$host$request_uri;
        # 解决如果URL中带"."后Nginx 503错误
        proxy_set_header Host $http_host;

        # 配置缓存大小
        proxy_buffers 256 4k;
        # 关闭磁盘缓存读写减少I/O
        proxy_max_temp_file_size 0;
         # 代理连接超时时间
        proxy_connect_timeout 30;

        # 配置代理服务器HTTP状态缓存时间
        proxy_cache_valid 200 302 10m;
        proxy_cache_valid 301 1h;
        proxy_cache_valid any 1m;
    }
}
- client端:
一次代理,直接在shell执行:

export http_proxy=http://192.168.1.9:8080

永久使用:
#vim .bashrc

export http_proxy=http://192.168.1.9:8080

#source  .bashrc
二:反向代理
- 反向代理时使后端服务器记录真实的访问IP
反向代理服务器配置:
server {
listen 80;
servername www.test.com;
upstream myserver {
      server 172.17.0.3:80;
      server 172.17.0.4:80;
  }
location / {
      root   html;

      #对发送给客户端的URL进行修改
      proxy_redirect off;
      #当后端web服务器上也配置有多个虚拟主机时,需要用该Header来区分反向代理那个主机名。在每个server模块中设置,区分每个虚拟主机。
      proxy_set_header Host $host;
      #重新定义或者添加发往后端服务器的请求头
      proxy_set_header X-Real_IP  $remote_addr;
      #故障转移
      proxy_next_upstream http_500 http_502 http_503 error timeout invalid_header;
      #后端Web服务器上的程序需要获取用户IP,从该Header头中获取
      proxy_set_header X-Forwarded-For $remote_addr;
      proxy_pass http://myserver;
}
}
- 后端RS为Apache时的配置
#只需修改 LogFormat 的格式
LogFormat "\"%{X-Forwarded-For}i\ %h %l %u %t \"%r\" %>s %b \"%{Referer}i\" \"%{User-Agent}i\"" combined
- 后端RS为Nginx时的配置
#不用修改日志格式,在location中添加以下内容
location / {
     set_real_ip_from 172.17.0.2;#反向代理服务器的IP
     real_ip_header X-Forwarded-For;
}
三:location
=:精确匹配
~:区分大小写的正则表达式模式匹配
~*:不区分大小写的正则表达式模式匹配
^~:URI的前半部分匹配,不检查正则表达式
优先级:(location = path) > (location ~* path) > (location path) > (location ^~  path) > (location /)
四:http 核心模块的内置变量
$args                    #请求中的参数值
$query_string            #同 $args
$arg_NAME                #GET请求中NAME的值
$is_args                 #如果请求中有参数,值为"?",否则为空字符串
$uri                     #请求中的当前URI(不带请求参数,参数位于$args),可以不同于浏览器传递的$request_uri的值,它可以通过内部重定向,或者使用index指令进行修改,$uri不包含主机名,如"/foo/bar.html"。
$document_uri            #同 $uri
$document_root           #当前请求的文档根目录或别名
$host                    #优先级:HTTP请求行的主机名>"HOST"请求头字段>符合请求的服务器名
$hostname                #主机名
$https                   #如果开启了SSL安全模式,值为"on",否则为空字符串。
$binary_remote_addr      #客户端地址的二进制形式,固定长度为4个字节
$body_bytes_sent         #传输给客户端的字节数,响应头不计算在内;这个变量和Apache的mod_log_config模块中的"%B"参数保持兼容
$bytes_sent              #传输给客户端的字节数
$connection              #TCP连接的序列号
$connection_requests     #TCP连接当前的请求数量
$content_length          #"Content-Length" 请求头字段
$content_type            #"Content-Type" 请求头字段
$cookie_name             #cookie名称
$limit_rate              #用于设置响应的速度限制
$msec                    #当前的Unix时间戳
$nginx_version           #nginx版本
$pid                     #工作进程的PID
$pipe                    #如果请求来自管道通信,值为"p",否则为"."
$proxy_protocol_addr     #获取代理访问服务器的客户端地址,如果是直接访问,该值为空字符串
$realpath_root           #当前请求的文档根目录或别名的真实路径,会将所有符号连接转换为真实路径
$remote_addr             #客户端地址
$remote_port             #客户端端口
$remote_user             #用于HTTP基础认证服务的用户名
$request                 #代表客户端的请求地址
$request_body            #客户端的请求主体:此变量可在location中使用,将请求主体通过proxy_pass,fastcgi_pass,uwsgi_pass和scgi_pass传递给下一级的代理服务器
$request_body_file       #将客户端请求主体保存在临时文件中。文件处理结束后,此文件需删除。如果需要之一开启此功能,需要设置client_body_in_file_only。如果将次文件传递给后端的代理服务器,需要禁用request body,即设置proxy_pass_request_body off,fastcgi_pass_request_body off,uwsgi_pass_request_body off,or scgi_pass_request_body off
$request_completion      #如果请求成功,值为"OK",如果请求未完成或者请求不是一个范围请求的最后一部分,则为空
$request_filename        #当前连接请求的文件路径,由root或alias指令与URI请求生成
$request_length          #请求的长度 (包括请求的地址,http请求头和请求主体)
$request_method          #HTTP请求方法,通常为"GET"或"POST"
$request_time            #处理客户端请求使用的时间; 从读取客户端的第一个字节开始计时
$request_uri             #这个变量等于包含一些客户端请求参数的原始URI,它无法修改,请查看$uri更改或重写URI,不包含主机名,例如:"/cnphp/test.php?arg=freemouse"
$scheme                  #请求使用的Web协议,"http" 或 "https"
$server_addr             #服务器端地址,需要注意的是:为了避免访问linux系统内核,应将ip地址提前设置在配置文件中
$server_name             #服务器名
$server_port             #服务器端口
$server_protocol         #服务器的HTTP版本,通常为 "HTTP/1.0" 或 "HTTP/1.1"
$status                  #HTTP响应代码
$time_iso8601            #服务器时间的ISO 8610格式
$time_local              #服务器时间(LOG Format 格式)
$cookie_NAME             #客户端请求Header头中的cookie变量,前缀"$cookie_"加上cookie名称的变量,该变量的值即为cookie名称的值
$http_NAME               #匹配任意请求头字段;变量名中的后半部分NAME可以替换成任意请求头字段,如在配置文件中需要获取http请求头:"Accept-Language",$http_accept_language即可
$http_cookie
$http_post
$http_referer
$http_user_agent
$http_x_forwarded_for
$sent_http_NAME          #可以设置任意http响应头字段;变量名中的后半部分NAME可以替换成任意响应头字段,如需要设置响应头Content-length,$sent_http_content_length即可
$sent_http_cache_control
$sent_http_connection
$sent_http_content_type
$sent_http_keep_alive
$sent_http_last_modified
$sent_http_location
$sent_http_transfer_encoding
五:rewrite 的flag含义
  last:一旦被当前规则匹配并重写后立即停止检查后续的其他rewrite的规则,而后通过重写后的规则重新发起请求
  break:一旦被当前规则匹配并重写后立即停止检查后续的其他rewrite的规则,而后继续由nginx进行后续的操作
  redirect:返回302临时重定向代码
  permanent:返回301永久重定向
六:添加第三方模块(以nginx-http-concat为例)
- 在GitHub下载该模块,放置到nginx源码中的devel目录中(创建devel目录)
wget https://github.com/alibaba/nginx-http-concat/archive/master.zip
-
解决 js 文件合并错误,修改nginx-http-concat.c
重新编译 nginx 添加 --add-module=扩展文件路径
./configure \
--prefix=/usr/local/nginx \
--with-pcre \
--with-http_sub_module \
--with-http_realip_module \
--with-http_gzip_static_module \
--with-http_stub_status_module \
--with-http_ssl_module \
--user=nginx \
--group=nginx \
--add-module=/usr/src/nginx-1.12.0/devel/nginx-http-concat-master
make 后不要 make install 复制 objs/nginx 到 /usr/local/nginx/sbin/ 下(备份老版本 nginx)
-
修改 /usr/local/nginx/conf/mine.types
根据静态文件所在位置配置 nginx 配置文件
location /css {
    concat on;
    concat_max_files 30;
}
location /js {
    concat on;
    concat_max_files 30;
}
-
测试结果
- Nginx和后端Upstream保持长链接
upstream http_backend {
    server 127.0.0.1:8080;

    keepalive 16;
}
server {
    ...

    location /http/ {
        proxy_pass http://http_backend;
        proxy_http_version 1.1;
        proxy_set_header Connection "";
    }
}


