@configuration 中@value不生效_SpringBoot2.x教程——SpringBoot中整合Redis实现持久化缓存...
在上一章节中,我们利用默认的ConcurrentHashMap来实现了一种默认的内存级别的缓存方案。但是该方案并没有进行持久化缓存,一旦内存被释放,缓存也就不存在了,所以本章节中,我带大家利用之前学过的Redis,来实现把缓存数据持久化到Redis中。
本案例中,我直接在上一节的案例上进行改造。
一. Spring Boot整合Redis实现缓存
1. 创建web项目
我们按照之前的经验,创建一个web程序,并将之改造成Spring Boot项目,具体过程略。

2. 添加依赖包
我们在上一章节的基础上,添加2个新的依赖包,redis和json的。
org.springframework.boot spring-boot-starter-data-jpa mysql mysql-connector-java org.springframework.boot spring-boot-starter-cache org.springframework.boot spring-boot-starter-data-redis com.alibaba fastjson 1.2.393. 修改application.yml配置文件
主要是添加关于redis的配置信息,以及设置缓存类型。
cache: default-exp: 1000 #单位秒,缓存的过期时间server: port: 8080spring: application: name: cache-demo datasource: driver-class-name: com.mysql.cj.jdbc.Driver username: root password: syc url: jdbc:mysql://localhost:3306/spring-security?useUnicode=true&characterEncoding=utf8&characterSetResults=utf8&useSSL=false&serverTimezone=UTC redis: host: localhost port: 6379 database: 0 #password: cache: type: redis #由redis进行缓存,一共有10种缓存方案 jpa: database: mysql show-sql: true #开发阶段,打印要执行的sql语句. hibernate: ddl-auto: update4. 修改缓存管理器等配置类
package com.yyg.boot.config;import com.alibaba.fastjson.JSON;import com.fasterxml.jackson.annotation.JsonAutoDetect;import com.fasterxml.jackson.annotation.PropertyAccessor;import com.fasterxml.jackson.databind.ObjectMapper;import org.springframework.beans.factory.annotation.Value;import org.springframework.cache.CacheManager;import org.springframework.cache.annotation.EnableCaching;import org.springframework.cache.interceptor.KeyGenerator;import org.springframework.context.annotation.Bean;import org.springframework.context.annotation.Configuration;import org.springframework.data.redis.cache.RedisCacheConfiguration;import org.springframework.data.redis.cache.RedisCacheManager;import org.springframework.data.redis.connection.RedisConnectionFactory;import org.springframework.data.redis.core.RedisTemplate;import org.springframework.data.redis.serializer.Jackson2JsonRedisSerializer;import org.springframework.data.redis.serializer.RedisSerializationContext;import org.springframework.data.redis.serializer.RedisSerializer;import org.springframework.data.redis.serializer.StringRedisSerializer;import java.lang.reflect.Method;import java.time.Duration;/** * @Author 一一哥Sun * @Date Created in 2020/4/14 * @Description Description * EnableCaching启用缓存 */@Configuration@EnableCachingpublic class CacheConfig { @Value("${cache.default-exp}") private long exps; @Value("${spring.redis.host}") private String host; @Value("${spring.redis.port}") private int port; //@Value("${spring.redis.timeout}") //private int timeout; //@Value("${spring.redis.password}") //private String password; @Bean public KeyGenerator keyGenerator() { return new KeyGenerator() { @Override public Object generate(Object target, Method method, Object... params) { StringBuffer sb = new StringBuffer(); sb.append(target.getClass().getName()); sb.append(method.getName()); for (Object obj : params) { sb.append(obj.toString()); } return sb.toString(); } }; } /** * RedisTemplate配置 */ @Bean public RedisTemplate, ?> redisTemplate(RedisConnectionFactory redisConnectionFactory) { RedisTemplate template = new RedisTemplate<>(); template.setConnectionFactory(redisConnectionFactory); // 使用Jackson2JsonRedisSerializer来序列化和反序列化redis的value值 Jackson2JsonRedisSerializer serializer = new Jackson2JsonRedisSerializer(JSON.class); ObjectMapper mapper = new ObjectMapper(); mapper.setVisibility(PropertyAccessor.ALL, JsonAutoDetect.Visibility.ANY); mapper.enableDefaultTyping(ObjectMapper.DefaultTyping.NON_FINAL); serializer.setObjectMapper(mapper); template.setValueSerializer(serializer); template.setHashValueSerializer(serializer); // 使用StringRedisSerializer来序列化和反序列化redis的key值 template.setKeySerializer(new StringRedisSerializer()); template.afterPropertiesSet(); return template; } @Bean public CacheManager cacheManager(RedisConnectionFactory redisConnectionFactory) { // 生成一个默认配置,通过config对象即可对缓存进行自定义配置 RedisSerializer redisSerializer = new StringRedisSerializer(); // 使用Jackson2JsnRedisSerializer来序列化和反序列化redis的value值 Jackson2JsonRedisSerializer serializer = new Jackson2JsonRedisSerializer<>(JSON.class); // 配置序列化 RedisCacheConfiguration config = RedisCacheConfiguration.defaultCacheConfig(); config.serializeKeysWith(RedisSerializationContext.SerializationPair.fromSerializer(redisSerializer)); config.serializeValuesWith(RedisSerializationContext.SerializationPair.fromSerializer(serializer)); // 设置缓存的默认过期时间 config.entryTtl(Duration.ofSeconds(exps)); // 不缓存空值 config.disableCachingNullValues(); return RedisCacheManager.builder(redisConnectionFactory).cacheDefaults(config).build(); }}5. 创建实体类
package com.yyg.boot.domain;import lombok.Data;import lombok.ToString;import javax.persistence.*;import java.io.Serializable;@Entity@Table(name="user")@Data@ToStringpublic class User implements Serializable { //IllegalArgumentException: DefaultSerializer requires a Serializable payload // but received an object of type [com.syc.redis.domain.User] @Id @GeneratedValue(strategy = GenerationType.AUTO) private Long id; @Column private String username; @Column private String password;}6. 创建User仓库类
package com.yyg.boot.repository;import com.yyg.boot.domain.User;import org.springframework.data.jpa.repository.JpaRepository;public interface UserRepository extends JpaRepository {}7. 创建Service服务类
定义UserService接口
package com.yyg.boot.service;import com.yyg.boot.domain.User;public interface UserService { User findById(Long id); User save(User user); void deleteById(Long id);}实现UserServiceImpl类
package com.yyg.boot.service.impl;import com.yyg.boot.domain.User;import com.yyg.boot.repository.UserRepository;import com.yyg.boot.service.UserService;import org.springframework.beans.factory.annotation.Autowired;import org.springframework.cache.annotation.CacheEvict;import org.springframework.cache.annotation.CachePut;import org.springframework.cache.annotation.Cacheable;import org.springframework.stereotype.Service;@Servicepublic class UserServiceImpl implements UserService { @Autowired private UserRepository userRepository; //普通的缓存+数据库查询代码实现逻辑: //User user=RedisUtil.get(key); // if(user==null){ // user=userDao.findById(id); // //redis的key="product_item_"+id // RedisUtil.set(key,user); // } // return user; /** * 注解@Cacheable:查询的时候才使用该注解! * 注意:在Cacheable注解中支持EL表达式 * redis缓存的key=user_1/2/3.... * redis的缓存雪崩,缓存穿透,缓存预热,缓存更新... * condition = "#result ne null",条件表达式,当满足某个条件的时候才进行缓存 * unless = "#result eq null":当user对象为空的时候,不进行缓存 */ @Cacheable(value = "user", key = "#id", unless = "#result eq null") @Override public User findById(Long id) { return userRepository.findById(id).orElse(null); } /** * 注解@CachePut:一般用在添加和修改方法中 * 既往数据库中添加一个新的对象,于此同时也往redis缓存中添加一个对应的缓存. * 这样可以达到缓存预热的目的. */ @CachePut(value = "user", key = "#result.id", unless = "#result eq null") @Override public User save(User user) { return userRepository.save(user); } /** * CacheEvict:一般用在删除方法中 */ @CacheEvict(value = "user", key = "#id") @Override public void deleteById(Long id) { userRepository.deleteById(id); }}8. 创建Controller接口方法
package com.yyg.boot.web;import com.yyg.boot.domain.User;import com.yyg.boot.service.UserService;import lombok.extern.slf4j.Slf4j;import org.springframework.beans.factory.annotation.Autowired;import org.springframework.http.HttpStatus;import org.springframework.http.ResponseEntity;import org.springframework.web.bind.annotation.*;@RestController@RequestMapping("/user")@Slf4jpublic class UserController { @Autowired private UserService userService; @PostMapping public User saveUser(@RequestBody User user) { return userService.save(user); } @GetMapping("/{id}") public ResponseEntity getUserById(@PathVariable("id") Long id) { User user = userService.findById(id); log.warn("user="+user.hashCode()); HttpStatus status = user == null ? HttpStatus.NOT_FOUND : HttpStatus.OK; return new ResponseEntity<>(user, status); } @DeleteMapping("/{id}") public String removeUser(@PathVariable("id") Long id) { userService.deleteById(id); return "ok"; }}9. 创建入口类
package com.yyg.boot;import org.springframework.boot.SpringApplication;import org.springframework.boot.autoconfigure.SpringBootApplication;@SpringBootApplicationpublic class CacheApplication { public static void main(String[] args) { SpringApplication.run(CacheApplication.class, args); }}10. 完整项目结构
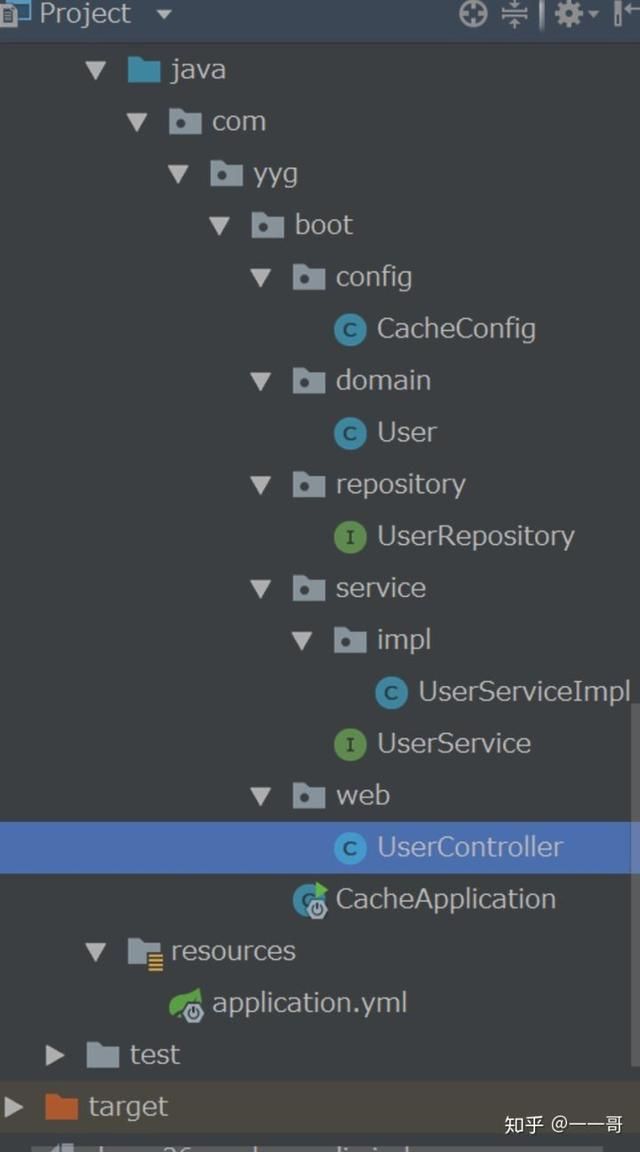
11. 重新项目进行测试
首先可以看到,我的redis中此时没有任何缓存数据。

解析来我在postman中进行查询。

此时在Redis Desktop Manager中重新加载一下数据,可以看到已经有了缓存的redis数据了。

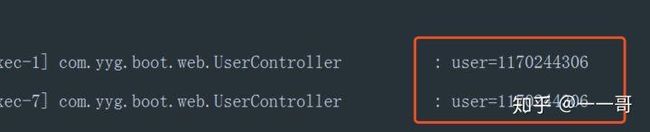
控制台中也可以看到User的hashCode依然相同,说明我们已经成功的整合了Redis,实现了把数据缓存到了Redis中,进而实现了持久化。