1. 五种类型的JS对比
Chrome插件的JS主要可以分为这5类:injected script、content-script、popup js、background js和devtools js,
1.1 权限对比
| JS种类 | 可访问的API | DOM访问情况 | JS访问情况 | 直接跨域 |
|---|---|---|---|---|
| injected script | 和普通JS无任何差别,不能访问任何扩展API | 可以 | 可以 | 不可以 |
| content script | 只能访问 extension、runtime等部分API | 可以 | 不可以 | 不可以 |
| popup js | 可访问绝大部分API,除了devtools系列 | 不可直接访问 | 不可以 | 不可以 |
| background js | 可访问绝大部分API,除了devtools系列 | 不可直接访问 | 不可以 | 不可以 |
| devtools js | 只能访问 devtools、extension、runtime等部分API | 可以 | 可以 | 不可以 |
2. 消息通信
通信主页:https://developer.chrome.com/extensions/messaging
前面我们介绍了Chrome插件中存在的5种JS,那么它们之间如何互相通信呢?下面先来系统概况一下,然后再分类细说。
2.1 popup和background
popup可以直接调用background中的JS方法,也可以直接访问background的DOM:
// background.js
function test()
{
    alert('我是background!');
}

// popup.js
var bg = chrome.extension.getBackgroundPage();
bg.test(); // 访问bg的函数
alert(bg.document.body.innerHTML); // 访问bg的DOM
在bg下面访问popup
var views = chrome.extension.getViews({type:'popup'});
2.2 popup 或者 content-scripts向主动bg发送消息(已验证)
//popup.js /content-scripts
chrome.runtime.sendMessage({greeting: '你好,我是content-script呀,我主动发消息给后台!'}, function(response) {
    console.log('收到来自后台的回复:' + response);
});
//bg
chrome.runtime.onMessage.addListener(function(request, sender, sendResponse)
{
    console.log('收到来自popup.js的消息:');
    console.log(request, sender, sendResponse);
    sendResponse('我是后台,我已收到你的消息:' + JSON.stringify(request));
});
在互相发送消息的时候我们要注意生命周期的问题,我们肯定是需要先注册监听事件,再注册发送事件才行。不然肯定是无法接收到消息的。
所以popup.js是点击的时候才会执行。因此content-scripts无法直接给popup.js发送消息。而经过验证popup.js貌似也无法直接给content-scripts发送消息,需要通过点击事件。
执行popup.js的时候会console: 收到回复:undefined
而content-scripts没有打印出任何消息。这个问题有待研究?
2.3 injected script和content-script
content-script和页面内的脚本(injected-script自然也属于页面内的脚本)之间唯一共享的东西就是页面的DOM元素,有2种方法可以实现二者通讯:
可以通过window.postMessage和window.addEventListener来实现二者消息通讯;
第一种(推荐)
injected-script中:
window.postMessage({"test": '你好!'}, '*');
content script中:
window.addEventListener("message", function(e)
{
    console.log(e.data);
}, false);
第二种:
injected-script中:
var customEvent = document.createEvent('Event');
customEvent.initEvent('myCustomEvent', true, true);
function fireCustomEvent(data) {
    hiddenDiv = document.getElementById('myCustomEventDiv');
    hiddenDiv.innerText = data
    hiddenDiv.dispatchEvent(customEvent);
}
fireCustomEvent('你好,我是普通JS!');
content-script.js中:
var hiddenDiv = document.getElementById('myCustomEventDiv');
if(!hiddenDiv) {
    hiddenDiv = document.createElement('div');
    hiddenDiv.style.display = 'none';
    document.body.appendChild(hiddenDiv);
}
hiddenDiv.addEventListener('myCustomEvent', function() {
    var eventData = document.getElementById('myCustomEventDiv').innerText;
    console.log('收到自定义事件消息:' + eventData);
});
2.4 长连接和短连接
其实上面已经涉及到了,这里再单独说明一下。Chrome插件中有2种通信方式,一个是短连接(chrome.tabs.sendMessage和chrome.runtime.sendMessage),一个是长连接(chrome.tabs.connect和chrome.runtime.connect)。
长短连接的概念我就不说了,大家都应该知道。
短连接上面已经有代码示例了,这里只讲一下长连接。
popup.js

// 获取当前选项卡ID
   function getCurrentTabId(callback) {
     chrome.tabs.query({ active: true, currentWindow: true }, function(tabs) {
       if (callback) callback(tabs.length ? tabs[0].id : null);
     });
   }

   function callbackInfo(tabId) {
     console.log(tabId)
     var port = chrome.tabs.connect(tabId, { name: 'test-connect' });
     port.postMessage({ question: '你是谁啊?' });
     port.onMessage.addListener(function(msg) {
       alert('收到消息:' + msg.answer);
       if (msg.answer && msg.answer.startsWith('我是')) {
         port.postMessage({ question: '哦,原来是你啊!' });
       }
     });
   }

   getCurrentTabId(callbackInfo)
//content-script.js: 监听长连接
chrome.runtime.onConnect.addListener(function(port) {
    console.log(port);
    if(port.name == 'test-connect') {
        port.onMessage.addListener(function(msg) {
            console.log('收到长连接消息:', msg);
            if(msg.question == '你是谁啊?') port.postMessage({answer: '我是司音!'});
        });
    }
});
3. 补充
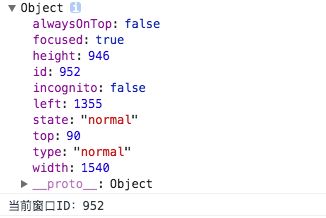
获取当前窗口ID
chrome.windows.getCurrent(function(currentWindow){
    console.log(currentWindow);
    console.log('当前窗口ID:' + currentWindow.id);
});
示例打印结果:
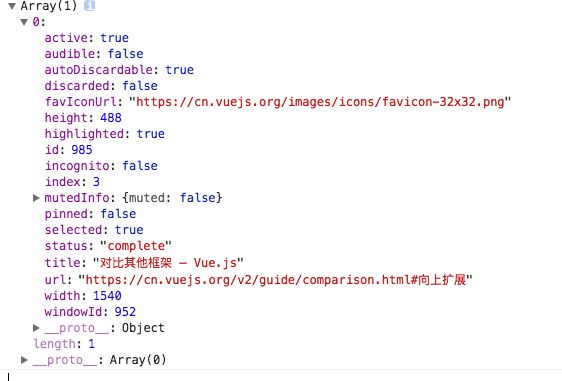
获取当前标签页id
// 获取当前选项卡ID
function getCurrentTabId(callback){
    chrome.tabs.query({active: true, currentWindow: true}, function(tabs){
        if(callback) callback(tabs.length ? tabs[0].id: null);
    });
}
示例tabs打印结果:
4. 本地存储
本地存储建议用chrome.storage而不是普通的localStorage,区别有好几点,个人认为最重要的2点区别是:chrome.storage是针对插件全局的,即使你在background中保存的数据,在content-script也能获取到;
chrome.storage.sync可以跟随当前登录用户自动同步,这台电脑修改的设置会自动同步到其它电脑,很方便,如果没有登录或者未联网则先保存到本地,等登录了再同步至网络;
需要声明storage权限,有chrome.storage.sync和chrome.storage.local2种方式可供选择,使用示例如下
// 读取数据,第一个参数是指定要读取的key以及设置默认值
chrome.storage.sync.get({color: 'red', age: 18}, function(items) {
    console.log(items.color, items.age);
});
// 保存数据
chrome.storage.sync.set({color: 'blue'}, function(){
    console.log('保存成功!');
});
5. 常用的一些api
chrome.tabs
chrome.runtime
chrome.webRequest
chrome.window
chrome.storage
chrome.contextMenus
chrome.extension