Flutter 拥有多个子元素的Widgets
1、Row、Column
row 在水平方向上排列子widget的列表。
column 在垂直方向上排列子widget的列表。
a、Row、Column属性
- MainAxisAlignment:主轴方向上的对齐方式,会对child的位置起作用,默认是start
center:将children放置在主轴的中心;
end:将children放置在主轴的末尾;
spaceAround:将主轴方向上的空白区域均分,使得children之间的空白区域相等,但是首尾child的空白区域为1/2;
spaceBetween:将主轴方向上的空白区域均分,使得children之间的空白区域相等,首尾child都靠近首尾,没有间隙;
spaceEvenly:将主轴方向上的空白区域均分,使得children之间的空白区域相等,包括首尾child;
start:将children放置在主轴的起点;
- MainAxisSize:在主轴方向占有空间的值,默认是max。
max:根据传入的布局约束条件,最大化主轴方向的可用空间;
min:与max相反,是最小化主轴方向的可用空间;
- CrossAxisAlignment:children在交叉轴方向的对齐方式,
baseline:在交叉轴方向,使得children的baseline对齐;
center:children在交叉轴上居中展示;
end:children在交叉轴上末尾展示;
start:children在交叉轴上起点处展示;
stretch:让children填满交叉轴方向;
- TextDirection:阿拉伯语系的兼容设置,一般无需处理。
- VerticalDirection:定义了children摆放顺序,默认是down。
down:从top到bottom进行布局;
up:从bottom到top进行布局。
- TextBaseline:使用的TextBaseline的方式
b、Row、Column案例
    Widget row = new Row(
      children: [
        Expanded(
            child: Text(
          'Deliver features faster',
          textAlign: TextAlign.center,
        )),
        Expanded(
            child: Text(
                'Craft beautiful UIs ',
                textAlign: TextAlign.center)),
        Expanded(
            child: FittedBox(
          fit: BoxFit.contain,
          child: const FlutterLogo(),
        )),
      ],
    );


    Widget column = new Column(
      children: [
        Text('Deliver features faster'),
        Text('Craft beautiful UIs'),
        Expanded(
          child: FittedBox(
            fit: BoxFit.contain, // otherwise the logo will be tiny
            child: const FlutterLogo(),
          ),
        ),
      ],
    );
3、Wrap
Wrap是一个可以使子控件自动换行的控件,默认的方向是水平的
a、Wrap属性
- direction:主轴(mainAxis)的方向,默认为水平。
- alignment:主轴方向上的对齐方式,默认为start。
- spacing:主轴方向上的间距。
- runAlignment:run的对齐方式。run可以理解为新的行或者列,如果是水平方向布局的话,run可以理解为新的一行。
- runSpacing:run的间距。
- crossAxisAlignment:交叉轴(crossAxis)方向上的对齐方式。
- textDirection:文本方向。
- verticalDirection:定义了children摆放顺序,默认是down,见Flex相关属性介绍。
4、Stack
跟Android中FrameLayout很像,都是可以叠加的现实View
a、Stack属性
- alignment : 指的是子Widget的对其方式,
- fit :用来决定没有Positioned方式时候子Widget的大小,
StackFit.loose 指的是子Widget 多大就多大,
StackFit.expand使子Widget 的大小和父组件一样大
- overflow :指子Widget 超出Stack时候如何显示,默认值是Overflow.clip,
Overflow.clip:子Widget超出Stack会被截断,
Overflow.visible超出部分还会显示的
- textDirection:排列方向
TextDirection.rtl: 从右到左
TextDirection.ltr: 从左到右
b、Stack案例
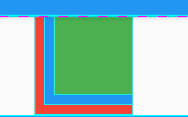
 Widget stack = new Stack(
      textDirection: TextDirection.rtl,
      children: [
        Container(
          width: 100,
          height: 100,
          color: Colors.red,
        ),
        Container(
          width: 90,
          height: 90,
          color: Colors.blue,
        ),
        Container(
          width: 80,
          height: 80,
          color: Colors.green,
        )
      ],
    );
c、Stack案例效果图
5、IndexedStack
IndexedStack和Stack一样,都是层布局控件, 可以在一个控件上面放置另一个控件,但唯一不同的是IndexedStack在同一时刻只能显示子控件中的一个控件,通过Index属性来设置显示的控件
a、IndexedStack属性
拥有Stack属性外,还有index属性
- index:显示第几个图案
6、Flow
一个实现流式布局算法的widget,
Flow用起来远比Wrap麻烦,但是它可以实现更加个性化的需求,我们可以通过delegate属性自己设置子控件排列规则。
a、Flow属性
-
Flowdelegate delegate :用于回调Flow大小,以及 计算childWidget的frame。
b、Flow案例
class TestFlowDelegate extends FlowDelegate {
  EdgeInsets margin = EdgeInsets.zero;

  TestFlowDelegate({this.margin});

  @override
  void paintChildren(FlowPaintingContext context) {
    var x = margin.left;
    var y = margin.top;
    //计算每一个子widget的位置
    for (int i = 0; i < context.childCount; i++) {
      var w = context.getChildSize(i).width + x + margin.right;
      if (w < context.size.width) {
        context.paintChild(
            i,
            transform: new Matrix4.compose(Vector.Vector3(x,y,0.0), Vector.Quaternion(0.0,0.0,0.3,0.1), Vector.Vector3(1.0,1.0,1.0))
        );
        x = w + margin.left;
      } else {
        x = margin.left;
        y += context.getChildSize(i).height + margin.top + margin.bottom;
        //绘制子widget(有优化)
        context.paintChild(i,
            transform: Matrix4.translationValues(x, y, 0.0) //位移
        );
        x += context.getChildSize(i).width + margin.left + margin.right;
      }
    }
  }

  getSize(BoxConstraints constraints) {
    //指定Flow的大小
    return Size(double.infinity, double.infinity);
  }

  @override
  bool shouldRepaint(FlowDelegate oldDelegate) {
    return oldDelegate != this;
  }
}


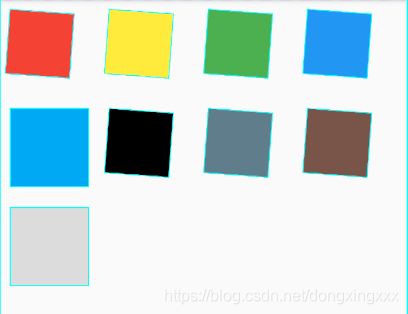
Flow flow = Flow(
      delegate: TestFlowDelegate(margin: EdgeInsets.all(10.0)),
      children: [
        new Container(width: 80.0, height: 80.0, color: Colors.red),
        new Container(width: 80.0, height: 80.0, color: Colors.yellow),
        new Container(width: 80.0, height: 80.0, color: Colors.green),
        new Container(width: 80.0, height: 80.0, color: Colors.blue),
        new Container(width: 80.0, height: 80.0, color: Colors.lightBlue),
        new Container(width: 80.0, height: 80.0, color: Colors.black),
        new Container(width: 80.0, height: 80.0, color: Colors.blueGrey),
        new Container(width: 80.0, height: 80.0, color: Colors.brown),
        new Container(width: 80.0, height: 80.0, color: Colors.black12),

      ],
    );
c、IntrinsicHeight案例效果图
6、Table
为其子widget使用表格布局算法的widget
a、Table属性
- columnWidths:设置每一列的宽度
- defaultColumnWidth:默认的每一列宽度值,默认情况下均分
- textDirection:文字方向
- border:表格边框
- defaultVerticalAlignment:默认垂直方向对齐方式:
- top:放置在顶部
- middle:垂直居中
- bottom:放置在底部
- baseline:文本baseline对齐
- fill:充满整个cell
- textBaseline:defaultVerticalAlignment为baseline的时候,会用到这个属性
b、Table案例
 Table table = new Table(
      border: TableBorder.all(
          width: 2.0, color: Colors.red, style: BorderStyle.solid),
      children: [
        new TableRow(
            children: [
              new TableCell(child: new Center(child: new Text("Hello 1"),)),
              new TableCell(child: new Center(child: new Text("Hello 2"),)),
              new TableCell(child: new Center(child: new Text("Hello 3"),)),
              new TableCell(child: new Center(child: new Text("Hello 4"),))
            ],
        ),
        new TableRow(
          children: [
            new TableCell(child: new Center(child: new Text("Hello 1"),)),
            new TableCell(child: new Center(child: new Text("Hello 2"),)),
            new TableCell(child: new Center(child: new Text("Hello 3"),)),
            new TableCell(child: new Center(child: new Text("Hello 4"),))
          ],
        ),
        new TableRow(
          children: [
            new TableCell(child: new Center(child: new Text("Hello 1"),)),
            new TableCell(child: new Center(child: new Text("Hello 2"),)),
            new TableCell(child: new Center(child: new Text("Hello 3"),)),
            new TableCell(child: new Center(child: new Text("Hello 4"),))
          ],
        ),
        new TableRow(
          children: [
            new TableCell(child: new Center(child: new Text("Hello 1"),)),
            new TableCell(child: new Center(child: new Text("Hello 2"),)),
            new TableCell(child: new Center(child: new Text("Hello 3"),)),
            new TableCell(child: new Center(child: new Text("Hello 4"),))
          ],
        ),
      ],

    );
c、Table案例效果图
8、ListBody
ListBody的作用是按给定的轴方向,按照顺序排列子节点。
a、ListBody属性
- mainAxis:排列的主轴方向。
- reverse:是否反向。
b、ListBody案例
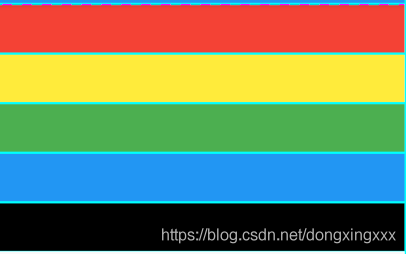
 Widget flex = new Flex(
      direction: Axis.horizontal,
      children: [
        ListBody(
          mainAxis: Axis.vertical,
          reverse: false,
          children: [
            Container(color: Colors.red, width: 50.0, height: 50.0,),
            Container(color: Colors.yellow, width: 50.0, height: 50.0,),
            Container(color: Colors.green, width: 50.0, height: 50.0,),
            Container(color: Colors.blue, width: 50.0, height: 50.0,),
            Container(color: Colors.black, width: 50.0, height: 50.0,),
          ],
        ),
      ],
    );
c、ListBody案例效果图
9、ListView
可滚动的列表控件。ListView是最常用的滚动widget,它在滚动方向上一个接一个地显示它的孩子。在纵轴上,孩子们被要求填充ListView。
a、ListView构建方案
- 通过children属性,即:用显示的自列表来构造
List此构造函数适合于具有少量子元素的列表视图, ListView.builder利用IndexedWidgetBuilder来按需构造,这个构造函数适合于具有大量(或无限)子视图的列表视图,因为构建器只对那些实际可见的子视图调用。- 使用
ListView.separated构造函数,采用两个IndexedWidgetBuilder:itemBuilder根据需要构建子项separatorBuilder类似地构建出现在子项之间的分隔符子项。此构造函数适用于具有固定数量的子控件的列表视图。 - 使用
ListView.custom的SliverChildDelegate构造,它提供了定制子模型的其他方面的能力。 例如,SliverChildDelegate可以控制用于估计实际上不可见的孩子的大小的算法
b、ListView案例
//ListView.builder构建

ListView listView = new ListView.builder(
      padding: EdgeInsets.all(10),
      itemCount: 5,
      itemExtent: 50.0,
      itemBuilder: (BuildContext context,int index){
        return new Text("Hello $index");
      },
    );
//ListView.separated构建
ListView listView = new ListView.separated(
itemCount: 5,
itemBuilder: (BuildContext context,int index){
return new Text("Hello $index");
},
separatorBuilder: (BuildContext context,int index){
return new Container(height: 10.0,color: Colors.red,);
},
);//通过 ListView.custom构建
/**
* 继承SliverChildBuilderDelegate 可以对列表的监听
*/
class MySliverChildDelegate extends SliverChildBuilderDelegate{
/*这两种效果等价*/
//MyDelegate(IndexedWidgetBuilder builder) : super(builder);
//MyDelegate(Widget Function(BuildContext, int) builder) : super(builder);
MySliverChildDelegate(IndexedWidgetBuilder builder,{
int childCount,
}) : super(builder,childCount:childCount);
监听 在可见的列表中 显示的第一个位置和最后一个位置
@override
void didFinishLayout(int firstIndex, int lastIndex) {
// TODO: implement didFinishLayout
super.didFinishLayout(firstIndex, lastIndex);
}
//添加进来的实例与之前的实例是否相同 相同返回true 反之false
@override
bool shouldRebuild(SliverChildBuilderDelegate oldDelegate) {
// TODO: implement shouldRebuild
return super.shouldRebuild(oldDelegate);
}
}
ListView listView = new ListView.custom(
itemExtent: 40.0,
childrenDelegate: MySliverChildDelegate(
(BuildContext context, int i) {
return new Container(
child: new Row(
mainAxisAlignment: MainAxisAlignment.spaceEvenly,
children: [
new Text(
"张三 name",
style: new TextStyle(fontSize: 18.0, color: Colors.red),
),
new Text(
"11 age}",
style: new TextStyle(fontSize: 18.0, color: Colors.green),
),
new Text(
"信息 content}",
style: new TextStyle(fontSize: 18.0, color: Colors.blue),
),
],
));
},
childCount: 10,
),
cacheExtent: 0.0,
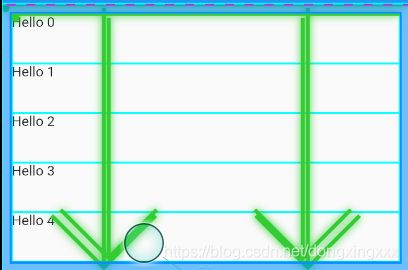
); c、ListView案例效果图
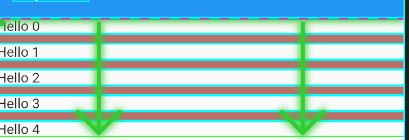
通过ListView.builder实现效果
ListView.separated构建
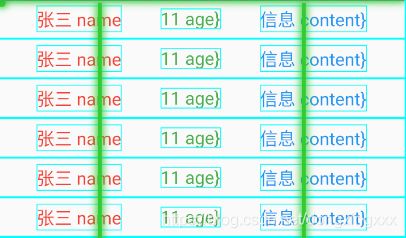
ListView.custom
