背景
静态分析源码,只能知道源码架构流程。
但是,对于不同的输入,程序的跳转走向,动态分析源码方法更加清晰。
本文采用eclipse代替gdb命令行方式,提升动态分析源码的效率。
准备
系统:centos 7.5
软件:
1.Eclipse IDE for C/C++ Developers (需要相应的jdk及gdb版本,自行安装)
2.gdb
源码 :PostgreSQL 11 Beta 2 Released!
安装pg
为了能够断点调试分析的执行过程,所以采用源码编译安装postgresql,启动debug相关选项。
1.解压
[appusr@postgre ~]$ tar zxvf postgresql-11beta2.tar.gz
[appusr@postgre postgresql-11beta2]$ cd postgresql-11beta2/
2.编译安装 。打开调试选项、关闭编译优化:--enable-debug CFLAGS=-O0
[appusr@postgre postgresql-11beta2]$ ./configure --with-icu --with-perl --with-python --with-tcl --with-gssapi --with-pam --with-ldap --with-openssl --with-pam --without-ldap --with-libxml --with-libxslt --enable-dtrace --enable-depend --enable-cassert --enable-profiling --with-systemd **--enable-debug CFLAGS=-O0** --prefix=/home/appusr/PostgreSQL/11.0.2/
[appusr@postgre postgresql-11beta2]$ make -j4
[appusr@postgre postgresql-11beta2]$ make install
注:为了做到全量代码调试,尽量打开更多的编译功能选项
3.设置环境变量:在~/.bashrc 加入以下内容
export PGHOME=/home/appusr/PostgreSQL/11.0.2export
PATH=$PGHOME/bin:/appdev/eclipse:$PATHexport
LD_LIBRARY_PATH=$PGHOME/lib:$LD_LIBRARY_PATH
执行 source ~/.bashrc
4.初始化数据库
[appusr@postgre postgresql-11beta2]$ mkdir /home/appusr/data
[appusr@postgre postgresql-11beta2]$ initdb -D /home/appusr/data
若要网络访问,请自行修改防火墙配置、postgresql.conf、pg_hba.conf
5.启动数据库:
pg_ctl -D /home/appusr/data -l /home/appusr/data/pg.log start
6.初始化数据:
REATE TABLE t_student
(sno char(9) primary key,
 sname char(20) unique,
 ssex char(2),
 sage smallint,
 sdept char(20) );

insert into t_student values('201215121','李勇','男',20,'CS');
insert into t_student values('201215122','刘晨','女',19,'CS');
insert into t_student values('201215123','王敏','女',18,'MA');
insert into t_student values('201215125','张立','男',19,'IS');
insert into t_student values('201215126','李一平','男',18,'IS');
insert into t_student values('201215127','张琴','女',19,'CS');
insert into t_student values('201215128','王方','女',20,'MA');
insert into t_student values('201215129','黄林林','男',21,'IS');

CREATE TABLE t_course
(cno char(4) primary key,
 cname char(40),
 cpno char(4),
 ccredit smallint);

insert into t_course values('1','数据库','5',4);
insert into t_course values('2','数学',null,2);
insert into t_course values('3','信息系统','1',4);
insert into t_course values('4','操作系统','6',3);
insert into t_course values('5','数据结构','7',4);
insert into t_course values('6','数据处理',null,2);
insert into t_course values('7','C语言','6',4);


CREATE TABLE t_sc
(sno char(9),
 cno char(4),
 grade smallint,
 primary key (sno,cno));

insert into t_sc values('201215121','1',92);
insert into t_sc values('201215121','2',85);
insert into t_sc values('201215121','3',88);
insert into t_sc values('201215121','4',98);
insert into t_sc values('201215121','5',89);
insert into t_sc values('201215121','6',95);
insert into t_sc values('201215121','7',93);
insert into t_sc values('201215122','2',90);
insert into t_sc values('201215122','3',80);
insert into t_sc values('201215122','4',85);
insert into t_sc values('201215122','6',92);
insert into t_sc values('201215123','1',90);
insert into t_sc values('201215123','2',84);
insert into t_sc values('201215123','3',91);
insert into t_sc values('201215123','4',90);
insert into t_sc values('201215123','5',80);
insert into t_sc values('201215123','6',78);
insert into t_sc values('201215123','7',65);
insert into t_sc values('201215128','1',78);
insert into t_sc values('201215128','2',82);
insert into t_sc values('201215128','3',77);
insert into t_sc values('201215128','4',79);
insert into t_sc values('201215128','5',92);
insert into t_sc values('201215128','6',98);
insert into t_sc values('201215128','7',50);
insert into t_sc values('201215125','1',67);
insert into t_sc values('201215125','2',71);
insert into t_sc values('201215125','3',90);
insert into t_sc values('201215126','4',81);
insert into t_sc values('201215126','5',90);
insert into t_sc values('201215126','6',56);
insert into t_sc values('201215126','7',89);
insert into t_sc values('201215127','1',81);
insert into t_sc values('201215127','2',72);
insert into t_sc values('201215127','3',90);
insert into t_sc values('201215127','4',64);
insert into t_sc values('201215127','5',79);
insert into t_sc values('201215127','6',50);
insert into t_sc values('201215127','7',96);
导入工程
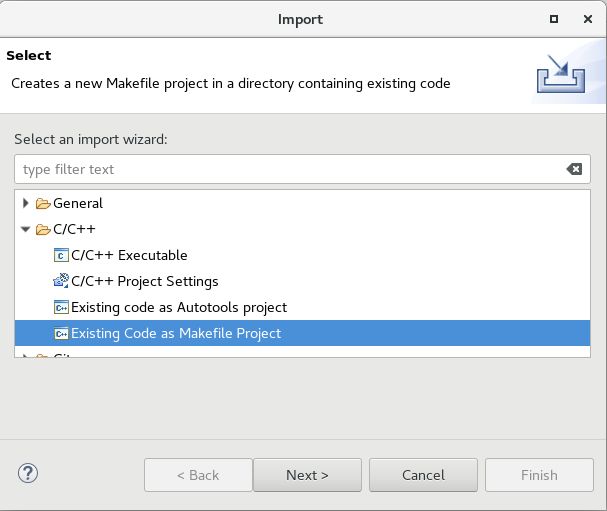
右键 Project Explorer ——》Import
选择 C/C++ ——》Existing Code as Makefile Project
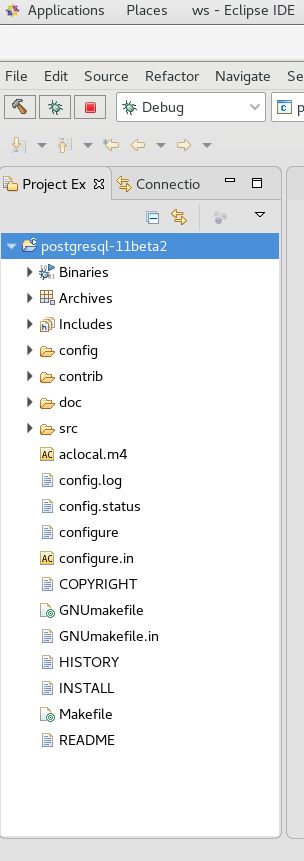
点击 next, 填入必要信息, 去掉C++勾选,
代入代码如下
断点调试
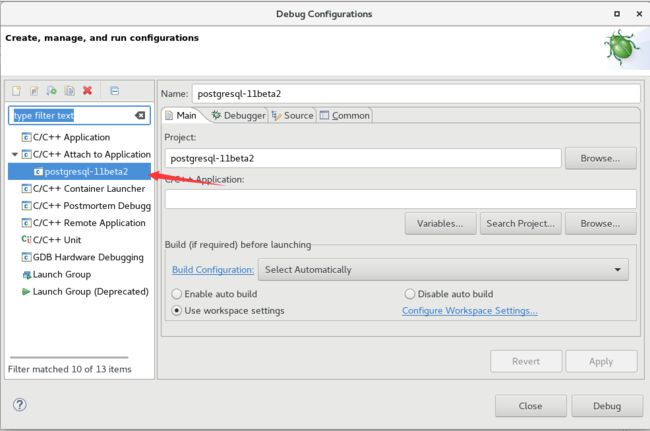
设置Debug,新建一个 C/C++ Attach to Application
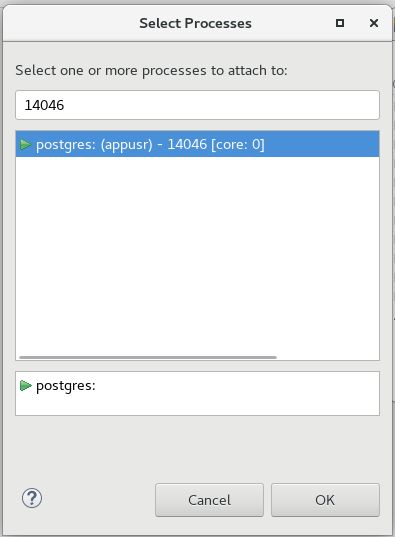
启动调试,输入绑定的pid号,点击 OK。
连接数据库fork出来的进程号是:14046
可以通过命令查询得到
select * from pg_stat_activity;
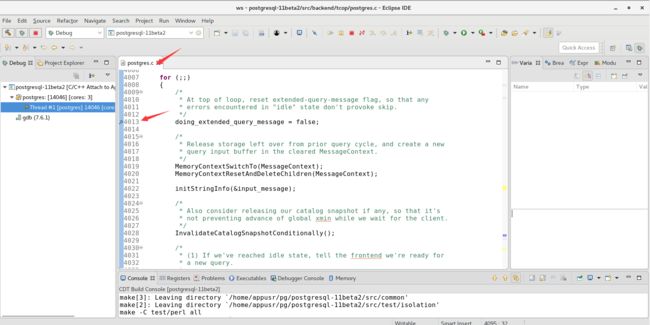
设置断点:
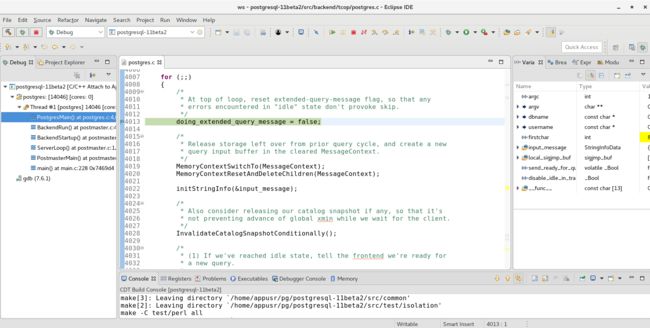
执行SQL命令就能进入到断点位置
select * from pg_stat_activity;
总结
断点调试postgresql,采用了gdb -p $pid 模式启动调试。
这些断点调试,在gdb中都能实现
采用eclipse 可视化集成环境调试,可以更加快捷方便,分析代码和调试程序效率更加高
不过eclipse集成环境对CPU、内存等资源消耗相对来说也比较高,如果在内存资源很低或没有界面的环境,还是得用gdb
