Linux环境下搭建区块链私有链+部署智能合约
文章目录
- 一、前期准备
- 二、安装goland环境
- 三、安装go版本的以太坊源码,并编译
- 四、私有链搭建
- 五、私有链节点加入
- 六、部署智能合约
- 七、参考链接
一、前期准备
- 安装更新相关组件
sudo yum update -y && yum install git wget bzip2 vim gcc-c++ ntp epel-release nodejs cmake -y
- 在自己喜欢的目录下执行以下操作。这里作者在/opt/module下新建了一个blockchain文件夹,所有操作在该文件夹下进行。
 cd /opt/module
 mkdir blockchain
- 安装VSCode
## install key and repository
sudo rpm --import https://packages.microsoft.com/keys/microsoft.asc
sudo sh -c 'echo -e "[code]\nname=Visual Studio Code\nbaseurl=https://packages.microsoft.com/yumrepos/vscode\nenabled=1\ngpgcheck=1\ngpgkey=https://packages.microsoft.com/keys/microsoft.asc" > /etc/yum.repos.d/vscode.repo'
## update
yum check-update
sudo yum install code
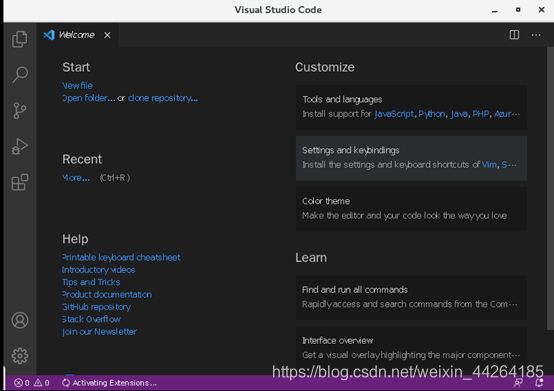
- 输入code,会出现软件界面
二、安装goland环境
- 获取资源包
wget https://studygolang.com/dl/golang/go1.7.3.linux-amd64.tar.gz
- 解压,解压后多了一个go目录
tar -zxvf go1.7.3.linux-amd64.tar.gz
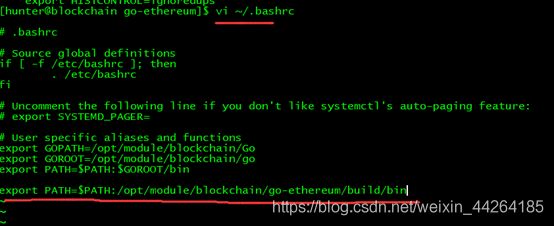
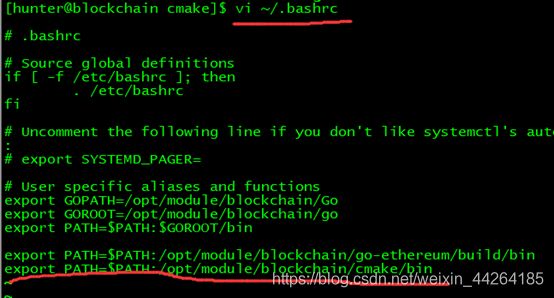
- 下面配置环境变量
vi ~/.bashrc
export GOPATH=/opt/module/blockchain/Go
export GOROOT=/opt/module/blockchain/go
export PATH=$PATH:$GOROOT/bin

注意: 圈出部分根据自己下载的路径灵活修改,如果用这种方式出错,应该是没有安装bashrc相关的组件,直接在etc/profile中修改,效果一样。
三、安装go版本的以太坊源码,并编译
- 获取资源,通过这个步骤,blockchain文件夹下面又多一个go-ethereum
git clone https://github.com/ethereum/go-ethereum.git
- 进入到go-ethereum,分别执行以下命令
git checkout v1.7.2
make geth
make all
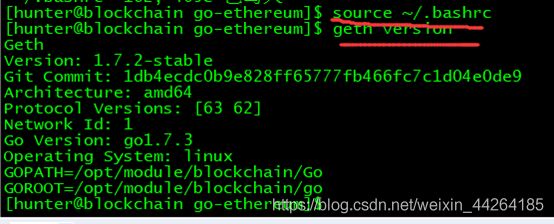
- 配置geth的环境变量,然后查看版本号确认安装成功 环境变量的配置,文件vi ~/.bashrc。(sudo vi
/etc/profile和下面命令效果一样,profile属于全局)
vi ~/.bashrc
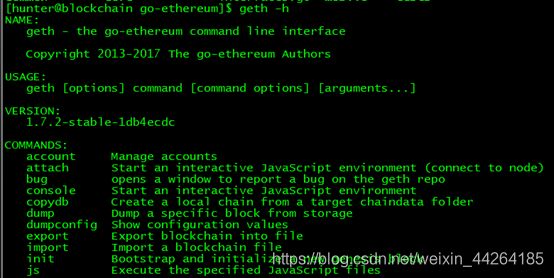
- 查看版本信息,确认是否配置成功
geth version
geth -h
- 安装配置cmake环境,智能合约编译需要cmake。为了方便后续环境配置,避免各种权限问题,这里还是先新建一个文件夹,在blockchain文件夹下新建cmake:
mkdir cmake
- 进入到cmake目录下,下载安装相关组件
cd cmake/
wget https://cmake.org/files/v3.12/cmake-3.12.3.tar.gz
- 解压
tar -zxvf cmake-3.12.3.tar.gz
- 进入到cmakr-3.12.3
cd cmake-3.12.3/
注意: 这个时候进行安装,会一直出错,下面先进行下面的操作,避免错误的发生。
先修改默认安装路径,找到图片中内容,默认路径修改一下。
vi bootstrap
- 安装(这时候应该就不会出错了)
sudo ./bootstrap && make && make install
如果使用这个命令安装出错,分别执行下面命令
sudo ./bootstrap
sudo make
sudo make install
![]()
至此,应该就可以安装成功了。
- 添加环境变量
vi ~/.bashrc
- 刷新使其生效
source ~/.bashrc
- 查看是否配置成功
cmake -version
- 关闭防火墙,如果之前关闭过,可以跳过这一步
systemctl stop firewalld
systemctl disable firewalld
- 时钟同步
systemctl enable ntpd
systemctl start ntpd
至此,环境准备完毕,下面可以开始搭建私有链
四、私有链搭建
- 在blockchain目录下,创建一个文件夹,用来存放我们的私有链相关信息,自己命名,灵活修改。
mkdir blockchain-test-1
- 进入到新建的目录下 cd blockchain-test-1。初始化一个创世区块(也就是私有链的第一个区块,区块链中之后的区块,都是接着这块向下添加的)新建一个文件:
touch genesis.json
vi genesis.json
添加以下内容:
{
    "nonce": "0x0000000000000042",
    "timestamp": "0x00",
    "parentHash": "0x0000000000000000000000000000000000000000000000000000000000000000",
    "extraData": "0x00",
    "gasLimit": "0x80000000",
    "difficulty": "0x400",
    "mixhash": "0x0000000000000000000000000000000000000000000000000000000000000000",
    "coinbase": "0x2D356ee3F5b8718d8690AFCD31Fe2CB5E602677e",
    "alloc": {},
    "config": {
        "chainId": 15,
        "homesteadBlock": 0,
        "eip155Block": 0,
        "eip158Block": 0
    }
}
- 初始化创世区块节点信息
geth --datadir node0 init genesis.json
- 执行geth的控制台,将输出重定向到geth.log中
geth --datadir node0 console 2>> geth.log
- 新建账号、查看账号及账号余额
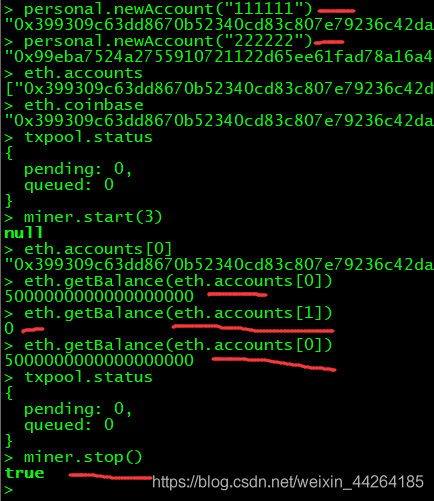
personal.newAccount(“111111”)
personal.newAccount(“222222”)
新建了两个账户,111111,222222分别是两个账户的密码。
- 查看挖矿的账户、当前区块数等
- 发起交易、查看交易池状态等,另开一个终端窗口,查看日志信息
tail -f geth.log
刚开始两个账号金额都是0,两个账户额度都是0,此时是不能交易的,先挖矿,让accounts[0]有点币,一般开启挖矿默认将挖到的币存入到accounts[0]中,也可以使用miner.setEtherbase(eth.accounts[1])设置coinbase为账户1,这里不执行这个操作,就用默认的,让accounts[0]中有点钱
- 启动挖矿后,第一次启动会很慢(可能五六七八…分钟),稍等一会
miner.start(3)
当出现successfully时,说明挖到了,再查看账号accounts[0]时,已经有金额了

可以观察到每次挖到一个新的区块都需要经历四个阶段。分别是commit new mining work => successfully sealed new block => block reached canonical chain => mined potential block,即先提交要打包某个区块的任务,然后成功打包该区块,该区块接到主链上(主链最后一个区块号一般会比当前的目标区块小一些,因为有分叉),成功完成挖矿。每条记录后面的number指明的是当前挖矿的目标区块序号。

现在accounts[0]有额度了
从accounts[0]向accounts[1]转账
先解锁accounts[0],否则会报错
personal.unlockAccount(eth.accounts[0])
eth.sendTransaction({from:eth.accounts[0],to:eth.accounts[1],value:999999)
miner.start(3)
tail -f geth.log

挖矿未完成之前,accounts[1]额度还是0
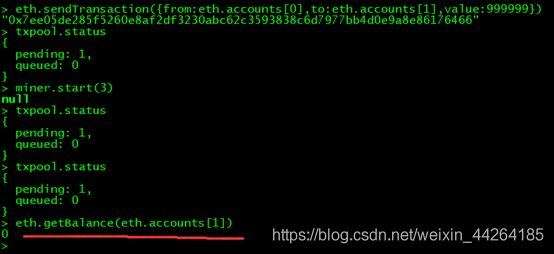
等了几分钟,日志出现了successfully,看一下交易是否完成了

查看资源池状态,可以看见pending从1变成0,再看accounts[1]是不是转进了999999
txpool.status
eth.getBalance(eth.accounts[1])
此时accounts[1]已经有一笔交易进入,金额999999,和预期效果一样。
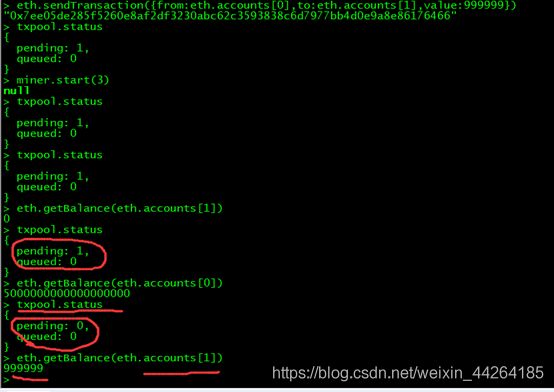
好了,交易完成,停止挖矿吧
miner.stop
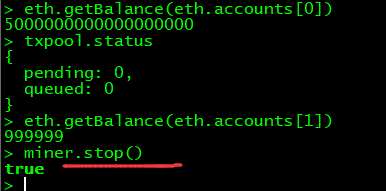
注: 只要实际上有在挖矿,start返回null或true都无所谓。
五、私有链节点加入
- 新建一个节点并初始化
geth --datadir node1 init genesis.json
- 启动上一个节点(node0节点)的rpc服务,并把网络id设置成2018,其他不设置(默认rpc端口8545,监听端口30303,ip地址127.0.0.1)
geth --datadir node0 -networkid 2018 -rpc console 2>> geth.log

另开一个终端(作为node1节点)启动新节点的rpc服务,把网络id设置成2018(要相同),rpc的端口默认8545,节点监听的端口默认是30303,这两个端口都被上一个节点占用了(因为我是在一台机器上),因此这个新节点的这两个端口都要手动设置(我这里分别设成8546和30304),ip地址仍是默认。
geth --datadir node1 -networkid 2018 -rpc -rpcport 8546 -port 30304 console 2>> geth.log
admin.nodeInfo.enode

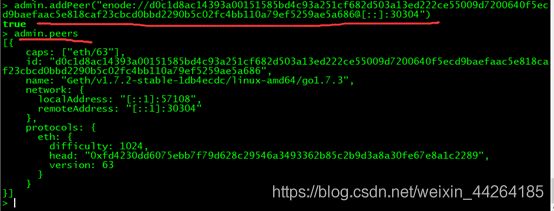
在另一个终端上(node0的终端上),进入上一个节点的console,加入新节点(注意,这里复制的内容会不一样,看生成的是什么就复制什么,不要复制这个)
admin.addPeer("enode://d0c1d8ac14393a00151585bd4c93a251cf682d503a13ed222ce55009d7200640f5ecd9baefaac5e818caf23cbcd0bbd2290b5c02fc4bb110a79ef5259ae5a686@[::]:30304")
六、部署智能合约
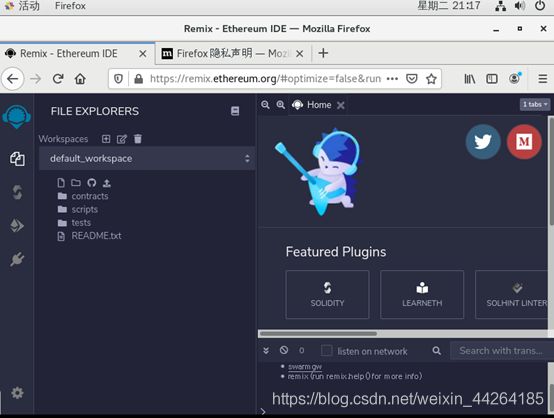
编写合约,使用remix,谷歌浏览器打开这个网站 https://remix.ethereum.org/#optimize=false
官方在线编译器:
https://ethereum.github.io/browser-solidity
https://remix.ethereum.org
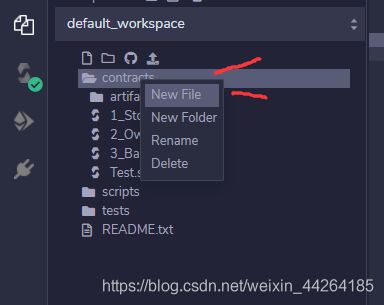
pragma solidity ^0.4.18;
contract Test{

    string public name;

    function Test() public {
        name = "zch";
    }

    function getName() public view returns (string) {
        return name;
    }

    function setName(string _name) public {
        name = _name;
    }
}

• 点击complie Test.sol
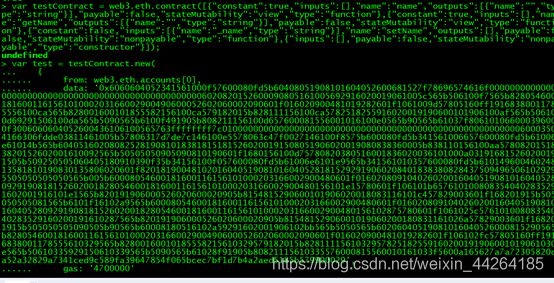
• 点compliation Details找到WEB3DEPLOY一项,拷贝里面的代码
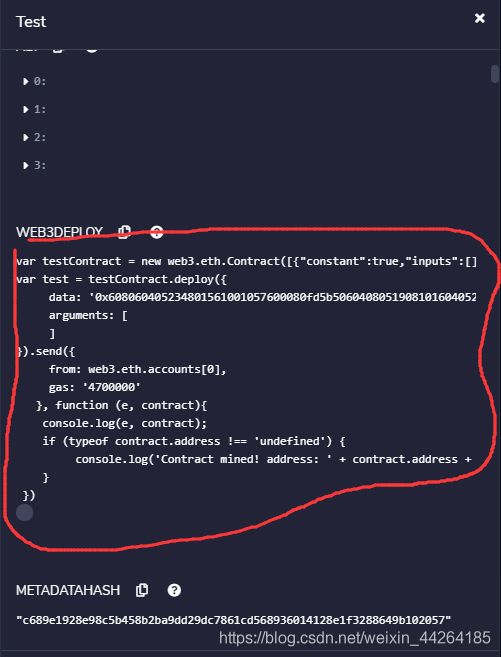
• 将上述代码直接黏贴进console,或者可以保存在某个js文件中再load进来(比较优雅)。如果报错说没有unlock则需要先解锁一个账户。
personal.unlockAccount(eth.accounts[0])
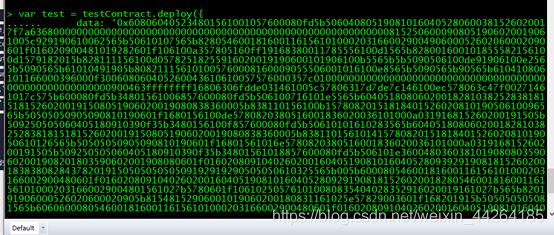
然后开始挖矿进行部署,否则合约实例的address是undefined。
miner.start()
tail -f geth.log
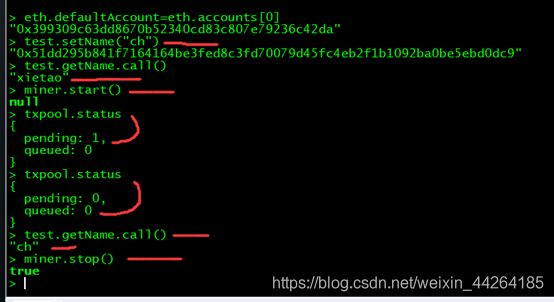
test.getName.call()
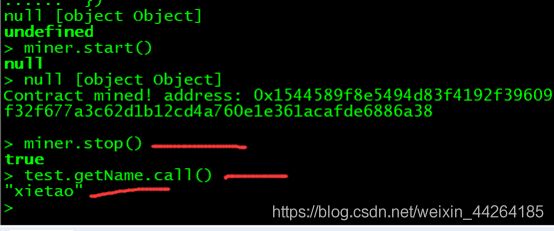
其他操作和交易时是一样的,交易前记得解锁账户,产生交易后记得挖矿。
写操作
• 为该节点设置默认账户,这样在调用set函数时就会自动让你付款。这种方法适用于只有一个账户的节点或者只有一个账户经常使用的多账户节点。
eth.defaultAccount=eth.accounts[0]
test.setName("ch")
执行后,查看名字还是原来的,因为写操作需要通过矿工对链做出更改和同步,有代价,所以要启动挖矿,挖矿结束后再次查看,发现名字已经修改过来了。最后停止挖矿。
七、参考链接
https://blog.csdn.net/Wonderful_sky/article/details/83898257
https://www.cnblogs.com/yunxintryyoubest/p/10640260.html


