SpringBoot——SpringBoot中使用RESTful风格
文章目录:
1.一些新的注解
1.1 @RestController
1.2 @RequestMapping(常用)
1.3 @GetMapping
1.4 @PostMapping
1.5 @PutMapping
1.6 @DeleteMapping
1.7 @PathVariable
2.SpringBoot实现RESTful风格
2.1 实例代码
2.2 GET请求方式
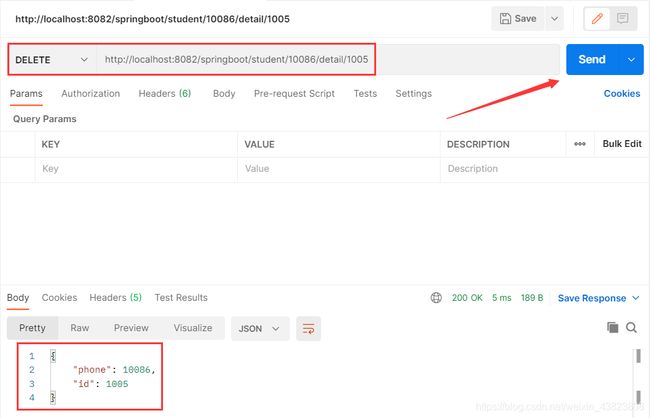
2.3 DELETE请求方式
2.4 POST请求方式
2.5 PUT请求方式
3.RESTful风格中请求冲突的问题
1.一些新的注解
1.1 @RestController
@RestController:Spring 4 后新增注解,是@Controller 注解功能的增强,是 @Controller 与 @ResponseBody 的组合注解。
如果一个 Controller 类添加了@RestController,那么该 Controller 类下的所有方法都相当于添加了@ResponseBody 注解,用于返回字符串或 json 数据。
1.2 @RequestMapping(常用)
支持 Get 请求,也支持 Post 请求
1.3 @GetMapping
@RequestMapping 和 Get 请求方法的组合,只支持 Get 请求,Get 请求主要用于查询操作。
1.4 @PostMapping
@RequestMapping 和 Post 请求方法的组合,只支持 Post 请求,Post 请求主要用户新增数据。
1.5 @PutMapping
@RequestMapping 和 Put 请求方法的组合,只支持 Put 请求,Put 通常用于修改数据。
1.6 @DeleteMapping
@RequestMapping 和 Delete 请求方法的组合,只支持 Delete 请求,通常用于删除数据。
1.7 @PathVariable
获取 url 中的数据,该注解是实现 RESTful 最主要的一个注解。
2.SpringBoot实现RESTful风格
REST (英文:Representational State Transfer ,简称 REST )
一种互联网软件架构设计的风格,但它并不是标准,它只是提出了一组客户端和服务器交互时的架构理念和设计原则,基于这种理念和原则设计的接口可以更简洁,更有层次,REST这个词,是 Roy Thomas Fielding 在他 2000 年的博士论文中提出的。
任何的技术都可以实现这种理念,如果一个架构符合 REST 原则,就称它为 RESTFul 架构。
比如我们要访问一个 http 接口:http://localhost:8080/springboot/order?id=1021&status=1
采用 RESTFul 风格则 http 地址为:http://localhost:8080/springboot/order/1021/1
2.1 实例代码
首先是一个实体类
package com.songzihao.springboot.entity;

public class Student {
    private Integer id;

    private String name;

    private Integer age;

    //getter and setter
}
然后是我们的控制层
package com.songzihao.springboot.controller;

import org.springframework.web.bind.annotation.*;

import java.util.HashMap;
import java.util.Map;

/**
 *
 */
@RestController //相当于是 @Controller 与 @ResponseBody 的组合注解,意味着当前控制层类中的所有方法返回的都是Json对象
public class StudentController {

    @GetMapping(value = "/student/{id}/{age}")
    public Object student(@PathVariable("id") Integer id,
                          @PathVariable("age") Integer age) {
        Map map=new HashMap<>();
        map.put("id",id);
        map.put("age",age);
        return map;
    }

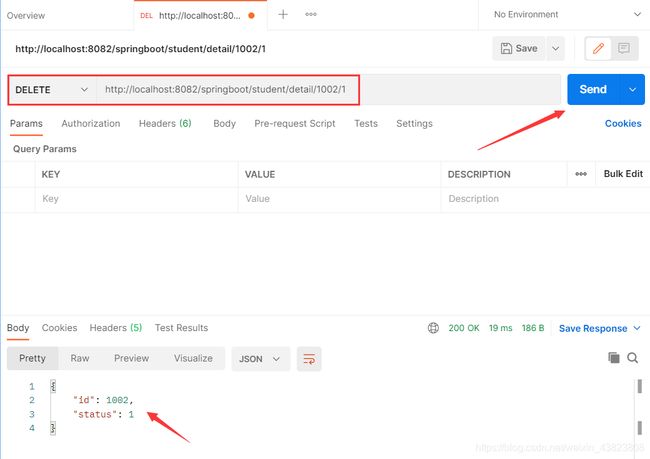
    @DeleteMapping(value = "/student/detail/{id}/{status}")
    public Object student2(@PathVariable("id") Integer id,
                           @PathVariable("status") Integer status) {
        Map map=new HashMap<>();
        map.put("id",id);
        map.put("status",status);
        return map;
    }

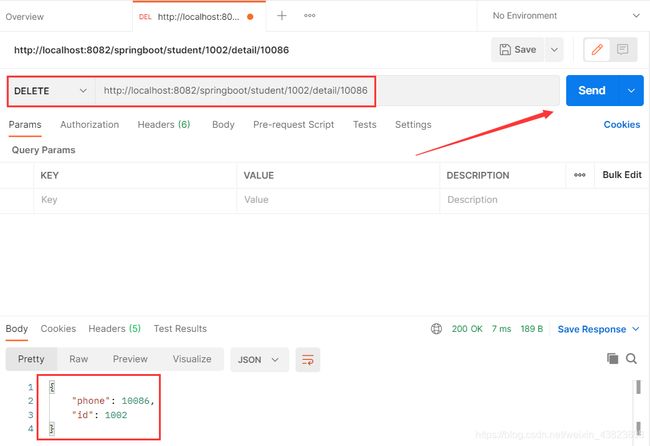
    @DeleteMapping(value = "/student/{id}/detail/{phone}")
    public Object student3(@PathVariable("id") Integer id,
                           @PathVariable("phone") Integer phone) {
        Map map=new HashMap<>();
        map.put("id",id);
        map.put("phone",phone);
        return map;
    }

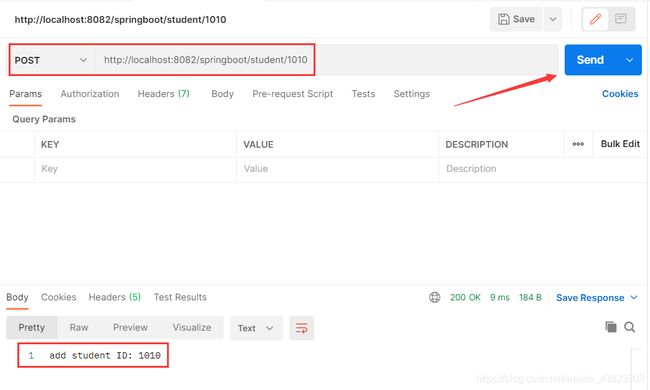
    @PostMapping(value = "/student/{id}")
    public String addStudent(@PathVariable("id") Integer id) {
        return "add student ID: " + id;
    }

    @PutMapping(value = "/student/{id}")
    public String updateStudent(@PathVariable("id") Integer id) {
        return "update student ID: " + id;
    }
}
接下来是springboot的核心配置文件
server.port=8082

server.servlet.context-path=/springboot
最后通过springboot项目入口类启动
package com.songzihao.springboot;

import org.springframework.boot.SpringApplication;
import org.springframework.boot.autoconfigure.SpringBootApplication;

@SpringBootApplication
public class Application {

    public static void main(String[] args) {
        SpringApplication.run(Application.class, args);
    }

}
由于请求方式的不同(有GET、POST、PUT、DELETE),这里我使用Postman工具来模拟发送请求,查看测试结果。
2.2 GET请求方式
2.3 DELETE请求方式
2.4 POST请求方式
2.5 PUT请求方式
3.RESTful风格中请求冲突的问题
对于下面这两段代码,就会出现请求冲突的问题。
    @DeleteMapping(value = "/student/detail/{id}/{status}")
    public Object student2(@PathVariable("id") Integer id,
                           @PathVariable("status") Integer status) {
        Map map=new HashMap<>();
        map.put("id",id);
        map.put("status",status);
        return map;
    }
@DeleteMapping(value = "/student/detail/{id}/{phone}")
public Object student2(@PathVariable("id") Integer id,
@PathVariable("phone") Integer phone) {
Map map=new HashMap<>();
map.put("id",id);
map.put("phone",phone);
return map;
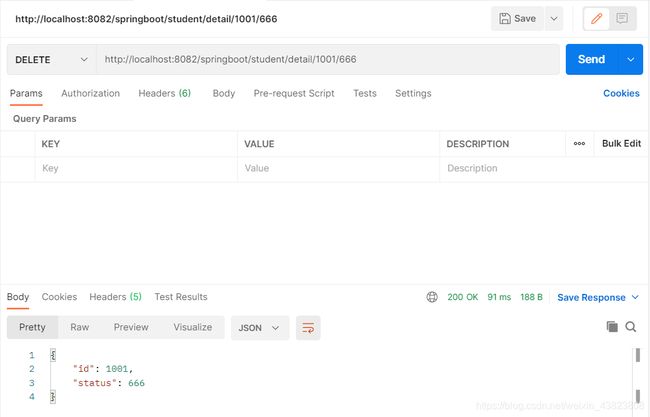
} 因为当我们发起请求之后,服务器并不知道这个地址 http://localhost:8082/springboot/student/1001/666 对应的是那个方法
解决的方法有两个:
- 修改路径。(见下面的代码)
- 修改请求方式。(这个意思是说,将请求方式由DELETE改为其他三种,所以就不再举例了)
    @DeleteMapping(value = "/student/detail/{id}/{status}")
    public Object student2(@PathVariable("id") Integer id,
                           @PathVariable("status") Integer status) {
        Map map=new HashMap<>();
        map.put("id",id);
        map.put("status",status);
        return map;
    }
@DeleteMapping(value = "/student/{phone}/detail/{id}")
public Object student3(@PathVariable("id") Integer id,
@PathVariable("phone") Integer phone) {
Map map=new HashMap<>();
map.put("id",id);
map.put("phone",phone);
return map;
}

