kubernetes部署springboot项目使用configmap尝试
背景:
我的基础环境all in kubernetes,参见:https://cloud.tencent.com/developer/article/1806089,https://cloud.tencent.com/developer/article/1811859后端大佬们玩springboot cloud项目.故要讲springboot cloud项目部署在kubernetes集群中。其实使用springboot cloud架构我还是有所反对的。看过一些文章如:https://www.cnblogs.com/lakeslove/p/10997011.html。springboot与我的kubernetes有很多的重合功能了。本来就是差不多同时兴起的项目…如果用新的东西 我还是比较想上服务网格:istio这样的。既然决定springboot cloud on kubernets了 那就先这样玩了…
关于打包 都是maven的本来可以直接接手的。但是程序喜欢自己打,我就只在项目里面放Dockerfile.只负责镜像层面了:

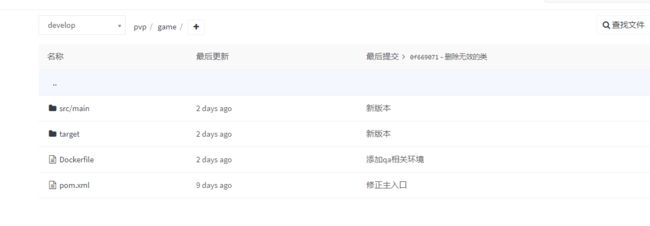 基本就是这个样子,当然了发布环境的时候我本来想写configmap的方式直接让程序去读我的环境变量的…但是程序找我要数据库 redis的连接地址 账号密码 说要写在 配置文件application.yml中,无果。随他去了。自己拉了一下t项目试一下是否可以在springboot中使用configmap的方式。
1. kubernetes部署springboot项目使用configmap
百度随手搜了一下啊关键词 springboot kubernetes configmap一堆:

比如图上这个,但是都感觉不是我想要的,我就想简单的整下我的变量。然后无意间看到了:https://capgemini.github.io/engineering/externalising-spring-boot-config-with-kubernetes/就按照这个方式来搞一下了:
注: 因为就是简单测试下我不想让他们写死文件,其他过程就省了了 我就直接打个包测试下了
1. 将用到的参数变量化
参照原配置文件:
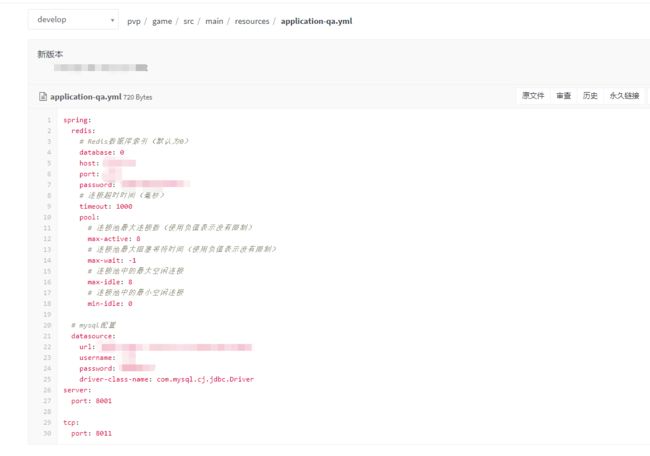

修改后的:
变量名都是自己随手写的 主要测试效果能否实现。当然了实际的需要和程序统一的还是规范化参数要好的,${}的格式都是。

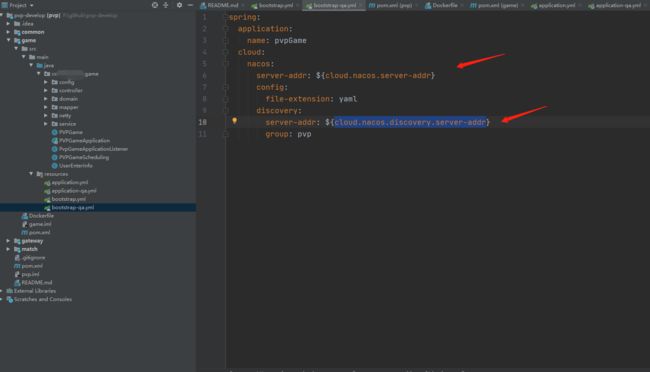
嗯提取了8个参数将其变量化。
2. 生成jar包并构建docker image
docker打包没有集成在我的jenkins pipeline里面(程序的库,我就不做过多参与了),生成jar包
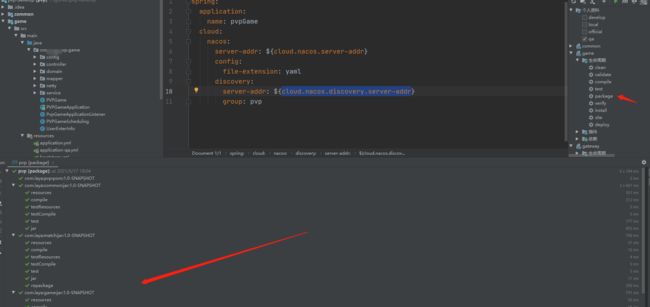
将jar包上传到我一台有docker环境的服务器上面打包成docker image:
cat Dockerfile
FROM openjdk:8-jdk-alpine
VOLUME /tmp
ADD target/game-1.0-SNAPSHOT.jar game-1.0-SNAPSHOT.jar
ENTRYPOINT ["java","-Djava.security.egd=file:/dev/./urandom","-jar","/game-1.0-SNAPSHOT.jar"]
docker build -t ccr.ccs.tencentyun.com/xxxx/xxxx:0.2 .
docker push ccr.ccs.tencentyun.com/xxxx/xxxx:0.2
3. 生成configmap文件
cat spring-boot.yaml
apiVersion: v1
kind: ConfigMap
metadata:
  name: spring-config
data:
  dev-config.json:
    '{
      "redis.database.host": "xxxx",
      "redis.database.port": "xxxx",
      "redis.database.password": "xxxx",
      "mysql.database.url": "jdbc:mysql://xxxx:3306/xxxx",
      "mysql.database.username": "xxxx",
      "mysql.database.password": "xxxxx",
      "cloud.nacos.server-addr": "http://xxxx:8848",
      "cloud.nacos.discovery.server-addr": "http://xxxx:8848"
     }'
kubectl apply -f spring-config.yaml -n qa
4. 部署springboot 服务
cat test.yaml
apiVersion: apps/v1
kind: Deployment
metadata:
  name: pvp-test
spec:
  replicas: 1
  strategy:
    rollingUpdate:
      maxSurge: 1
      maxUnavailable: 0
  selector:
    matchLabels:
      app: pvp-test
  template:
    metadata:
      labels:
        app: pvp-test
    spec:
      containers:
        - name: pvp-test
          image: ccr.ccs.tencentyun.com/xxxx/xxxx:0.2
          env:
          - name: SPRING_PROFILES_ACTIVE
            value: "qa"
          - name: SPRING_APPLICATION_JSON
            valueFrom:
             configMapKeyRef:
              name: spring-config
              key: dev-config.json
          envFrom:
          - configMapRef:
              name: deploy
          ports:
            - containerPort: 8001
              name: game-http
            - containerPort: 8011
              name: game-tcp
          resources:
            requests:
              memory: "512M"
              cpu: "500m"
            limits:
              memory: "512M"
              cpu: "500m"
      imagePullSecrets:
        - name: tencent
---

apiVersion: v1
kind: Service
metadata:
  name: pvp-test
  labels:
    app: pvp-test
spec:
  ports:
  - port: 8001
    name: game-http
    targetPort: 8001
  - port: 8011
    name: game-tcp
    targetPort: 8011
  selector:
    app: pvp-test
kubectl apply -f 2.yaml -n qa
注: imagePullSecrets为下载image的秘钥。如果你是公开的仓库可以忽略。我的仓库用的腾讯云的个人版。秘钥自己创建名字就叫tencent了.
测试时候比较仓库 配置文件都起名 1 2 这样的yaml文件了见谅
5. 查看部署结果与nacos注册状况
kubectl  get pods -n qa
kubectl logs -f pvp-test-7f49fcdb9-dsjlz  -n qa
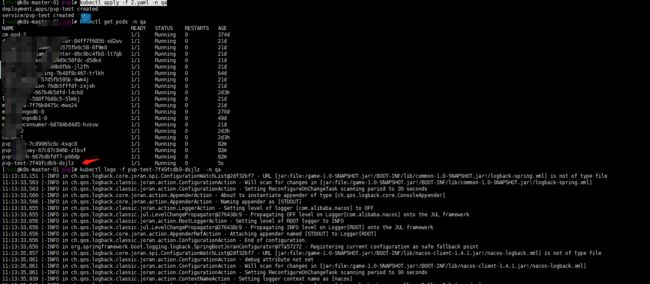
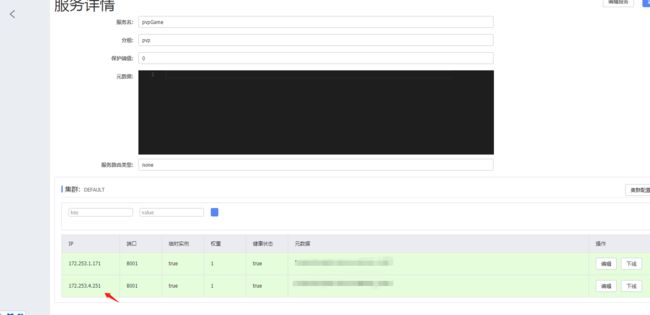
启动的过程中是有错误的但是先忽略这个。因为我看了一下啊nacos中 我的服务其实已经注册上了…。初步我想要 结果算是实现了!


6. 关于报错:
字面上的意思吧?
User “system:serviceaccount:qa:default” cannot get resource “configmaps” in API group “” in the namespace “qa”.
这里算是RBAC clusterrole rolebinding的一个复习吧。
cat configmap-get.yaml
kind: ClusterRole
apiVersion: rbac.authorization.k8s.io/v1
metadata:
  namespace: qa
  name: configmap-get
rules:
- apiGroups: [""]
  resources: ["configmap"]
  verbs: ["get"]
与serviceaccount:qa:default绑定
kubectl create clusterrolebinding configmap-get-configmap --clusterrole=configmap-get --serviceaccount=qa:default
杀死容器继续查看新的容器 的log
kubectl delete pods pvp-test-7f49fcdb9-dsjlz -n qa
kubectl logs -f pvp-test-7f49fcdb9-ck9m6 -n qa


依然报错…仔细一看日志…嗯 参数应该是configmaps…,我少写了一个s吧?修改configmap-get.yaml文件如下:
kind: ClusterRole
apiVersion: rbac.authorization.k8s.io/v1
metadata:
  namespace: qa
  name: configmap-get
rules:
- apiGroups: [""]
  resources: ["configmaps"]
  verbs: ["get"]
apply 重新部署clusterrole。删除旧pod重新查看日志:
kubectl apply -f configmap-get.yaml
kubectl delete pods  pvp-test-7f49fcdb9-ck9m6 -n qa
后记:
今天复习了好几个知识点…
- configmap
- clusterrole rolebinding


