Elasticsearch:Elastic Maps Server 介绍
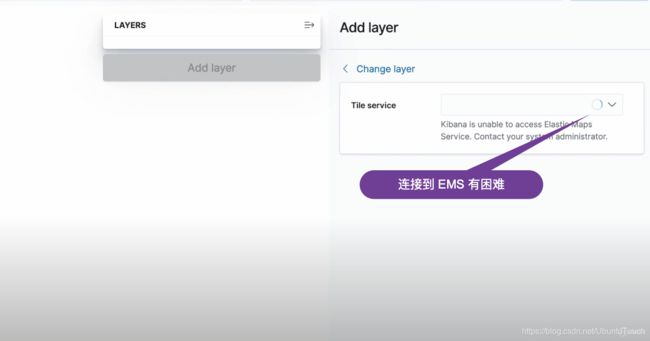
在今天的文章中,我们很高兴向大家介绍 Elastic Maps Server。目前已经是正式版发布。如果你无法从 Kibana 服务器或浏览器客户端连接到 Elastic Maps Service,并且你的集群具有适当的许可证级别,则可以选择在自己的基础架构上托管该服务。
Elastic Maps Server 是 Elastic Maps Service 的自我管理版本,以 Docker 镜像的形式提供,同时提供 EMS 底图和 EMS 边界。 图像与底图捆绑在一起,最高缩放级别为 8。将其连接到 Elasticsearch 集群以进行许可证验证后,你可以选择下载和配置更详细的底图数据库。
重要:Elastic Maps Server 不提供 Vega,坐标和区域地图可视化所需的栅格图块(raster tiles)。
安装步骤
首先我们按照文章 “Security:如何安装 Elastic SIEM 和 EDR” 安装一个具有 https 访问权限的 Elastic Stack 集群。我的 Elasticsearch 及 Kibana 可以分别于一下的地址进行访问:
- https://localhost:9200/
- https://localhost:5601/
超级用户 elastic 的密码是 password。
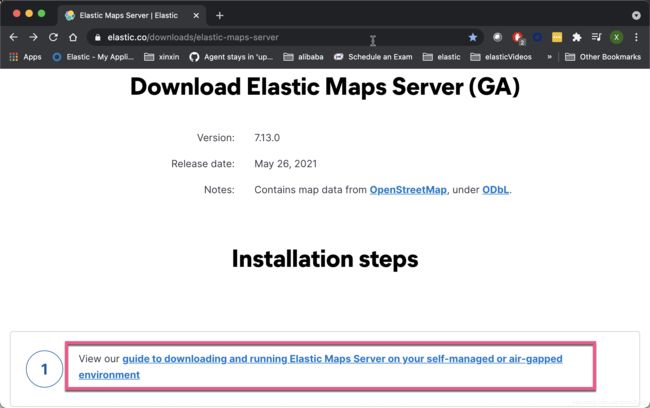
我们接着到 Elastic 的官方网址 Elastic Maps Server 去下载。
我们首先需要在自己的电脑上安装 Docker。这里就不再累述了。我们启动 Docker。
我们可以使用 docker pull 从 Elastic Docker 注册表中下载 Elastic Maps Server 图像。
docker pull docker.elastic.co/elastic-maps-service/elastic-maps-server-ubi8:7.13.0大家可能已经注意到上面的版本是 7.13,但是我们目前的 Elastic Stack 的最新版本是 7.12.1。这是什么原因呢?Elastic Maps 是独立于 Elastic Stack 开发的模块,它和 Elastic Stack 的版本可以完全不一致。
启动 Elastic Maps Server 并公开默认端口8080:
docker run --rm --init --publish 8080:8080 \
  docker.elastic.co/elastic-maps-service/elastic-maps-server-ubi8:7.13.0
Elastic Maps Server 运行之后,请按照网页上的说明进行操作:http://localhost:8080/ 定义配置文件,并可以选择下载更详细的底图数据库。
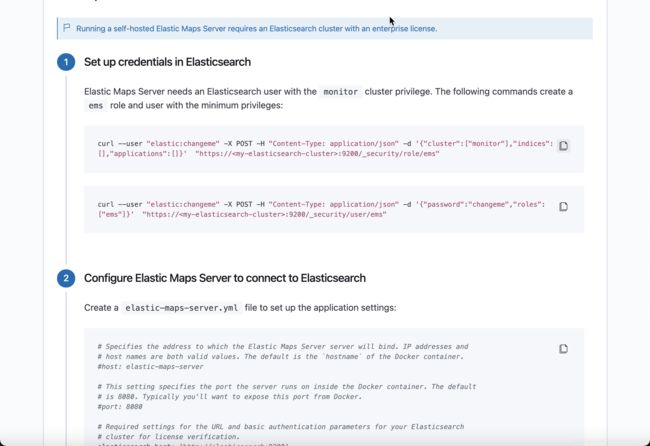
在上面,我们会发现一些错误。我们需要按照下面的 Setup Instructions。我们向下滚动:
按照上面的要求,我们输入如下的命令来创建一个 ems 的 role:
curl -k --user "elastic:password" -X POST -H "Content-Type: application/json" -d '{"cluster":["monitor"],"indices":[],"applications":[]}' "https://localhost:9200/_security/role/ems"请注意在上面,我们使用 -k 选项来规避 SSL 错误信息:
$ curl -k --user "elastic:password" -X POST -H "Content-Type: application/json" -d '{"cluster":["monitor"],"indices":[],"applications":[]}'  "https://localhost:9200/_security/role/ems"
{"role":{"created":true}}
我们使用如下的命令来创建一个 ems 的用户,并设置它的密码为 password。
curl -k --user "elastic:password" -X POST -H "Content-Type: application/json" -d '{"password":"password","roles":["ems"]}' "https://localhost:9200/_security/user/ems"上面的命令返回的结果为:
$ curl -k --user "elastic:password" -X POST -H "Content-Type: application/json" -d '{"password":"password","roles":["ems"]}'  "https://localhost:9200/_security/user/ems"
{"created":true}
接下来,我们来配置 Elastic Maps Server 连接到 Elasticsearch。创建一个叫做 elastic-maps-server.yml 的文件:
elastic-maps-server.yml
# Specifies the address to which the Elastic Maps Server server will bind. IP addresses and
# host names are both valid values. The default is the `hostname` of the Docker container.
# host: localhost

# This setting specifies the port the server runs on inside the Docker container. The default
# is 8080. Typically you'll want to expose this port from Docker.
# port: 8080

logging.level: debug

# Required settings for the URL and basic authentication parameters for your Elasticsearch
# cluster for license verification.
elasticsearch.host: 'https://192.168.0.3:9200'
elasticsearch.username: 'ems'
elasticsearch.password: 'password'

# Optional settings that provide the paths to the PEM-format SSL certificate and key files.
# These files are used to verify the identity of Elastic Maps Server to Elasticsearch and
# are required when xpack.security.http.ssl.client_authentication in Elasticsearch is set
# to required.
# elasticsearch.ssl.certificate: /etc/ssl/certs/elasticsearch.crt
# elasticsearch.ssl.key: /etc/ssl/certs/elasticsearch.key

# Optional setting that enables you to specify a path to the PEM file for the certificate
# authority for your Elasticsearch instance.
elasticsearch.ssl.certificateAuthorities: [ /etc/ssl/certs/ca.crt ]

# To disregard the validity of SSL certificates, change this setting's value to 'none'.
#elasticsearch.ssl.verificationMode: full


# Enables SSL and paths to the PEM-format SSL certificate and SSL key files, respectively.
# These settings enable SSL for outgoing requests from the Elastic Maps Server server to
# the browser.
#ssl.enabled: false
#ssl.certificate: /etc/ssl/certs/ems.crt
#ssl.key: /etc/ssl/certs/ems.key

# Location of planet tiles database
#path.planet: /usr/src/app/data/planet.mbtiles

# Logging level for Elastic Maps Server logs
#logging.level: info

# Optional: Should the status and layer preview be enabled? (default: true)
#ui: true
在上面,我们需要注意的是针对如下的项进行配置:
- elasticsearch.host: 'https://localhost:9200'
- elasticsearch.username: 'ems'
- elasticsearch.password: 'password'
- elasticsearch.ssl.certificateAuthorities: [ /etc/ssl/certs/ca.crt ]
我们需要根据自己的配置和证书的位置来进行配置。在我们的当前目录下,创建一个如下的叫做 ems 的目录,并把 ca.crt 拷贝到 ems 目录中:
$ pwd
/Users/liuxg/data/ems
$ tree -L 2
.
├── data
├── elastic-maps-server.yml
├── ems
│   └── ca.crt
└── log
    └── elastic-maps-server.log
我们重新以如下的格式来运行 Elastic Maps Server:
docker run --rm --name elastic-maps-server -it \
   --hostname elastic-maps-server \
   -p 8080:8080 \
   -v "${PWD}/elastic-maps-server.yml:/usr/src/app/server/config/elastic-maps-server.yml" \
   -v "${PWD}/ems:/etc/ssl/certs" \
   -v "${PWD}/log:/var/log/elastic-maps-server" \
docker.elastic.co/elastic-maps-service/elastic-maps-server-ubi8:7.13.0
请注意:在上面,和 localhost:8080 中的 guide 相比,我去掉了在如下的一行:
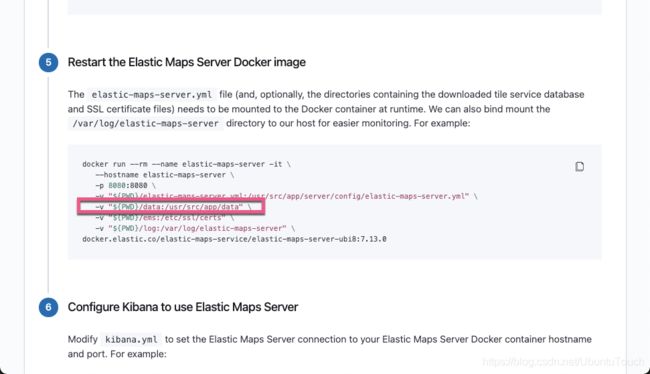
-v "${PWD}/data:/usr/src/app/data" \如果你没有数据在 data 目录中,启动会自动终止。
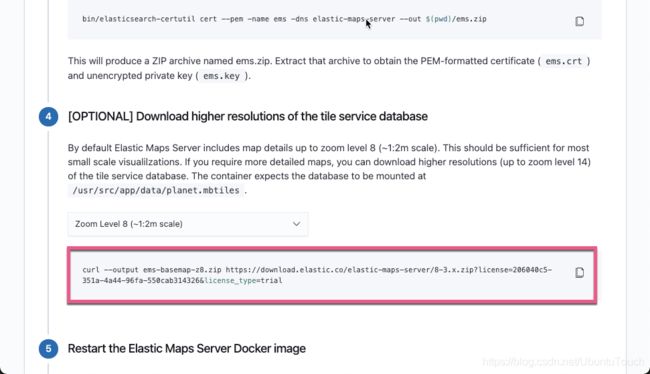
我们接下来可以下载 tile service database:
上面显示了具体的下载地址。在默认的情况下,如果不下载数据,Elastic Map Server 可以支持放大倍数到8。如果你觉得这个不够,你可以按照上面的链接下载数据,这样地图可以放大到14倍。把下载的数据保存到当前目录的 data 子目录下。当然这个依赖于你的硬盘大小。需要的文件大小为90G。还有你必须具有 Enterprise 授权才可以。你可以到 Kibana 中去启动试用功能:
如果你选择下载地图数据,并已经成功下载,那么请按照如下的命令来重新启动 Elastic Maps Server:
docker run --rm --name elastic-maps-server -it \
   --hostname elastic-maps-server \
   -p 8080:8080 \
   -v "${PWD}/elastic-maps-server.yml:/usr/src/app/server/config/elastic-maps-server.yml" \
   -v "${PWD}/data:/usr/src/app/data" \
   -v "${PWD}/ems:/etc/ssl/certs" \
   -v "${PWD}/log:/var/log/elastic-maps-server" \
docker.elastic.co/elastic-maps-service/elastic-maps-server-ubi8:7.13.0
在上面,
我们接下来配置 Kibana。我们找到 Kibana 的配置文件 config/kibana.yml。 添加如下的一行:
map.emsUrl: https://elastic-maps-server:8080针对我的情况,我的 elastic-maps-server 的地址是 localhost:8080:
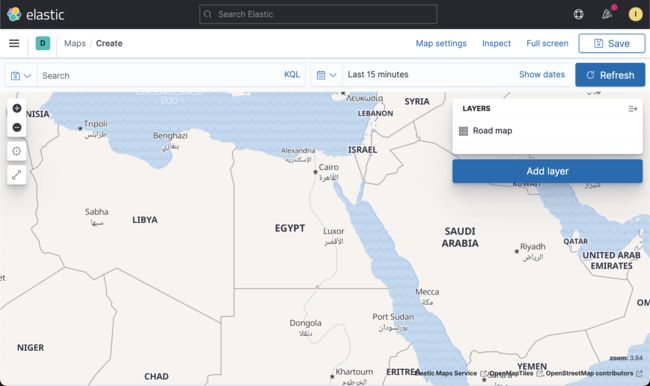
map.emsUrl: http://localhost:8080配置完后,我们重新启动 Kibana。我们打开 Maps 应用:
我们发现即使在网路断掉的情况下,我们也可以很顺畅地放大缩小我们的地图。
