Vue.js 实战系列之实现视频类WebApp的项目开发——16. 用户信息编辑提交保存的实现
如果想看该实战系列的其他内容,请移步至 Vue.js 实战系列之实现视频类WebApp的项目开发。
项目仓库地址,欢迎 Star
实现效果
功能实现
-
创建修改信息页面
在
src/views/mine下创建updateInfo.vue页面updateInfo.vue
<template> <div> <Header :title="修改名字" hasLeft hasRight rightText="保存">Header> <div class="update"> <p class="title">我的{ {title}}p> <input type="text" v-model="content"> <span class="iconfont icon-guanbi1">span> <span class="length">{ {content.length}}/{ {maxLenght}}span> div> div> template> <script> import Header from '@/common/components/index/Header.vue'; export default { data() { return { title: '', content: '', maxLenght: 20, }; }, components: { Header, }, created() { this.title = this.$route.params.title; this.content = this.$route.params.content; }, }; script> <style lang="less" scoped> .update { background-color: #101821; height: calc(100vh - 48px); color: #fff; border-top: 1px solid rgb(199, 199, 199); padding: 20px; .title { color: #a7a7a7; font-size: 16px; margin-top: 0px; } input { color: #fff; background-color: #101821; border: none; height: 46px; width: 100%; font-size: 14px; border-bottom: 1px solid #a7a7a7; position: relative; margin-bottom: 20px; } .icon-guanbi1 { color: #a7a7a7; font-size: 20px; position: absolute; right: 15px; margin-top: -55px; } .length { color: #a7a7a7; font-size: 14px; } } style> -
通过
editInfo.vue页面跳转至该页面,并携带相关参数editInfo.vue
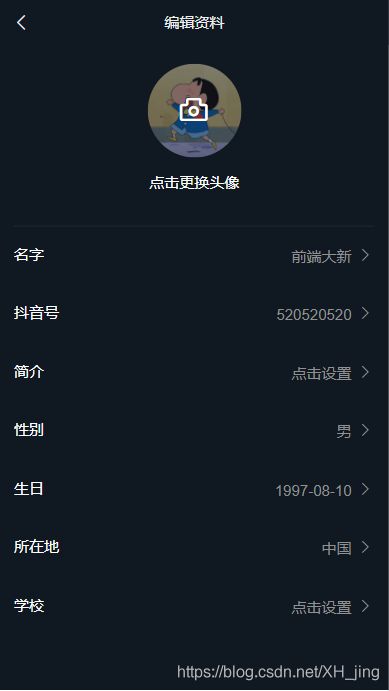
<div class="edit-box">
    <div
    	class="edit-item"
    	@click="$router.push({name: 'update', params: {title: '名字' , content: userInfo.name, desc: 20, type: 'name'}})"
    >
      <span class="label">名字span>
      <span>
        {
      { userInfo.name }}
        <span class="iconfont icon-right">span>
      span>
    div>
    <div
    	class="edit-item"
    	@click="$router.push({name: 'update', params: {title: '抖音号' , content: userInfo.dyh, desc: '最多16个字,只允许包含字母、数字、下划线和点,30天内仅能修改一次', type: 'dyh'}})"
    >
      <span class="label">抖音号span>
      <span>
        {
      { userInfo.dyh }}
        <span class="iconfont icon-right">span>
      span>
    div>
    <div
    	class="edit-item"
    	@click="$router.push({name: 'update', params: {title: '简介' , content: userInfo.desc, desc: '填写个人简介更容易获得别人关注哦', type: 'desc'}})"
    >
      <span class="label">简介span>
      <span class="desc">
        点击设置
        <span class="iconfont icon-right">span>
      span>
    div>
div>
将其他标签内容修改成修改参数跳转。
-
用户信息修改保存
目前只对名称,抖音号,简介进行修改,其他内容的修改后续添加
-
区分修改的内容并实现保存功能
updateInfo.vue
<template> <div> <Header :title="'修改' + title" hasLeft hasRight rightText = "保存" :isChange = "isChange" @saveInfo = "saveInfo" >Header> <div class="update"> <div v-if="type === 'name'"> <p class="title">我的{ { title }}p> <input type="text" v-model="content" v-on:input="changeInput" /> <span class="iconfont icon-guanbi1" @click="clear">span> <span class="length">{ { content.length }}/{ { maxLenght }}span> div> <div v-if="type === 'dyh'"> <p class="title">我的{ { title }}p> <input type="text" v-model="content" v-on:input="changeInput" /> <span class="iconfont icon-guanbi1" @click="clear">span> <span class="desc">{ { desc }}span> div> <div v-if="type === 'desc'"> <p class="title">个人{ { title }}p> <textarea v-model="content" :placeholder="desc" v-on:input="changeInput" >textarea> div> div> div> template> <script> import Header from '@/common/components/index/Header.vue'; import { mapActions } from 'vuex'; export default { data() { return { title: '', content: '', maxLenght: 20, isChange: false, desc: '', }; }, components: { Header, }, created() { this.title = this.$route.params.title; this.content = this.$route.params.content; this.desc = this.$route.params.desc; this.type = this.$route.params.type; }, methods: { ...mapActions('user', ['UpdateUserInfo']), changeInput() { if (this.content !== this.$route.params.content) { this.isChange = true; } else { this.isChange = false; } }, clear() { this.content = ''; }, saveInfo() { const that1 = this; this.UpdateUserInfo({ key: this.type, value: this.content, that: that1, }); }, }, }; script> <style lang="less" scoped> .update { background-color: #101821; height: calc(100vh - 48px); color: #fff; border-top: 1px solid rgb(199, 199, 199); padding: 20px; .title { color: #a7a7a7; font-size: 16px; margin-top: 0px; } input { color: #fff; background-color: #101821; border: none; height: 46px; width: 100%; font-size: 14px; border-bottom: 1px solid #a7a7a7; position: relative; margin-bottom: 20px; } .icon-guanbi1 { color: #a7a7a7; font-size: 20px; position: absolute; right: 15px; margin-top: -55px; } .length { color: #a7a7a7; font-size: 14px; } .desc { color: #a7a7a7; font-size: 14px; line-height: 20px; text-align: justify; } textarea { width: 100%; height: 200px; background-color: #3b3b3b; border: none; padding: 15px 10px; box-sizing: border-box; font-size: 14px; } } style>-
顶部 Header 公共组件触发保存按钮
Header.vue
<template> <div class="header"> <div class="left" v-if="hasLeft"> <span class="iconfont icon-fanhui" v-if="isBack" @click="$router.back()" >span> <span class="iconfont icon-guanbi" v-if="isClose" @click="$router.go(-1)" >span> div> <div class="title"> <span>{ { title }}span> div> <div class="right" v-if="hasRight"> <span :style="isChange ? 'opacity: 1;' : 'opacity: 0.8;'" @click="sava"> { {rightText}} span> div> div> template> <script> export default { props: { title: { type: String, default: '', required: true, }, hasLeft: { type: Boolean, default: true, }, hasRight: { type: Boolean, default: false, }, rightText: { type: String, default: '', }, isBack: { type: Boolean, default: true, }, isClose: { type: Boolean, default: false, }, isChange: { type: Boolean, default: false, }, }, methods: { // 触发父组件中的 保存 功能 sava() { this.$emit('saveInfo'); }, }, }; script> <style lang="less" scoped> .header { height: 48px; width: 100%; background-color: #101821; color: #eee; display: flex; justify-content: center; align-items: center; font-size: 16px; padding: 0 10px; box-sizing: border-box; .left { position: absolute; left: 10px; .iconfont { font-size: 24px; } } .right { position: absolute; right: 20px; font-weight: 600; color: #fa5c00; font-size: 18px; } } style>-
通过 Vuex 实现数据管理
在
src/store/modules/user.js修改注意:
vue axios不能post本地.json数据,所以此处只对state中的数据进行修改.
import { GET } from '@/request/http'; import router from '../../router'; const user = { namespaced: true, state: { userInfo: { }, }, mutations: { updateUseInfo(state, res) { const key1 = res.key; const value1 = res.value; const that1 = res.that; state.userInfo[key1] = value1; // 使用自定义的组件提示修改成功 that1.$toast('修改成功'); setTimeout(() => { // 修改成功之后 返回上一层 router.back(); }, 1500); }, }, actions: { GetUserInfo({ state, commit }, params) { // ... }, UpdateUserInfo({ state, commit }, params) { commit('updateUseInfo', params); }, }, }; export default user; -
总结
本章节需要注意的几个点:
- 在公共子组件中触发父组件的保存功能
$router.push路由跳转axios post修改数据
上一章节: 15. 用户信息编辑页面的实现
下一章节: 17. 我的消息页面的实现
项目整体介绍:Vue.js 项目实战之实现视频播放类WebApp的项目开发(仿抖音app)
项目仓库地址,欢迎 Star。
有任何问题欢迎评论区留言讨论。


