2019独角兽企业重金招聘Python工程师标准>>> ![]()
1 使用UIScrollview实现无限轮播原理
在开发中常需要对广告或者是一些图片进行自动的轮播,也就是所谓的无限滚动。
在开发的时候,我们通常的做法是使用一个UIScrollView,在UIScrollView上面添加多个imageView,然后设置imageView的图片,和scrollView的滚动范围。
以前的做法:
一般而言,轮播的广告或者是图片数量都不会太多(3~5张)。所以,并不会太多的去考虑性能问题。但是如果图片过多(比如有16张图片,就需要创建16个imageView),那么就不得不考虑性能问题了。
更甚,如果深入做一个图片浏览的小程序,那么可能会处理成百上千张图片,这会造成极大的内存浪费且性能低下。
图片数量众多:
当用户在查看第一张图片的时候,后面的7张创建的时间太早,且用户可能根本就没机会看见(看完前面几张就没有兴趣再看后面的内容 了)。
优化思路:只有在需要用到的时候,再创建,创建的imageView进行村循环利用。比较好的做法,不论有多少张图片,只需要创建3个imageView就够了。

使用UIScrollView来实现,首先设置三个固定的UIImageView(下文分别用L、M、R代替)放入一个UIScrollview中,M总是显示当前要显示的图片,而L和R根据M的变化而变化。
当然,还需要一个依次存储图片信息数据的数组(以下简称array),用于给L、M、R三张试图提供数据源。
举例:
循环轮播0,1,2,3 这四张图片,当M显示第0张时,将4赋给L,将2赋给R。
初始状态
- 将试图向左滑动后,屏幕上显示的是R,即显示的是图片1。
则在此时,在后台将M的图片设置为1,将UIScrollview的偏移量设置成初始状态。接着将L设置为0,R设置为2。这里的UIImageView的image变化和UIScrollView偏移量设置都不能开始UIView的动画效果。最终的现实效果如下图:
- 向右滑动和向左滑动是一样的道理,当然遇到array头和尾时是需要处理的,使用模运算符(%)就可以了:
L取得图片是(index+ array.count)%array.count,
RM取得图片的索引是(index+ array.count -1)%array.count,
R取得图片是(index+ array.count + 1)%array.count,
2 使用CollectionView实现无限轮播的具体实现
本文介绍使用Collectionview来实现无限滚动的循环利用。它支持垂直和水平方向上的滚动。
今天为什么写这个呢,之前写过项目用scrollView封装写过轮播图,但是感觉不是很好,而且传值也很不好写,所以今天用collectionView写的轮播图,传值也很是好写的。
5517BA7A-0DE8-43B6-8C97-7BACA687416D.png
<1>先定一些我们需要的属性
@property (nonatomic, retain) UICollectionView *collection;
@property (nonatomic, retain) NSMutableArray *marr;// 存图片的数组
@property (nonatomic, retain) UIPageControl *page;
@property (nonatomic, retain) NSTimer *timer;
// 调用的一些方法
- (void)viewDidLoad {
    [super viewDidLoad];
    [self createCollectionView];
    [self createPhone];
    [self createPage];
    [self addTimer];
    // Do any additional setup after loading the view, typically from a nib.
}
<2>//先做一些事前工作,把collectionView铺好
    UICollectionViewFlowLayout *layout = [[UICollectionViewFlowLayout alloc]init];
    layout.itemSize = CGSizeMake(WIDTH, 300);
    layout.scrollDirection = UICollectionViewScrollDirectionHorizontal;
    layout.minimumLineSpacing = 0;
    self.collection = [[UICollectionView alloc]initWithFrame:CGRectMake(0, 0, WIDTH, 300) collectionViewLayout:layout];
    [self.view addSubview:self.collection];
    self.collection.backgroundColor = [UIColor whiteColor];
    self.collection.pagingEnabled = YES;//开启翻页效果
    self.collection.delegate = self;
    self.collection.dataSource = self;
    self.collection.showsHorizontalScrollIndicator = NO;//滑条不出现
    [self.collection registerClass:[CellOfFirst class] forCellWithReuseIdentifier:@"pool"];
<3>collectionView 的协议方法
- (NSInteger)collectionView:(UICollectionView *)collectionView numberOfItemsInSection:(NSInteger)section {

    return self.marr.count;// 返回图片的个数
}
// 说一下为什么返回100个分区
// 我们可以将第50个分区的一组图片作为用户看到的第一组图片,这样就实现轮播的效果了。(100分区足够了,除非脑残划100次)
- (NSInteger)numberOfSectionsInCollectionView:(UICollectionView *)collectionView {
    return 100;
}
- (UICollectionViewCell *)collectionView:(UICollectionView *)collectionView cellForItemAtIndexPath:(NSIndexPath *)indexPath {
// 自定义的Cell类
    CellOfFirst *cell = [collectionView dequeueReusableCellWithReuseIdentifier:@"pool" forIndexPath:indexPath];
   cell.pic.image = self.marr[indexPath.row];
    return cell;

}
// 本地的图片
- (void)createPhone {
    self.marr = [NSMutableArray array];
    for (int i = 1; i < 12; i++) {
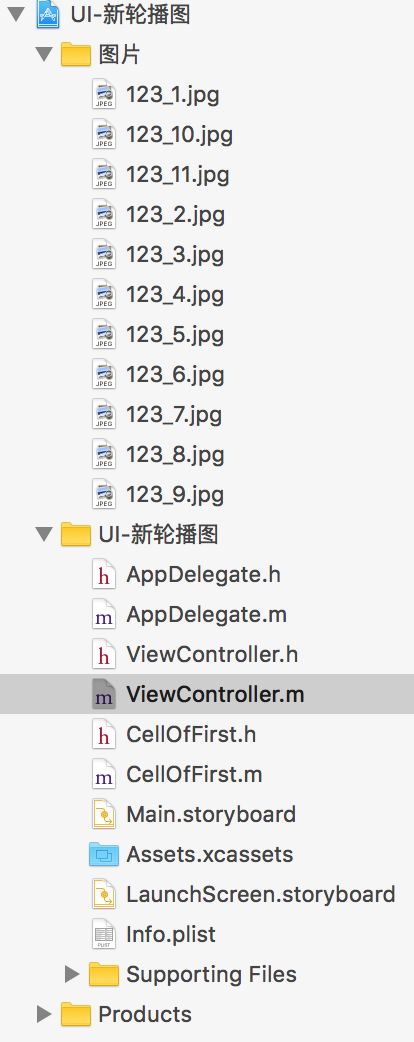
        NSString *name = [NSString stringWithFormat:@"123_%d.jpg",i];
        UIImage *image = [UIImage imageNamed:name];
        [self.marr addObject:image];
    }
    //设置起始位置
    [self.collection scrollToItemAtIndexPath:[NSIndexPath indexPathForItem:0 inSection:50] atScrollPosition:UICollectionViewScrollPositionLeft animated:NO];
}
// 获取pageControoler
// 被忘记调用呦
- (void)createPage {
    self.page = [[UIPageControl alloc]initWithFrame:CGRectMake(0, 250, WIDTH, 50)];
    [self.view addSubview:self.page];
    self.page.numberOfPages = self.marr.count;
 }
// 当图片划得时候已经减速时
// collectionView继承于scrollview 所以我们可用此方法
- (void)scrollViewDidScroll:(UIScrollView *)scrollView {
    // 计算page算法
    int page = (int) (scrollView.contentOffset.x / WIDTH + 0.5) % self.marr.count;
    self.page.currentPage = page;


}
// 我们可以添加定时器了 (一样别忘记获取完图片调用)
- (void)addTimer {
    self.timer = [NSTimer scheduledTimerWithTimeInterval:3.0 target:self selector:@selector(nextImage) userInfo:nil repeats:YES];
    [[NSRunLoop mainRunLoop] addTimer:_timer forMode:NSRunLoopCommonModes];
}
- (void)nextImage {
//设置当前 indePath
NSIndexPath *currrentIndexPath = [[self.collection indexPathsForVisibleItems]lastObject];
NSIndexPath *currentIndexPathReset = [NSIndexPath indexPathForItem:currrentIndexPath.item inSection:50];
[self.collection scrollToItemAtIndexPath:currentIndexPathReset atScrollPosition:UICollectionViewScrollPositionLeft animated:NO];
// 设置下一个滚动的item
NSInteger nextItem = currentIndexPathReset.item +1;
NSInteger nextSection = currentIndexPathReset.section;
if (nextItem==self.marr.count) {
// 当item等于轮播图的总个数的时候
// item等于0, 分区加1
// 未达到的时候永远在50分区中
nextItem=0;
nextSection++;
}
NSIndexPath *nextIndexPath = [NSIndexPath indexPathForItem:nextItem inSection:nextSection];
[self.collection scrollToItemAtIndexPath:nextIndexPath atScrollPosition:UICollectionViewScrollPositionLeft animated:YES];
}// 当用户自己划图片时 当然我们也需要定时器被移除 (时机很重要)
- (void)removeTimer{
    [self.timer invalidate];
    self.timer = nil;
  }
// 当图片即将开始被拖拽时 我们将定时器移除
- (void)scrollViewWillBeginDragging:(UIScrollView *)scrollView {

    [self removeTimer];
}
// 当图片已经完成被拖拽时 我们还需加上定时器
- (void)scrollViewDidEndDragging:(UIScrollView *)scrollView willDecelerate:(BOOL)decelerate {

    [self addTimer];
}
这些做完我们基本就完成轮播图自动轮播了,大家有兴趣的可以尝试下。


