阅读目录(Content)
一,环境配置
二,配置harbor私有仓库
三,配置私有镜像
四,push镜像到harbor
五,rancher 搭建
六,配置数据库主从
七,wordpress 配置
一,环境配置
rancher 2.1.6
二,配置harbor私有仓库
见上文
三,配置私有镜像
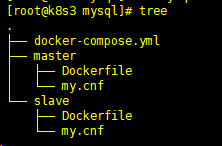
01,总文件

dockerfile 为主配置文件,html 为站点文件wordpress.,官网下载更加
1FROM centos:7.4.1708 2MAINTAINER kingle 3ENV PHP_VARSION5.5.32 4ENV NGINX_VERSION1.14.0 5ADD . /usr/local/share/ 6RUN ln -sf /usr/share/zoneinfo/Asia/Shanghai /etc/localtime 7RUN curl -o /etc/yum.repos.d/CentOS-Base.repo http://mirrors.aliyun.com/repo/Centos-7.repo && \ 8curl -o /etc/yum.repos.d/epel.repo http://mirrors.aliyun.com/repo/epel-7.repo 9RUN yum install -y pcre pcre-devel openssl openssl-devel gcc make gcc-c++10RUN cd /usr/local/share/ && tar zxf nginx-1.14.0.tar.gz && \11useradd www -s /bin/nologin -M12WORKDIR /usr/local/share/nginx-1.14.0/13RUN ./configure --user=www --group=www \14--prefix=/application/nginx \15--with-http_stub_status_module --with-http_ssl_module && \16make -j4&& make install17RUN yum install vim net-tools zlib-devel openssl-devel openssl libxml2-devel libjpeg-devel libjpeg-turbo-devel libiconv-devel freetype-devel libpng-devel gd-devel libcurl-devel libxslt-devel libxslt-devel libmcrypt-devel mcrypt mhash -y18RUN cd /usr/local/share/ && tar zxf libmcrypt-2.5.8.tar.gz && tar zxf mcrypt-2.6.8.tar.gz && tar zxf mhash-0.9.9.9.tar.gz19RUN cd /usr/local/share/libmcrypt-2.5.8&& \20./configure && make && make install && \21ln -s /usr/local/bin/libmcrypt_config /usr/bin/libmcrypt_config && \22export LD_LIBRARY_PATH=/usr/local/lib:$LD_LIBRARY_PATH23RUN cd /usr/local/share/mhash-0.9.9.9&& \24./configure && make && make install25RUN cd /usr/local/share/mcrypt-2.6.8&& \26./configure && make && make install27RUN cd /usr/local/share/ && tar zxf libiconv-1.14.tar.gz && \28tar zxf php-5.5.32.tar.gz && \29cd /usr/local/share/libiconv-1.14&& \30sed -i -e'/gets is a security/d'srclib/stdio.in.h && \31./configure --prefix=/usr/local/libiconv && make -j4&& make install32RUN cd /usr/local/share/php-5.5.32&& ./configure --prefix=/application/php --with-fpm-user=www \33--with-fpm-group=www \34--with-iconv=/usr/local/libiconv \35--with-mysqli \36--with-pdo-mysql \37--with-openssl \38--with-gd \39--with-zlib \40--with-gettext \41--with-curl \42--with-png-dir \43--with-jpeg-dir \44--with-freetype-dir \45--with-xmlrpc \46--with-mhash \47--with-openssl \48--enable-fpm \49--enable-xml \50--enable-shmop \51--enable-sysvsem \52--enable-inline-optimization \53--enable-mbregex \54--enable-mbstring \55--enable-ftp \56--enable-gd-native-ttf \57--enable-mysqlnd \58--enable-pcntl \59--enable-sockets \60--enable-zip \61--enable-soap \62--enable-session \63--enable-bcmath \64--enable-exif \65--enable-fileinfo \66--enable-opcache=no\67--disable-rpath \68--disable-debug \69--without-pear && \70touch ext/phar/phar.phar && \71make -j4&& make install && \72cp ./php.ini-production /application/php/lib/php.ini && \73cp sapi/fpm/init.d.php-fpm /etc/init.d/php-fpm && \74cp /application/php/etc/php-fpm.conf.default /application/php/etc/php-fpm.conf75RUNchmod+x /etc/init.d/php-fpm76RUN echo"export PATH=$PATH:/application/php/sbin/:/application/nginx/sbin/">>/etc/profile && source /etc/profile77add start.sh /root/start.sh78RUN /etc/init.d/php-fpm start79RUNchmod+x /root/start.sh80WORKDIR /application/81ADD html/conf/nginx.conf /application/nginx/conf/nginx.conf82CMD ["/application/nginx/sbin/nginx","-c","/application/nginx/conf/nginx.conf"]
02,构建镜像
docker build -t web-11:v3 .
03,搭建mysql镜像
可以通过官方的docker镜像源进行安装比较块
wget https://codeload.github.com/docker-library/mysql/zip/master
另一种自定义:
1[root@k8s3mysql]# cat docker-compose.yml 2version:'2' 3services: 4mysql-master: 5build: 6context: ./ 7dockerfile: master/Dockerfile 8environment: 9-"MYSQL_ROOT_PASSWORD=root"10-"MYSQL_DATABASE=replicas_db"11links:12- mysql-slave13ports:14-"33065:3306"15restart: always16hostname: mysql-master17mysql-slave:18build:19context: ./20dockerfile: slave/Dockerfile21environment:22-"MYSQL_ROOT_PASSWORD=root"23-"MYSQL_DATABASE=replicas_db"24ports:25-"33066:3306"26restart: always27hostname: mysql-slave
1[root@k8s3mysql]# cat master/Dockerfile2FROM mysql:5.7.173MAINTAINER kingle4ADD ./master/my.cnf /etc/mysql/my.cnf5EXPOSE33066CMD ["mysqld"]
[root@k8s3mysql]# cat master/my.cnf[mysqld]
server_id=100binlog-ignore-db=mysqllog-bin=replicas-mysql-bin
binlog_cache_size=1M
binlog_format=mixed
expire_logs_days=7slave_skip_errors=1062
1[root@k8s3mysql]# cat slave/Dockerfile2FROM mysql:5.7.173MAINTAINER kingle4ADD ./slave/my.cnf /etc/mysql/my.cnf5EXPOSE33066CMD ["mysqld"]
1[root@k8s3mysql]# cat slave/my.cnf 2[mysqld] 3server_id=101 4binlog-ignore-db=mysql 5log-bin=replicas-mysql-slave1-bin 6binlog_cache_size=1M 7binlog_format=mixed 8expire_logs_days=7 9slave_skip_errors=106210relay_log=replicas-mysql-relay-bin11log_slave_updates=112read_only=1
运行命令:
1 docker-compose up -d
等待配置完成
四,push镜像到harbor
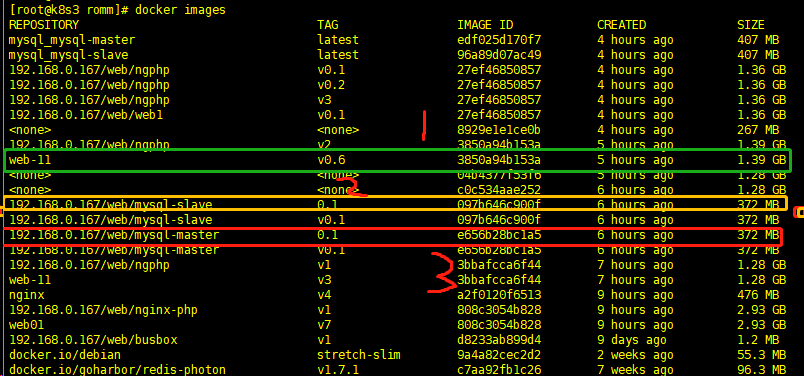
docker images 可以看见编排出来的包,
这三个包弄了一下午的编排
docker tag192.168.0.167/web/ngphp:v0.1192.168.0.167/web/ngphp:v3
docker tag 192.168.0.167/web/mysql-slave:0.1192.168.0.167/web/mysql-slave:v0.1docker tag 192.168.0.167/web/mysql-master:0.1192.168.0.167/web/mysql-master:v0.1
登入harbor私有仓库

dockerpush192.168.0.167/web/web1:v0.1docker push192.168.0.167/web/mysql-master:v0.1docker push192.168.0.167/web/mysql-slave:v0.1
到harbor查看

上传成功了
五,rancher 搭建
配置rancher


等待启动完成
站点访问:

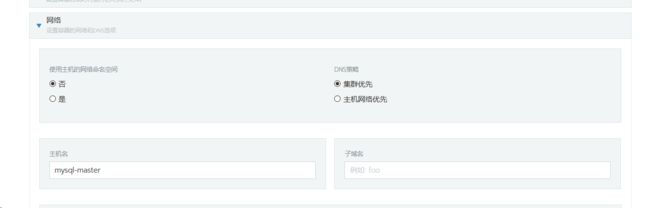
六,配置数据库主从
主库从库搭建就命名不一样,其余参照下面搭建


点击启动即可
查看你

查看主库ip

命令编辑
授权给从库
create user 'repl'@'%' identified by '123456'
GRANT REPLICATION SLAVE ON *.* to'rep1'@'%'identified by'123456';
FLUSH PRIVILEGES;
show mater slave


从库配置
1CHANGE MASTER TO MASTER_HOST='10.42.1.31', MASTER_USER='repl', MASTER_PASSWORD='123456', MASTER_LOG_FILE='replicas-mysql-bin.000003',MASTER_LOG_POS=1144353;
发现一个问题:

解决:
主库:
刷写日志: 记录好binlog 和pos

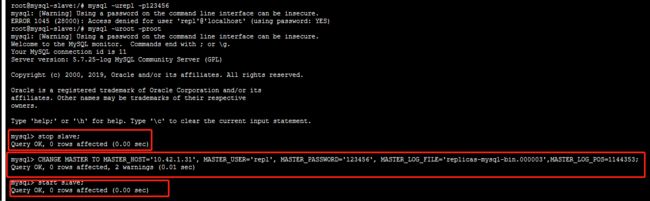
从库
stop slave
stop slave ;reset slave;
CHANGE MASTER TO MASTER_HOST='10.42.1.31', MASTER_USER='repl', MASTER_PASSWORD='123456', MASTER_LOG_FILE='replicas-mysql-bin.000004',MASTER_LOG_POS=154;
start slave;
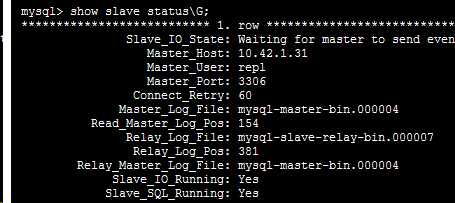
成功解决
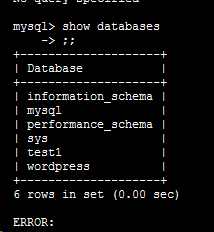
从库也一样了
七,wordpress 配置
根据步骤填写,回不去,少了截图,大家正常发挥,有问题联系,邮箱在下面.

点击安装即可

