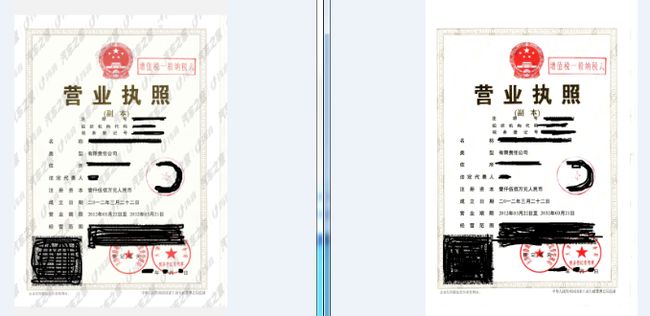
读图:
* read_image (Image, 'D:/Download/514302228.bmp')
图像增强:(增加水印与其他元素的色差)
* mult_image (Image, Image514302228, ImageResult, 0.005, 0)
分解彩色图像为三通道(筛选水印表现最为明显的某一颜色通道)
* decompose3 (ImageResult, Image1, Image2, Image3)
阈值选择水印区域(本例图是在B颜色下最为明显,所以选择了Image3)
* threshold (Image3, Region, 230, 250)
* complement (Region, RegionComplement)
* complement (RegionComplement, Region)
分别对三通道的水印区域重新会值为背景色,253-254-248三个颜色基准取自原图的背景三色灰度
* paint_region (Region, Image1, Image1, 253, 'fill')
* paint_region (Region, Image2, Image2, 254, 'fill')
* paint_region (Region, Image3, Image3, 248, 'fill')
将三通道图像合并为一张彩色图像
* compose3 (Image1, Image2, Image3, MultiChannelImage)
保存图片到本地
* write_image (Result, 'jpeg', 0, 'D:/Result.jpg')
