授权步骤
用户同意授权,获取code
通过code换取网页授权access_token
拉取用户信息(需scope为 snsapi_userinfo)
项目依赖
SpringBoot:2.1.4.RELEASE
weixin-java-mp:3.4.0
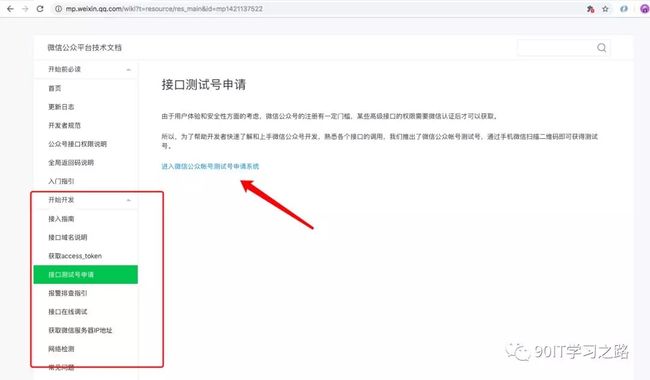
公众测试号申请
开发文档:https://mp.weixin.qq.com/wiki?t=resource/res_main&id=mp1445241432
由于我这边申请过了所以不做过多演示,这里我们需要注意几个地方,我们如果不适用JDSK的话只需要关注红色方框的地方,如果需要使用JSDK如调用相机、分享等。
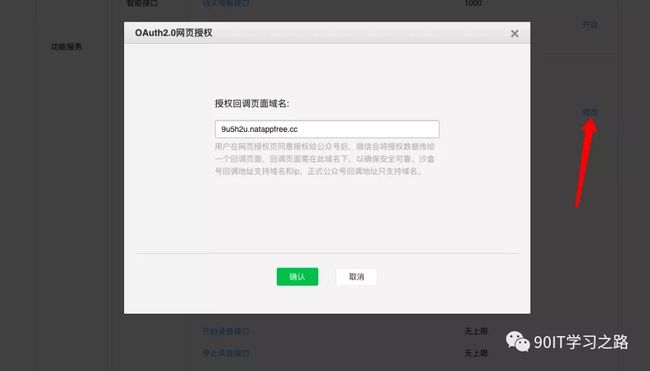
其次测试号微信授权需要配置回调域名所以我们需要配置Natapp映射的域名,这里配置的地址只需要域名,配置在页面服务->网页账号->修改。
项目配置
核心pom.xml。
  com.github.binarywang
  weixin-java-mp
  3.4.0
核心application.yml。
wechat:
  appId: #appId
  appSecret: #appSecret
  token: #服务器消息token
  aesKey: #aesKey
projecturl:
  projectUrl: #natapp调试地址
项目代码
配置类
以下配置类@Data使用了Lombok文章中没有说明配置的话自己百度或者自己写GetSet。
/**
* 可以放一些微信相关的配置属性
*/
@Component
@ConfigurationProperties(prefix = "wechat")
@Data
public class WeChatAccountConfig {
    /**
     * 设置微信公众号的appid
     */
    private String appId;
    /**
     * 设置微信公众号的app secret
     */
    private String appSecret;
    /**
     * 设置微信公众号的token
     */
    private String token;
    /**
     * 设置微信公众号的EncodingAESKey
     */
    private String aesKey;
}
/**
* 项目公用一些API地址
*/
@Component
@ConfigurationProperties(prefix = "projecturl")
@Data
public class ProjectUrlConfig {
    /**
     * 项目访问URL
     */
    private String projectUrl;
}
SDK配置类
@Component
public class WeChatMpServerConfig {
    @Autowired
    private WeChatAccountConfig weChatAccountConfig;
    @Bean
    public WxMpService wxMpService(){
        WxMpService wxMpService = new WxMpServiceImpl();
        wxMpService.setWxMpConfigStorage(wxMpConfigStorage());
        return wxMpService;
    }
    @Bean
    public WxMpConfigStorage wxMpConfigStorage(){
        WxMpInMemoryConfigStorage wxMpConfigStorage = new WxMpInMemoryConfigStorage();
        wxMpConfigStorage.setAppId(weChatAccountConfig.getAppId());
        wxMpConfigStorage.setSecret(weChatAccountConfig.getAppSecret());
        return wxMpConfigStorage;
    }
}
这个配置类的由来主要是因为WxMpService接口有多个实现类自动注入的话IOC不知道使用哪个实现类,还有就是每次调用API接口如查用户、素材之类。每次之前都要设置一个wxMpConfigStorage,所以我们这里使用了一个组件来管理相关的Bean配置。
控制层
@Controller
@RequestMapping("/oauth/")
public class WeChatOAuthController {
    @Autowired
    private ProjectUrlConfig projectUrlConfig;
    @Autowired
    private WxMpService wxMpService;
    /**
     * 构造网页授权URL
     * https://open.weixin.qq.com/connect/oauth2/authorize?appid=APPID&redirect_uri=REDIRECT_URI&response_type=code&scope=SCOPE&state=STATE#wechat_redirect
     *
     * @Param returnUrl 可以传入微信端应用地址
     */
    @GetMapping("authorization")
    public String authorizationUrl(@RequestParam(value = "returnUrl",defaultValue = "STATE") String returnUrl){
        String url = projectUrlConfig.getProjectUrl()+"/oauth/userInfo";
        String redirectUrl = wxMpService.oauth2buildAuthorizationUrl(url, WxConsts.OAuth2Scope.SNSAPI_USERINFO, URIUtil.encodeURIComponent(returnUrl));
        return "redirect:"+redirectUrl;
    }
    @GetMapping("userInfo")
    @ResponseBody
    public String userInfo(@RequestParam("code") String code,@RequestParam("state") String state){
        WxMpOAuth2AccessToken auth2AccessToken;
        WxMpUser wxMpUser;
        try {
            auth2AccessToken = wxMpService.oauth2getAccessToken(code);
            wxMpUser = wxMpService.oauth2getUserInfo(auth2AccessToken,null);
        } catch (WxErrorException e) {
            e.printStackTrace();
            throw new ProjectException(ResultEnum.WECHAT_ERROR.getCode(),e.getMessage());
        }
        return "你好!"+wxMpUser.getNickname()+",openId="+auth2AccessToken.getOpenId();
    }
}
其中我们大体的可以看出authorizationUrl接口是用户在微信端点击的授权API其次方法中才是构建微信授权链接让项目自己去重定向之后会到回调地址userInfo接口这里大家可以自由发挥返回前端页面也可以。
项目测试
下方就是微信授权访问接口中的方法和官方参数解析。
https://open.weixin.qq.com/connect/oauth2/authorize?
appid=APPID&
redirect_uri=REDIRECT_URI&
response_type=code&
scope=SCOPE&
state=STATE#wechat_redirect
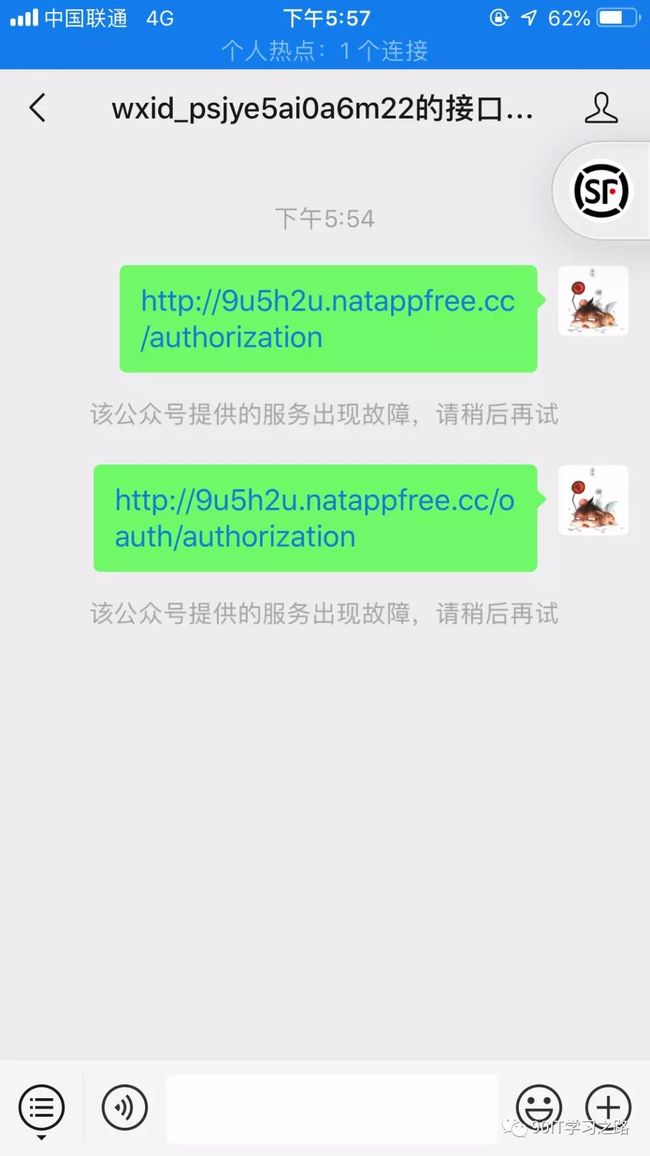
项目启动之后我们需要把外部访问请求发送到自己的测试公众号前提需要关注。
以上就是用户授权的操作一般在公众号开发嵌入H5网页常用的第一步还有就是jdsk验证也需要这里不细讲可以百度相关教程,使用了此SDK之后不需要自己去封装一些API操作简便了微信开发。(此教程于博客迁移,时间并非当日编写其次可去GitHub搜索weixin-java-mp看最新文档和相关使用教程)


