我们已经创建了基本的服务,现在要将这些服务以Web Api的方式发布。
创建Api项目
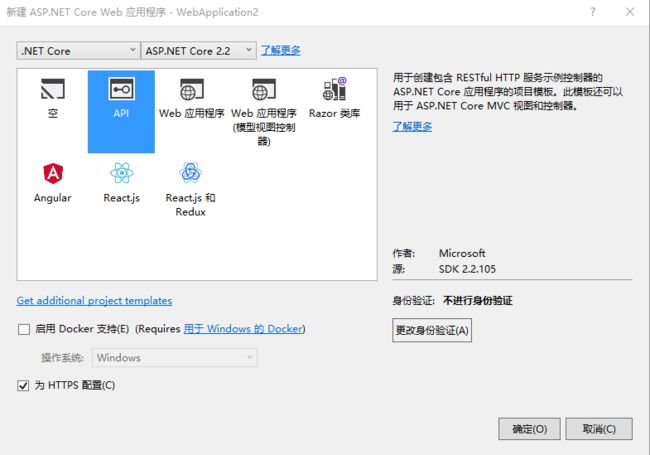
首先,我们在解决方案中增加一个Asp.Net Core项目,命名为ZL.Poem.WebApi,选择类型为Api:
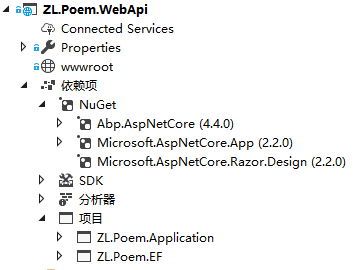
然后在项目中使用NuGet增加引用Abp.AspNetCore,并将项目ZL.Poem.Application和ZL.Poem.EF增加到依赖项中。
创建Abp模块
接下来,创建Abp模块:
using Abp.AspNetCore;
using Abp.AspNetCore.Configuration;
using Abp.Modules;
using System.Reflection;
using ZL.Poem.Application;
using ZL.Poem.EF;

namespace ZL.Poem.WebApi
{
    [DependsOn(typeof(PoemDataModule),
       typeof(PoemApplicationModule),
        typeof(AbpAspNetCoreModule))]

    public class PoemWebApiModule : AbpModule
    {
        public override void PreInitialize()
        {
            Configuration.DefaultNameOrConnectionString = "Server=localhost; Database=PoemNew; Trusted_Connection=True;";
        }

        public override void Initialize()
        {
            IocManager.RegisterAssemblyByConvention(Assembly.GetExecutingAssembly());

            //创建动态Web Api
            Configuration.Modules.AbpAspNetCore().CreateControllersForAppServices(typeof(PoemApplicationModule).Assembly, moduleName: "app", useConventionalHttpVerbs: false);

        }
    }
}
这个模块依赖于PoemDataModule、PoemApplicationModule和AbpAspNetCoreModule。这个项目是启动项目,需要定义连接字串,这里我们先用硬编码的方式定义,接下来,会把连接字串移动到配置文件中。
这里最关键的部分是创建动态Web Api
Configuration.Modules.AbpAspNetCore().CreateControllersForAppServices(typeof(PoemApplicationModule).Assembly, moduleName: "app", useConventionalHttpVerbs: true);
创建的动态Web Api映射PoemApplicationModule模块中IPoemAppService中的方法,这里接口约定的命名规则是I+服务名称+AppService,比如,IPoemAppService的服务名称为Poem,映射的地址为:
api/services/[moduleName]/[服务名称]/[方法名称]
这里moduleName被定义为app,IPoemAppService的服务名称为Poem,那么对应的web api 地址为:
api/serivces/app/Poem/[方法名称]
如果调用IPoemAppService中的GetAllCategories,那么web api地址为:
api/serivces/app/Poem/GetAllCategories。
修改Startup
下面要修改Startup.cs,在启动时执行模块的初始化,要修改两处:
修改public void ConfigureServices(IServiceCollection services),改为:
        public IServiceProvider ConfigureServices(IServiceCollection services)
        {
            services.AddMvc().SetCompatibilityVersion(CompatibilityVersion.Version_2_2);
            return services.AddAbp();

        }
改为返回IServiceProvider,并增加return services.AddAbp
然后需要将app.UseAbp()增加到public void Configure(IApplicationBuilder app, IHostingEnvironment env) 中,注意,这句话必须放在开始:
// This method gets called by the runtime. Use this method to configure the HTTP request pipeline.
        public void Configure(IApplicationBuilder app, IHostingEnvironment env)
        {

            app.UseAbp();

            if (env.IsDevelopment())
            {
                app.UseDeveloperExceptionPage();
            }
            else
            {
                app.UseHsts();
            }

            app.UseHttpsRedirection();
            app.UseMvc(routes =>
            {
                routes.MapRoute(
                    name: "defaultWithArea",
                    template: "{area}/{controller=Home}/{action=Index}/{id?}");

                routes.MapRoute(
                    name: "default",
                    template: "{controller=Home}/{action=Index}/{id?}");
            });

        }
使用PostMan或者Restlet Client进行测试
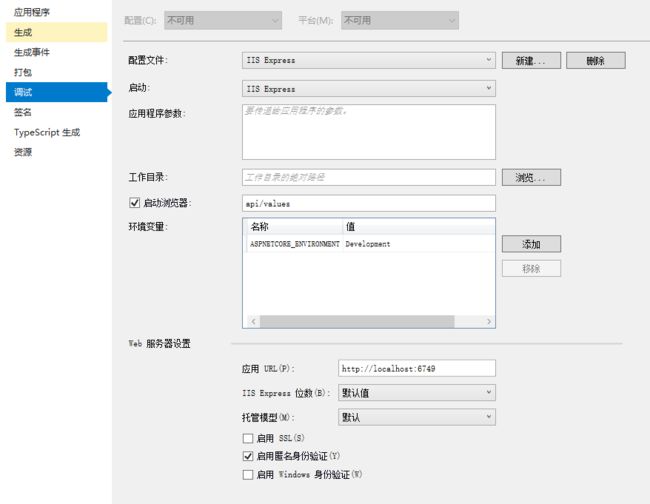
为了使用PostMan等客户端工具测试,我们先去掉项目的SSL支持:
然后可以启动项目,项目会启动浏览器,但什么也不显示。
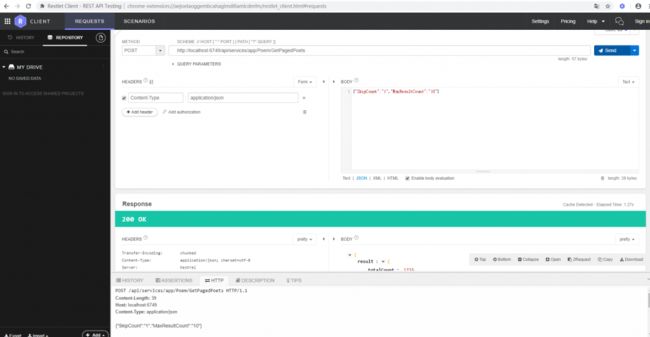
这时,我们可以用Restlet Client进行测试:
使用配置文件
现在,我们完善一下Web Api项目,将数据库连接串移动到配置文件中。
首先我们需要在ZL.Poem.Core中创建一个通用的读取配置文件的扩展,
在项目中使用NuGet安装:
Microsoft.Extensions.Configuration.EnvironmentVariables
Microsoft.Extensions.Configuration.Json
在项目中创建Configuration目录,并创建类:
using Abp.Extensions;
using Microsoft.Extensions.Configuration;
using System.Collections.Concurrent;

namespace ZL.Poem.Core.Configuration
{
    public static class AppConfigurations
    {
        private static readonly ConcurrentDictionary ConfigurationCache;

        static AppConfigurations()
        {
            ConfigurationCache = new ConcurrentDictionary();
        }

        public static IConfigurationRoot Get(string path, string environmentName = null)
        {
            var cacheKey = path + "#" + environmentName;
            return ConfigurationCache.GetOrAdd(
                cacheKey,
                _ => BuildConfiguration(path, environmentName)
            );
        }

        private static IConfigurationRoot BuildConfiguration(string path, string environmentName = null)
        {
            var builder = new ConfigurationBuilder()
                .SetBasePath(path)
                .AddJsonFile("appsettings.json", optional: true, reloadOnChange: true);

            if (!environmentName.IsNullOrWhiteSpace())
            {
                builder = builder.AddJsonFile($"appsettings.{environmentName}.json", optional: true);
            }

            builder = builder.AddEnvironmentVariables();

            return builder.Build();
        }
    }
}
这个类可以读取和创建项目的配置文件appsettings.json。
回到Web Api项目,将ZL.Poem.Core加入到引用,然后,修改模块:
using Microsoft.AspNetCore.Hosting;
using Microsoft.Extensions.Configuration;
using System.Reflection;
using ZL.Poem.Application;
using ZL.Poem.EF;
using ZL.Poem.Core.Configuration;

namespace ZL.Poem.WebApi
{
    [DependsOn(typeof(PoemDataModule),
       typeof(PoemApplicationModule),
        typeof(AbpAspNetCoreModule))]

    public class PoemWebApiModule : AbpModule
    {
        private readonly IHostingEnvironment _env;
        private readonly IConfigurationRoot _appConfiguration;

        public PoemWebApiModule(IHostingEnvironment env)
        {
            _env = env;
            _appConfiguration = AppConfigurations.Get(env.ContentRootPath, env.EnvironmentName);

        }

        public override void PreInitialize()
        {
            Configuration.DefaultNameOrConnectionString = _appConfiguration.GetConnectionString( "DefaultConnection");
        }

        public override void Initialize()
        {
            IocManager.RegisterAssemblyByConvention(Assembly.GetExecutingAssembly());

            Configuration.Modules.AbpAspNetCore().CreateControllersForAppServices(typeof(PoemApplicationModule).Assembly,
                moduleName: "app", useConventionalHttpVerbs: false);
        }
    }
}
这里,我们从配置文件中读取连接字串DefaultConnection。我们在appsettings.json中配置连接字串:
{

  "ConnectionStrings": {
    "DefaultConnection": "Server=localhost; Database=PoemNew; Trusted_Connection=True;"
  },
  "Logging": {
    "LogLevel": {
      "Default": "Warning"
    }
  },
  "AllowedHosts": "*"
}
到这里Web Api项目就编制完成了。接下来我们增加Swagger支持。
Swagger 集成
在NuGet中安装 Swashbuckle.AspNetCore,然后,在StartUp中进行设置:
在ConfigureServices中增加下面的代码:
            services.AddSwaggerGen(options =>
            {
                options.SwaggerDoc("v1", new Info { Title = "Poem API", Version = "v1" });
                options.DocInclusionPredicate((docName, description) => true);
            });
在Configure中增加:
            app.UseSwagger();
            //Enable middleware to serve swagger - ui assets(HTML, JS, CSS etc.)
            app.UseSwaggerUI(options =>
            {
                options.SwaggerEndpoint("/swagger/v1/swagger.json", "Poem API V1");
            }); //URL: /swagger
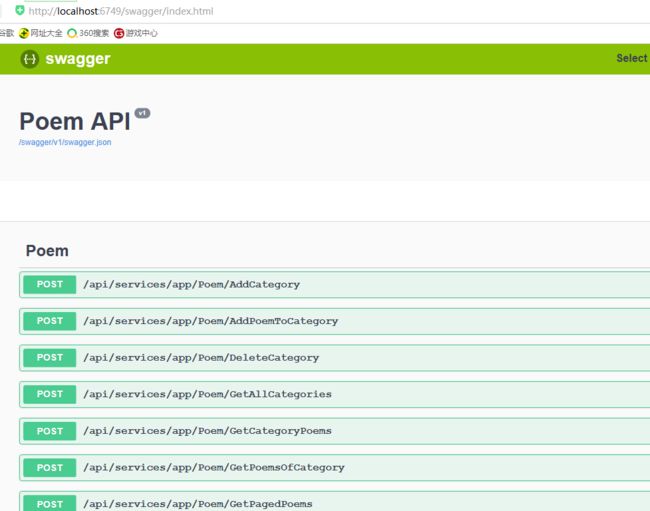
启动项目,可以访问swagger了:
到这里,web api的功能基本完成,下一步,我们开发客户端。客户端可以是基于Web的多页面应用,也可以是基于某种前端框架的单页面应用,还可以是基于Xamarin的富客户端。
本文同步发布在我的个人网站 http://www.jiagoushi.cn
