Android Studio 开发–微信APP门户界面设计
Android Studio 开发–微信APP门户界面设计
本次Github代码仓库 --crcr1013/MyWechat
文章目录
-
- Android Studio 开发--微信APP门户界面设计
- 前言
- 一、成果要求
- 二、关键步骤
-
- 1、准备工作
-
- 1.1环境准备
- 1.2图片准备
- 2、布局设计
-
- 2.1头部文件(top.xml)
- 2.2底部文件(bottom.xml)
- 2.2.1框架
- 2.2.2调参
- 2.3基本布局文件(activity_main.xml)
- 2.3.1框架
- 2.3.2调参
- 2.4中部布局文件(fragment_xxx.xml)
- 2.5主活动函数的java代码(MainActivity.java)
- 2.5.1中部布局文件对应的Fragment
- 2.5.2编写MainActivity.java主函数
- 三、效果展示
- 四、总结
前言
一、成果要求
1、根据课程实操实现APP门户界面框架设计,共包含4个tab页,能实现tab页之间的点击切换;
2、在进行切换时,顶部title同步改变,中间显示框的页面同步改变,底部选择框被选择的图标颜色加深。
二、关键步骤
1、准备工作
1.1环境准备
新建AS项目WechatDemo,安装SDK、AVD,完成项目基础的搭建。
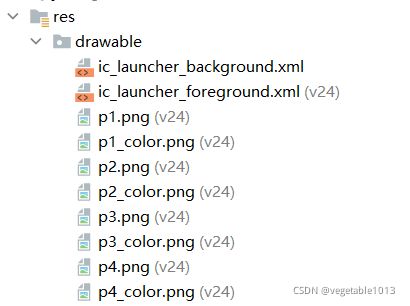
1.2图片准备
把该项目中用到的ui图片(四个功能按钮各有两个图标图片)复制粘贴到项目的文件夹WechatDemo\app\src\main\res\drawable-v24,并注意图片命名。
2、布局设计
微信共包含4个tab页,即聊天,朋友,发现,设置,页面分为上中下三个部分,头部是界面标题部分,中部是界面展示部分,底部是按钮控制部分。故我们需要头部显示的xml文件(top.xml),底部按钮控制的xml文件(bottom.xml),点击的四个button要对应四个中部展示界面的xml文件(fragment_weixin.xml,fragment_friends.xml,frament_find.xml,fragment_shezhi.xml)。
2.1头部文件(top.xml)
简单的TextView文本显示,需要调整文本大小,文本颜色,文本背景颜色,文本位置居中。
LinearLayout中添加一个TextView,需将LinearLayout设置为horizontal,TextView的gravity设置为center,颜色,文本大小等参数如代码所示:
<LinearLayout xmlns:android="http://schemas.android.com/apk/res/android"
    android:layout_width="match_parent"
    android:layout_height="wrap_content"
    android:background="@color/black">

    <TextView
        android:id="@+id/textView"
        android:layout_width="match_parent"
        android:layout_height="wrap_content"
        android:gravity="center"
        android:text="微信"
        android:textColor="@color/white"
        android:textSize="30sp" />
LinearLayout>
2.2底部文件(bottom.xml)
2.2.1框架
微信底部应为四个按钮图片及对应文字,即p1(聊天),p2(朋友),p3(发现),p4(设置)。在已有的LinearLayout中添加一个LinearLayout,放入ImageView和TextView,设置最外层LinearLayout的orientation为水平(即使待添加的每个控件在一条水平线上),再复制粘贴三个LinearLayout,调整内层4个LinearLayout的orientation为垂直(即图片和文本呈上下垂直关系)。
2.2.2调参
1、给每个LinearLayout中的ImageView和TextView添加对应图片和文本,设置每个LinearLayout为平铺,即将layout_width设置为wrap_content,将layout_height设置为match_parent,将layout_weight设置为1,同时需要修改每个LinearLayout中ImageView和TextView的id,增加每个LinearLayout的id(以便于后边把ImageView和TextView合起来作为一个可以点击的按钮)。
2、设置最外层LinearLayout的高度,背景颜色,内层四个LinearLayout的背景颜色,居中,每个TextView的文本颜色,文本大小,居中,代码参数如下(以LinearLayout_weixin为例):
最外层LinearLayout
<LinearLayout xmlns:android="http://schemas.android.com/apk/res/android"
    xmlns:app="http://schemas.android.com/apk/res-auto"
    xmlns:tools="http://schemas.android.com/tools"
    android:layout_width="match_parent"
    android:layout_height="100dp">
LinearLayout>
LinearLayout_weixin
    <LinearLayout
        android:id="@+id/LinearLayout_weixin"
        android:layout_width="wrap_content"
        android:layout_height="match_parent"
        android:layout_weight="1"
        android:orientation="vertical"
        android:clickable="true"
        android:gravity="center"
        android:background="@color/black">

        <ImageView
            android:id="@+id/imageView1"
            android:layout_width="match_parent"
            android:layout_height="wrap_content"
            android:src="@drawable/p1"
            tools:srcCompat="@drawable/p1"/>

        <TextView
            android:id="@+id/textView1"
            android:layout_width="match_parent"
            android:layout_height="wrap_content"
            android:gravity="center"
            android:text="聊天"
            android:textColor="@color/white"
            android:textSize="20sp" />
    LinearLayout>
注意:在设置ImageView的图片资源时,要用android:src="@drawable/p1"参数,否则肯会出现图片不显示的情况。
2.3基本布局文件(activity_main.xml)
2.3.1框架
将已有的最外层LinearLayout布局设置为vertical,用include将top和bottom加入到该xml视图中,添加一个FrameLayout在include中间。
2.3.2调参
将FrameLayout的id设置为content,便于调用。将其layout_width设置为match_parent,将layout_height设置为match_parent,将layout_weight设置为1。
<LinearLayout xmlns:android="http://schemas.android.com/apk/res/android"
    xmlns:app="http://schemas.android.com/apk/res-auto"
    xmlns:tools="http://schemas.android.com/tools"
    android:layout_width="match_parent"
    android:layout_height="match_parent"
    android:orientation="vertical"
    tools:context=".MainActivity" >
    <include layout="@layout/top"/>
    <FrameLayout
        android:id="@+id/content"
        android:layout_width="match_parent"
        android:layout_height="match_parent"
        android:layout_weight="1">
    FrameLayout>
    <include layout="@layout/bottom" />
LinearLayout>
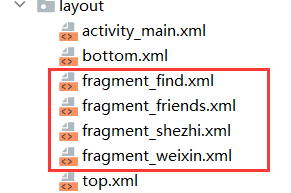
2.4中部布局文件(fragment_xxx.xml)
layout中新建四个中部布局文件,分别命名。
分别添加TextView,设置文字内容,字体大小风格和居中。
以fragment_weixin.xml为例:
<LinearLayout xmlns:android="http://schemas.android.com/apk/res/android"
    xmlns:tools="http://schemas.android.com/tools"
    android:layout_width="match_parent"
    android:layout_height="match_parent"
    tools:context=".weixinFragment">


    <TextView
        android:id="@+id/title_weixin"
        android:layout_width="match_parent"
        android:layout_height="match_parent"
        android:gravity="center"
        android:text="这是微信聊天界面!"
        android:textSize="30sp" />

LinearLayout>
要实现点击bottom不同按钮用以切换中间内容,大体思路是在java文件夹下第一个package中为4个内容xml界面配置4个Fragment,再把它们压缩成一个FrameLayout,写到程序中,做一个子窗口,具体步骤在后面主活动函数的java代码中介绍。
2.5主活动函数的java代码(MainActivity.java)
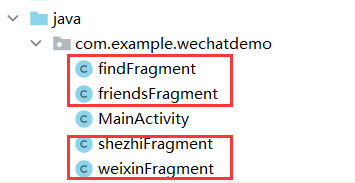
2.5.1中部布局文件对应的Fragment
创建四个Fragment类
创建好后可以将没用的方法语句删除,在每个类中,最需要注意的是最后一行代码,修改R.layout.x为对应xml文件。
以weixinFragment为例:
package com.example.wechatdemo;

import android.os.Bundle;
import android.app.Fragment;
import android.view.LayoutInflater;
import android.view.View;
import android.view.ViewGroup;

public class weixinFragment extends Fragment {


    public weixinFragment() {

        // Required empty public constructor
    }
    @Override
    public View onCreateView(LayoutInflater inflater, ViewGroup container,
                             Bundle savedInstanceState) {

        // Inflate the layout for this fragment
        return inflater.inflate(R.layout.fragment_weixin, container, false);
    }
}
注意:有时默认导入的Fragment相关的包可能会出现问题,需手动修改为import android.app.Fragment;。
2.5.2编写MainActivity.java主函数
1 、用4个Fragment类创建4个实例对象,创建FragmentManager对象;分别创建LinearLayout、TextView、ImageView对象;
private weixinFragment weixinFragment = new weixinFragment();
private friendsFragment friendsFragment = new friendsFragment();
private findFragment findFragment = new findFragment();
private shezhiFragment shezhiFragment = new shezhiFragment();
private FragmentManager fragmentManager;
private View LinearLayout1,LinearLayout2,LinearLayout3,LinearLayout4;
private TextView textView1,textView2,textView3,textView4;
private ImageView image1,image2,image3,image4;
2、在onCreate中在onCreate中添加需要找到的LinearLayout,需要更改的按钮图片ImageView,需要更改的头部文本TextView;
3、 编写initFragment函数把4个Fragment放到FrameLayout中,即可将四个文件的展示界面进行传递;
    private void initFragment(){

        fragmentManager = getFragmentManager();
        FragmentTransaction transaction = fragmentManager.beginTransaction();
        transaction.add(R.id.content,weixinFragment);
        transaction.add(R.id.content,friendsFragment);
        transaction.add(R.id.content,findFragment);
        transaction.add(R.id.content,shezhiFragment);
        transaction.commit();
    }
4、编写hideFragment函数隐藏所有内容页面,该函数在界面展示函数showFragment调用;
    public void hideFragment(FragmentTransaction transaction){

        transaction.hide(weixinFragment);
        transaction.hide(friendsFragment);
        transaction.hide(findFragment);
        transaction.hide(shezhiFragment);
    }
5 、编写resetImg函数用来把图标变灰,该函数需在onClick函数中调用;
    private void resetImgs(){

        image1.setImageResource(R.drawable.p1);
        image2.setImageResource(R.drawable.p2);
        image3.setImageResource(R.drawable.p3);
        image4.setImageResource(R.drawable.p4);
    }
6、编写showFragment函数用来实现bottom中四个按钮对应的fragment界面的展示,同时实现头部控件文本的切换,底部控件被选中的按钮图片颜色由灰色变为有颜色(此处只展示case(0)的情况);注意需要将bottom.xml中各LinearLayout的监听参数设置如下android:clickable="true";
    private void showFragment(int i){

        FragmentTransaction transaction = fragmentManager.beginTransaction();
        hideFragment(transaction);
        switch (i){

            case 0:
                transaction.show(weixinFragment);
                image1.setImageResource(R.drawable.p1_color);
                textView1.setText("聊天");
                break;
            case 1:
            ...
                       }
        transaction.commit();
    }
7、将MainActivity继承Activity类,添加implements View.OnClickListener,重写onClick函数。利用switch…case函数通过不同的参数调用showFragment(i)
public class MainActivity extends Activity implements View.OnClickListener {
onClick函数如下:
    @Override
    public void onClick(View v) {

        resetImgs();
        switch (v.getId()){

            case R.id.LinearLayout_weixin:
                showFragment(0);
                break;
            case R.id.LinearLayout_friends:
                showFragment(1);
                break;
            case R.id.LinearLayout_find:
                showFragment(2);
                break;
            case R.id.LinearLayout_shezhi:
                showFragment(3);
                break;
            default:
                break;
        }
    }
8、在onCreate中调用 initFragment(); showFragment(0);
三、效果展示


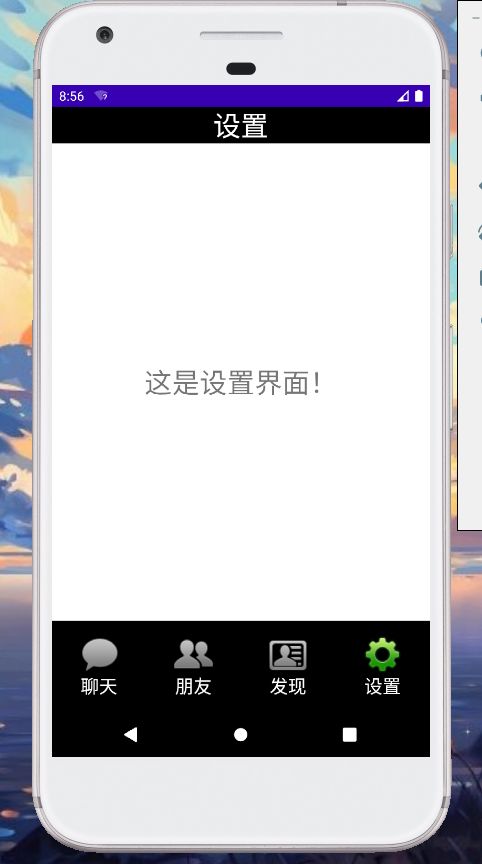
动画展示
四、总结
本次博客是我第一次写博客,发博客,内容是AS开发。
本次的Project非常有意思,让我对AS开发产生了较大的兴趣,不过目前我尚且不算已入门,希望在今后的AS学习中,跟着老师的脚步,跟着众多大佬的脚步提高自己的技术水平和作为一个程序猿的各方面的修养。
写本博客让我对该项目的开发在结构上和内容上都有了更深刻的认识,在今后开发AS项目的思路方面也有了更深刻的体会,不论是本站还是其他的博客网站,都有有意义和无意义的博客之分,在此顺便向认真写博客分享资源的人致敬,希望之后多在项目开发思路、项目源码等方面有着自己贡献!!加油!