分离部署LAMP
文章目录
- 分离部署LAMP
-
- 1.环境准备
- 2.安装ansible
- 3.master主机开始anisble文件配置
- 4.node1安装httpd
- 5.node2安装mariadb
- 6.node3安装php
- 7.node1主机(apache)创建用户改变属主
- 8.node2主机(mariadb)创建用户改变属主
- 9.node1主机(apache)修改相关配置文件
- 10. node2mysql开机自启
- 11. node3修改相关配置文件
- 12 .启动httpd和php
- 13.node[1-3]关闭防火墙和selinux
- 14.域名添加
- 15.效果展示
分离部署LAMP
1.环境准备
| 系统 | ip地址 | 名字 | 安装服务 |
|---|---|---|---|
| reahat8 | 192.168.91.128 | master | ansible |
| reahat8 | 192.168.91.129 | node1 | httpd |
| reahat8 | 192.168.91.130 | node2 | mariadb |
| reahat8 | 192.168.91.131 | node3 | php |
2.安装ansible
#master主机
yum -y install epel-release
yum -y install ansible
#slave[01-03]主机
python3-libselinux
3.master主机开始anisble文件配置
#受管主机添加清单文件
/ / 进入指定的ansible清单目录下面
[root@master ~]# cd /opt/project
[root@master project]# ls
ansible.cfg  hehe  inventories
[root@master project]# vim ansible.cfg
inventory      = inventories

/ / 配置清单文件
[root@master project]# vim inventories
[root@master project]# cat inventories
[web1]
192.168.91.129
[web2]
192.168.91.130
[web3]
192.168.91.131

// 进行免密登录
[root@master project]# ssh-copy-id [email protected]
/usr/bin/ssh-copy-id: INFO: Source of key(s) to be installed: "/root/.ssh/id_rsa.pub"
/usr/bin/ssh-copy-id: INFO: attempting to log in with the new key(s), to filter out any that are already installed
/usr/bin/ssh-copy-id: INFO: 1 key(s) remain to be installed -- if you are prompted now it is to install the new keys
[email protected]'s password:

Number of key(s) added: 1

Now try logging into the machine, with:   "ssh '[email protected]'"
and check to make sure that only the key(s) you wanted were added.

[root@master project]# ssh-agent bash
[root@master project]# ssh-add
Identity added: /root/.ssh/id_rsa (root@master)
#其它俩个操作 步骤一样

/ / ping三个主机检查是否免密设置成功,能否进行远程
[root@master project]# ansible all -m ping
192.168.91.129 | SUCCESS => {
    "ansible_facts": {
        "discovered_interpreter_python": "/usr/libexec/platform-python"
    },
    "changed": false,
    "ping": "pong"
}
192.168.91.130 | SUCCESS => {
    "ansible_facts": {
        "discovered_interpreter_python": "/usr/libexec/platform-python"
    },
    "changed": false,
    "ping": "pong"
}
192.168.91.131 | SUCCESS => {
    "ansible_facts": {
        "discovered_interpreter_python": "/usr/libexec/platform-python"
    },
    "changed": false,
    "ping": "pong"
}
4.node1安装httpd
每台机器上都得有yum源仓库
利用shell模块进行安装,可以安装全部包
/ / 安装httpd所有包
[root@master project]# ansible web1 -m shell -a 'yum -y install httpd*'
192.168.91.129 | CHANGED | rc=0 >>
Updating Subscription Management repositories.
Unable to read consumer identity
This system is not registered to Red Hat Subscription Management. You can use subscription-manager to register.
Last metadata expiration check: 1 day, 1:25:32 ago on Sat 17 Jul 2021 09:11:12 PM CST.
Dependencies resolved.
=========================================================================================
 Package                  Arch    Version                                Repo        Size
=========================================================================================
Installing:
 httpd                    x86_64  2.4.37-21.module+el8.2.0+5008+cca404a3 AppStream  1.4 M


/ / 安装完成
  pkgconf-1.4.2-1.el8.x86_64
  pkgconf-m4-1.4.2-1.el8.noarch
  pkgconf-pkg-config-1.4.2-1.el8.x86_64
  redhat-logos-httpd-81.1-1.el8.noarch

Complete!
5.node2安装mariadb
/ / 安装mariadb所有包
[root@master project]# ansible web2 -m shell -a 'yum -y install mariadb*'
192.168.91.130 | CHANGED | rc=0 >>
Updating Subscription Management repositories.
Unable to read consumer identity
This system is not registered to Red Hat Subscription Management. You can use subscription-manager to register.
Last metadata expiration check: 7:58:23 ago on Sun 18 Jul 2021 02:57:26 PM CST.
Package mariadb-3:10.3.17-1.module+el8.1.0+3974+90eded84.x86_64 is already installed.
Package mariadb-backup-3:10.3.17-1.module+el8.1.0+3974+90eded84.x86_64 is already installed.
Package mariadb-common-3:10.3.17-1.module+el8.1.0+3974+90eded84.x86_64 is already installed.
Package mariadb-connector-c-3.0.7-1.el8.x86_64 is already installed.
Package mariadb-connector-c-config-3.0.7-1.el8.noarch is already installed.
Package mariadb-connector-c-devel-3.0.7-1.el8.x86_64 is already installed.
Package mariadb-connector-odbc-3.0.7-1.el8.x86_64 is already installed.
Package mariadb-devel-3:10.3.17-1.module+el8.1.0+3974+90eded84.x86_64 is already installed.
Package mariadb-embedded-3:10.3.17-1.module+el8.1.0+3974+90eded84.x86_64 is already installed.
Package mariadb-embedded-devel-3:10.3.17-1.module+el8.1.0+3974+90eded84.x86_64 is already installed.
Package mariadb-errmsg-3:10.3.17-1.module+el8.1.0+3974+90eded84.x86_64 is already installed.
Package mariadb-gssapi-server-3:10.3.17-1.module+el8.1.0+3974+90eded84.x86_64 is already installed.
Package mariadb-java-client-2.2.5-2.el8.noarch is already installed.
Package mariadb-oqgraph-engine-3:10.3.17-1.module+el8.1.0+3974+90eded84.x86_64 is already installed.
Package mariadb-server-3:10.3.17-1.module+el8.1.0+3974+90eded84.x86_64 is already installed.
Package mariadb-server-galera-3:10.3.17-1.module+el8.1.0+3974+90eded84.x86_64 is already installed.
Package mariadb-server-utils-3:10.3.17-1.module+el8.1.0+3974+90eded84.x86_64 is already installed.
Package mariadb-test-3:10.3.17-1.module+el8.1.0+3974+90eded84.x86_64 is already installed.
Dependencies resolved.
Nothing to do.
Complete!
6.node3安装php
/ / 安装php所有包
[root@master project]# ansible web3 -m shell -a 'yum -y install php*'
192.168.91.131 | CHANGED | rc=0 >>
Updating Subscription Management repositories.
Unable to read consumer identity
This system is not registered to Red Hat Subscription Management. You can use subscription-manager to register.
Last metadata expiration check: 12:27:50 ago on Sun 18 Jul 2021 10:18:49 AM CST.
Dependencies resolved.
==============================================================================================
 Package                      Arch    Version                                 Repo        Size
==============================================================================================
Installing:
 php                          x86_64  7.2.24-1.module+el8.2.0+4601+7c76a223   Appstream  1.5 M


/ / 安装完成
  recode-3.6-47.el8.x86_64
  redhat-logos-httpd-81.1-1.el8.noarch
  tokyocabinet-1.4.48-10.el8.x86_64
  unixODBC-2.3.7-1.el8.x86_64

Complete!
7.node1主机(apache)创建用户改变属主
[root@master ~]# ansible web1 -m user -a "name=apache system=yes create_home=no shell=/sbin/nologin"
192.168.91.129 | SUCCESS => {

    "ansible_facts": {

        "discovered_interpreter_python": "/usr/libexec/platform-python"
    },
    "append": false,
    "changed": false,
    "comment": "Apache",
    "group": 48,
    "home": "/usr/share/httpd",
    "move_home": false,
    "name": "apache",
    "shell": "/sbin/nologin",
    "state": "present",
    "uid": 48
}
[root@node1 ~]# id apache
uid=48(apache) gid=48(apache) 组=48(apache

[root@master ~]# ansible web1 -m shell -a "chown -R apache.apache /var/www/html"
192.168.91,129
| CHANGED | rc=0 >>
[root@node1 ~]# ll -d /var/www//html/
drwxr-xr-x. 2 apache apache 6 6月  30 04:11 /var/www//html/
8.node2主机(mariadb)创建用户改变属主
[root@master ~]# ansible web2 -m user -a "name=mysql system=yes create_home=no shell=/sbin/nologin"
192.168.91.130 | CHANGED => {

    "ansible_facts": {

        "discovered_interpreter_python": "/usr/bin/python"
    },
    "changed": true,
    "comment": "",
    "create_home": false,
    "group": 996,
    "home": "/home/mysql",
    "name": "mysql",
    "shell": "/sbin/nologin",
    "state": "present",
    "system": true,
    "uid": 998
}
#node2改变属主
[root@master ~]# ansible web2 -m shell -a "chown -R mysql:mysql /opt/data"
192.168.91.130 | CHANGED | rc=0 >>
[root@node2 ~]# ll -d /opt/data/
drwxr-xr-x. 2 mysql mysql 6 7月  17 10:52 /opt/data/
9.node1主机(apache)修改相关配置文件
1.模块功能开启
[root@master project]# ansible web1 -m shell -a "sed -i '/proxy_module/s/#//g' /etc/httpd/conf.modules.d/00-proxy.conf"
192.168.91.129 | CHANGED | rc=0 >>
[root@master project]# ansible web1 -m shell -a "sed -i '/proxy_fcgi_module/s/#//g' /etc/httpd/conf.modules.d/00-proxy.conf"
192.168.91.129 | CHANGED | rc=0 >>
2.取消监听端口注释以及域名注释
[root@master project]# ansible web1 -m lineinfile -a 'path=/etc/httpd/conf/httpd.conf regexp="^#Listen 80" line="Listen 80"'
192.168.91.129 | SUCCESS => {
"ansible_facts": {
"discovered_interpreter_python": "/usr/libexec/platform-python"
},
"backup": "",
"changed": false,
"msg": ""
}
[root@master project]# ansible web1 -m shell -a "sed -i '/www.example/s/#//g' /etc/httpd/conf/httpd.conf"
192.168.91.129 | CHANGED | rc=0 >>
3.添加俩行内容(\n:换行)
[root@master project]# ansible web1 -m lineinfile -a 'path=/etc/httpd/conf/httpd.conf regexp="^AddType" line="AddType application/x-httpd-php .php\nAddType application/x-httpd-php-source .phps"'
192.168.91.129 | CHANGED => {
"ansible_facts": {
"discovered_interpreter_python": "/usr/libexec/platform-python"
},
"backup": "",
"changed": true,
"msg": "line added"
}
4.index.html前面加index.php
[root@master ~]# ansible web1 -m shell -a "sed -i '/index.html/s/index.html/index.php index.html/g' /etc/httpd/conf/httpd.conf"
5.找到vhosts.conf文件复制到/etc/httpd/conf.d/下
[root@master ~]# ansible web1 -m shell -a "find / -name *vhosts.conf"
192.168.91.129 | CHANGED | rc=0 >>
/usr/share/doc/httpd/httpd-vhosts.conf
[root@master ~]# ansible web1 -m shell -a "mv /usr/share/doc/httpd/httpd-vhosts.conf /etc/httpd/conf.d/"
192.168.91.129 | CHANGED | rc=0 >>
6.修改虚拟配置文件
[root@master ~]# ansible web1 -m shell -a "> /etc/httpd/conf.d/httpd-vhosts.conf"
192.168.91.129 | CHANGED | rc=0 >>
[root@master ~]# ansible web1 -m lineinfile -a 'path=/etc/httpd/conf.d/httpd-vhosts.conf line="\n DocumentRoot "/var/www/html"\n ServerName example.com\n ProxyRequests Off\n ProxyPassMatch ^/(.*\.php)$ fcgi://192.168.91.129:9000/data/php/$1\n \n Options none\n AllowOverride none\n Require all granted\n \n "'
192.168.91.129 | CHANGED => {
"ansible_facts": {
"discovered_interpreter_python": "/usr/libexec/platform-python"
},
"backup": "",
"changed": true,
"msg": "line added"
}
#node1上查看
[root@node1 ~]# cat /etc/httpd/conf.d/httpd-vhosts.conf
<VirtualHost *:80>
DocumentRoot "/var/www/html"
ServerName www.example.com
ProxyRequests Off
ProxyPassMatch ^/(.*\.php)$ fcgi://192.168.91.129:9000/data/php/$1
<Directory "/data/php/">
Options none
AllowOverride none
Require all granted
</Directory>
</VirtualHost>
10. node2mysql开机自启
#开启mariadb
[root@master ~]# ansible web2 -m service -a "name=mysql.service state=present enabled=yes"
11. node3修改相关配置文件
#创建文件,并且输入如下内容
[root@master ~]# ansible web3-m lineinfile -a "path=/data/php/index.php line= create=yes"
#修改/etc/php-fpm.d/www.conf文件
[root@master ~]# ansible web3 -m shell -a "sed -i '/www.sock/s/listen/;listen/g' /etc/php-fpm.d/www.conf"
[root@master ~]# ansible web3 -m shell -a "sed -i '/clients/s/12.0.0.1/192.168.91.131/g' /etc/php-fpm.d/www.conf"
12 .启动httpd和php
[root@master ~]# ansible web1 -m shell -a 'systemctl start httpd-service'
[root@master ~]# ansible web3 -m shell -a 'systemctl start php-fpm-service'
13.node[1-3]关闭防火墙和selinux
[root@master ~]# ansible web1 -m shell -a "systemctl stop firewalld"
[root@master ~]# ansible web2 -m shell -a "systemctl stop firewalld"
[root@master ~]# ansible web3 -m shell -a "systemctl stop firewalld"
[root@master ~]# ansible web1 -m shell -a "systemctl disable firewalld"
[root@master ~]# ansible web2 -m shell -a "systemctl disable firewalld"
[root@master ~]# ansible web3 -m shell -a "systemctl disable firewalld"
14.域名添加
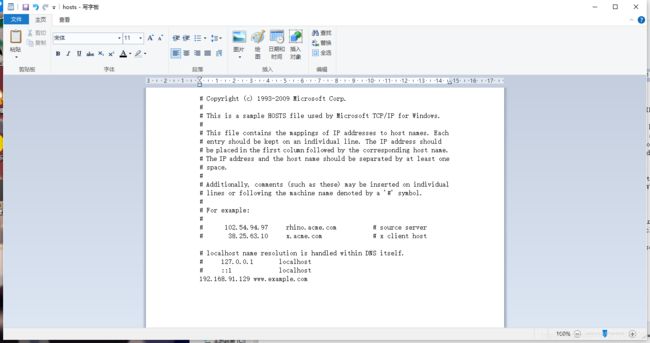
在C:/windows/system32/drivers/etc/hosts.拖出来修改,修改完在放回去,就可以让域名有效(失效就拖出来删除增加的再放回去)
15.效果展示
