WebMagic是一个开源爬虫框架,本项目通过在SpringBoot项目中使用WebMagic去抓取数据,最后使用MyBatis将数据入库。
本项目代码地址:ArticleCrawler: SrpingBoot+WebMagic+MyBaties实现爬虫和数据入库 (gitee.com)
创建数据库:
本示例中库名为article,表名为cms_content,表中包含contentId、title、date三个字段。
CREATE TABLE `cms_content` (
  `contentId` varchar(40) NOT NULL COMMENT '内容ID',
  `title` varchar(150) NOT NULL COMMENT '标题',
  `date` varchar(150) NOT NULL COMMENT '发布日期',
  PRIMARY KEY (`contentId`)
) ENGINE=InnoDB DEFAULT CHARSET=utf8 COMMENT='CMS内容表';
新建SpringBoot项目:
1、配置依赖pom.xml
    4.0.0

        org.springframework.boot
        spring-boot-starter-parent
        2.5.5


    com.example
    Article
    0.0.1-SNAPSHOT
    Article
    Article

        1.8
        UTF-8
        true
        3.8.1
        3.1.0

        5.1.47
        1.1.17
        1.3.4
        1.2.58
        3.9
        2.10.2
        0.7.5


            org.springframework.boot
            spring-boot-starter-web


            org.springframework.boot
            spring-boot-starter-test
            test


            org.springframework.boot
            spring-boot-configuration-processor
            true


            mysql
            mysql-connector-java
            ${mysql.connector.version}


            com.alibaba
            druid-spring-boot-starter
            ${druid.spring.boot.starter.version}


            org.mybatis.spring.boot
            mybatis-spring-boot-starter
            ${mybatis.spring.boot.starter.version}


            com.alibaba
            fastjson
            ${fastjson.version}


            org.apache.commons
            commons-lang3
            ${commons.lang3.version}


            joda-time
            joda-time
            ${joda.time.version}


            us.codecraft
            webmagic-core
            ${webmagic.core.version}


                    org.slf4j
                    slf4j-log4j12


                org.apache.maven.plugins
                maven-compiler-plugin
                ${maven.compiler.plugin.version}

                    ${java.version}
                    ${java.version}
                    ${project.build.sourceEncoding}


                org.apache.maven.plugins
                maven-resources-plugin
                ${maven.resources.plugin.version}

                    ${project.build.sourceEncoding}


                org.springframework.boot
                spring-boot-maven-plugin

                    true
                    true


                            repackage


            public
            aliyun nexus
            http://maven.aliyun.com/nexus/content/groups/public/

                true


            public
            aliyun nexus
            http://maven.aliyun.com/nexus/content/groups/public/

                true


                false
2、创建CmsContentPO.java
数据实体,和表中3个字段对应。
package site.exciter.article.model;

public class CmsContentPO {
    private String contentId;

    private String title;

    private String date;

    public String getContentId() {
        return contentId;
    }

    public void setContentId(String contentId) {
        this.contentId = contentId;
    }

    public String getTitle() {
        return title;
    }

    public void setTitle(String title) {
        this.title = title;
    }

    public String getDate() {
        return date;
    }

    public void setDate(String date) {
        this.date = date;
    }
}
3、创建CrawlerMapper.java
package site.exciter.article.dao;

import org.apache.ibatis.annotations.Mapper;
import site.exciter.article.model.CmsContentPO;

@Mapper
public interface CrawlerMapper {
    int addCmsContent(CmsContentPO record);
}
4、配置映射文件CrawlerMapper.xml
在resources下新建mapper文件夹,在mapper下创建CrawlerMapper.xml
        insert into cms_content (contentId,
        title,
        date)
        values (#{contentId,jdbcType=VARCHAR},
        #{title,jdbcType=VARCHAR},
        #{date,jdbcType=VARCHAR})
5、配置application.properties
配置数据库和mybatis映射关系。
# mysql
spring.datasource.name=mysql
spring.datasource.type=com.alibaba.druid.pool.DruidDataSource
spring.datasource.driver-class-name=com.mysql.jdbc.Driver
spring.datasource.url=jdbc:mysql://10.201.61.184:3306/article?useUnicode=true&characterEncoding=utf8&useSSL=false&allowMultiQueries=true
spring.datasource.username=root
spring.datasource.password=root

# druid
spring.datasource.druid.initial-size=5
spring.datasource.druid.min-idle=5
spring.datasource.druid.max-active=10
spring.datasource.druid.max-wait=60000
spring.datasource.druid.validation-query=SELECT 1 FROM DUAL
spring.datasource.druid.test-on-borrow=false
spring.datasource.druid.test-on-return=false
spring.datasource.druid.test-while-idle=true
spring.datasource.druid.time-between-eviction-runs-millis=60000
spring.datasource.druid.min-evictable-idle-time-millis=300000
spring.datasource.druid.max-evictable-idle-time-millis=600000

# mybatis
mybatis.mapperLocations=classpath:mapper/CrawlerMapper.xml
6、创建ArticlePageProcessor.java
解析html的逻辑。
package site.exciter.article;

import org.springframework.stereotype.Component;
import us.codecraft.webmagic.Page;
import us.codecraft.webmagic.Site;
import us.codecraft.webmagic.processor.PageProcessor;
import us.codecraft.webmagic.selector.Selectable;

@Component
public class ArticlePageProcessor implements PageProcessor {

    private Site site = Site.me().setRetryTimes(3).setSleepTime(1000);

    @Override
    public void process(Page page) {
        String detail_urls_Xpath = "//*[@class='postTitle']/a[@class='postTitle2']/@href";
        String next_page_xpath = "//*[@id='nav_next_page']/a/@href";
        String next_page_css = "#homepage_top_pager > div:nth-child(1) > a:nth-child(7)";
        String title_xpath = "//h1[@class='postTitle']/a/span/text()";
        String date_xpath = "//span[@id='post-date']/text()";
        page.putField("title", page.getHtml().xpath(title_xpath).toString());
        if (page.getResultItems().get("title") == null) {
            page.setSkip(true);
        }
        page.putField("date", page.getHtml().xpath(date_xpath).toString());

        if (page.getHtml().xpath(detail_urls_Xpath).match()) {
            Selectable detailUrls = page.getHtml().xpath(detail_urls_Xpath);
            page.addTargetRequests(detailUrls.all());
        }

        if (page.getHtml().xpath(next_page_xpath).match()) {
            Selectable nextPageUrl = page.getHtml().xpath(next_page_xpath);
            page.addTargetRequests(nextPageUrl.all());

        } else if (page.getHtml().css(next_page_css).match()) {
            Selectable nextPageUrl = page.getHtml().css(next_page_css).links();
            page.addTargetRequests(nextPageUrl.all());
        }
    }

    @Override
    public Site getSite() {
        return site;
    }
}
7、创建ArticlePipeline.java
处理数据的持久化。
package site.exciter.article;

import org.slf4j.Logger;
import org.slf4j.LoggerFactory;
import org.springframework.beans.factory.annotation.Autowired;
import org.springframework.stereotype.Component;
import site.exciter.article.model.CmsContentPO;
import site.exciter.article.dao.CrawlerMapper;
import us.codecraft.webmagic.ResultItems;
import us.codecraft.webmagic.Task;
import us.codecraft.webmagic.pipeline.Pipeline;

import java.util.UUID;

@Component
public class ArticlePipeline implements Pipeline {

    private static final Logger LOGGER = LoggerFactory.getLogger(ArticlePipeline.class);

    @Autowired
    private CrawlerMapper crawlerMapper;

    public void process(ResultItems resultItems, Task task) {
        String title = resultItems.get("title");
        String date = resultItems.get("date");

        CmsContentPO contentPO = new CmsContentPO();
        contentPO.setContentId(UUID.randomUUID().toString());
        contentPO.setTitle(title);
        contentPO.setDate(date);

        try {
            boolean success = crawlerMapper.addCmsContent(contentPO) > 0;
            LOGGER.info("保存成功:{}", title);
        } catch (Exception ex) {
            LOGGER.error("保存失败", ex);
        }
    }
}
8、创建ArticleTask.java
执行抓取任务。
package site.exciter.article;

import org.slf4j.Logger;
import org.slf4j.LoggerFactory;
import org.springframework.beans.factory.annotation.Autowired;
import org.springframework.stereotype.Component;
import us.codecraft.webmagic.Spider;

import java.util.concurrent.Executors;
import java.util.concurrent.ScheduledExecutorService;
import java.util.concurrent.TimeUnit;

@Component
public class ArticleTask {
    private static final Logger LOGGER = LoggerFactory.getLogger(ArticlePipeline.class);

    @Autowired
    private ArticlePipeline articlePipeline;

    @Autowired
    private ArticlePageProcessor articlePageProcessor;

    private ScheduledExecutorService timer = Executors.newSingleThreadScheduledExecutor();

    public void crawl() {
        // 定时任务,每10分钟爬取一次
        timer.scheduleWithFixedDelay(() -> {
            Thread.currentThread().setName("ArticleCrawlerThread");

            try {
                Spider.create(articlePageProcessor)
                        .addUrl("http://www.cnblogs.com/dick159/default.html?page=2")
                        // 抓取到的数据存数据库
                        .addPipeline(articlePipeline)
                        // 开启5个线程抓取
                        .thread(5)
                        // 异步启动爬虫
                        .start();
            } catch (Exception ex) {
                LOGGER.error("定时抓取数据线程执行异常", ex);
            }
        }, 0, 10, TimeUnit.MINUTES);
    }
}
9、修改Application
package site.exciter.article;

import org.mybatis.spring.annotation.MapperScan;
import org.springframework.beans.factory.annotation.Autowired;
import org.springframework.boot.CommandLineRunner;
import org.springframework.boot.SpringApplication;
import org.springframework.boot.autoconfigure.SpringBootApplication;

@SpringBootApplication
@MapperScan(basePackages = "site.exciter.article.interface")
public class ArticleApplication implements CommandLineRunner {

    @Autowired
    private ArticleTask articleTask;

    public static void main(String[] args) {
        SpringApplication.run(ArticleApplication.class, args);
    }

    @Override
    public void run(String... args) throws Exception {
        articleTask.crawl();
    }
}
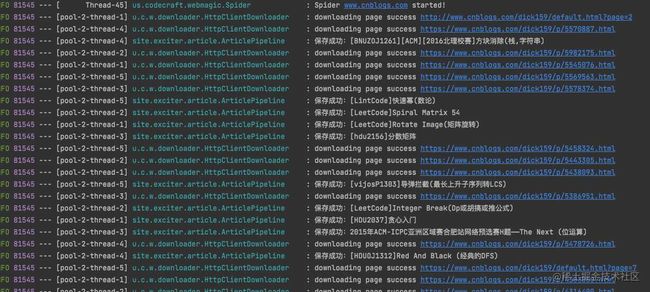
10、执行application,开始抓数据并入库

到此这篇关于SrpingBoot+WebMagic+MyBaties实现爬虫和数据入库的示例的文章就介绍到这了,更多相关SrpingBoot+WebMagic+MyBaties爬虫和数据入库内容请搜索脚本之家以前的文章或继续浏览下面的相关文章希望大家以后多多支持脚本之家!