简易版电商系统实现记录
前言
最近手上没啥活就干脆把之前一直想练的一个项目拿出来做做,挺有意思的一点就是平时都是自己在别人搭好的项目结构上直接写业务逻辑,当自己从0开始写项目的时候还是遇到了一些问题,也算是更宏观的学习如何做出一个项目。
这个项目的角色有用户和管理员,主要涉及到的业务逻辑有用户管理、商品管理、购物车管理、订单管理和支付管理。实际应用中的电商项目肯定很复杂,除了基本的业务逻辑外,如果数据访问量比较大的话还会加redis缓存机制,如果需要离线计算还会加Hadoop框架...这个练手的项目本身是使用SSM框架做的maven项目,打算直接使用spring boot加mybatis,另外使用swagger测试。
准备
- MySQL
- Navicat
- IDEA
- Git
实现过程
数据库
用户表、商品类别表、商品表、购物车表、订单表、订单详情表、支付信息表和地址信息表
1. 用户表
用户名不能重复,所以单服务器中多并发的情况下可以使用同步加锁的方法查询数据库中是否有同名用户(多个用户同时注册);如果是多节点即架构为分布式的时候,锁失效,需要使用数据库的唯一索引unique_key,通过btree的方式将username设为唯一索引,如此一来对于username的唯一性判断就交给mysql,业务中就无须加锁/同步方法去校验用户名是否存在。
2. 类别表
同一个父类别下的类别按照sort_order大小顺序排列,如果sort_order值相同,则按照id大小排序。
3. 商品表
产品主图中存储的是url的相对地址,获取的时候可以从数据库获取这个图片的相对地址后叠加项目配置文件中的图片存储路径;后续如果项目有迁移,直接修改配置文件中的路径即可,数据库不用做修改。
商品详情中存储很多html样式,还有图片外链等信息
decimal(20,2)表示20位数中有两位小数,即小数点前18位,小数点后2位。对应Java中使用BigDecimal进行计算(需要考虑到计算中丢失精度的问题)
库容量stock字段的大小是11位(100 0000 0000),并非11个
4. 购物车表
由于购物车表经常会通过userId进行查询,所以使用btree创建一个关于user_id的普通索引(根据这个索引查询会比普通字段查询效率高),提高查询效率。
5. 支付信息表
6. 订单表
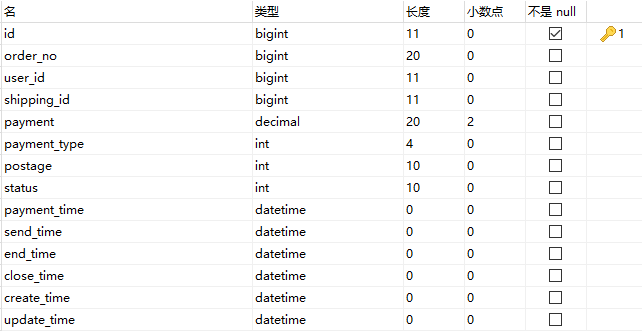
订单号加了个唯一索引,插入数据的时候保证订单号唯一,并且可用于提高查询效率(高频率通过订单号查询订单场景使用)
表中的payment字段表示商品付款金额,不需要与产品中的金额做联动处理(用户可以高于/低于原价购买商品。这个payment是用户购买的时候的真实付款金额)
对于订单状态的字段值设置,可以加上大小判断,例如如果一个订单状态是20,可以通过是否大于20判断这个订单是否以发货/交易成功/交易关闭(给状态字段加上其他处理,并非单纯的是否等于某个值)
支付时间是从支付宝回调的状态信息中的时间作为该订单支付的时间
交易关闭是指购买生成订单后长时间没有支付,导致订单失效,交易自动关闭的时间
7. 订单详情表
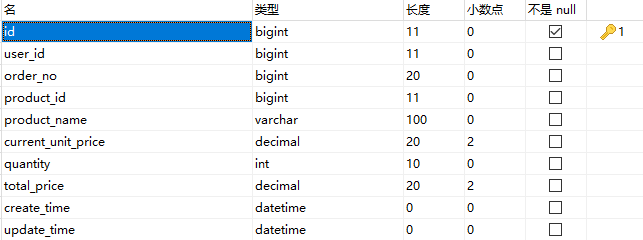
本身可以通过order_no然后通过支付信息表获取user_id,但是可以加上user_id这个冗余来提高查询效率(取消联表查询操作)
由于商品id对应的名称和图片后续会随着商家的修改而变动,所以订单明细中需要存储当前订单中产品的基本信息,以供用户后续自行查看(类似快照)
索引有两个,一个是order_no,另一个是user_id和order_no的组合索引(用于查询某个用户的某个订单信息)注意这两个索引均为普通索引,并没有唯一特性,所以在表中可以重复,主要用于提高查询效率
这里给出mysql表字段类型设计的时候的知识:
源自:https://www.cnblogs.com/yinqanne/p/9635106.html
源自:https://www.cnblogs.com/baizhanshi/p/8482068.html
从业务逻辑出发:
- 用户注册:在用户表中添加一个条目
- 用户登录:从用户表中查询是否有该用户,如果有且密码相同则登录成功进入系统
- 用户查询产品,涉及分类表和产品表,可以通过分类表的id查询某个类别下所有的产品
- 用户确定某个产品加入购入车,会在购物车信息表中添加一个条目(包含用户id、产品id、产品数量以及是否勾选的状态信息)。用户可以在购物车中看到自己添加到购物车的所有产品(展示购物车表中根据用户id所有的条目)
- 用户选择购买购物车中的某个条目,进入订单确认页,展示该用户所有的地址信息/给定一个设置好的默认地址信息,用户确认地址后生成一个订单信息插入到订单表中
- 订单表中包含用户id、订单id、地址id。金额通过产品id从产品表中获得(通过订单详情表与产品表一对一查询实现)。一个订单中可包含多个订单详情(订单详情表与订单表是多对一的关系),用户点击订单中的某个产品进入订单详情页(包括用户id、产品id、订单id、产品生成订单时的名称、图片、数量、总价等信息)
- 用户支付订单,由第三方产商生成流水号返回到订单表中,修改订单的流水信息和订单状态信息(未支付-已支付-订单取消等)
在设计数据表的时候需要注意的点:
- 在一般项目中不用外键,在后续数据量增大后外键对分库分表以及清洗数据操作不友好。触发器同理
- 考虑到后续访问量暴增的现象(推广/爆红),可以在表中添加冗余字段,减少表联查操作,提高查询效率(例如产品表中产品的图信息)
项目结构
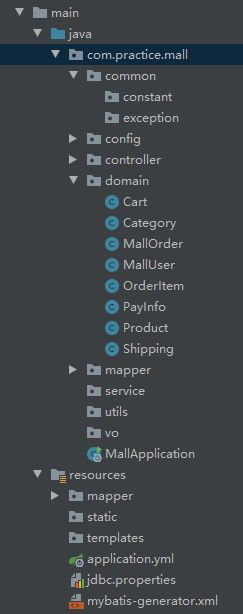
一般一个JavaWeb项目基本都使用MVC架构,分为controller、entity、service、mapper层分别代表与前端交互的、pojo与数据库表映射的、业务端、持久层。
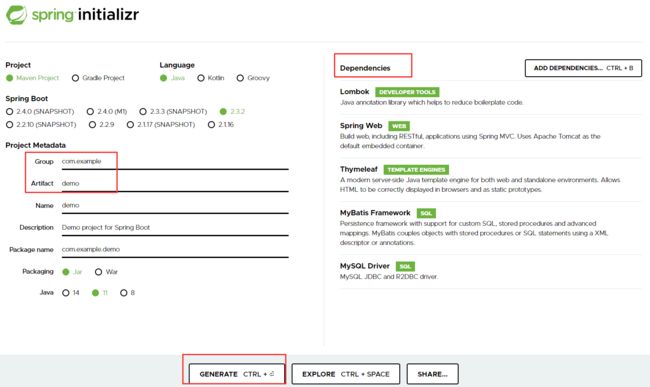
使用IDEA创建一个springboot项目,这里有一个技巧就是如果直接从IDEA中导入创建加载springboot项目会由于网慢导致失败,可以直接从https://start.spring.io/填写必要信息选择依赖,下载zip包到本地,直接解压导入即可~
使用MyBatis-Generator反向生成代码
1. 配置pom.xml依赖
				org.mybatis.generator
				mybatis-generator-maven-plugin
				1.3.2


					true

					true

					src/main/resources/mybatis-generator.xml


						mysql
						mysql-connector-java
						8.0.17
2. 编写数据库配置文件jdbc.properties
jdbc.driver=com.mysql.cj.jdbc.Driver
jdbc.url=jdbc:mysql://localhost:3306/mall?useUnicode=true&characterEncoding=utf8&useSSL=false&serverTimezone=GMT
jdbc.username=root
jdbc.password=root
3. 编写反向生成mybatis代码的配置文件mybatis-generator.xml
配置文件引用头:http://mybatis.org/generator/configreference/xmlconfig.html
具体配置项讲解可参考:https://baijiahao.baidu.com/s?id=1659247254821180985&wfr=spider&for=pc
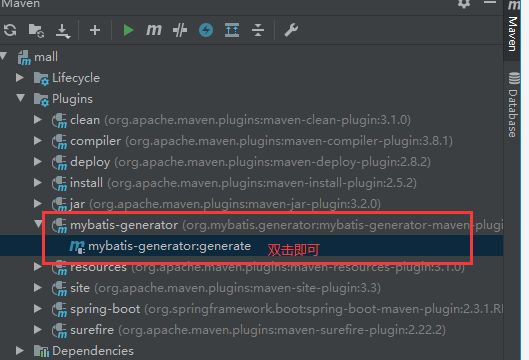
3. 利用mybatis-generator插件反向生成代码(domain实体类、mapper持久层类、mapper.xml MyBatis数据库CRUD代码)
至此,基本的CRUD操作已经都有了,后续根据业务需要会手动修改mapper文件对数据库进行操作。
配置Swagger-ui以及项目数据库连接池
1. 配置pom.xml
			io.springfox
			springfox-swagger2
			2.6.1


			io.springfox
			springfox-swagger-ui
			2.6.1


			com.alibaba
			druid-spring-boot-starter
			1.1.10
2. 编写项目配置文件application.yml/application.properties
#服务器端口和访问路径配置
server:
port: 8080
servlet:
context-path:

#数据库访问
spring:
  datasource:
    type: com.alibaba.druid.pool.DruidDataSource
    driver-class-name: com.mysql.cj.jdbc.Driver
    url: jdbc:mysql://localhost:3306/mall?useUnicode=true&characterEncoding=utf8&useSSL=false&serverTimezone=GMT
    username: root
    password: 123456
    druid:
      max-wait: 60000
      max-active: 10
      min-idle: 1
#配置mybatis(相当于普通MyBatis中的SqlMapConfig.xml主配置文件中指定映射配置文件的地址和别称)
mybatis:
  mapper-locations: classpath:/mapper/*.xml
  type-aliases-package: com.practice.mall.domain
  configuration:
    map-underscore-to-camel-case: true
    use-generated-keys: true
    cache-enabled: false
3. 编写SwaggerConfiguration类
@Configuration //容器的配置
@EnableSwagger2
public class SwaggerConfiguration {
    /**
     * 注册Bean实体
     * @return
     */
    @Bean //bean实体创建
    public Docket createRestApi(){

        return new Docket(DocumentationType.SWAGGER_2)
                .apiInfo(apiInfo())
                .select()
                //当前包名
                .apis(RequestHandlerSelectors.basePackage("com.practice.mall"))
                .paths(PathSelectors.any())
                .build();
    }

    /**
     * 构建API文档的详细信息方法
     * @return
     */
    public ApiInfo apiInfo(){
        return new ApiInfoBuilder()
                //API页面标题
                .title("Spring Boot实现电商系统")
                //创建者
                .contact(new Contact("ciery","https://mp.csdn.net/console/article",""))
                //版本
                .version("1.0")
                //描述
                .description("API描述")
                .build();
    }
}
4. 编写Controller层代码测试Swagger
@Api("用户管理API")
@RestController
public class UserController {
    @ApiOperation(value = "测试",notes = "测试swagger")
    @GetMapping("/test")
    public String test(@RequestParam("id") Long id){
        if(id==0){
            return "test failure";
        }
        return "test success";
    }
}
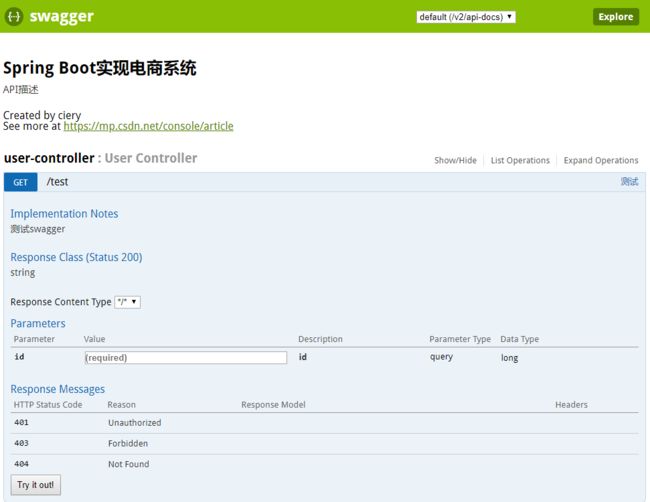
运行项目,在浏览器输入locahost:8080/swagger-ui.html进入swagger-ui界面
将项目部署到远程Git仓库中
实际项目开发中往往是多个人一起协作开发,所以git多版本代码管理工具就很派上用场,使用码云作为代码托管。在此简单记录部署代码到远程库中的过程。
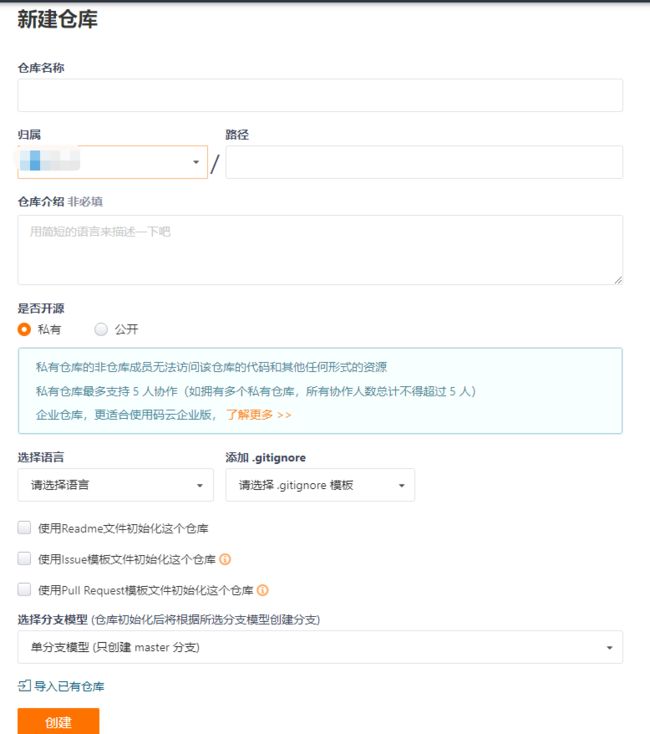
1. 创建远程仓库
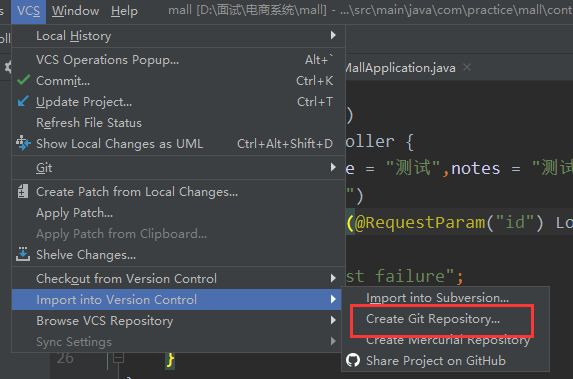
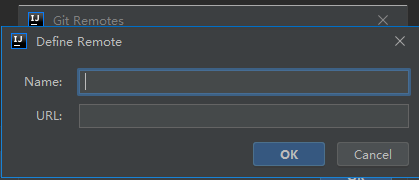
2. IDEA中创建本地git仓库并连接远程库
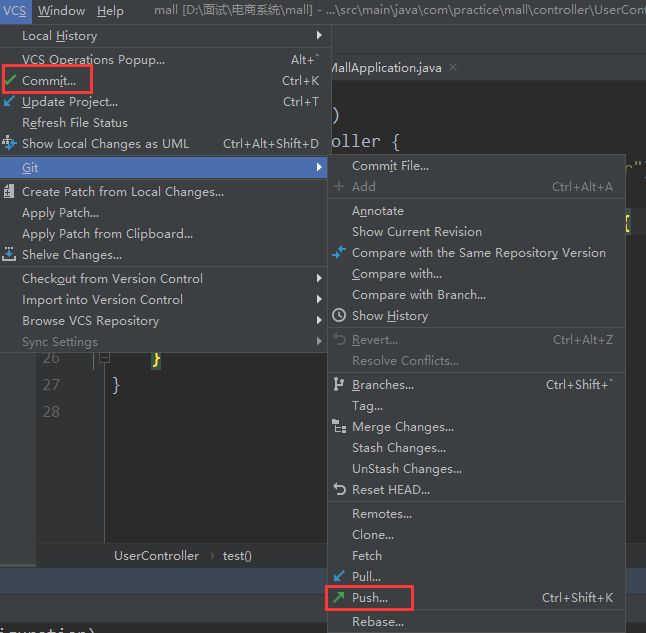
3. 先同步本地库和远程库,然后commit-push即可
更详细的操作可参考:https://blog.csdn.net/ILV_XJ/article/details/82662465
如果第一次push提示reject,参考:https://blog.csdn.net/ange2000561/article/details/104956898/
登录gitee的时候显示密码错误,参考:https://blog.csdn.net/Djj_Alice/article/details/98250882
通用模块
创建响应状态的枚举类枚举返回code和message,创建响应类,提高代码的可复用性。
public enum ResponseCode {
    //枚举值(包含定义的枚举类属性)
    SUCCESS(0,"SUCCESS"),
    ERROR(1,"ERROR"),
    NEED_LOGIN(10,"NEED_LOGIN"),
    ILLEGAL_ARGUMENT(2,"ILLEGAL_ARGUMENT");

    private final int code;
    private final String description;

    ResponseCode(int code,String description){ //默认访问修饰符为private
        this.code = code;
        this.description = description;
    }

    public int getCode(){
        return code;
    }

    public String getDescription(){
        return description;
    }
}
public class ServerResponse implements Serializable {
private int status;
private String message;
private T data; //使用泛型T封装返回值data对象,可适配多种数据类型,例如success时返回对象,failure时返回map等
//所有的构造方法都设置成private(访问修饰符为私有),外部不可访问
private ServerResponse(int status){
this.status = status;
}
private ServerResponse(int status,T data){
this.status = status;
this.data = data;
}
private ServerResponse(int status,String message,T data){
this.status = status;
this.message = message;
this.data = data;
}
private ServerResponse(int status,String message){
this.status = status;
this.message = message;
}
@JsonIgnore //json序列化后不会显示在json字段中
public boolean isSuccess(){
return this.status == ResponseCode.SUCCESS.getCode(); //判断status是否为0,如果是true则success,如果是false则fail
}
public int getStatus(){
return status;
}
public T getData(){
return data;
}
public String getMessage(){
return message;
}
public static ServerResponse createBySuccess(){
return new ServerResponse(ResponseCode.SUCCESS.getCode());
}
public static ServerResponse createBySuccess(T data){
return new ServerResponse(ResponseCode.SUCCESS.getCode(),data);
}
public static ServerResponse createBySuccess(String message,T data){
return new ServerResponse(ResponseCode.SUCCESS.getCode(),message,data);
}
public static ServerResponse createBySuccessMessage(String message){
return new ServerResponse(ResponseCode.SUCCESS.getCode(),message);
}
public static ServerResponse createByError(){
return new ServerResponse(ResponseCode.ERROR.getCode(),ResponseCode.ERROR.getDescription());
}
public static ServerResponse createByErrorMessage(String errorMessage){
return new ServerResponse(ResponseCode.ERROR.getCode(),errorMessage);
}
//用于一些非法操作的提示
public static ServerResponse createByErrorCodeMessage(int errorCode,String errorMessage){
return new ServerResponse(errorCode,errorMessage);
}
用户管理模块
用户管理模块主要包括:登录/登出、注册、忘记密码、修改密码、更新用户信息等。所有模块功能实现涉及controller、service、mapper层
1. 注册用户
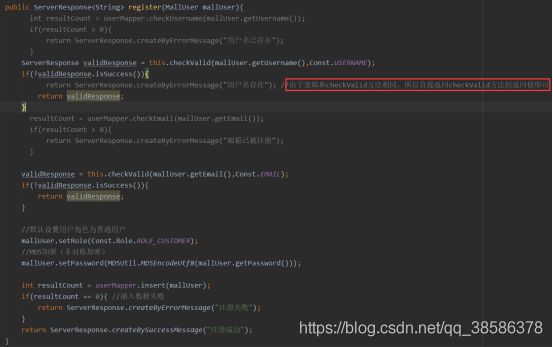
1.1 前端传到后端一个User对象,后端校验用户名是否存在,如果不存在继续;如果存在则返回ResponseBodyErrorMessage
1.2 检验邮箱是否存在,如果不存在继续;如果存在则返回ResponseBodyErrorMessage
1.3 利用加密算法对User的getPassword得到的密码进行加密,然后将User对象存入到数据库中,如果成功返回ResponseBodySuccessMessage
2. 登录
2.1 根据username判断数据库中是否有该username,如果没有提示该用户不存在
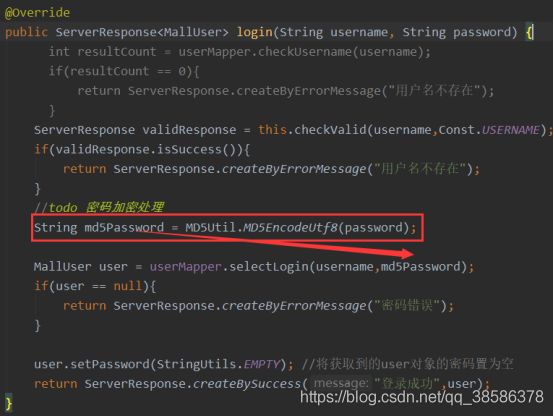
2.2 如果用户名存在,则根据username和password查询数据库是否有User对象,如果没有则提示密码错误(其中需要对前端传过来的password进行加密,然后在数据库中对注册时已经加密的密码进行匹配)
2.3 如果根据username和password查询到数据库的User对象则登录成功,使用StringUtils类的empty处理将密码置空,然后设置session的attribute为(“current_user”,密码置空后的User对象)
3. 登出
直接remove掉session的名字为current_user的attribute即可
4. 忘记密码
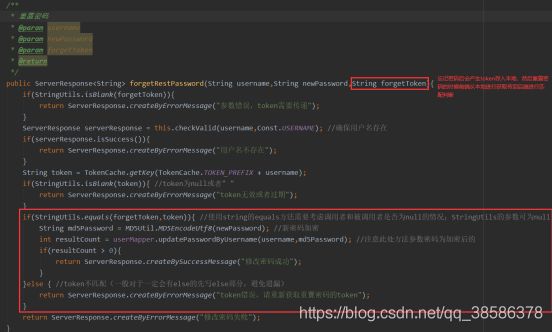
4.1 检查token是否为空
4.2 检查用户名是否存在
4.3 检查token是否和本地缓存的token匹配,若匹配则将新密码加密后更新到数据库中
5. 修改密码
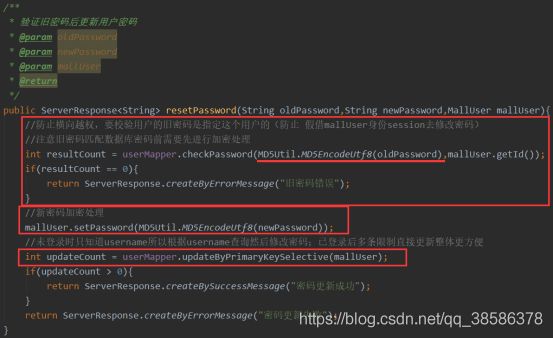
5.1 检查session是否为空
5.2 检查旧密码是否正确(注意旧密码要加密处理 然后再匹配)
5.3 新密码加密后更新user对象对应的password(user对象从session中获取),更新方法使用条件更新(不为null的更新)
6. 管理员登录:验证角色是否为管理员,避免横向越权
分类管理模块
分类管理模块包括对分类的CRUD操作和递归遍历获取所有的分类。
1. 校验是否为管理员:判断User对象的role即可,在很多管理员权限的操作中都需要进行角色判断
/**
     * 检查用户是否为管理员
     * @param user
     * @return
     */
    public ServerResponse checkAdmin(MallUser user){
        if(user != null && user.getRole() == Const.Role.ROLE_ADMIN){
            return ServerResponse.createBySuccess();
        }
        return ServerResponse.createByError();
    }
2. 删除分类:修改status为0即可,需要注意要修改本类别的status,还需要修改这个类别所有子类别的status,另外还需要将所有类别下的商品status置为已删除(业务处理要保证业务逻辑完整)
//controller
    @ApiOperation("删除分类")
    @DeleteMapping("/deleteCategory")
    public ServerResponse deleteCategory(HttpSession session,@RequestParam(value = "categoryId",required = true)Long categoryId){
        MallUser user = (MallUser)session.getAttribute(Const.CURRENT_USER);
        if(user == null){
            return ServerResponse.createByErrorCodeMessage(ResponseCode.NEED_LOGIN.getCode(),"请先登录");
        }
        //校验是否为管理员
        if(userService.checkAdmin(user).isSuccess()){//是管理员,处理 获取递归子分类信息的逻辑
            return categoryService.deleteCategory(categoryId);
        }else {
            return ServerResponse.createByErrorMessage("无权限,需要管理员权限");
        }
    }
/**
* 根据categoryId删除分类 删除之后对应分类下所有的分类和商品都应该处理(分类状态为删除,分类下商品状态为删除)
* @param categoryId
* @return
*/
@Transactional //事务
public ServerResponse deleteCategory(Long categoryId){
//获取本身和递归子分类
List categoryList = getChildCategoryDeep(categoryId).getData();
for(Category category : categoryList){
//获取分类下商品列表
ProductFilter productFilter = new ProductFilter();
productFilter.setCategoryId(category.getId());
List productList = productService.getProductListByProductFilter(productFilter).getData();
//修改分类下商品状态
for(Product product : productList){
ServerResponse response = productService.updateProductStatus(product.getId(), Const.ProductStatusEnum.DELETED.getCode());
if(!response.isSuccess()){
return ServerResponse.createByErrorMessage("删除失败");
}
}
//删除分类 注意此处为获取目标删除category列表中的id(而非直接方法参数id)
int deleteCount = categoryMapper.updateCategoryStatus(category.getId());
if(deleteCount == 0){
return ServerResponse.createByErrorMessage("删除失败");
}
}
return ServerResponse.createBySuccessMessage("删除成功");
} //mapper
/**
* 根据categoryId更新分类的status为false表示删除
* @param categoryId
* @return
*/
int updateCategoryStatus(Long categoryId);
//mapper.xml

    update category
    set status = 0,
    update_time = now()
    where id = #{categoryId}
3. 递归获取所有子分类:根据所给的分类Id获取表中所有parentId为这个id的分类集合,然后再遍历集合中的每个分类查找分类表中parentId为这些分类Id的数据,直到集合遍历完毕为止
/**
     * 利用递归获取所有的子节点
     * @param categorySet
     * @param categoryId
     * @return
     */
    private Set findChildCategoryId(Set categorySet,Long categoryId){
        Category category = categoryMapper.selectByPrimaryKey(categoryId);
        if(category != null){
            categorySet.add(category);
        }
        //查找子节点,递归算法需要一个退出条件
        List childCategoryList = categoryMapper.selectChildCategory(categoryId);
        //即使没有结果,也不是null而是[],所以无需判断是否为null
        for(Category childCategory : childCategoryList){
            findChildCategoryId(categorySet,childCategory.getId());
        }
        return categorySet;
    }


/**
     * 根据categoryId获取递归的子节点信息
     * @param categoryId
     * @return
     */
    public ServerResponse> getChildCategoryDeep(Long categoryId){
        Set categorySet = Sets.newHashSet();
        return ServerResponse.createBySuccess(findChildCategoryId(categorySet,categoryId));
    }
商品管理模块
商品管理分为前台普通用户管理和后台管理员管理。其中前台包括根据产品ID获取在售商品详情,分页条件查询商品列表;后台包括对商品的CURD操作,文件上传等功能。
一、前台管理
1. 查看在售商品详情
鉴于数据库product中的一些字段并不需要呈现给用户,所以可以创建一个view object(ProductDetail对象)用于传递给前端处理。
@Data
public class ProductDetail {
    private Long id;
    private Long categoryId;
    private String name;
    private String subTitle;
    private String mainImage;
    private String subImages;
    private String detail;
    private BigDecimal price;
    private Integer stock;
    private Integer status;

    private String createTime;
    private String updateTime;

    private Long parentCategoryId;
}
1.1 判断productId是否为null
1.2 根据productId查询数据库获取product对象
1.3 判断product是否为null
1.4 若product不为null,检查其status是否为在售,如果是则返回,否则提示商品已下架或删除
    /**
     * 用户根据productId获取商品列表,需要如果product的status不为1,则提示下架,不讲该商品返回给用户
     * @param productId
     * @return
     */
    public ServerResponse getUserProductDetail(Long productId){
        if(productId == null){
            return ServerResponse.createByErrorCodeMessage(ResponseCode.ILLEGAL_ARGUMENT.getCode(),ResponseCode.ILLEGAL_ARGUMENT.getDescription());
        }
        Product product = productMapper.selectByPrimaryKey(productId);
        if(product == null){
            return ServerResponse.createByErrorMessage("商品已下架或删除");
        }
        if(Const.ProductStatusEnum.ON_SALE.getCode() != product.getStatus()){
            return ServerResponse.createByErrorMessage("商品已下架或删除");
        }
        return ServerResponse.createBySuccess(assembleProductDetail(product));
    }
抽象出从数据库获取的product对象转为需要展示给前端的productDetail对象
/**
     * 将product对象转为前端展示的productDetail对象
     * @param product
     * @return
     */
    private ProductDetail assembleProductDetail(Product product){
        ProductDetail productDetail = new ProductDetail();
        BeanUtils.copyProperties(product,productDetail);//将product中相同属性赋值给productDetail


        //parentCategoryId
        Category category = categoryMapper.selectByPrimaryKey(productDetail.getCategoryId());
        if(category == null){
            productDetail.setParentCategoryId(0L); //默认父节点为0(商品不隶属于分类/分类已被删除)
        }else {
            productDetail.setParentCategoryId(category.getParentId());
        }

        //createTime updateTime
        productDetail.setCreateTime(DateTimeUtil.dateToStr(product.getCreateTime()));
        productDetail.setUpdateTime(DateTimeUtil.dateToStr(product.getUpdateTime()));

        return productDetail;
    }
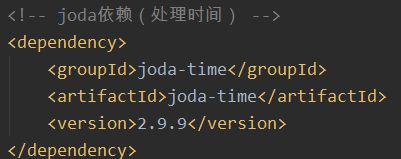
其中可以使用joda-time统一处理Date对象和String对象的转换(避免使用Calendar和SimpleDateFormat)
//使用joda处理时间
public class DateTimeUtil {
    private static final String STANDARD_FORMAT = "yyyy-MM-dd HH:mm:ss";


    //str->Date 使用默认的formatStr
    public static Date strToDate(String dateTimeStr){
        //定义格式化对象
        DateTimeFormatter dateTimeFormatter = DateTimeFormat.forPattern(STANDARD_FORMAT);
        //将字符串解析为DateTime对象
        DateTime dateTime = dateTimeFormatter.parseDateTime(dateTimeStr);
        //将DateTime转为Date输出
        return dateTime.toDate();
    }

    //Date->str 使用默认的formatStr
    public static String dateToStr(Date date){
        if(date == null) {
            return StringUtils.EMPTY; //返回""空字符串,而非null对象(可能会引起其他地方报错)
        }
        //将Date转为DateTime
        DateTime dateTime = new DateTime(date);
        //格式化为string后输出
        return dateTime.toString(STANDARD_FORMAT);
    }

    //重载overload str->Date 使用自定义的formatStr
    public static Date strToDate(String dateTimeStr,String formatStr){
        //定义格式化对象
        DateTimeFormatter dateTimeFormatter = DateTimeFormat.forPattern(formatStr);
        //将字符串解析为DateTime对象
        DateTime dateTime = dateTimeFormatter.parseDateTime(dateTimeStr);
        //将DateTime转为Date输出
        return dateTime.toDate();
    }

    //重载overload Date->str 使用自定义的formatStr
    public static String dateToStr(Date date,String formatStr){
        if(date == null) {
            return StringUtils.EMPTY; //返回""空字符串,而非null对象(可能会引起其他地方报错)
        }
        //将Date转为DateTime
        DateTime dateTime = new DateTime(date);
        //格式化为string后输出
        return dateTime.toString(formatStr);
    }
}其中对于商品的status创建枚举类进行说明,对于一些常用的状态判断可以不用下降到sql层,可以查询所有后进行判断
public enum ProductStatusEnum{
        ON_SALE(1,"在售"),
        OFF_SALE(2,"下架"),
        DELETED(3,"删除");

        private String value;
        private int code;

        ProductStatusEnum(int code,String value){
            this.code = code;
            this.value = value;
        }

        public String getValue() {
            return value;
        }

        public int getCode() {
            return code;
        }
    }
2. 条件查询返回列表
2.1 判断条件参数
2.2 根据categoryId获取本身类别和子类别的categoryIdList
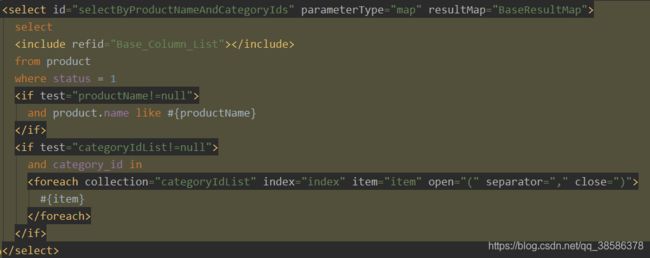
2.3 关键字productName做模糊查询处理
2.4 处理分页
2.5 查询并动态排序
创建排序常量
public interface ProductListOrderBy{
        //排序规则(升序/降序)
        Set PRICE_ASC_DESC = Sets.newHashSet("price_desc","price_asc"); //虽然只有两个值,但为提高查询效率使用Set(HashSet)
    }
/**
* 根据条件查询product返回分页结果,支持动态排序
* @param keyword 商品名称关键字 模糊查询
* @param categoryId 需要获取本身及对应的所有子分类
* @param pageNum
* @param pageSize
* @param orderBy desc/asc排序,如果为空不做排序处理(数据库默认为asc升序排列查询结果)
* @return
*/
public ServerResponse getProductList(String keyword,Long categoryId,int pageNum,int pageSize,String orderBy){
//参数判断 对于所有的String使用StringUtils进行判断
if(StringUtils.isBlank(keyword) && categoryId == null){
return ServerResponse.createByErrorCodeMessage(ResponseCode.ILLEGAL_ARGUMENT.getCode(),ResponseCode.ILLEGAL_ARGUMENT.getDescription());
}
//分类处理
List categoryList = new ArrayList<>();
if(categoryId != null){
Category category = categoryMapper.selectByPrimaryKey(categoryId);
if(category == null && StringUtils.isBlank(keyword)){
//没有该分类,且没有关键字,返回一个空集合,不报错
PageHelper.startPage(pageNum,pageSize);
List productLists = Lists.newArrayList();
PageInfo pageInfo = new PageInfo(productLists);
return ServerResponse.createBySuccess(pageInfo);
}
//返回父类下的所有子分类+本身
categoryList = categoryService.getChildCategoryDeep(category.getId()).getData();
}
//判断关键字
if(StringUtils.isNotBlank(keyword)){
keyword = new StringBuilder().append("%").append(keyword).append("%").toString(); //模糊查询
}
//处理pageHelper
PageHelper.startPage(pageNum,pageSize);
//排序处理 动态排序
if(StringUtils.isNotBlank(orderBy)){
if(Const.ProductListOrderBy.PRICE_ASC_DESC.contains(orderBy)){
String[] orderByArray = orderBy.split("_");
PageHelper.orderBy(orderByArray[0] + " " + orderByArray[1]); //order by 字段名 asc/desc
}
}
//sql逻辑
List categoryIdList = Lists.newArrayList();
for(Category category : categoryList){
categoryIdList.add(category.getId());
}
//使用三元运算符处理参数为"" " " [] null的现象
// (避免sql中where条件为"" " " []的情况,查了也是白查浪费效率;这些值类型全置为null,返回全查询结果即可)
List products = productMapper.selectByProductNameAndCategoryIds(StringUtils.isBlank(keyword) ? null : keyword,
categoryIdList.size() == 0 ? null : categoryIdList);
//pageHelper收尾
PageInfo pageResult = new PageInfo(products);
pageResult.setList(assembleProductList(products));
return ServerResponse.createBySuccess(pageResult);
} 二、后台商品管理
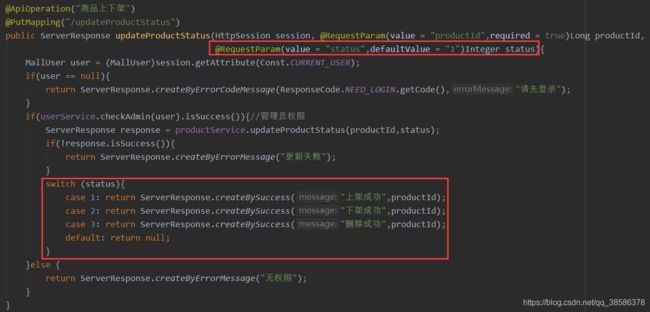
对商品的增加和更新,不再赘述,调用选择性的增加/更新数据的方法,将传入对象中不为null的属性赋值给数据库对应的字段,其余的使用默认值或原值即可。商品的上架、下架、删除也是直接修改对象的status并根据不同的status进行不同提示
1. 条件查询获取商品列表
1.1 检查session
1.2 检查角色
1.3 检查参数
1.4 分页加载
1.5 查询sql处理获取product集合
1.6 处理集合product对象,将其转为前端展示的vo对象
1.7 分页处理
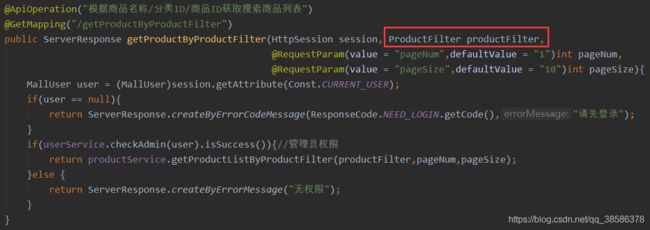
为方便前端传数据给后端,定义一个过滤器对象用来接收条件查询的条件
@Data
public class ProductFilter {

    private String productName;

    private Long categoryId;

    private Long productId;
}
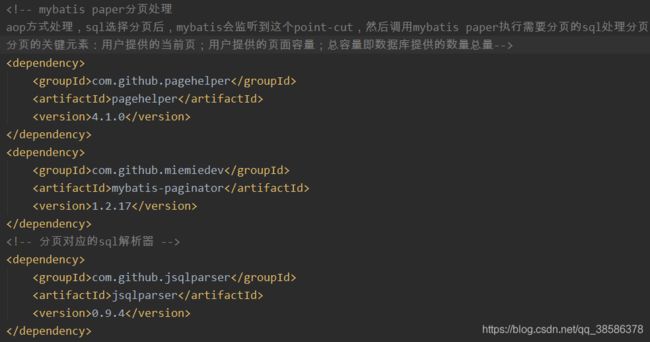
在pom.xml依赖配置文件中导入分页依赖
 /**
     * 根据productFilter对象条件查询product并分页处理
     * @param productFilter
     * @return
     */
    public ServerResponse getProductListByProductFilter(ProductFilter productFilter,int pageNum,int pageSize){
        //startPage-start
        PageHelper.startPage(pageNum,pageSize);

        //填充自己的sql查询逻辑
        String productName = productFilter.getProductName();
        if(productFilter.getCategoryId() == null && productFilter.getProductId() == null && StringUtils.isBlank(productName)){
            return ServerResponse.createByErrorMessage("搜索条件参数为空");
        }
        if(StringUtils.isNotBlank(productName)){ //模糊查询
            productFilter.setProductName(new StringBuilder().append("%").append(productName).append("%").toString());
        }
        List products = productMapper.selectByProductFilter(productFilter);

        //pageHelper收尾
        PageInfo pageResult = new PageInfo(assembleProductList(products));
        return ServerResponse.createBySuccess(pageResult);
    }
将结果转为ProductList对象传给前端
 //ProductList类
@Data
public class ProductList {
    private Long id;

    private Long categoryId;

    private String name;

    private String subTitle;

    private String mainImage;

    private BigDecimal price;

    private Integer status;
}


//Product对象转为ProductList对象

private List assembleProductList(List products){
        //创建需要展示给前端的数据对象List集合
        List productLists = Lists.newArrayList();
        //遍历赋值
        for(Product product : products){
            ProductList productList = new ProductList();
            BeanUtils.copyProperties(product,productList);

            productLists.add(productList);
        }

        return productLists;
    }
如果不加条件全查询所有的商品列表,重写一个流程,方法中不加ProductFilter即可
2. 上传文件
2.1 检查session
2.2 检查角色
2.3 上传文件(获取文件目录,重新拼接文件名,MultipartFile转File存入即可)
2.4 重构返回值为Map类型(一般统一使用自定义的高复用ServerResponse对象,也可根据需要自定义返回值对象)
@ApiOperation("上传富文本文件")
    @PostMapping("/richTextImgUpload")
    public Map richTextImgUpload(HttpSession session, @RequestParam(value = "uploadFile",required = false) MultipartFile file,
                                 HttpServletRequest request, HttpServletResponse response){
       Map resultMap = Maps.newHashMap();
        MallUser user = (MallUser)session.getAttribute(Const.CURRENT_USER);
        if(user == null){
            resultMap.put("success",false);
            resultMap.put("msg","请先登录");
        }

        //富文本中对返回值有自己的要求,使用simditor
        if(userService.checkAdmin(user).isSuccess()){//管理员权限,避免非管理员权限用户多次上传文件将磁盘占满
            //获取文件路径
            String path = request.getSession().getServletContext().getRealPath("upload");
            //获取上传成功后的文件名
            String targetFileName = fileService.upload(file,path);
            if(StringUtils.isBlank(targetFileName)){
                resultMap.put("success",false);
                resultMap.put("msg","上传失败");
            }

            resultMap.put("success",true);
            resultMap.put("msg","上传成功");

            //对返回响应值的约定
            response.addHeader("Access-Control-Allow-Headers","X-File-Name");
            return resultMap;
        }else {
            resultMap.put("success",false);
            resultMap.put("msg","无权限");
            return resultMap;
        }
    }
/**
* 根据file和path上传文件到本地/ftp服务器
* @param file
* @param path
* @return
*/
public String upload(MultipartFile file,String path){
//获取文件名
String fileName = file.getOriginalFilename();
//扩展名即文件后缀 abc.jpg 使用lastIndexOf是从最后一个开始取.,以防出现abc.bc.jpg多个.的文件名
String fileExtensionName = fileName.substring(fileName.lastIndexOf(".") + 1);
//为防止上传的文件名相同(同名文件覆盖原有文件),对文件名重命名,使用UUID
String uploadFileName = UUID.randomUUID().toString() + "." + fileExtensionName;
//log日志输出
logger.info("开始上传文件,文件名:{},上传的路径:{},新文件名:{}",fileName,path,uploadFileName);
//创建文件夹(文件夹不存在则需要手动创建)
File fileDir = new File(path);
if(!fileDir.exists()){
fileDir.setWritable(true); //不一定文件一开始有写的权限,所以需要程序赋予一下
fileDir.mkdirs(); //创建目录
}
//创建文件(File不存在则自动创建)
File targetFile = new File(path,uploadFileName);
try {
file.transferTo(targetFile); //multipartFile转为File对象即文件上传至upload文件夹中
//todo 将文件上传到FTP服务器上
//todo 上传之后,将upload下的文件删除(以防后续tomcat服务器上的这个文件夹积压影响性能)
targetFile.delete();
} catch (IOException e) {
logger.error("上传文件异常",e);
}
return null;
}需要注意对于文件处理中前端需要标记
enctype="multipart/form-data"购物车管理模块
购物车模块主要包括添加购物车、更新购物车、移除购物车、全选/全不选、单选/单反选、计算购物车产品总数等,其中计算产品总数不强制用户登录(未登录状态显示产品数为0)![]() ,其余功能均需保证用户处于登录状态(即验证session中的user是否为null)
,其余功能均需保证用户处于登录状态(即验证session中的user是否为null)
MallUser currentUser = (MallUser) session.getAttribute(Const.CURRENT_USER);
        if(currentUser == null){
            return ServerResponse.createByErrorCodeMessage(ResponseCode.NEED_LOGIN.getCode(),"请先登录");
        }
另外由于数据库中的cart表不足以支撑前端的购物车呈现(产品图、产品总数、产品副标题、总价等信息),所以创建两个vo类用来表示购物车中的每个产品CartProduct和整个购物车对象CartVo
@Data
public class CartProduct { //结合产品product和购物车cart的对象(购物车中可以看到product的名字 图片等信息,一个产品一个CartProduct)
    /** 购物车Id */
    private Long id;
    /** 用户ID */
    private Long userId;
    private Long productId;
    /** 购物车中该product的数量 */
    private Integer quantity;
    private String productName;
    private String productSubTitle;
    private BigDecimal productPrice; //单价
    /** 产品图片(根据url在服务器中查找图片并进行呈现)*/
    private String productMainImage;
    /** 购物车中该产品的总价 */
    private BigDecimal productTotalPrice;
    /** 该产品的库存量 */
    private Integer productStock;
    /**  产品在购物车中是否被勾选(如果被勾选显示总价) */
    private Integer productChecked;
    /** 限制数量的一个返回结果(如果用户选择数量超出产品总库存,则返回提示,前端显示提示并修改 产品选择数量 为该产品的最大数量) */
    private String limitQuantity;
}
@Data //@Data的用处:实体类中无需手动加setter和getter方法,其他类中继续new该对象,然后setXXX()/getXXX()即可
public class CartVo { //购物车总和
private List cartProductList; //购物车列表
BigDecimal cartTotalPrice; //默认属性的访问修饰符为private 购物车选中产品的总价
private Boolean allChecked;//是否勾选
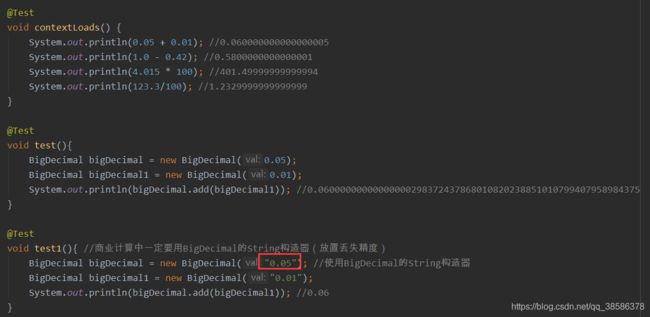
} 需要特别注意的一点是电商系统中最重要的一点就是金额的计算,一般金额都会使用double类型,但是直接double加减乘除会存在精度丢失的情况,这个是非常严重的错误。所以Java中对于金额/其他不允许精度丢失的计算都会时间BigDecimal,并且是String类型作为参数。
如果项目中对于BigDecimal计算较多,可以抽象成一个类来统一管理。
public class BigDecimalUtil {
    //构造器私有化,放置外部调用
    private BigDecimalUtil(){}

    /**
     * double加法
     * @param v1
     * @param v2
     * @return
     */
    public static BigDecimal add(double v1, double v2){
        BigDecimal b1 = new BigDecimal(Double.toString(v1)); //转为string构造器
        BigDecimal b2 = new BigDecimal(Double.toString(v2));
        return b1.add(b2);
    }

    /**
     * double减法
     * @param v1
     * @param v2
     * @return
     */
    public static BigDecimal sub(double v1, double v2){
        BigDecimal b1 = new BigDecimal(Double.toString(v1)); //转为string构造器
        BigDecimal b2 = new BigDecimal(Double.toString(v2));
        return b1.subtract(b2);
    }

    /**
     * double乘法
     * @param v1
     * @param v2
     * @return
     */
    public static BigDecimal mul(double v1, double v2){
        BigDecimal b1 = new BigDecimal(Double.toString(v1)); //转为string构造器
        BigDecimal b2 = new BigDecimal(Double.toString(v2));
        return b1.multiply(b2);
    }

    /**
     * double除法(需要进行四舍五入处理,防止遇到除不尽的情况)
     * @param v1
     * @param v2
     * @return
     */
    public static BigDecimal div(double v1, double v2){
        BigDecimal b1 = new BigDecimal(Double.toString(v1)); //转为string构造器
        BigDecimal b2 = new BigDecimal(Double.toString(v2));
        return b1.divide(b2,2,BigDecimal.ROUND_HALF_UP); //四舍五入,保留两位小数
    }
}
1. 查看购物车列表
1.1 检查session,如果用户没登录,提示登录
1.2 从数据库获取所有的cart
1.3 根据cart和其productId对应的product构建cartProduct(vo对象)核实quantity以及计算某个产品的总价(BigDecimal计算)
1.4 获取所有的cartProduct构建cartVo(购物车vo对象)计算购物车总价 并返回(其中cartVo有一个属性是否全选:在数据库中根据userId查看是否有checked=0的,如果有则说明不是全选返回0即可)
 /**
     * 返回前端展示的购物车对象(购物车列表。是否全选、总价)
     * @param userId
     * @return
     */
    private CartVo getCartVoLimit(Long userId){
        CartVo cartVo = new CartVo();
        //查询userId对应的所有cart对象
        List cartList = cartMapper.selectCartByUserId(userId);

        List cartProductList = Lists.newArrayList();

        //处理总价精度问题
        BigDecimal cartTotalPrice = new BigDecimal("0");

        if(!CollectionUtils.isEmpty(cartList)){ //购物车不为空
            for(Cart cart : cartList){ //遍历获取CartProduct对象(需要展示给前端的)
                CartProduct cartProduct = new CartProduct();
                cartProduct.setId(cart.getId());
                cartProduct.setUserId(userId);
                cartProduct.setProductId(cart.getProductId());

                Product product = productMapper.selectByPrimaryKey(cart.getProductId());
                if(product != null){
                    cartProduct.setProductMainImage(product.getMainImage());
                    cartProduct.setProductName(product.getName());
                    cartProduct.setProductSubTitle(product.getSubTitle());
                    cartProduct.setProductPrice(product.getPrice());
                    cartProduct.setProductStock(product.getStock());
                    //判断库存
                    int buyLimitCount = 0;
                    if(product.getStock() >= cart.getQuantity()){
                        buyLimitCount = cart.getQuantity();
                        cartProduct.setLimitQuantity(Const.Cart.LIMIT_NUM_SUCCESS);
                    }else {
                        buyLimitCount = product.getStock();
                        cartProduct.setLimitQuantity(Const.Cart.LIMIT_NUM_FAIL);
                        //购物车中更新有效库存
                        cart.setQuantity(buyLimitCount);
                        cartMapper.updateByPrimaryKeySelective(cart);
                    }
                    cartProduct.setQuantity(buyLimitCount);
                    //计算总价cartProduct.getQuantity() Integer隐性向上转型为Double cartProduct.getProductPrice().doubleValue() doubleValue()转型为double
                    cartProduct.setProductTotalPrice(BigDecimalUtil.mul(cartProduct.getProductPrice().doubleValue(),cartProduct.getQuantity()));
                    cartProduct.setProductChecked(cart.getChecked());
                }
                if(cart.getChecked() == Const.Cart.CHECKED){//如果已勾选,增加到整个购物车总价中
                    cartTotalPrice = BigDecimalUtil.add(cartTotalPrice.doubleValue(),cartProduct.getProductTotalPrice().doubleValue());
                }
                cartProductList.add(cartProduct);
            }
        }

        cartVo.setCartTotalPrice(cartTotalPrice);
        cartVo.setCartProductList(cartProductList);
        cartVo.setAllChecked(this.getAllCheckedStatus(userId));
        return cartVo;
    }

/**
     * 检查用户的购物车是否被全选
     * @param userId
     * @return
     */
    private boolean getAllCheckedStatus(Long userId){
        if(userId == null){
            return false;
        }
//        return cartMapper.selectCartProductCheckedStatusByUserId(userId) == 0 ? true : false;
        return cartMapper.selectCartProductCheckedStatusByUserId(userId) == 0; //本身 == 0 这个运算返回的就是true/false
    }
查询购物车是否全选,使用反向思维查询购物车这个user对应的对象是否有未选中的即可
2. 增加购物车
2.1 业务场景是在产品详情页添加到购物车。根据userId、count、productId增加一个Cart对象(实际中应该有productType商品属性)
2.2 检查session
2.3 添加cart(检查是否购物车中该用户本身就有productId,如果有则使用sql的update方法,如果没有则使用sql的insert方法)
3. 更新购物车
3.1 业务场景是直接在购物车中更新。实际中也有更新产品type(商品的属性选择)
3.2 检查session
3.3 更新cart
4. 移除购物车 同上直接给出sql语句,支持批量删除,所以productId为一个List
    delete from cart
    where user_id = #{userId}

    and product_id in

        #{item}
5. 全选
5.1 由于前端如果包含全选/不选的值,和后端的耦合性会变强(后端字段改了前端还得联调),所以干脆全选对应一个controller接口,全反选对应另一个controller接口(每个接口中分别调用不同的Const中声明的CHECKED/UNCHECKED)
5.2 检查session
5.3 修改userId对应的checked
/**
     * 选/不选购物车CartVo中的购物车对象CartProduct(如果productId为null的话为全选/全反选)
     * @param userId
     * @return
     */
    public ServerResponse selectOrUnSelectCart(Long userId,Long productId,Integer checked){
        if(userId == null || checked == null){ //不判断productId,因为全选/全不选中productId==null
            return ServerResponse.createByErrorCodeMessage(ResponseCode.ILLEGAL_ARGUMENT.getCode(),ResponseCode.ILLEGAL_ARGUMENT.getDescription());
        }
        int updateCount = cartMapper.checkedOrUncheckedProduct(userId,productId,checked);
        if(updateCount == 0){ //可能本身就是全选状态,更新选中结果updateCount也不会为0(重新更新一遍,因为where中没有checked的判断)
            // (当然实际场景中不会说全选了之后再去选中)
            return ServerResponse.createByErrorMessage("全选/反选失败");
        }
        return listCart(userId);
    }
    update cart
    set cart.checked = #{checked},
    update_time = now()
    where user_id = #{userId}

      and product_id = #{productId}
全不选同全选,只是传入的是Const.Cart.UN_CHECKED参数
6. 单反选
由于全选是没有显示productId,而单选限制,可以sql语句中使用if标签进行productId是否为null的判断,如果非null加上即为修改某个产品的checked字段(这样的话全选/全不选/单选/单反选都可以调用一个service-mapper,全选/全不选在controller层调用service中的方法置productId为null即可)
单选同单反选,只是传入的是CHECKED参数
7. 查询购物车商品总数
7.1 (每个产品的quantity之和):用于购物车(num)
7.2检查session,如果用户没登录,返回0
7.3 根据userId在cart中使用sum(quantity)得到所有产品的数量(每个产品的数量之和)
7.4 鉴于可能会userId没有添加购物车,sum返回null,sql会报错。所以使用IFNULL(sum(quantity),0)方法将将null置为0
需要注意一点:MyBatis中关于update、delete和insert写操作都需要保证sql标签上有parameter(Type/Map);select读操作都需要保证sql标签上有parameter和result(Type/Map),否则执行sql会报错
收货地址管理模块
收货地址模块包括对收货地址的CURD操作,其中需要注意的是查询地址详情、更新地址、删除地址都需要防止横向越权。
横向越权:攻击者尝试访问与他拥有相同权限的用户的资源,一般的解决方法:建立用户和资源的绑定关系,这样用户对任何资源进行操作时,通过该绑定关系都可确保该资源是属于该用户的,简单来说就是执行sql的是时候添加用户作为筛选条件
1. 添加地址
1.1 shipping中的userId根据session中的user赋值,添加后返回自增生成的shippingId
1.2 检查session
1.3 赋值userId属性
1.4 insert操作
1.5 返回整个新增shipping的id,以便前端根据id返回详情
......
2. 更新地址
2.1 防止横向越权,覆盖shipping中的userId,同时update的条件添加userId的判断
2.2 检查session
2.3 赋值userId属性
2.4 Update操作
/**
     * 根据userId和shipping更新shipping(同样sql语句要带userId,防止横向越权,因为shipping对象也可随意创建,
     * 传入的shipping对象不会对userId进行校验,验证是当前操作用户)
     * @param userId
     * @param shipping
     * @return
     */
    public ServerResponse updateShipping(Long userId, Shipping shipping){
//        int updateCount = shippingMapper.updateByPrimaryKeySelective(shipping);
//        只要登录的用户都可以拼接shipping对象进url然后调用此方法
//        随意修改某个id的shippingId(相当于只要登录了就可以随意修改shipping表) userId没起作用
        //解决方法:根据userId和shipping执行sql中的update语句(锁定为当前用户操作,鉴于用户一般无法知道他人的id)
        shipping.setUserId(userId); //更新的shipping绑定到当前userId上
        int updateCount = shippingMapper.updateShipping(shipping); //userId锁定,update的时候userId不变
        if(updateCount == 0){
            return ServerResponse.createByErrorMessage("更新收货地址失败");
        }
        return ServerResponse.createBySuccessMessage("更新收货地址成功");
    }
    update shipping


        receiver_name = #{receiverName,jdbcType=VARCHAR},


        receiver_phone = #{receiverPhone,jdbcType=VARCHAR},


        receiver_province = #{receiverProvince,jdbcType=VARCHAR},


        receiver_city = #{receiverCity,jdbcType=VARCHAR},


        receiver_district = #{receiverDistrict,jdbcType=VARCHAR},


        receiver_address = #{receiverAddress,jdbcType=VARCHAR},


        receiver_zip = #{receiverZip,jdbcType=VARCHAR},


        create_time = #{createTime,jdbcType=TIMESTAMP},

      update_time = now(),

    where id = #{id,jdbcType=BIGINT}
    and user_id = #{userId,jdbcType=BIGINT}
3. 删除地址:防止横向越权,根据userId和shippingId删除
    delete from shipping

    where shipping.id = #{shippingId}
    and user_id = #{userId}
4. 查询地址详情:防止横向越权,根据userId和shippingId查询
5. 查询地址列表:根据userId查询并进行分页(分页处理同商品管理模块)
    /**
     * 根据userId查询所有shipping,并分页展示
     * @param userId
     * @param pageNum
     * @param pageSize
     * @return
     */
    public ServerResponse getShippingList(Long userId,int pageNum,int pageSize){
        //分页处理
        PageHelper.startPage(pageNum,pageSize);

        //sql处理 根据userId查询所有的shipping对象
        List shippingList = shippingMapper.selectByUserId(userId);

        //构造pageInfo 并返回
        return ServerResponse.createBySuccess(new PageInfo(shippingList));
    }
支付管理模块
支付管理模块主要是用户支付订单(调用支付宝当面付API返回支付二维码),验证支付宝回调数据,查询订单支付状态等功能。
1. 注册支付宝开发者身份,下载联调支付宝当面付功能
支付宝沙箱支付功能参考:https://blog.csdn.net/weixin_44520739/article/details/89214609
支付宝沙箱官方资料:
https://opendocs.alipay.com/open/194/106078
https://opendocs.alipay.com/open/200/105311
需要的工具:
当面付demo:https://opendocs.alipay.com/open/54/104506
沙箱版钱包:https://openhome.alipay.com/platform/appDaily.htm?tab=tool
支付宝平台开发助手:https://opendocs.alipay.com/open/291/105971
1.1 注册登录支付宝沙箱之后,下载当面付demo,根据开发助手生成公钥和私钥,修改demo中的zfbinfo.properties
生成公钥私钥和修改当面付demo配置文件都在支付宝提供的文档中有写,此处不再赘述,
1.2 运行main方法,获取二维码生成链接,利用二维码生成器生成二维码图片(https://cli.im/)
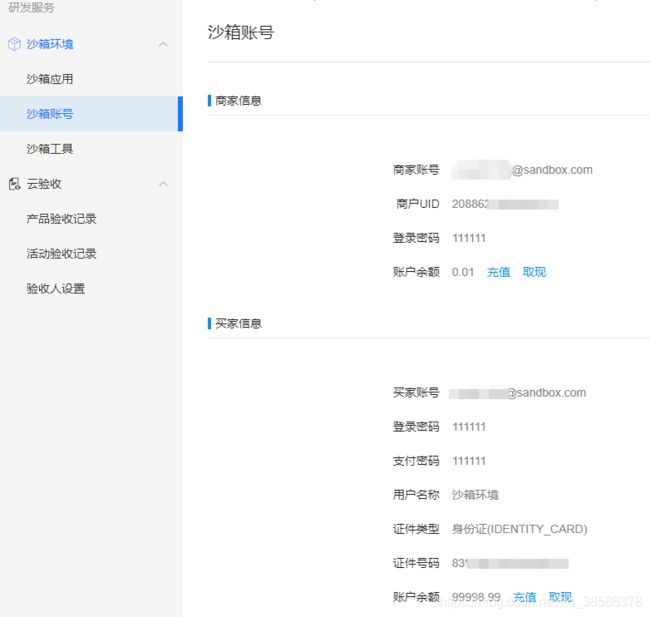
1.3 利用android手机下载的沙箱版支付宝app,使用沙箱提供的买家账号扫描二维码完成支付,并分别登陆验证买家和卖家的账单,交易成功 结果如下↓,商家余额0.01
1.4 mall系统集成当面付依赖 从demo中复制四个jar包到mall新建的webapp/lib下,另外pom.xml中加入demo其他lib中的依赖,注意版本要保持一致
			commons-codec
			commons-codec
			1.10


			commons-configuration
			commons-configuration
			1.10


			commons-lang
			commons-lang
			2.6


			commons-logging
			commons-logging
			1.1.1


			com.google.zxing
			core
			2.1


			com.google.code.gson
			gson
			2.3.1


			org.hamcrest
			hamcrest-core
			1.3
1.5 复制demo中的代码到mall系统中
2. 用户支付订单功能
2.1 检查session
2.2 根据userId和orderNo查询是否有该订单
2.3 如果有则将订单存储到map集合中,并调用支付宝支付API,生成二维码上传到服务器上(demo中Main类)
   //controller
 @ApiOperation("根据订单返回支付二维码")
    @GetMapping("/pay")
    public ServerResponse pay(HttpSession session, Long orderNo, HttpServletRequest request){
        MallUser currentUser = (MallUser)session.getAttribute(Const.CURRENT_USER);
        if(currentUser == null){
            return ServerResponse.createByErrorCodeMessage(ResponseCode.NEED_LOGIN.getCode(),ResponseCode.NEED_LOGIN.getDescription());
        }

        String path = request.getSession().getServletContext().getRealPath("upload");

        return orderService.pay(orderNo,currentUser.getId(),path);
    }


//service
//支付调用支付宝支付API得到支付二维码
    public ServerResponse pay(Long orderNo, Long userId, String path) {
        Map resultMap = Maps.newHashMap();

        //先查询order是否存在
        MallOrder order = mallOrderMapper.selectByUserIdAndOrderNo(userId, orderNo);
        if (order == null) {
            return ServerResponse.createByErrorMessage("用户没有该订单");
        }
        resultMap.put("orderMap", String.valueOf(order));

        // (必填) 商户网站订单系统中唯一订单号,64个字符以内,只能包含字母、数字、下划线,
        // 需保证商户系统端不能重复,建议通过数据库sequence生成,
        String outTradeNo = order.getOrderNo().toString();

        // (必填) 订单标题,粗略描述用户的支付目的。如“xxx品牌xxx门店当面付扫码消费”
        String subject = new StringBuilder().append("mall扫描支付,订单号:").append(outTradeNo).toString();

        // (必填) 订单总金额,单位为元,不能超过1亿元
        // 如果同时传入了【打折金额】,【不可打折金额】,【订单总金额】三者,则必须满足如下条件:【订单总金额】=【打折金额】+【不可打折金额】
        String totalAmount = order.getPayment().toString(); //总金额

        // (可选) 订单不可打折金额,可以配合商家平台配置折扣活动,如果酒水不参与打折,则将对应金额填写至此字段
        // 如果该值未传入,但传入了【订单总金额】,【打折金额】,则该值默认为【订单总金额】-【打折金额】
        String undiscountableAmount = "0";

        // 卖家支付宝账号ID,用于支持一个签约账号下支持打款到不同的收款账号,(打款到sellerId对应的支付宝账号)
        // 如果该字段为空,则默认为与支付宝签约的商户的PID,也就是appid对应的PID
        String sellerId = "";

        // 订单描述,可以对交易或商品进行一个详细地描述,比如填写"购买商品2件共15.00元"
        String body = new StringBuilder().append("订单").append(outTradeNo).append("购买商品共").append(totalAmount).append("元").toString();

        // 商户操作员编号,添加此参数可以为商户操作员做销售统计
        String operatorId = "test_operator_id";

        // (必填) 商户门店编号,通过门店号和商家后台可以配置精准到门店的折扣信息,详询支付宝技术支持
        String storeId = "test_store_id";

        // 业务扩展参数,目前可添加由支付宝分配的系统商编号(通过setSysServiceProviderId方法),详情请咨询支付宝技术支持
        ExtendParams extendParams = new ExtendParams();
        extendParams.setSysServiceProviderId("2088100200300400500");

        // 支付超时,定义为120分钟
        String timeoutExpress = "120m";

        // 商品明细列表,需填写购买商品详细信息,
        List goodsDetailList = new ArrayList();

        //获取订单详情
        List orderItemList = orderItemMapper.selectByOrderNoAndUserId(order.getOrderNo(), userId);
        for (OrderItem orderItem : orderItemList) {
             创建一个商品信息,参数含义分别为商品id(使用国标)、名称、单价(单位为分)、数量,如果需要添加商品类别,详见GoodsDetail
            GoodsDetail goods = GoodsDetail.newInstance(orderItem.getProductId().toString(), orderItem.getProductName(),
                    // 单价 * 100 转为单位为分
                    BigDecimalUtil.mul(orderItem.getCurrentUnitPrice().doubleValue(), new Double(100).doubleValue()).longValue(),
                    orderItem.getQuantity());
            goodsDetailList.add(goods);
        }

        // 创建扫码支付请求builder,设置请求参数
        AlipayTradePrecreateRequestBuilder builder = new AlipayTradePrecreateRequestBuilder()
                .setSubject(subject).setTotalAmount(totalAmount).setOutTradeNo(outTradeNo)
                .setUndiscountableAmount(undiscountableAmount).setSellerId(sellerId).setBody(body)
                .setOperatorId(operatorId).setStoreId(storeId).setExtendParams(extendParams)
                .setTimeoutExpress(timeoutExpress)
                .setNotifyUrl(PropertiesUtil.getProperty("alipay.callback.url"))//支付宝服务器主动通知商户服务器里指定的页面http路径,根据需要设置
                .setGoodsDetailList(goodsDetailList);


        /** 一定要在创建AlipayTradeService之前调用Configs.init()设置默认参数
         *  Configs会读取classpath下的zfbinfo.properties文件配置信息,如果找不到该文件则确认该文件是否在classpath目录
         */
        Configs.init("zfbinfo.properties");

        /** 使用Configs提供的默认参数
         *  AlipayTradeService可以使用单例或者为静态成员对象,不需要反复new
         */
        AlipayTradeService tradeService = new AlipayTradeServiceImpl.ClientBuilder().build();

        AlipayF2FPrecreateResult result = tradeService.tradePrecreate(builder);

        switch (result.getTradeStatus()) {
            case SUCCESS:
                log.info("支付宝预下单成功: )");

                AlipayTradePrecreateResponse response = result.getResponse();
                dumpResponse(response);

                File folder = new File(path);
                if(!folder.exists()){
                    folder.setWritable(true); //可写
                    folder.mkdirs(); //创建路径
                }

                // 需要修改为运行机器上的路径
                //细节:获取的path中最后没有 /,所以在拼接的时候要加 /
                String qrPath = String.format(path + "/qr-%s.png", response.getOutTradeNo());
                String qrFileName = String.format("qr-%s.png",response.getOutTradeNo());
                ZxingUtils.getQRCodeImge(response.getQrCode(),256,qrPath);


                //创建目标文件后,上传到FTP服务器上
                File targetFile = new File(path,qrFileName);
                try {
                    FTPUtil.uploadFile(Lists.newArrayList(targetFile));
                } catch (IOException e) {
                    log.error("上传二维码异常",e);
                    e.printStackTrace();
                }
                log.info("qrPath:" + qrPath);

                String qrUrl = PropertiesUtil.getProperty("ftp.server.http.prefix") + targetFile.getName();

                resultMap.put("qrUrl",qrUrl);  //二维码链接
                return ServerResponse.createBySuccess(resultMap);

            case FAILED:
                log.error("支付宝预下单失败!!!");
                return ServerResponse.createByErrorMessage("支付宝预下单失败!!!");
            case UNKNOWN:
                log.error("系统异常,预下单状态未知!!!");
                return ServerResponse.createByErrorMessage("系统异常,预下单状态未知!!!");
            default:
                log.error("不支持的交易状态,交易返回异常!!!");
                return ServerResponse.createByErrorMessage("不支持的交易状态,交易返回异常!!!");
        }
    }

    // 简单打印应答
    private void dumpResponse (AlipayResponse response){
        if (response != null) {
            log.info(String.format("code:%s, msg:%s", response.getCode(), response.getMsg()));
            if (StringUtils.isNotEmpty(response.getSubCode())) {
                log.info(String.format("subCode:%s, subMsg:%s", response.getSubCode(),
                        response.getSubMsg()));
            }
            log.info("body:" + response.getBody());
        }
    }
3. 验证支付宝回调数据
3.1 在订单支付功能的时候设置支付宝支付的回调通知url(这边controller的一个接口,参数为HttpServletRequest,由订单支付的时候生成)根据request获取订单结果信息
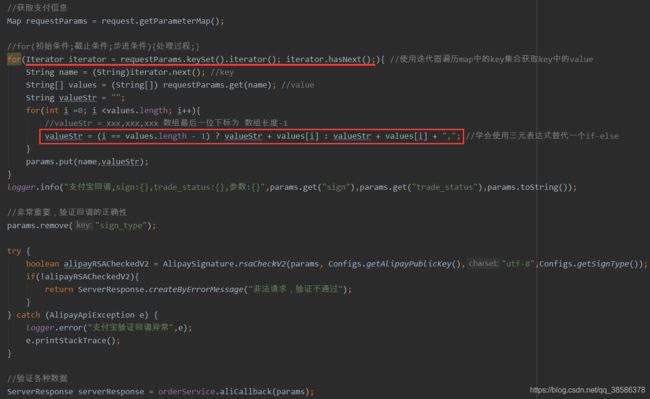
(回调的妙义在于:避免服务器端多次轮询访问支付宝,回调的话就是支付宝支付完通知服务端,自然就需要服务端提供一个API以供支付宝推送信息,推送的信息就是API的参数,即支付信息)
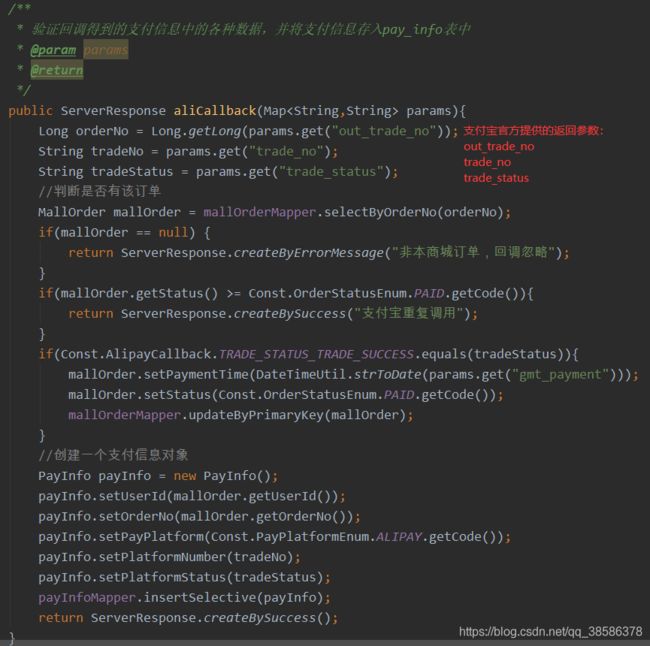
3.2 验证订单回调数据
4. 查询订单支付状态
4.1 检查session
4.2 根据userId和orderNo查询是否有订单
4.3 判断订单状态,如果大于枚举属性PAID的getCode(),则返回给前端true,否则返回false
//service
/**
     * 根据用户id和订单号查询订单支付状态
     * @param userId
     * @param orderNo
     * @return
     */
    public ServerResponse queryOrderPayStatus(Long userId, Long orderNo){
        MallOrder mallOrder = mallOrderMapper.selectByUserIdAndOrderNo(userId,orderNo);
        if(mallOrder == null){
            return ServerResponse.createByErrorMessage("用户没有订单");
        }
        if(mallOrder.getStatus() >= Const.OrderStatusEnum.PAID.getCode()){
            return ServerResponse.createBySuccess();
        }
        return ServerResponse.createByError();
    }


//Const枚举类 枚举订单状态、支付状态和支付平台
    public enum OrderStatusEnum {
        CANCELED(0,"已取消"),
        NO_PAY(10,"未支付"),
        PAID(20,"已付款"),
        SHIPPED(40,"已发货"),
        ORDER_SUCCESS(50,"订单完成"),
        ORDER_CLOSE(60,"订单关闭");

        private int code;
        private String value;

        OrderStatusEnum(int code, String value) {
            this.code = code;
            this.value = value;
        }

        public String getValue() {
            return value;
        }

        public void setValue(String value) {
            this.value = value;
        }

        public int getCode() {
            return code;
        }

        public void setCode(int code) {
            this.code = code;
        }
    }

    public interface AlipayCallback{
        String TRADE_STATUS_WAIT_BUYER_PAY = "WAIT_BUYER_PAY";
        String TRADE_STATUS_TRADE_SUCCESS = "TRADE_SUCCESS";

        String RESPONSE_SUCCESS = "success";
        String RESPONSE_FAIL = "fail";
    }

    public enum PayPlatformEnum{
        ALIPAY(1,"支付宝");

        PayPlatformEnum(int code, String value) {
            this.code = code;
            this.value = value;
        }

        private int code;
        private String value;

        public int getCode() {
            return code;
        }

        public void setCode(int code) {
            this.code = code;
        }

        public String getValue() {
            return value;
        }

        public void setValue(String value) {
            this.value = value;
        }
    }
订单管理模块
订单管理模块涉及前后台分别管理。前台主要包括创建订单、取消订单、查询订单列表、查询订单详情等;后台主要包括查询订单/订单详情、订单发货等。基本CRUD操作与其他模块类似,此处简单说一下vo处理。
通常和数据库映射的是entity类,有的时候不太适合直接返回给前端进行展示(例如密码需要置为EMPTY,例如有的页面涉及多个表),那么一般的话会创建一个vo类专门用于与前端的数据交互。
在本系统中订单设计两张表,订单表和订单详情表,但实际用户创建一个订单后可以展示的信息有订单信息、订单详情信息还有收货信息,所以需要创建一个展示的vo类。
一般应用使用entity dao vo,如果业务复杂添加bo,如果有数据传输添加dto(但目前没有体会到DTO的用处,后续有用到再更新)
@Data
public class OrderVo {
    //订单信息
    private Long orderNo;
    private BigDecimal payment;
    private Integer paymentType;
    private String paymentTypeDesc;
    private Integer postage;
    private Integer status;
    private String statusDesc;
    private Date paymentTime;
    private Date sendTime;
    private Date endTime;
    private Date closeTime;
    private Date createTime;

    //订单详情信息
    private List orderItemVoList;

    private String imageHost;
    private Long shippingId;
    private String receiverName; //收件人姓名

    //收货地址
    private ShippingVo shippingVo;

}


//OrderItemVo
@Data
public class OrderItemVo {
    private Long id;
    private Long orderNo;
    private Long productId;

    private String productName;
    private String productImage;

    private BigDecimal currentUnitPrice;

    private Integer quantity;
    private BigDecimal totalPrice;

    private Date createTime;
}

//ShippingVo
@Data
public class ShippingVo {
    private String receiverName; //收件人姓名
    private String receiverPhone; //收件人电话
    private String receiverProvince; //收件人省份
    private String receiverCity; //城市
    private String receiverDistrict; //市区
    private String receiverAddress; //详细地址
    private String receiverZip; //邮编
}
以 前台创建订单为例进行简单说明:
1. 检验session
 MallUser currentUser = (MallUser)session.getAttribute(Const.CURRENT_USER);
        if(currentUser == null){
            return ServerResponse.createByErrorCodeMessage(ResponseCode.NEED_LOGIN.getCode(),ResponseCode.NEED_LOGIN.getDescription());
        }
2. 根据userId和shippingId创建订单
- 首先根据userid选出所有已选中的购物车列表
- 然后根据购物车列表验证没有产品状态不在售卖状态和购物车中产品的数量不大于产品库存,构建产品详情列表
- 根据产品详情列表计算订单总价
- 根据userId shippingId 总价payment生成订单对象(生成订单号)
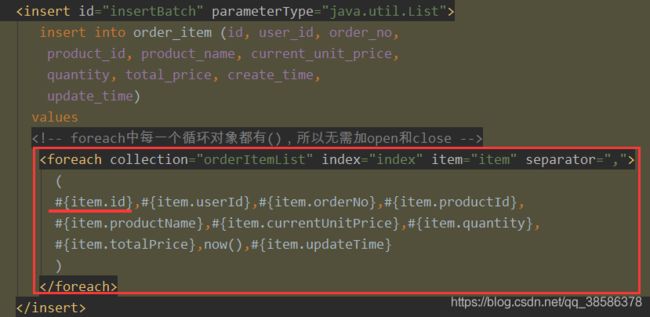
3. 给订单详情赋予订单的订单号,并批量导入订单详情到数据库中
4.根据订单详情遍历,根据产品Id查询产品,重新set库存属性更新产品实现减少库存
5. 根据已选中的购物车列表遍历,根据购物车Id删除购物车对象实现清空购物车
6. 返回给前端OrderVo对象,主要包括订单数据(订单号、总金额、支付类型、邮费、状态、支付时间、发货时间、订单取消时间、订单关闭时间、订单创建时间)、支付类型描述、订单状态描述;订单详情数据(产品id、产品名、产品图片、当前的单价、购买数量、总价);收货地址数据(收件人姓名、电话、地址、邮编等)
 /**
     * 根据userId和shippingId生成一个订单vo
     * @param userId
     * @param shippingId
     * @return
     */
    public ServerResponse createOrder(Long userId, Long shippingId){
        //获取已勾选的购物车列表
        List cartList = cartMapper.selectCheckCartByUserId(userId);

        //计算订单总价
        ServerResponse serverResponse = this.getCartOrderItem(userId,cartList); //获取订单详情列表
        if(!serverResponse.isSuccess()){
            return serverResponse; //将错误返回给controller
        }
        List orderItemList = (List)serverResponse.getData();//serverResponse成功的话可类型强转;不成功的话前面已经方法返回
        BigDecimal payment = this.getOrderTotalPrice(orderItemList); //获取订单详情列表的总价

        //生成订单
        MallOrder mallOrder = this.assembleOrder(userId,shippingId,payment);
        if(mallOrder == null){
            return ServerResponse.createByErrorMessage("生成订单错误");
        }
        if(CollectionUtils.isEmpty(orderItemList)){
            return ServerResponse.createByErrorMessage("购物车为空");
        }

        //给订单详情赋值 订单的订单号
        for(OrderItem orderItem : orderItemList){
            orderItem.setOrderNo(mallOrder.getOrderNo());
        }
        //批量导入订单详情
        orderItemMapper.insertBatch(orderItemList);

        //减少产品库存
        this.reduceProductStock(orderItemList);
        //清空购物车
        this.cleanCart(cartList);

        //返回给前端数据
        OrderVo orderVo = this.assembleOrderVo(mallOrder,orderItemList);
        return ServerResponse.createBySuccess(orderVo);
    }

    /**
     * 根据mallOrder对象,订单详情列表生成订单vo
     * @param mallOrder
     * @param orderItemList
     * @return
     */
    private OrderVo assembleOrderVo(MallOrder mallOrder,List orderItemList){
        OrderVo orderVo = new OrderVo();
        orderVo.setOrderNo(mallOrder.getOrderNo());
        orderVo.setPayment(mallOrder.getPayment());
        orderVo.setPaymentType(mallOrder.getPaymentType());
        orderVo.setPaymentTypeDesc(Const.PaymentTypeEnum.codeOf(mallOrder.getPaymentType()).getValue()); //Integer自动拆箱成int

        orderVo.setPostage(mallOrder.getPostage());
        orderVo.setStatus(mallOrder.getStatus());
        orderVo.setStatusDesc(Const.OrderStatusEnum.codeOf(mallOrder.getStatus()).getValue());

        //收货地址信息
        orderVo.setShippingId(mallOrder.getShippingId());
        Shipping shipping = shippingMapper.selectByPrimaryKey(mallOrder.getShippingId());
        if(shipping != null){
            orderVo.setReceiverName(shipping.getReceiverName());
            orderVo.setShippingVo(this.assembleShippingVo(shipping));
        }

        orderVo.setPaymentTime(mallOrder.getPaymentTime());
        orderVo.setSendTime(mallOrder.getSendTime());
        orderVo.setEndTime(mallOrder.getEndTime());
        orderVo.setCloseTime(mallOrder.getCloseTime());
        orderVo.setCreateTime(mallOrder.getCreateTime());

        orderVo.setImageHost(PropertiesUtil.getProperty("ftp.server.http.prefix"));

        //订单详情信息
        List orderItemVoList = Lists.newArrayList();
        for(OrderItem orderItem : orderItemList){
            OrderItemVo orderItemVo = this.assembleOrderItemVo(orderItem);
            orderItemVoList.add(orderItemVo);
        }

        return orderVo;
    }

    /**
     * 根据orderItem对象获取orderItemVo对象
     * @param orderItem
     * @return
     */
    private OrderItemVo assembleOrderItemVo(OrderItem orderItem){
        OrderItemVo orderItemVo = new OrderItemVo();
        BeanUtils.copyProperties(orderItemVo,orderItem);
        return orderItemVo;
    }

    /**
     * 根据shipping对象获取shippingVo对象
     * @param shipping
     * @return
     */
    private ShippingVo assembleShippingVo(Shipping shipping){
        ShippingVo shippingVo = new ShippingVo();
        BeanUtils.copyProperties(shippingVo,shipping);
        return shippingVo;
    }

    /**
     * 清空购物车
     * @param cartList
     */
    private void cleanCart(List cartList){
        for(Cart cart : cartList){
            cartMapper.deleteByPrimaryKey(cart.getId());
        }
    }

    /**
     * 减少产品的库存
     * @param orderItemList
     */
    private void reduceProductStock(List orderItemList){
        for(OrderItem orderItem : orderItemList){
            Product product = productMapper.selectByPrimaryKey(orderItem.getProductId()); //根据订单详情中的productId获取product对象
            product.setStock(product.getStock() - orderItem.getQuantity()); //减少库存(因为生成订单详情的时候有判断orderItem中的产品数量<=product的库存,所以可直接减)
            productMapper.updateByPrimaryKeySelective(product);
        }
    }

    /**
     * 根据userid shippingid和总金额生成订单对象
     * @param userId
     * @param shippingId
     * @param payment
     * @return
     */
    private MallOrder assembleOrder(Long userId, Long shippingId, BigDecimal payment){
        MallOrder mallOrder = new MallOrder();

        //生成订单号(订单号的规划很重要,例如安全性不被其他人轻易知道[单纯时间戳很容易被猜到];可根据订单号中的某一位分表分库)
        Long orderNo = this.generatorOrderNo();

        mallOrder.setOrderNo(orderNo);
        mallOrder.setStatus(Const.OrderStatusEnum.NO_PAY.getCode());
        mallOrder.setPostage(0); //包邮
        mallOrder.setPaymentType(Const.PaymentTypeEnum.ONLINE_PAY.getCode());
        mallOrder.setPayment(payment);

        mallOrder.setUserId(userId);
        mallOrder.setShippingId(shippingId);
        //发货时间
        //付款时间
        int insert = mallOrderMapper.insertSelective(mallOrder);
        if(insert > 0){
            return mallOrder;
        }
        return null;
    }

    /**
     * 根据时间戳 + 随机值 生成订单号
     * @return
     */
    private Long generatorOrderNo(){
        long currentTime = System.currentTimeMillis(); //系统当前时间戳
//        return currentTime + currentTime % 10; //叠加一个0-9的随机数字
        //但是考虑到如果两个人同时下单,currentTime + currentTime % 10会相同,但是数据库中mall_order表的orderNo为唯一索引,会导致有一个人下单失败
        return currentTime + new Random().nextInt(100); //两个人相同的概率--,但不是根本解决方法
        //当并发非常大的时候,可以给订单号的随机数取值生成一个缓存池。每次同一时间生成一个订单会从缓存池中拿取一个随机值作为订单号的随机数,
        // 同一时间的其他订单会继续从缓存池中拿取随机值,如果池子空了则等待
        // 下一秒订单号创建完毕,将这个随机数放回到缓存池中共其他时间的订单使用
    }

    /**
     * 遍历订单详情,加和所有的订单详情对象总价 得到 总的订单总价
     * @param orderItemList
     * @return
     */
    private BigDecimal getOrderTotalPrice(List orderItemList){
        BigDecimal payment = new BigDecimal("0");

        for(OrderItem orderItem : orderItemList){
            payment = BigDecimalUtil.add(payment.doubleValue(),orderItem.getTotalPrice().doubleValue()); //add(a,b) = a + b;在a的基础上加b返回加值后的a
        }

        return payment;
    }

    /**
     * 根据userid和购物车选中的集合,验证产品状态在线,数量未超产品库存之后生成订单详情列表
     * @param userId
     * @param cartList
     * @return
     */
    private ServerResponse getCartOrderItem(Long userId, List cartList){
        //订单详情列表
        List orderItemList = Lists.newArrayList();

        if(CollectionUtils.isEmpty(cartList)){
            return ServerResponse.createByErrorMessage("购物车为空");
        }

        //校验购物车的数据,包括产品的状态和数量
        for(Cart cart : cartList){
            OrderItem orderItem = new OrderItem(); //订单详情

            Product product = productMapper.selectByPrimaryKey(cart.getProductId());
            if(Const.ProductStatusEnum.ON_SALE.getCode() != product.getStatus()){ //判断产品是否为在售状态
                return ServerResponse.createByErrorMessage("产品" + product.getName() + "不是售卖状态");
            }

            //校验库存
            if(cart.getQuantity() > product.getStock()){ //购物车产品数量 > 产品库存(购物车添加产品,产品库存不变;支付锁单/成功后产品库存变化)
                return ServerResponse.createByErrorMessage("产品" + product.getName() + "库存不足");
            }

            orderItem.setUserId(userId);
            orderItem.setProductId(product.getId());
            orderItem.setProductName(product.getName());
            orderItem.setCurrentUnitPrice(product.getPrice());
            orderItem.setQuantity(cart.getQuantity());
            orderItem.setTotalPrice(BigDecimalUtil.mul(product.getPrice().doubleValue(),cart.getQuantity()));
            orderItemList.add(orderItem);
        }
        return ServerResponse.createBySuccess(orderItemList);
    }
其中有一个涉及批量导入的部分,批量将订单号导入到订单详情中
操作日志模块
一个项目中涉及多个用户,一般会对用户的操作生成一条日志信息并存入数据库中。
日志功能由于相对来讲独立于项目基础的功能,所以一般都通过Spring的AOP功能给需要生成操作日志的切入点添加通知,增强代码;也可以通过AOP+注解的方式,给所有加注解的方法织入通知(对于通知,可使用前置+后置通知,也可直接使用环绕通知,在切入点方法执行前后编写想要的增强通知代码即可)
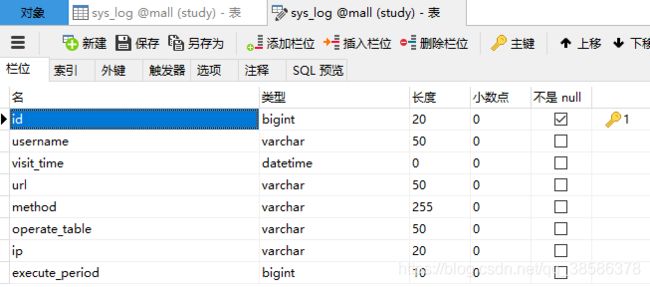
1. 设计日志表,主要字段为方法开始时间、访问的类名、方法名、用户名、操作表名和方法执行时长等
2. 注解,根据不同的方法获取表名
@Target({ElementType.METHOD})
@Retention(RetentionPolicy.RUNTIME)
public @interface SysLogAnnotation {
    /**
     * 操作表名
     * @return
     */
    String operationTableName();
}
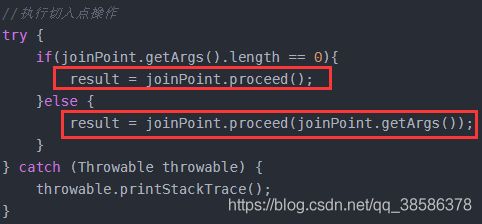
3. aop编写日志,使用环绕通知,在方法执行之前获取方法开始时间、类名、方法名、操作表名(其中操作表名根据注解获得,类名和方法名由切入点获取);执行方法之后获取执行时长、执行方法url拼接(类名/方法名,如果保证方法路径名=方法名;如果不可通过方法上的@RequestMapping上的注解获取)
@Component
@Aspect
public class LogAop {
    @Autowired
    HttpServletRequest request;
    @Autowired
    SysLogService sysLogService;

    private Date visitTime; //开始时间
    private Class aClass; //访问的类
    private String methodName; //方法名
    private String username; //用户名
    private String tableName; //操作表名
    private Object result; //切入点返回值

    @Around(value = "@annotation(sysLogAnnotation)")
    //注意由于环绕通知需要植入的切入点方法多有返回值,而aop通过动态代理执行切入点方法需要通知的方法返回值可以转换成切入点方法的返回值,否则切入点方法执行会报错/没有返回值;直接改成Object
    public Object logAround(final ProceedingJoinPoint joinPoint, final SysLogAnnotation sysLogAnnotation){
        //前置通知
        visitTime = new Date(); //当前时间即开始访问的时间
        aClass = joinPoint.getTarget().getClass(); //具体要访问的类
        methodName = joinPoint.getSignature().getName(); //获取访问的方法的名称
        tableName = sysLogAnnotation.operationTableName(); //操作表名

        if(request.getSession().getAttribute(Const.CURRENT_USER)!=null){
            username = ((MallUser)request.getSession().getAttribute(Const.CURRENT_USER)).getUsername();
        }

        //执行切入点操作
        try {
            if(joinPoint.getArgs().length == 0){
                result = joinPoint.proceed();
            }else {
                result = joinPoint.proceed(joinPoint.getArgs());
            }
        } catch (Throwable throwable) {
            throwable.printStackTrace();
        }

        //后置通知
        long time = new Date().getTime() - visitTime.getTime(); //获取访问时长

        //获取url
        String url = "";
        if(aClass != null && methodName != null && !StringUtils.equals(methodName,"listSysLog")) { //根据实际需求可过滤掉不需要记录到日志中的method
            //利用反射获取类上的@RequestMapping 注解也是一个类

            //获取类上的value值
            RequestMapping classAnnotation = (RequestMapping) aClass.getAnnotation(RequestMapping.class);
            if (classAnnotation != null) {
                String[] classValue = classAnnotation.value();
                url = classValue[0] + "/" + methodName;

                //获取访问的ip
                String ip = request.getRemoteAddr();

                if (StringUtils.isBlank(username) && request.getSession().getAttribute(Const.CURRENT_USER) != null) {
                    username = ((MallUser) request.getSession().getAttribute(Const.CURRENT_USER)).getUsername();
                } else if (StringUtils.isBlank(username)) {
                    username = "test";
                }

                //将日志相关信息封装到sysLog对象中
                SysLog sysLog = new SysLog();
                sysLog.setUsername(username);
                sysLog.setVisitTime(visitTime);
                sysLog.setOperateTable(tableName);
                sysLog.setIp(ip);
                sysLog.setUrl(url);
                sysLog.setMethod("[类名]" + aClass.getName() + "[方法名]" + methodName); //有时候aclass和method可能为null
                sysLog.setExecutePeriod(time);
                sysLogService.addSysLog(sysLog);
            }
        }
        return result;
    }
}
注意由于环绕通知需要植入的切入点方法多有返回值,而aop通过动态代理执行切入点方法需要通知的方法返回值可以转换成切入点方法的返回值,否则切入点方法执行会报错/没有返回值;直接改成Object
4. 测试例如在UserController傻瓜你的getUserInfo方法上添加注解,查看用户获取个人信息是否有日志生成
![]()
总结
回顾一下,主要是实现了普通电商系统中的用户模块、分类模块、商品模块、购物车模块、收货地址模块、支付模块和订单模块,基本熟悉了解了:
SpringBoot开发和MyBatis开发
需求分析、数据库设计、功能性实现、编码规范
高复用模块代码设计、session检验、身份验证、guava 缓存验证token
涉密信息返回置EMPTY、集合字符串等的检验方式、树形结构、排序分页
joda-time处理时间、文件上传、double类型数据计算转BigDecimal、全选/全不选/单选/单反选中四个controller接口对应service中一个方法的高复用写法
支付宝对接完成支付、支付回调、根据业务创建vo类与前端交互、避免横向和纵向越权的方法
对一个JavaWeb开发项目架构有了比较充分的了解认知。
知道的越多,不知道的越多。学习基本路径:基础理论框架学习、简单实操、底层原理、实际应用场景的项目实战,多多总结不断进步。


