机器视觉OpenCV-sobel、robert、gauss算子边缘检测
实验三 边缘检测算子()
一、题目描述
利用opencv或其他工具编写程序实现边缘检测算子。先读取图片,然后对图像反色,最后分别输出sobel、robert、gauss算子边缘检测的结果。
1、掌握对图片反色的操作
2、理解sobel算子边缘检测
3、理解robert算子边缘检测
4、理解gauss算子边缘检测
二、实现过程
#导入库
import cv2
import numpy as np
import matplotlib.pyplot as plt
from PIL import Image, ImageDraw, ImageFont
#用于给图片添加中文字符
def ImgText_CN(img, text, left, top, textColor=(0, 255, 0), textSize=20):
if (isinstance(img, np.ndarray)): #判断是否为OpenCV图片类型
img = Image.fromarray(cv2.cvtColor(img, cv2.COLOR_BGR2RGB))
draw = ImageDraw.Draw(img)
fontText = ImageFont.truetype("font/simhei.ttf", textSize, encoding="utf-8")
draw.text((left, top), text, textColor, font=fontText)
return cv2.cvtColor(np.asarray(img), cv2.COLOR_RGB2BGR)
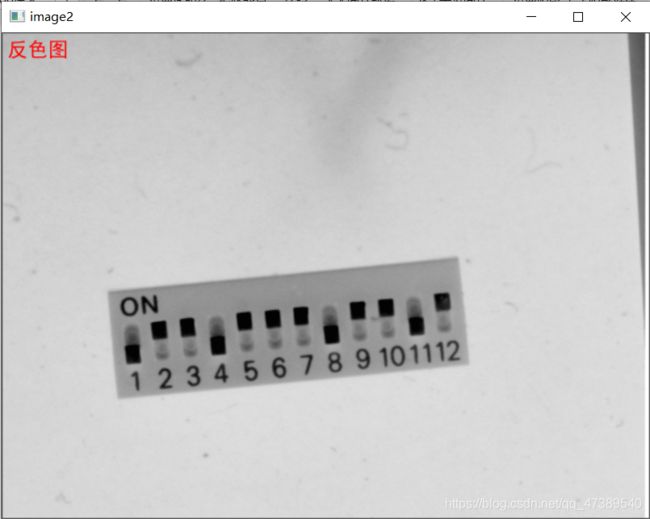
### 图片反色
def inverse_color(image):
height,width,temp = image.shape
img2 = image.copy()
for i in range(height):
for j in range(width):
img2[i,j]=(255-image[i,j][0],255-image[i,j][1],255-image[i,j][2])
return img2
# 读取图像
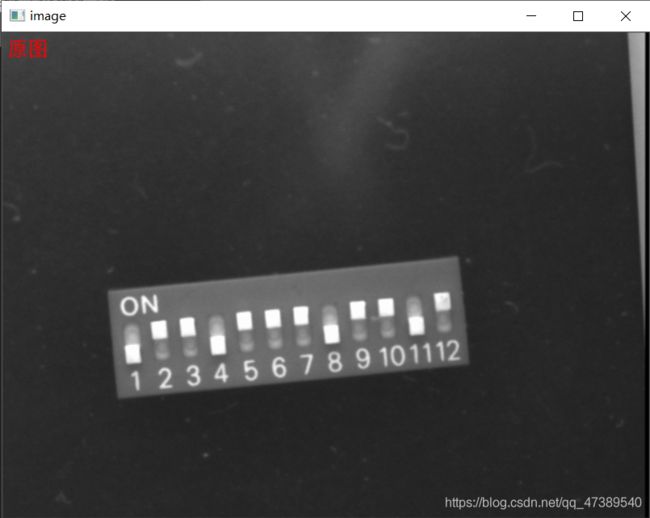
img = cv2.imread('dip_switch_02.bmp')
# 显示原图
show=ImgText_CN(img,"原图",5,5,(255, 0, 0), 20)
cv2.imshow("image",show)
# 反色
img1 = inverse_color(img)
show=ImgText_CN(img1,"反色图",5,5)
cv2.imshow("image2",show)
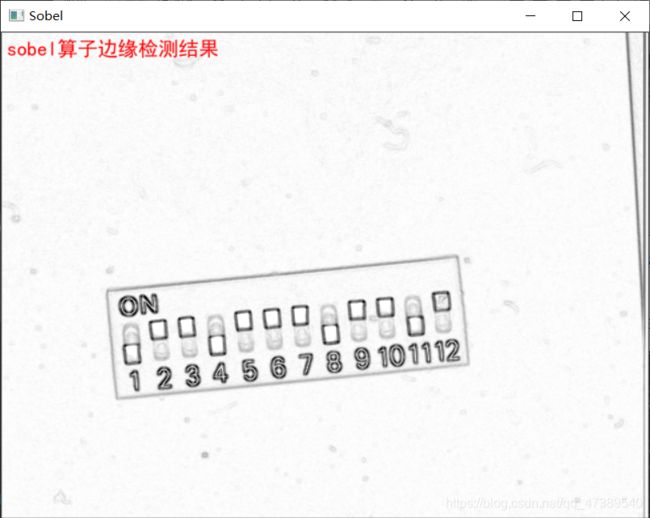
# Sobel算子边缘检测
sobelx = cv2.Sobel(img1,cv2.CV_16S,1,0)
sobely = cv2.Sobel(img1,cv2.CV_16S,0,1)
sobelx = cv2.convertScaleAbs(sobelx)
sobely = cv2.convertScaleAbs(sobely)
sobelXY = cv2.addWeighted(sobelx,0.5,sobely,0.5,0)
show=ImgText_CN(inverse_color(sobelXY),"sobel算子边缘检测结果",5,5,(255, 0, 0), 20)
cv2.imshow("Sobel",show)
#Robert算子边缘检测
kernelx = np.array([[-1,0],[0,1]], dtype=int)
kernely = np.array([[0,-1],[1,0]], dtype=int)
x = cv2.filter2D(img1, cv2.CV_16S, kernelx)
y = cv2.filter2D(img1, cv2.CV_16S, kernely)
absX = cv2.convertScaleAbs(x)
absY = cv2.convertScaleAbs(y)
Roberts = cv2.addWeighted(absX,0.5,absY,0.5,0)
show=ImgText_CN(inverse_color(Roberts),"robert算子边缘检测结果",5,5,(255, 0, 0), 20)
cv2.imshow("Robert",show)
# Guass算子边缘检测
gray_lap=cv2.Laplacian(img1,cv2.CV_16S,ksize=5)
gauss_img=cv2.convertScaleAbs(gray_lap)
dst3=cv2.bitwise_not(gauss_img)
show=ImgText_CN(dst3,"gauss算子边缘检测结果",5,5,(255, 0, 0), 20)
cv2.imshow("Gauss",show)
# 销毁资源
cv2.waitKey(0)
cv2.destroyAllWindows()
三、运行结果

四、问题及解决方法
问题1:“原图”文本在后续对图片的操作中出现。
分析:原因是我直接在原图上添加了文字,导致后面用原图操作时,文字还在上面。解决:添加文字的图片要重新赋值,不要和原图搞混了。
问题2:puttext添加中文,显示是乱码。
分析:puttext本身并不支持中文,如果一定要输出中文就需要FreeType字体库进行处理,在python可以通过PIL转换一下。本次实验,我使用了自定义函数ImgText_CN,通过PIL库实现的。
问题3:在实验室的电脑上写中文时会报错。SyntaxError: Non-ASCII character ‘\xe4’ in file test.py on line 2, but no encoding declared; see http://www.python.org/peps/pep-0263.html for details
分析:由于Python中默认的编码格式是 ASCII 格式,在没修改编码格式时无法正确打印汉字,所以在读取中文时会报错。解决方法为只要在文件开头加入 # -- coding: UTF-8 -- 或者 #coding=utf-8 就行了