centos7 php多版本切换_腾讯云服务器(CentOS7、Tencent Linux)手动搭建LNMP环境(linux+Nginx+Mariadb+PHP)...
今天来个腾讯云服务器CVM手动搭建LNMP环境(linux+Nginx+Mariadb+PHP)。
腾讯云十周年活动刚刚开始时买了的1核2G的星星海云服务器SA2,带宽1M,系统盘50G 高性能云硬盘,288元/3年挺划算。
活动详情:https://www.liuyi.me/go/tencent10
手动搭建服务器运行环境就是喜欢折腾,如果觉得麻烦的网友可以使用LNMP镜像直接启动CVM实例,以便快速建站。

本文示例步骤使用以下软件版本:
操作系统:CentOS 7.x,Tencent Linux release 2.4 (Final)
Web服务器版本:Nginx 1.16.1
数据库版本:Mariadb 5.5.65
脚本语言版本:PHP 7.2.32
说明:当您使用不同软件版本时,可能需要根据实际情况调整命令和参数配置。
一:登录 Linux 实例
1、使用标准方式登录 Linux 实例,WebShell为腾讯云推荐的登录方式。
2、使用 SSH 登录 Linux 实例,我个人比较喜欢Xshell+Xftp组合。
二:安装配置Nginx
1、执行以下命令,安装 nginx。
yum install -y nginx2、执行以下命令,打开 nginx.conf 文件。
vim /etc/nginx/nginx.conf按 “i” 切换至编辑模式,编辑 nginx.conf 文件。
找到 server{...},并将 server 大括号中相应的配置信息替换为如下内容。用于取消对 IPv6 地址的监听,同时配置 Nginx,实现与 PHP 的联动。
server { listen 80; server_name locahost; root /usr/share/nginx/html; location / { index index.php index.html index.htm; } location ~ .php$ { root /usr/share/nginx/html; fastcgi_pass 127.0.0.1:9000; fastcgi_index index.php; fastcgi_param SCRIPT_FILENAME $document_root$fastcgi_script_name; include fastcgi_params; } error_page 404 /404.html; location = /40x.html { } error_page 500 502 503 504 /50x.html; location = /50x.html { } }编辑完成之后,按Esc键,然后输入:wq并回车以保存并关闭配置文件。
3、执行以下命令启动 Nginx,设置 Nginx 为开机自启动。
systemctl start nginxsystemctl enable nginx4、在本地浏览器中访问云服务器实例的公网IP地址,查看 Nginx 服务是否正常运行。
http:///
显示如下,则说明Nginx安装配置成功。
三:安装配置MariaDB数据库
1、安装 MariaDB,等待安装完毕再执行下一步操作。
yum install mariadb mariadb-server -y2、启动 MariaDB 服务,设置 MariaDB 为开机自启动。
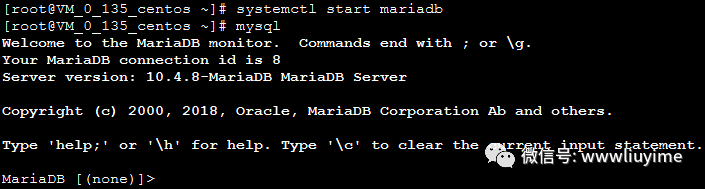
systemctl start mariadbsystemctl enable mariadb3、验证 MariaDB 是否安装成功,执行以下命令。
mysql显示结果如下,则成功安装,输入 \q 退出 MariaDB。
4、初始化root密码,配置数据库安全选项
mysql_secure_installation在此省略了很多,#号后面有中文备注,请自行参考,我是一路全选Y
Enter current password for root (enter for none): #初次配置无密码可直接回车,有密码输入密码回车OK, successfully used password, moving on...Set root password? [Y/n] y #是否设置 root 用户密码,输入 y 并回车或直接回车New password: #设置 root 用户的密码Re-enter new password: #再输入一次你设置的密码 ... Success!Remove anonymous users? [Y/n] y #是否删除匿名用户, 生产环境建议删除 ... Success!Disallow root login remotely? [Y/n] y #是否禁止 root 远程登录, 根据自己的需求选择 Y/n 并回车, 建议禁止 ... Success!Remove test database and access to it? [Y/n] #是否删除 test 数据库, 直接回车Reload privilege tables now? [Y/n] #是否重新加载权限表,直接回车 ... Success!Thanks for using MariaDB! #最后看到这个提示说明已经配置成功5、执行以下命令启动MariaDB,设置 MariaDB 为开机自启动。
systemctl start mariadbsystemctl enable mariadb6、初始化MariaDB完成,接下来测试登录,通过命令行登录:
mysql -uroot -p[root@VM-0-10-tlinux ~]# mysql -uroot -p
Enter password: 这里输入密码
Welcome to the MariaDB monitor. Commands end with ; or \g.
Your MariaDB connection id is 2
Server version: 5.5.65-MariaDB MariaDB Server
Copyright (c) 2000, 2018, Oracle, MariaDB Corporation Ab and others.
Type 'help;' or '\h' for help. Type '\c' to clear the current input statement.
MariaDB [(none)]> exit
Bye
[root@VM-0-10-tlinux ~]#
输入:exit退出。
四:安装配置PHP
1、依次执行以下命令,更新 yum 中 PHP 的软件源。
https://mirror.webtatic.com/yum/el7/epel-release.rpm #添加第三方 yum 包rpm -Uvh https://mirror.webtatic.com/yum/el7/webtatic-release.rpm #添加第三方 yum 包的 webtatic 库yum list php72* #查看 php 可用安装版本包yum install php72w php72w-opcache php72w-xml php72w-mcrypt php72w-gd php72w-devel php72w-mysqlnd php72w-intl php72w-mbstring php72w-pear php72w-pdo php72w-fpm #安装 php7.2.xx 及插件这里省略很多安装过程,此步骤耗时较长,请关注安装进度,等待安装完毕。
2、查看已安装的 php 版本
php -v至此,LNMP环境配置完成,接下来我们验证LNMP环境是否搭建成功。
3、创建测试文件phpinfo.php,用于展示PHP信息。
echo "" >> /usr/share/nginx/html/phpinfo.php本文配置的网站根目录为/usr/share/nginx/html。
4、启动 PHP-FPM 服务。
systemctl start php-fpm5、设置 PHP-FPM 服务为开机自启动。
systemctl enable php-fpm6、打开浏览器在地址栏输入http:///phpinfo.php

在完成了 LNMP环境搭建之后,就可在此基础上进行手动搭建 Wordpress、Z-blog个人博客了。