Spring5 学习笔记 三、IOC 操作 Bean 管理
原例来源:尚硅谷Spring5框架教程(idea版)
1、(xml 注入集合属性)IOC 操作 Bean 管理
<1>.注入数组、List 集合、Map 集合
- 注入数组类型属性
- 注入 List 集合类型属性
- 注入 Map 集合类型属性
class stu
package com.company.collectiontype;
import java.util.List;
import java.util.Map;
import java.util.Set;
public class stu {
// 1.数组类型
private String[] courses;
// 2.list类型
private List<String> list;
// 3.map类型
private Map<String,String> map;
//4 set 集合类型属性
private Set<String> sets;
public void setCourses(String[] courses) {
this.courses = courses;
}
public void setList(List<String> list) {
this.list = list;
}
public void setMap(Map<String, String> map) {
this.map = map;
}
public void setSets(Set<String> sets) {
this.sets = sets;
}
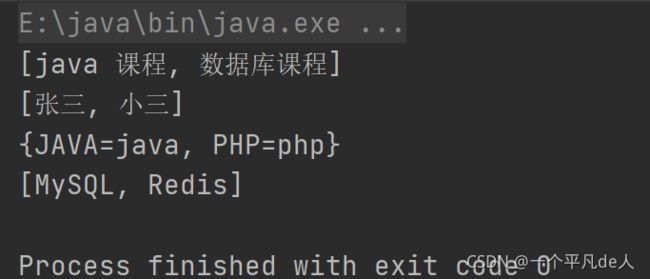
public void showData() {
System.out.println(Arrays.toString(this.courses)+ "\n" + this.list + "\n" +this.map + "\n" + this.sets);
}
}
bean.xml:
<beans xmlns="http://www.springframework.org/schema/beans"
       xmlns:xsi="http://www.w3.org/2001/XMLSchema-instance"
       xsi:schemaLocation="http://www.springframework.org/schema/beans http://www.springframework.org/schema/beans/spring-beans.xsd">

    <bean id="stu" class="com.company.collectiontype.stu">

        <property name="courses">
            <array>
                <value>java 课程value>
                <value>数据库课程value>
            array>
        property>


        <property name="list">
            <list>
                <value>张三value>
                <value>小三value>
            list>
        property>

        <property name="map">
            <map>
                <entry key="JAVA" value="java">entry>
                <entry key="PHP" value="php">entry>
            map>
        property>

        <property name="sets">
            <set>
                <value>MySQLvalue>
                <value>Redisvalue>
            set>
        property>
    bean>

beans>
测试类:
package com.company.testdemo;

import com.company.collectiontype.stu;

import org.junit.Test;
import org.springframework.context.ApplicationContext;
import org.springframework.context.support.ClassPathXmlApplicationContext;

public class TestStudents {

    //测试
    @Test
    public void testShow() {

        //1 加载 spring 配置文件
        ApplicationContext context =
                new ClassPathXmlApplicationContext("bean.xml");
        //2 获取配置创建的对象
        stu stu = context.getBean("stu", stu.class);

        stu.showData();
    }
}
<2>.在集合里面设置对象类型值
Class Courses :
package com.company.collectiontype;

public class Courses {

    private String cname;

    public void setCname(String cname) {

        this.cname = cname;
    }

    @Override
    public String toString() {

        return "Courses{" +
                "cname='" + cname + '\'' +
                '}';
    }
}
Class stu:
package com.company.collectiontype;
import java.util.Arrays;
import java.util.List;
import java.util.Map;
import java.util.Set;
public class stu {
private List<Courses> coursesList;
public void setCoursesList(List<Courses> coursesList) {
this.coursesList = coursesList;
}
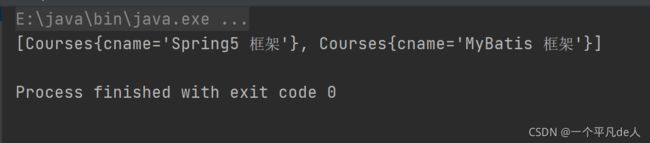
public void showData() {
System.out.println(this.coursesList);
}
}
bean.xml:
<beans xmlns="http://www.springframework.org/schema/beans"
       xmlns:xsi="http://www.w3.org/2001/XMLSchema-instance"
       xsi:schemaLocation="http://www.springframework.org/schema/beans http://www.springframework.org/schema/beans/spring-beans.xsd">

    <bean id="stu" class="com.company.collectiontype.stu">

        <property name="coursesList">
            <list>
                <ref bean="course1">ref>
                <ref bean="course2">ref>
            list>
        property>
    bean>


    <bean id="course1" class="com.company.collectiontype.Courses">
        <property name="cname" value="Spring5 框架">property>
    bean>
    <bean id="course2" class="com.company.collectiontype.Courses">
        <property name="cname" value="MyBatis 框架">property>
    bean>

beans>
测试类:
package com.company.testdemo;

import com.company.collectiontype.stu;

import org.junit.Test;
import org.springframework.context.ApplicationContext;
import org.springframework.context.support.ClassPathXmlApplicationContext;

public class TestStudents {

    //测试
    @Test
    public void testShow() {

        //1 加载 spring 配置文件
        ApplicationContext context =
                new ClassPathXmlApplicationContext("bean.xml");
        //2 获取配置创建的对象
        stu stu = context.getBean("stu", stu.class);

        stu.showData();
    }
}
<3>.把集合注入部分提取出来
(1)在 spring 配置文件中引入名称空间 util
<beans xmlns="http://www.springframework.org/schema/beans"
       xmlns:xsi="http://www.w3.org/2001/XMLSchema-instance"
       xmlns:p="http://www.springframework.org/schema/p"
       xmlns:util="http://www.springframework.org/schema/util"
       xsi:schemaLocation="
            http://www.springframework.org/schema/beans
            http://www.springframework.org/schema/beans/spring-beans.xsd
            http://www.springframework.org/schema/util
            http://www.springframework.org/schema/util/spring-util.xsd
       ">

(2)使用 util 标签完成 list 集合注入提取
bean.xml:
<beans xmlns="http://www.springframework.org/schema/beans"
       xmlns:xsi="http://www.w3.org/2001/XMLSchema-instance"
       xmlns:p="http://www.springframework.org/schema/p"
       xmlns:util="http://www.springframework.org/schema/util"
       xsi:schemaLocation="
            http://www.springframework.org/schema/beans
            http://www.springframework.org/schema/beans/spring-beans.xsd
            http://www.springframework.org/schema/util
            http://www.springframework.org/schema/util/spring-util.xsd
       ">


    <util:list id="bookList">
        <value>易筋经value>
        <value>九阴真经value>
        <value>九阳神功value>
    util:list>

    <bean id="book" class="com.company.collectiontype.Book">
        <property name="list" ref="bookList"/>
    bean>
beans>
Class Book:
package com.company.collectiontype;
import java.util.List;
public class Book {
private List<String> list;
public void setList(List<String> list) {
this.list = list;
}
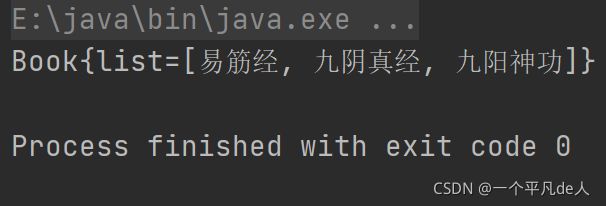
@Override
public String toString() {
return "Book{" +
"list=" + list +
'}';
}
}
测试类:
package com.company.testdemo;

import com.company.collectiontype.Book;

import org.junit.Test;
import org.springframework.context.ApplicationContext;
import org.springframework.context.support.ClassPathXmlApplicationContext;

public class TestStudents {

    //测试
    @Test
    public void testShow() {

        //1 加载 spring 配置文件
        ApplicationContext context =
                new ClassPathXmlApplicationContext("bean.xml");
        //2 获取配置创建的对象
        Book book = context.getBean("book", Book.class);//此次s"book" 与 bean.xml 中的id对应
        System.out.println(book);
    }
}
- 易错点:


2. (工厂Bean)IOC 操作 Bean 管理
1、Spring 有两种类型 bean,一种普通 bean,另外一种工厂 bean(FactoryBean)
2、普通 bean:在配置文件中定义 bean 类型就是返回类型
3、工厂 bean:在配置文件定义 bean 类型可以和返回类型不一样
第一步 创建类,让这个类作为工厂 bean,实现接口 FactoryBean
第二步 实现接口里面的方法,在实现的方法中定义返回的 bean 类型
class Course:
package com.company.collectiontype;

public class Course {

    private String cname;

    public void setCname(String cname) {

        this.cname = cname;
    }

    @Override
    public String toString() {

        return "Courses{" +
                "cname='" + cname + '\'' +
                '}';
    }
}
class MyBean:
package com.company.factorybean;

import com.company.collectiontype.Course;
import org.springframework.beans.factory.FactoryBean;

public class MyBean implements FactoryBean<Course> {

    //定义返回 bean
    @Override
    public Course getObject() throws Exception {

        Course course = new Course();
        course.setCname("abc");
        return course;
    }
    @Override
    public Class<?> getObjectType() {

        return null;
    }
    @Override
    public boolean isSingleton() {

        return false;
    }
}
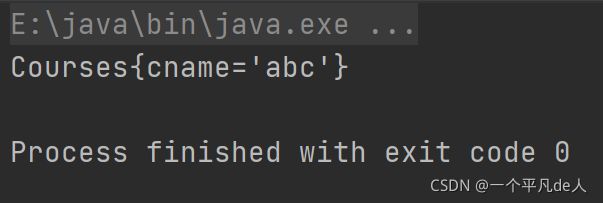
bean.xml:
<bean id="myBean" class="com.company.factorybean.MyBean">bean>
test:
 @Test
    public void test3() {

        ApplicationContext context =
                new ClassPathXmlApplicationContext("bean.xml");
        Course course = context.getBean("myBean", Course.class);
        System.out.println(course);
    }
3.(bean 作用域)IOC 操作 Bean 管理
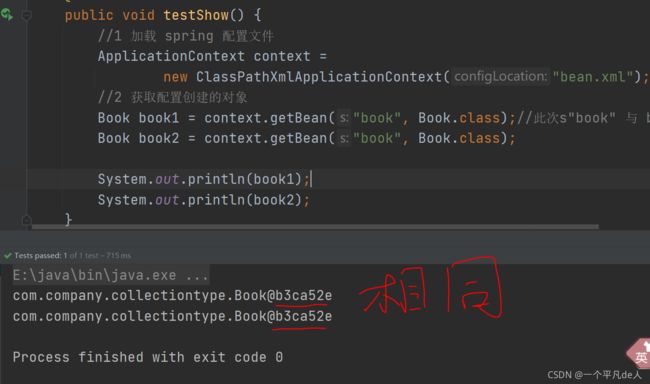
1、在 Spring 里面,设置创建 bean 实例是单实例还是多实例
2、在 Spring 里面,默认情况下,bean 是单实例对象
<bean id="book" class="com.company.collectiontype.Book">
	<property name="bookName" value="高等数学"/>
bean>
package com.company.collectiontype;

import java.util.List;

public class Book {

    private String bookName;

    public void setBookName(String bookName) {

        this.bookName = bookName;
    }

    public void showData(){

        System.out.println(this.bookName);
    }
}
@Test
    public void testShow() {

        //1 加载 spring 配置文件
        ApplicationContext context =
                new ClassPathXmlApplicationContext("bean.xml");
        //2 获取配置创建的对象
        Book book1 = context.getBean("book", Book.class);//此次s"book" 与 bean.xml 中的id对应
        Book book2 = context.getBean("book", Book.class);

        System.out.println(book1);
        System.out.println(book2);
    }
@Test
    public void testShow() {

        //1 加载 spring 配置文件
        ApplicationContext context =
                new ClassPathXmlApplicationContext("bean.xml");
        //2 获取配置创建的对象
        Book book1 = context.getBean("book", Book.class);//此次s"book" 与 bean.xml 中的id对应
        Book book2 = context.getBean("book", Book.class);

        book1.setBookName("大学英语");
        book1.showData();
        book2.showData();
    }

3、如何设置单实例还是多实例
(1)在 spring 配置文件 bean 标签里面有属性(scope)用于设置单实例还是多实例
(2)scope 属性值
第一个值 默认值,singleton,表示是单实例对象
第二个值 prototype,表示是多实例对象
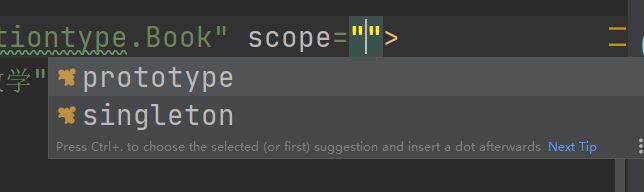
<bean id="book" class="com.company.collectiontype.Book" scope="prototype">
	<property name="bookName" value="高等数学"/>
bean>
 @Test
    public void testShow() {

        //1 加载 spring 配置文件
        ApplicationContext context =
                new ClassPathXmlApplicationContext("bean.xml");
        //2 获取配置创建的对象
        Book book1 = context.getBean("book", Book.class);
        Book book2 = context.getBean("book", Book.class);

        book1.setBookName("大学英语");
        book1.showData();
        book2.showData();
        System.out.println(book1);
        System.out.println(book2);
    }
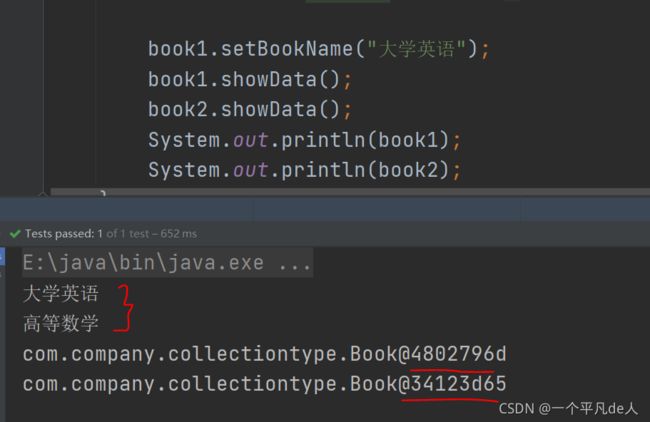
(3)singleton 和 prototype 区别
第一 singleton 单实例,prototype 多实例
第二 设置 scope 值是 singleton 时候,加载 spring 配置文件时候就会创建单实例对象
设置 scope 值是 prototype 时候,不是在加载 spring 配置文件时候创建 对象,在调用
getBean 方法时候创建多实例对
4.(bean 生命周期)IOC 操作 Bean 管理
1、生命周期
(1)从对象创建到对象销毁的过程
2、bean 生命周期
(1)通过构造器创建 bean 实例(无参数构造)
(2)为 bean 的属性设置值和对其他 bean 引用(调用 set 方法)
(3)调用 bean 的初始化的方法(需要进行配置初始化的方法)
(4)bean 可以使用了(对象获取到了)
(5)当容器关闭时候,调用 bean 的销毁的方法(需要进行配置销毁的方法)
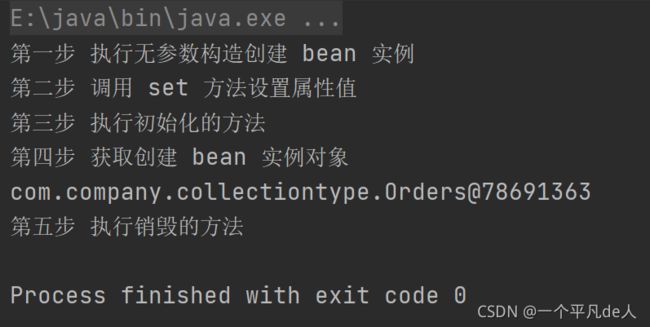
3、演示 bean 生命周期
package com.company.collectiontype;

public class Orders {

    //无参数构造
    public Orders() {

        System.out.println("第一步 执行无参数构造创建 bean 实例");
    }

    private String oname;

    public void setOname(String oname) {

        this.oname = oname;
        System.out.println("第二步 调用 set 方法设置属性值");
    }

    //创建执行的初始化的方法
    public void initMethod() {

        System.out.println("第三步 执行初始化的方法");
    }

    //创建执行的销毁的方法
    public void destroyMethod() {

        System.out.println("第五步 执行销毁的方法");
    }
}
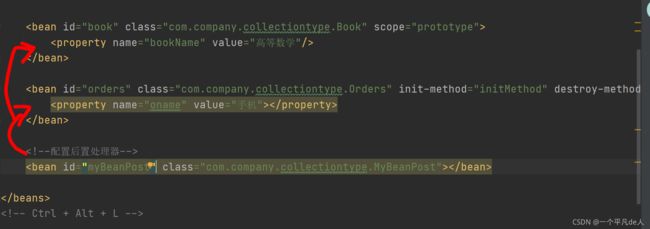
bean.xml
<bean id="orders" class="com.company.collectiontype.Orders" init-method="initMethod" destroy-method="destroyMethod">
	<property name="oname" value="手机">property>
bean>
@Test
    public void testBean3() {

    // ApplicationContext context =
    // new ClassPathXmlApplicationContext("bean4.xml");
        ClassPathXmlApplicationContext context =
                new ClassPathXmlApplicationContext("bean.xml");
        Orders orders = context.getBean("orders", Orders.class);
        System.out.println("第四步 获取创建 bean 实例对象");
        System.out.println(orders);
        //手动让 bean 实例销毁
        context.close();
    }
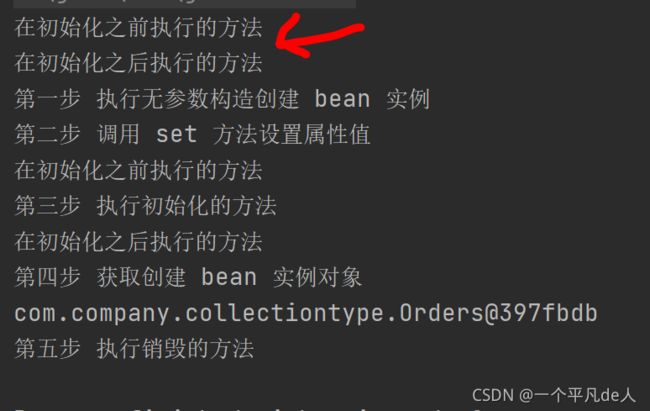
4、bean 的后置处理器,bean 生命周期有七步
(1)通过构造器创建 bean 实例(无参数构造)
(2)为 bean 的属性设置值和对其他 bean 引用(调用 set 方法)
(3)把 bean 实例传递 bean 后置处理器的方法 postProcessBeforeInitialization
(4)调用 bean 的初始化的方法(需要进行配置初始化的方法)
(5)把 bean 实例传递 bean 后置处理器的方法 postProcessAfterInitialization
(6)bean 可以使用了(对象获取到了)
(7)当容器关闭时候,调用 bean 的销毁的方法(需要进行配置销毁的方法)
5、演示添加后置处理器效果
(1)创建类,实现接口 BeanPostProcessor,创建后置处理器
package com.company.collectiontype;

import org.springframework.beans.BeansException;
import org.springframework.beans.factory.config.BeanPostProcessor;

public class MyBeanPost implements BeanPostProcessor {

    @Override
    public Object postProcessBeforeInitialization(Object bean, String beanName)
            throws BeansException {

        System.out.println("在初始化之前执行的方法");
        return bean;
    }

    @Override
    public Object postProcessAfterInitialization(Object bean, String beanName)
            throws BeansException {

        System.out.println("在初始化之后执行的方法");
        return bean;
    }
}
bean.xml 配置后置处理器:
<bean id="myBeanPost" class="com.company.collectiontype.MyBeanPost">bean>
会对xml文件中的所有bean产生影响:
5.(xml 自动装配)IOC 操作 Bean 管理
1、什么是自动装配
(1)根据指定装配规则(属性名称或者属性类型),Spring 自动将匹配的属性值进行注入
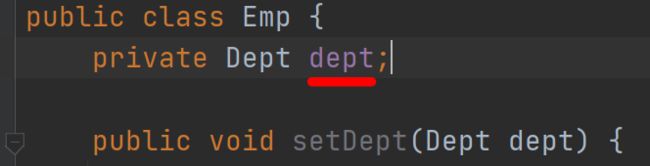
<1>.传统的手动装配:
package com.company.autowire;

public class Emp {

    private Dept dept;

    public void setDept(Dept dept) {

        this.dept = dept;
    }

    @Override
    public String toString() {

        return "Emp{" +
                "dept=" + dept +
                '}';
    }
}
package com.company.autowire;

public class Dept {

}
<bean id="emp" class="com.company.autowire.Emp">
	<property name="dept" ref="dept">property>
bean>

<bean id="dept" class="com.company.autowire.Dept">bean>
public class TestDemo {

    @Test
    public void testBean3() {

         ApplicationContext context =
         new ClassPathXmlApplicationContext("bean2.xml");
        Emp emp = context.getBean("emp", Emp.class);

        System.out.println(emp);
    }
}
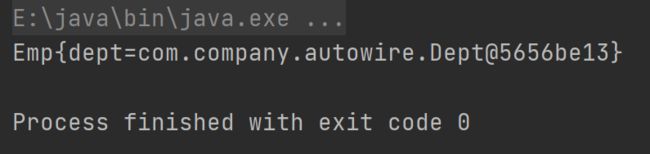
<2>.自动装配
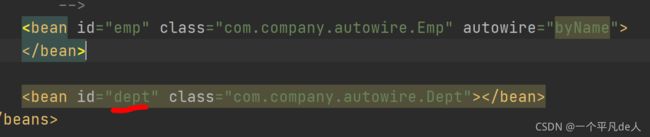
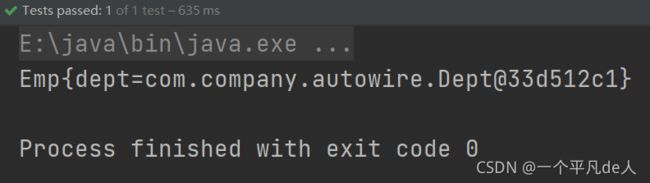
(1)根据属性名称自动注入
    <bean id="emp" class="com.company.autowire.Emp" autowire="byName">
    bean>

    <bean id="dept" class="com.company.autowire.Dept">bean>
注入值 bean 的 id 值和类属性名称一样
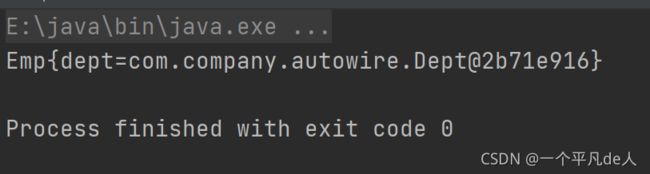
(2)根据属性类型自动注入
    <bean id="emp" class="com.company.autowire.Emp" autowire="byType">
    bean>

    <bean id="dept" class="com.company.autowire.Dept">bean>
6、外部属性文件
以数据库配置为例:
<1>直接配置数据库信息
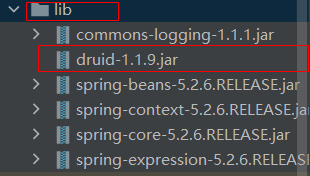
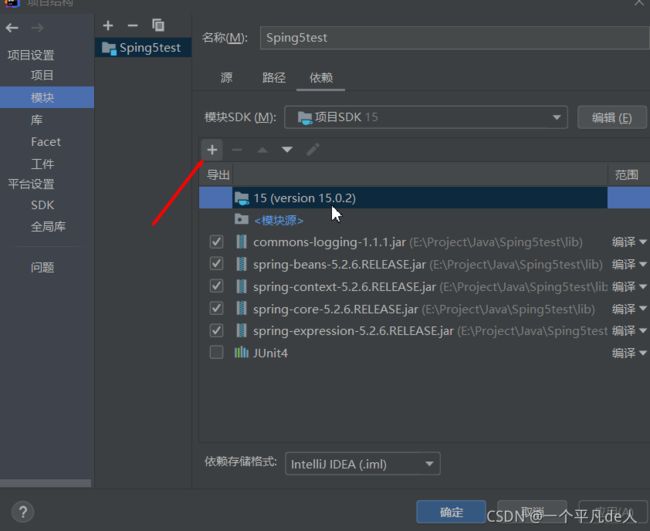
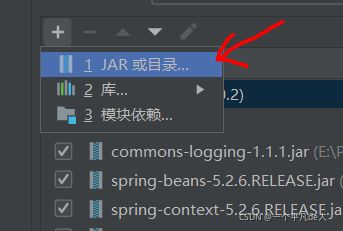
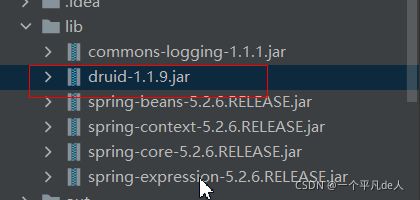
配置德鲁伊连接池
【1】引入德鲁伊连接池依赖 jar 包
![]()
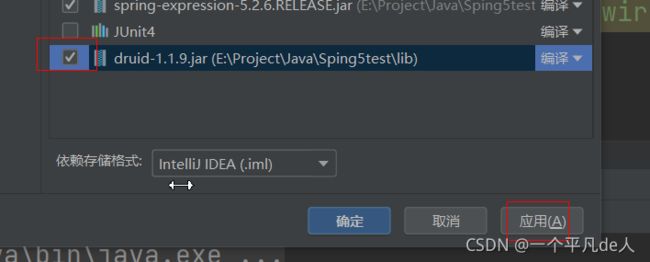
【2】创建bean6.xml
<beans xmlns="http://www.springframework.org/schema/beans"
       xmlns:xsi="http://www.w3.org/2001/XMLSchema-instance"
       xsi:schemaLocation="http://www.springframework.org/schema/beans http://www.springframework.org/schema/beans/spring-beans.xsd">

    <bean id="dataSource" class="com.alibaba.druid.pool.DruidDataSource">
        <property name="driverClassName" value="com.mysql.jdbc.Driver">property>
        <property name="url" value="jdbc:mysql://localhost:3306/userDb">property>
        <property name="username" value="root">property>
        <property name="password" value="root">property>
    bean>

beans>
<2>引入外部属性文件配置数据库连接池
【1】创建外部属性文件,properties 格式文件,写数据库信息
prop.driverClass=com.mysql.jdbc.Driver
prop.url=jdbc:mysql://localhost:3306/userDb
prop.userName=root
prop.password=root
【2】把外部 properties 属性文件引入到 spring 配置文件中
- 引入 context 名称空间
<beans
xmlns:context="http://www.springframework.org/schema/context"
xsi:schemaLocation="http://www.springframework.org/schema/context http://www.springframework.org/schema/context/spring-context.xsd"
>
<beans xmlns="http://www.springframework.org/schema/beans"
       xmlns:xsi="http://www.w3.org/2001/XMLSchema-instance"
       xmlns:p="http://www.springframework.org/schema/p"
       xmlns:util="http://www.springframework.org/schema/util"
       xmlns:context="http://www.springframework.org/schema/context"
       xsi:schemaLocation="http://www.springframework.org/schema/beans http://www.springframework.org/schema/beans/spring-beans.xsd
                           http://www.springframework.org/schema/util http://www.springframework.org/schema/util/spring-util.xsd
                           http://www.springframework.org/schema/context http://www.springframework.org/schema/context/spring-context.xsd">


    <context:property-placeholder location="classpath:jdbc.properties"/>


    <bean id="dataSource" class="com.alibaba.druid.pool.DruidDataSource">
        <property name="driverClassName" value="${prop.driverClass}">property>
        <property name="url" value="${prop.url}">property>
        <property name="username" value="${prop.userName}">property>
        <property name="password" value="${prop.password}">property>
    bean>

beans>
7、(基于注解方式)IOC 操作 Bean 管理
<1> 什么是注解
(1)注解是代码特殊标记,格式:@注解名称(属性名称=属性值, 属性名称=属性值…)
(2)使用注解,注解作用在类上面,方法上面,属性上面
(3)使用注解目的:简化 xml 配置
<2> Spring 针对 Bean 管理中创建对象提供注解
(1)@Component
(2)@Service
(3)@Controller
(4)@Repository
- 上面四个注解功能是一样的,都可以用来创建 bean 实例
<3> 基于注解方式实现对象创建
【1】第一步 引入依赖

【2】开启组件扫描
<context:component-scan base-package="com.company.deme3">context:component-scan>
<beans xmlns="http://www.springframework.org/schema/beans"
       xmlns:xsi="http://www.w3.org/2001/XMLSchema-instance"
       xmlns:p="http://www.springframework.org/schema/p"
       xmlns:util="http://www.springframework.org/schema/util"
       xmlns:context="http://www.springframework.org/schema/context"
       xsi:schemaLocation="http://www.springframework.org/schema/beans http://www.springframework.org/schema/beans/spring-beans.xsd
                           http://www.springframework.org/schema/util http://www.springframework.org/schema/util/spring-util.xsd
                           http://www.springframework.org/schema/context http://www.springframework.org/schema/context/spring-context.xsd">


    <context:component-scan base-package="com.company.deme3">context:component-scan>

beans>
<context:component-scan base-package="com.company.deme3.dao,com.company.deme3.service">context:component-scan>
【3】创建类,在类上面添加创建对象注解
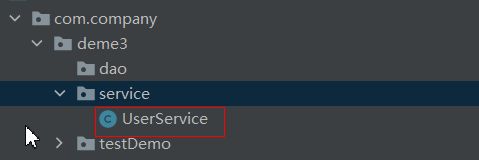
在注解里面 value 属性值可以省略不写,默认值是类名称,首字母小写
package com.company.deme3.service;
import org.springframework.stereotype.Component;
//在注解里面 value 属性值可以省略不写,
//默认值是类名称,首字母小写
//UserService -- userService
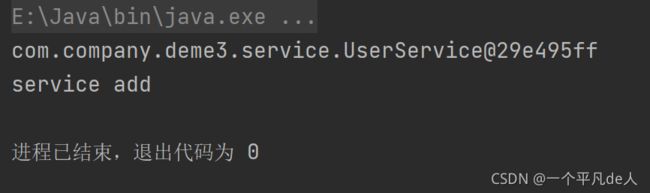
//类似于【4】创建测试类
package com.company.deme3.testDemo;

import com.company.deme3.service.UserService;
import com.company.demo.autowire.Emp;
import org.junit.Test;
import org.springframework.context.ApplicationContext;
import org.springframework.context.support.ClassPathXmlApplicationContext;

public class TestDemo {

    @Test
    public void testBean3() {

         ApplicationContext context =
         new ClassPathXmlApplicationContext("bean.xml");
        UserService userService = context.getBean("userService", UserService.class);

        System.out.println(userService);
        userService.add();
    }
}
<4> 开启组件扫描细节配置
【1】设置扫描
use-default-filters="false" 表示现在不使用默认 filter,自己配置 filter
context:include-filter ,设置扫描哪些内容
<context:component-scan base-package="com.company.deme3" use-default-filters="false">

<context:include-filter type="annotation"
                        expression="org.springframework.stereotype.Controller"/>
context:component-scan>
【2】设置不扫描
context:exclude-filter: 设置哪些内容不进行扫描
<context:component-scan base-package="com.company.deme3">

	<context:exclude-filter type="annotation"
                            expression="org.springframework.stereotype.Controller"/>
context:component-scan>
<5> 基于注解方式实现属性注入
(1)@Autowired:根据属性类型进行自动装配
第一步 把 service 和 dao 对象创建,在 service 和 dao 类添加创建对象注解
第二步 在 service 注入 dao 对象,在 service 类添加 dao 类型属性,在属性上面使用注解

UserDao 接口类:
package com.company.deme3.dao;

public interface UserDao {

    public void add();
}
UserDaoImpl 接口实现类:
package com.company.deme3.dao;

import org.springframework.stereotype.Repository;

@Repository()
public class UserDaoImpl implements UserDao {

    @Override
    public void add() {

        System.out.println("dao add.....");
    }
}
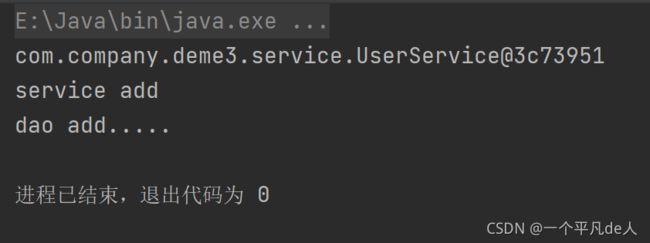
UserService 类:
package com.company.deme3.service;
import com.company.deme3.dao.UserDao;
import org.springframework.beans.factory.annotation.Autowired;
import org.springframework.stereotype.Component;
import org.springframework.stereotype.Service;
@Service
public class UserService {
//定义 dao 类型属性
//不需要添加 set 方法
//添加注入属性注解
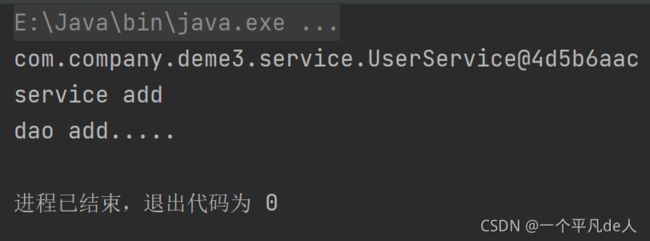
@Autowired
private UserDao userDao;
public void add(){
System.out.println("service add");
userDao.add();
}
}
测试类:
package com.company.deme3.testDemo;

import com.company.deme3.service.UserService;
import com.company.demo.autowire.Emp;
import org.junit.Test;
import org.springframework.context.ApplicationContext;
import org.springframework.context.support.ClassPathXmlApplicationContext;

public class TestDemo {

    @Test
    public void testBean3() {

         ApplicationContext context =
         new ClassPathXmlApplicationContext("bean.xml");
        UserService userService = context.getBean("userService", UserService.class);

        System.out.println(userService);
        userService.add();
    }
}
(2)@Qualifier:根据名称进行注入
这个@Qualifier 注解的使用,和上面@Autowired 一起使用
UserDaoImpl 类修改value值:
package com.company.deme3.dao;

import org.springframework.stereotype.Repository;

@Repository(value = "userDaoValue")
public class UserDaoImpl implements UserDao {

    @Override
    public void add() {

        System.out.println("dao add.....");
    }
}
根据value名称进行注入:
package com.company.deme3.service;
import com.company.deme3.dao.UserDao;
import org.springframework.beans.factory.annotation.Autowired;
import org.springframework.beans.factory.annotation.Qualifier;
import org.springframework.stereotype.Component;
import org.springframework.stereotype.Service;
//在注解里面 value 属性值可以省略不写,
//默认值是类名称,首字母小写
//UserService -- userService
//类似于测试类不变:
(3)@Resource:即可以根据类型注入,又可以根据名称注入
测试类不变:
package com.company.deme3.service;

import com.company.deme3.dao.UserDao;
import org.springframework.beans.factory.annotation.Autowired;
import org.springframework.beans.factory.annotation.Qualifier;
import org.springframework.beans.factory.annotation.Value;
import org.springframework.stereotype.Component;
import org.springframework.stereotype.Repository;
import org.springframework.stereotype.Service;

import javax.annotation.Resource;//导入@Resource
@Service
public class UserService {


//    @Resource
    @Resource(name = "userDaoValue") //根据名称进行注入
    private UserDao userDao;

    public void add(){

        System.out.println("service add");
        userDao.add();
    }
}
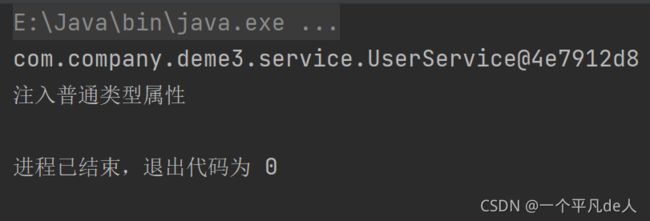
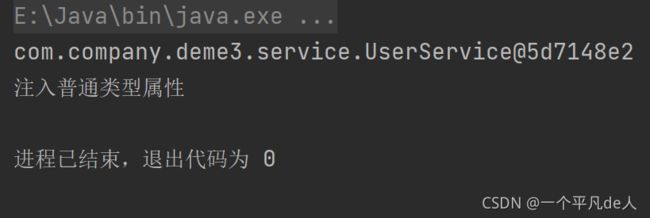
(4)@Value:注入普通类型属性
上面三个注入的都是类,
package com.company.deme3.service;

import com.company.deme3.dao.UserDao;
import org.springframework.beans.factory.annotation.Autowired;
import org.springframework.beans.factory.annotation.Qualifier;
import org.springframework.beans.factory.annotation.Value;
import org.springframework.stereotype.Component;
import org.springframework.stereotype.Repository;
import org.springframework.stereotype.Service;

import javax.annotation.Resource;

@Service
public class UserService {

    @Value(value = "注入普通类型属性")
    private String name;

    public void add(){

        System.out.println(this.name);
    }
}
测试类不变:
<6> 纯注解开发
只要注解,不要配置文件开发
【1】创建配置类,替代 xml 配置文件
@Configuration
@ComponentScan(basePackages = {
     "com.company.deme3"})
public class springConfig {

}
【2】编写测试类
package com.company.deme3.testDemo;

import com.company.deme3.service.UserService;
import com.company.demo.autowire.Emp;
import org.junit.Test;
import org.springframework.context.ApplicationContext;
import org.springframework.context.annotation.AnnotationConfigApplicationContext;
import org.springframework.context.support.ClassPathXmlApplicationContext;

import com.company.deme3.config.springConfig;

public class TestDemo {

      @Test
    public void testServer() {

        ApplicationContext context =
                new AnnotationConfigApplicationContext(springConfig.class);
        UserService userService = context.getBean("userService", UserService.class);

        System.out.println(userService);
        userService.add();
    }
}