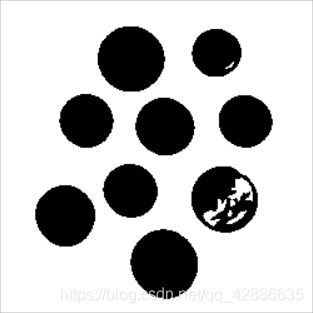
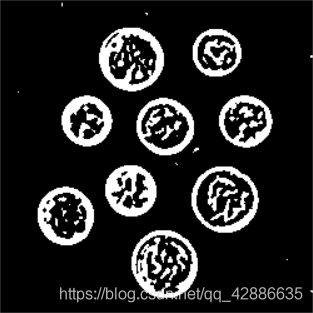
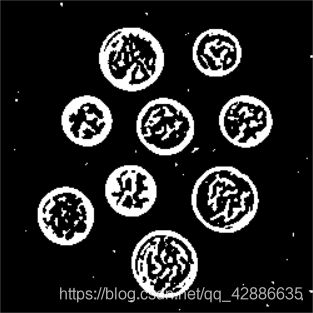
OpenCV笔记之九——图像阈值化
九、图像阈值化
【本文中所有源代码均来自 Practical Python and OpenCV, 3rd Edition 的随书代码(略有修改)】
图像阈值化是对图像的二值化操作。通常,我们通过阈值化将一幅灰度图转化为一张二值图像,即图中的像素不是0(白色)就是255(黑色)。简单的阈值化处理是设置一个阈值p,并将灰度图中所有像素值小于p的像素点置为0,而大于p的像素点置为255。这样就能将一幅图像完全转化为只有两个值的图像。
通过图像阈值化,我们可以聚焦于图像中我们关注的物体或部分区域。尤其当该物体(区域)与其他部分的明暗度相差较大时,可以通过阈值化将其与其他区域分离出来。图像阈值化常用于从背景中分割图像前景或提取目标物体等。
通过一个简单的示例,我们可以很清晰地理解其概念。
1、简单的阈值化处理
a.源代码呈现
simple_thresholding.py
# Import the necessary packages
import numpy as np
import argparse
import cv2

# Construct the argument parser and parse the arguments
ap = argparse.ArgumentParser()
ap.add_argument("-i", "--image", required=True, help="Path to the image")
args = vars(ap.parse_args())

# Load the image, convert it to grayscale, and blur it slightly
image = cv2.imread(args["image"])
image = cv2.cvtColor(image, cv2.COLOR_BGR2GRAY)
# Apply Gaussian blurring to remove some high frequency edges in the image
blurred = cv2.GaussianBlur(image, (5, 5), 0)
cv2.imshow("Original", image)

# Using a normal we can change the last argument in the function
# to make the coins black rather than white.
(T, thresh) = cv2.threshold(blurred, 155, 255, cv2.THRESH_BINARY)
cv2.imshow("Threshold Binary", thresh)

# Let's apply basic thresholding. The first parameter is the image we want to threshold,
# the second value is is our threshold check. If a pixel value is greater than our threshold
# (in this case, 155), we convert it to be WHITE, otherwise it is BLACK.
(T, threshInv) = cv2.threshold(blurred, 155, 255, cv2.THRESH_BINARY_INV)
cv2.imshow("Threshold Binary Inverse", threshInv)

# Finally, let's use our threshold as a mask and visualize only
# the coins in the image
cv2.imshow("Coins", cv2.bitwise_and(image, image, mask = threshInv))
cv2.waitKey(0)
b.代码分析
Line 1-9
导入计算所需的宏包,设置参数解析器对象,以便解析命令行输入的图片参数。
Line 12-16
读入图像,并将原图像转化为灰度图,采用核为5×5大小的高斯滤波器对图像进行模糊处理,除去图像中存在的高频噪声,显示原图像(“Original”)。
Line 20-21
运用opencv提供的函数cv2.threshold( )对灰度图进行阈值化处理。
该函数的第一个参数为输入图像;第二个参数表示我们所设置的阈值T,在这里设为155;第三个参数设置最大值,此例中图像中像素值超过155的像素都将被置为255;第四个参数需要提供一种阈值方法,在这里cv2.THRESH_BINARY是最基础的二值化阈值处理方法,即大于阈值的像素被置为最大值,反之置0。
该函数返回两个值,第一个是设置的阈值,第二个是阈值化处理后的图像。
完成图像阈值化后,显示图像(“Threshold Binary”)与原图像进行对比
Line 26-27
更换阈值化处理方法,在完成阈值化后进行反向操作,由cv2.THRESH_BINARY_INV完成。
显示图像(“Threshold Binary Inverse”)与原图像进行对比
Line 31-32
通过cv2.bitwise_and( )函数,将反向二值化图像当作一张掩膜应用于原图像并显示。此时,我们将得到了一张除了硬币区域其余区域均为黑色的图像。
 |
 |
|---|---|
| Original | Threshold Binary |
 |
 |
| Threshold Binary Inverse | Coins |
除了上述介绍的二值阈值化、反向二值化,单阈值分割方法还有如截断阈值化等多种方法,在此不多赘述,待由有心人自行探索。
2、自适应阈值化
上述方法虽然易于操作,但是存在着缺陷。由于阈值需要人为设定,有时可能需要耗费大量时间来确定一个较为合适的阈值来很好地完成任务。此外,当图像中存在大量不同像素强度值时,只使用一个阈值来处理图像的结果往往不尽如人意。此时,我们可以引入自适应阈值化。相比于之前简单的图像阈值化处理,自适应阈值化不再是选取全局阈值对图像进行二值化,而是根据图像上的每一个小区域计算其局部最优阈值T。
a.源代码呈现
adaptive_thresholding.py
# Import the necessary packages
import numpy as np
import argparse
import cv2

# Construct the argument parser and parse the arguments
ap = argparse.ArgumentParser()
ap.add_argument("-i", "--image", required = True, help = "Path to the image")
args = vars(ap.parse_args())

# Load the image, convert it to grayscale, and blur it slightly
image = cv2.imread(args["image"])
image = cv2.cvtColor(image, cv2.COLOR_BGR2GRAY)
blurred = cv2.GaussianBlur(image, (5, 5), 0)
cv2.imshow("Original", image)

# In our previous example, we had to use manually specify a pixel value to globally threshold the image.
# In this example we are going to examine a neighborbood of pixels and adaptively apply thresholding
# to each neighborbood. In this example, we'll calculate the mean value of the neighborhood area of
# 11 pixels and threshold based on that value.
# Finally, our constant C is subtracted from the mean calculation (in this case 4)
thresh = cv2.adaptiveThreshold(blurred, 255, cv2.ADAPTIVE_THRESH_MEAN_C, cv2.THRESH_BINARY_INV, 11, 4)
cv2.imshow("Mean Thresh", thresh)

# We can also apply Gaussian thresholding in the same manner
thresh = cv2.adaptiveThreshold(blurred, 255, cv2.ADAPTIVE_THRESH_GAUSSIAN_C, cv2.THRESH_BINARY_INV, 15, 3)
cv2.imshow("Gaussian Thresh", thresh)
cv2.waitKey(0)
b.代码分析
Line 1-10
导入所需的宏包,创建参数解析器。
Line 12-16
读入图像,转化为灰度图,进行高斯滤波去噪,显示图像。
Line 23-24
借助OpenCV中cv2.adaptiveThreshold( )函数对图像采取自适应阈值二值化的方法。
该函数中第一个参数是目标图像,我们在此输入高斯模糊处理后的灰度图。
第二个参数设置最大值。
第三个参数指定阈值的计算方法,常见方法有cv2.ADAPTIVE_THRESH_MEAN_C、cv2.ADAPTIVE_THRESH_GAUSSIAN_C等。前者取邻域内像素点的均值,后者则取邻域内像素点的加权平均。
第四个参数指示阈值化方式,与cv2.threshold( )函数相同,有cv2.THRESH_BINARY、cv2.THRESH_BINARY_INV等方法。在此选择反向二值化操作。
第五个参数指定了邻域大小blockSize,该参数必须设置为奇数,类似滤波时设置的核。设置为11,说明我们对11×11邻域内的像素点综合考虑计算局域内的自适应阈值。
最后一个参数是一个常数项C,计算得出邻域内的均值或加权平均后减去该常数获得阈值,该常数可以为负值。
【需要注意的是,对于自适应阈值化操作,最关键的参数是邻域大小blockSize与选择从均值或加权平均中减去的常数C】
自适应阈值化完成后,显示图像(“Mean Thresh”)。
Line 27-28
更改阈值的计算方法,选择cv2.ADAPTIVE_THRESH_GAUSSIAN_C,对邻域内像素取加权平均减去常数获得阈值。同时扩大邻域面积,令更多像素点参与计算。
显示更改参数后自适应阈值化的图像(“Gaussian Thresh”)。
c.运行结果
 |
 |
 |
|---|---|---|
| Original | Mean Thresh | Gaussian Thresh |
3、OTSU法与Riddler-Calvard阈值法
关于阈值,若取值过低,则识别边缘过细;若取值过高,则又容易错过边缘。自动计算阈值能够给出一个相对合理且合适的阈值,相对来说是最好的方法。
运用OTSU法(大津法/最大类间方差法)和Riddler-Calvard阈值法可以自动计算一幅图像合适的阈值。其中,Riddler-Calvard阈值法是由Riddler和Calvard在1978年提出的一种根据迭代选取阈值的方法,其缺点在于十分耗时。大津法是由日本学者Nobuyuki Otsu于1979年提出的一种阈值确定方法,它不受图像的亮度和对比度影响,通过寻找到前景与背景类间方差最大时的分割灰度T作为图像分割的阈值,通常被认为是选取阈值的最佳算法。
在此,我们仅讨论如何在python中使用这两种方法计算阈值而略去其详细的数学公式计算过程。
通过导入mahotas宏包,我们可以应用其中这两种阈值的计算方法来帮助我们计算合适的阈值。
a.源代码呈现
otsu_and_riddler.py
# Import the necessary packages
from __future__ import print_function
import numpy as np
import argparse
import mahotas
import cv2

# Construct the argument parser and parse the arguments
ap = argparse.ArgumentParser()
ap.add_argument("-i", "--image", required = True, help = "Path to the image")
args = vars(ap.parse_args())

# Load the image, convert it to grayscale, and blur it slightly
image = cv2.imread(args["image"])
image = cv2.cvtColor(image, cv2.COLOR_BGR2GRAY)
blurred = cv2.GaussianBlur(image, (5, 5), 0)
cv2.imshow("Original", image)

# OpenCV provides methods to use Otsu's thresholding, but mahotas implementation is more 'Pythonic'.
# Otsu's method assumes that are two 'peaks' in the grayscale histogram.
# It finds these peaks, and then returns a value we should threshold on.
T = mahotas.thresholding.otsu(blurred)
print("Otsu's threshold: {}".format(T))

# Applying the threshold can be done using NumPy, where values smaller than the threshold are
# set to zero, and values above the threshold are set to 255 (white).
thresh = image.copy()
thresh[thresh > T] = 255
thresh[thresh < 255] = 0
thresh = cv2.bitwise_not(thresh)
cv2.imshow("Otsu", thresh)

# An alternative is to use the Riddler-Calvard method
T = mahotas.thresholding.rc(blurred)
print("Riddler-Calvard: {}".format(T))
thresh = image.copy()
thresh[thresh > T] = 255
thresh[thresh < 255] = 0
thresh = cv2.bitwise_not(thresh)
cv2.imshow("Riddler-Calvard", thresh)
cv2.waitKey(0)
b.代码分析
Line 1- 17
导包,创建解析器对象,图像预处理(载入图像、灰度图转化、模糊处理)
Line 22-23
mahotas包中的thresholding中包括了各种计算阈值的方法,其中包括了大津法和Riddler-Calvard法。
mahotas.thresholding.otsu( )函数只需输入目标图像,就能自动计算并返回一个合适的阈值。
获取阈值后,输出其具体数值。
Line 27-31
由于mahotas.thresholding.otsu( )只返回了阈值,并未直接完成对图像阈值化的处理,因此需要手动完成后续工作。
首先对原图像进行深拷贝,便于存放阈值化后的图像;其次将图像中所有大于阈值的像素点均置为255(白色),随后将其余像素置为0(黑色),实现图像二值化。最后对图像进行取反,实现反向二值化,输出图像。
Line 34-40
由mahotas.thresholding.rc( )函数调用,用Riddler-Calvard法计算图像阈值并对图像进行反向二值化,输出图像。
c.运行结果
Otsu’s threshold: 137
Riddler-Calvard: 137.80118246864677
 |
 |
 |
|---|---|---|
| Original | Otsu | Riddler-Calvard |
可以看到,因为两种算法所得的阈值取整后都为137,两张阈值化处理后的图像其实是一模一样的。