1、查找/var目录下不属于root、lp、gdm的所有文件
find /var ! \( -user root -o -user lp -o -user gdm \) -ls
[root@centos7 ~]#find /var ! \( -user root -o -user lp -o -user gdm \) -ls
    73    0 drwxr-xr-x   2 abrt     abrt            6 May  6 19:21 /var/tmp/abrt
101354809    0 drwxr-xr-x   4 colord   colord         67 May  6 19:22 /var/lib/colord
279449    0 drwxr-xr-x   2 colord   colord          6 Aug  6  2017 /var/lib/colord/icc
101898310    4 -rw-r--r--   1 colord   colord       4096 May  6 19:22 /var/lib/colord/mapping.db
101898311    8 -rw-r--r--   1 colord   colord       7168 May  6 19:22 /var/lib/colord/storage.db
36406408    0 drwx------   2 colord   colord          6 May  6 19:22 /var/lib/colord/.cache
67530828    0 drwx------   2 rpc      rpc             6 Oct 31  2018 /var/lib/rpcbind
34876696    0 drwx------   2 pulse    pulse           6 Apr 13  2018 /var/lib/pulse
355825    0 drwxr-xr-x   2 chrony   chrony          6 Apr 13  2018 /var/lib/chrony
358967    0 drwx------   4 rpcuser  rpcuser        30 May  6 18:56 /var/lib/nfs/statd
34908271    0 drwx------   2 rpcuser  rpcuser         6 Nov  8  2018 /var/lib/nfs/statd/sm
2、统计/etc/init.d/functions文件中每个单词的出现次数,并排序(用grep和sed两种方法分别实现)
方法一 cat /etc/init.d/functions | grep -o "[[:alpha:]]\+" | sort | uniq -c | sort -nr
[root@centos7 profile.d]#cat /etc/init.d/functions | grep -o "[[:alpha:]]\+" | sort | uniq -c | sort -nr
     73 pid
     60 if
     58 file
     57 echo
     54 return
     52 then
     51 fi
     39 n
     38 base
     37 local
     34 kill
     28 z
方法二 cat /etc/init.d/functions | sed -r 's/[^[:alpha:]]/\n/g' | sed '/^$/d' | sort | uniq -c | sort -nr
[root@centos7 data]#cat /etc/init.d/functions | sed -r 's/[^[:alpha:]]/\n/g' | sed '/^$/d' | sort | uniq -c | sort -nr
     73 pid
     60 if
     58 file
     57 echo
     54 return
     52 then
     51 fi
     39 n
     38 base
     37 local
     34 kill
     28 z
3、利用sed取出ifconfig命令中本机的IPv4地址
方法一ifconfig ens33 | sed -n '2p' | sed 's/.*inet //' | sed 's/ netmask.*$//'
[root@centos7 data]#ifconfig ens33 | sed -n '2p' | sed 's/.*inet //' | sed 's/  netmask.*$//'
192.168.38.101
方法二ifconfig ens33 | sed -n '2s/ *inet *\(.*\) \{2,\}netmask.*/\1/pg'
[root@centos7 data]#ifconfig ens33 | sed -n '2s/ *inet *\(.*\) \{2,\}netmask.*/\1/pg'
192.168.38.101
4、总结yum的配置和使用,包括yum仓库的创建
yum:Yellowdog Update Modifier,rpm的前端程序,可解决软件包相关依赖性,可在多个库之间定位软件包,up2date的替代工具
yum repository: yum repo,存储了众多rpm包,以及包的相关的元数据文件(放置于特定目录repodata下)
文件服务器:
http://
https://
ftp://
file://
yum配置:
yum的配置文件分为两部分:main和repositoy
· man部分定义了全局配置选项,整个yum配置文件应该只有一个main,位于 /etc/yum.conf 中;
· repository 部分定义了每个源/服务器的具体配置,可以有一到多个。位于 /etc/yum.repo.d 目录下的各个文件中
仓库指向的定义:
[repositoryID]
name=Some name for this repository
baseurl=url://path/to/repository/
enabled={1|0}
gpgcheck={1|0}
gpgkey=URL
enablegroups={1|0}
failovermethod={roundrobin|priority}
roundrobin:意为随机挑选,默认值
priority:按顺序访问
cost= 默认为1000
| 命令 | 说明 | 命令 | 说明 |
|---|---|---|---|
| yum repolist | 显示仓库列表 | yum list | 显示程序包 |
| yum install package1 | 安装程序包package1 | yum update package1 | 升级程序包package1 |
| yum remove package | 卸载程序包 | yum downgrade package1 | 降级程序包package1 |
| yum info [...] | 查看程序包信息 | yum clean | 清理本地缓存 |
| yum search keyword | 以指定的关键字搜索程序包 | yum makecache | 构建缓存 |
| --disablerepo=repoidglob | 临时禁用此处指定的repo | --enablerepo=repoidglob | 临时启用此处指定的repo |
加入epel源
[root@centos7 yum.repos.d]#cat base.repo
[base]
name=CentOS
baseurl=file:///media
gpgcheck=0

[epel]
name=EPEL
baseurl=https://mirrors.aliyun.com/epel/$releasever/$basearch/
        https://mirrors.tuna.tsinghua.edu.cn/epel/$releasever/$basearch/
gpgcheck=0
enabled=1
搭建局域网内部服务器,不连接外网,局域http协议的网络yum仓库
也可以先建立本地yum用yum安装httpd
[root@centos7 ~]#rpm -ql httpd
/etc/httpd
/etc/httpd/conf
/var/www
/var/www/cgi-bin
/var/www/html
[root@centos7 ~]#cd /var/www/html
[root@centos7 html]#systemctl start httpd
[root@centos7 html]#systemctl stop firewalld.service
此时在浏览器输入IP可以看到测试页面
建立一个页面
[root@centos7 html]#echo welcome to nyc! > index.html
建立目录
[root@centos7 html]#mkdir -pv centos/{6,7}/os/x86_64/
mkdir: created directory ‘centos’
mkdir: created directory ‘centos/6’
mkdir: created directory ‘centos/6/os’
mkdir: created directory ‘centos/6/os/x86_64/’
mkdir: created directory ‘centos/7’
mkdir: created directory ‘centos/7/os’
mkdir: created directory ‘centos/7/os/x86_64/’
挂载光盘到目录
[root@centos7 html]#mount /dev/sr0 /var/www/html/centos/7/os/x86_64/
mount: /dev/sr0 is write-protected, mounting read-only
修改repo后yum clean all 清理缓存
yum repolist 缓存刷新成功
同理添加光驱挂载c6.10光盘
echo - - - > /sys/class/scsi_host/host2/scan 刷新显示光驱
参考上步骤
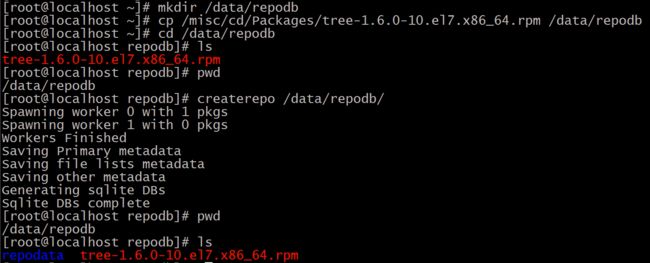
自己建立无库的rpm安装包的库
createrepo
5、编写系统初始化脚本reset.sh ,包括别名,提示符颜色, yum仓库配置文件
#!/bin/bash
#
#********************************************************************
#Author:                Jack
#QQ:                    Secret
#Date:                  2019-06-03
#FileName:             reset.sh
#URL:                   Building
#Description:          The test script
#Copyright (C):         2019 All rights reserved
#********************************************************************
rootbashrc=`cd;pwd`/.bashrc
echo "alias net='cd /etc/sysconfig/network-scripts/'" >> $rootbashrc
echo "PS1='\[\e[1;32m\][\u@\h \W]\\$\[\e[0m\]'" > /etc/profile.d/env.sh
cd `df | grep /dev/sr* | tr -s ' ' | cut -d ' ' -f 6-` || \
  mount `df | grep /dev/sr* | tr -s ' ' | cut -d ' ' -f 1` /media
cat > /etc/yum.repos.d/base.repo <
6、安装tree,ftp,lftp,telnet等包
yum install tree ftp lftp telnet -y
7、在CentOS7上编译安装apache2.4源码包,并启动此服务
- 安装开发工具包,此方法偷懒,生产中建议依赖什么装什么
yum grouplist
yum groupinstall "development tools" - 解压下载的源码后!!!必须!!!要进入到编译的目录
查看说明
[root@centos7 httpd-2.4.39]#./configure --help
`configure' configures this package to adapt to many kinds of systems.

Usage: ./configure [OPTION]... [VAR=VALUE]...

To assign environment variables (e.g., CC, CFLAGS...), specify them as
VAR=VALUE.  See below for descriptions of some of the useful variables.

Defaults for the options are specified in brackets.

Configuration:
  -h, --help              display this help and exit
      --help=short        display options specific to this package
      --help=recursive    display the short help of all the included packages
  -V, --version           display version information and exit
  -q, --quiet, --silent   do not print `checking ...' messages
      --cache-file=FILE   cache test results in FILE [disabled]
  -C, --config-cache      alias for `--cache-file=config.cache'
  -n, --no-create         do not create output files
      --srcdir=DIR        find the sources in DIR [configure dir or `..']

Installation directories:
  --prefix=PREFIX         install architecture-independent files in PREFIX
                          [/usr/local/apache2]
  --exec-prefix=EPREFIX   install architecture-dependent files in EPREFIX
                          [PREFIX]
- 创建帐号
[root@centos7 httpd-2.4.39]#getent passwd | grep 80
[root@centos7 httpd-2.4.39]#useradd -r -u 80 -d /data/www/ -s /sbin/nologin httpd
[root@centos7 httpd-2.4.39]#id httpd
uid=80(httpd) gid=80(httpd) groups=80(httpd)
- 开始选择设置
[root@centos7 httpd-2.4.39]#./configure --prefix=/app/httpd --sysconfdir=/etc/httpd24 --enable-ssl --disable-status
- 提示依赖,安装软件
yum install apr-devel
yum install apr-util-devel
yum install pcre-devel
yum install openssl-devel
- 再次运行编译
[root@centos7 httpd-2.4.39]#./configure --prefix=/app/httpd --sysconfdir=/etc/httpd24 --enable-ssl --disable-status
- 编译成功生成了Makefile文件,开始编译,有可能会提示依赖
[root@centos7 httpd-2.4.39]#make
- 提示完成
make[4]: Leaving directory `/data/httpd-2.4.39/modules/mappers'
make[3]: Leaving directory `/data/httpd-2.4.39/modules/mappers'
make[2]: Leaving directory `/data/httpd-2.4.39/modules'
make[2]: Entering directory `/data/httpd-2.4.39/support'
make[2]: Leaving directory `/data/httpd-2.4.39/support'

make[1]: Leaving directory `/data/httpd-2.4.39'
- 开始编译
[root@centos7 httpd-2.4.39]#make install
Making install in srclib
进入安装目录的bin下
[root@centos7 httpd-2.4.39]#cd /app/httpd/bin/
[root@centos7 bin]#pwd
/app/httpd/bin
[root@centos7 bin]#ls
ab         apxs      dbmmanage  envvars-std  htcacheclean  htdigest  httpd      logresolve
apachectl  checkgid  envvars    fcgistarter  htdbm         htpasswd  httxt2dbm  rotatelogs
- 由于此处bin目录不存在PATH变量中,把目录加进去
[root@centos7 bin]#echo 'PATH=/app/httpd/bin:$PATH' > /etc/profile.d/httpd.sh
[root@centos7 bin]#cat /etc/profile.d/httpd.sh
PATH=/app/httpd/bin:$PATH
[root@centos7 bin]#. /etc/profile.d/httpd.sh
[root@centos7 bin]#echo $PATH
/app/httpd/bin:/data/bin:/usr/local/sbin:/usr/local/bin:/usr/sbin:/usr/bin:/root/bin
- 启动运行软件
[root@centos7 ~]#apachectl start
AH00558: httpd: Could not reliably determine the server's fully qualified domain name, using centos7.localdomain. Set the 'ServerName' directive globally to suppress this message
- 此时浏览器打开查看页面,页面地址在这里
[root@centos7 ~]#cd /app/httpd
[root@centos7 httpd]#ls
bin  build  cgi-bin  error  htdocs  icons  include  logs  man  manual  modules
[root@centos7 httpd]#cd htdocs/
[root@centos7 htdocs]#ls
index.html
[root@centos7 htdocs]#cat index.html
It works!
- 查看账号是否被用上
[root@centos7 htdocs]#ps aux
root      48304  0.0  0.2 101656  2636 ?        Ss   22:29   0:00 /app/httpd/bin/httpd -k start
daemon    48305  0.0  0.3 456104  3024 ?        Sl   22:29   0:00 /app/httpd/bin/httpd -k start
daemon    48333  0.0  0.2 456104  2420 ?        Sl   22:29   0:00 /app/httpd/bin/httpd -k start
daemon    48334  0.0  0.2 456104  2416 ?        Sl   22:29   0:00 /app/httpd/bin/httpd -k start
daemon    48394  0.0  0.2 456104  2408 ?        Sl   22:30   0:00 /app/httpd/bin/httpd -k start
- 未用上 需要更改
[root@centos7 htdocs]#vim /etc/httpd24/httpd.conf
166 User httpd
167 Group httpd
保存后,停止应用再启动
[root@centos7 htdocs]#apachectl stop
AH00558: httpd: Could not reliably determine the server's fully qualified domain name, using centos7.localdomain. Set the 'ServerName' directive globally to suppress this message
[root@centos7 htdocs]#apachectl start
AH00558: httpd: Could not reliably determine the server's fully qualified domain name, using centos7.localdomain. Set the 'ServerName' directive globally to suppress this message
- 再次查看查看账号是否被用上 成功!
[root@centos7 htdocs]#ps aux
root      48525  0.0  0.2 101656  2632 ?        Ss   22:36   0:00 /app/httpd/bin/httpd -k start
httpd     48526  0.0  0.2 456104  2952 ?        Sl   22:36   0:00 /app/httpd/bin/httpd -k start
httpd     48527  0.0  0.2 456104  2412 ?        Sl   22:36   0:00 /app/httpd/bin/httpd -k start
httpd     48528  0.0  0.2 456104  2412 ?        Sl   22:36   0:00 /app/httpd/bin/httpd -k start
httpd     48610  0.0  0.2 456104  2408 ?        Sl   22:36   0:00 /app/httpd/bin/httpd -k start
- 添加man帮助的地址 下面为C7,C6在/etc/man.config
[root@centos7 man]#cd /app/httpd/man/
[root@centos7 man]#pwd
/app/httpd/man
[root@centos7 man]#vim /etc/man_db.conf
  1 #
  2 #
  3 # This file is used by the man-db package to configure the man and cat paths.
  4 # It is also used to provide a manpath for those without one by examining
  5 # their PATH environment variable. For details see the manpath(5) man page.
  6 #
  7 # Lines beginning with `#' are comments and are ignored. Any combination of
  8 # tabs or spaces may be used as `whitespace' separators.
  9 #
 10 # There are three mappings allowed in this file:
 11 # --------------------------------------------------------
 12 # MANDATORY_MANPATH                     manpath_element
 13 # MANPATH_MAP           path_element    manpath_element
 14 # MANDB_MAP             global_manpath  [relative_catpath]
 15 #---------------------------------------------------------
 16 # every automatically generated MANPATH includes these fields
 17 #
 18 #MANDATORY_MANPATH                      /usr/src/pvm3/man
 19 #
 20 MANDATORY_MANPATH                       /usr/man
 21 MANDATORY_MANPATH                       /usr/share/man
 22 MANDATORY_MANPATH                       /usr/local/share/man
 23 MANDATORY_MANPATH                       /app/httpd/man