从零开始实现yolox一:数据集类
数据集类
- 1 数据集及其划分
-
- (1)数据集文件组织结构
- (2)数据集的划分
- (3)从xml文件中提取目标信息(边框和分类)
- 2 数据集类
-
- (1)`__init__`与`__len__`函数
- (2)`__getitem__`函数
- (3)dataset测试脚本
- 3 collate_fn及测试脚本
本系列参考了博主Bubbliiiing的博客与代码,链接为:https://blog.csdn.net/weixin_44791964/article/details/120476949
在复现之前,有必要知道YOLOX的原理,以及pytorch框架的使用,这是最基础的部分。
让我们开始复现之旅吧。
1 数据集及其划分
(1)数据集文件组织结构
建立如图所示的目录结构用于存放数据

其中Annotations用于存放标签文件(即xml文件),ImageSets用于存放数据集划分后的txt文件,JPEGImages用于存放图片,图片要和标签文件的名字对应起来。
将图片和标签文件复制到Annotations和JPEGImages中,复制之后:
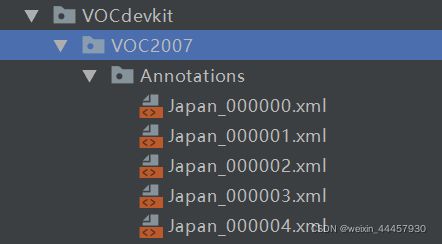
Annotations是下面这个样子
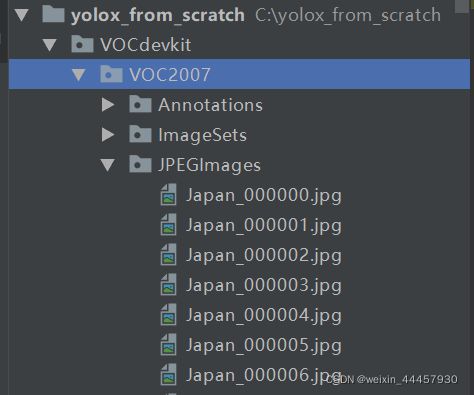
JPEGImages是下面这个样子
(2)数据集的划分
这个数据集中10506张图片,现计划按照7:1:2的方式划分训练集、验证集和测试集,并且把对应的文件名存放到train.txt、val.txt和test.txt文件中,那么可以在yolox_from_scratch下新建一个名为split_voc.py的程序,新建后目录结构如下:

split_voc.py内容如下:
import os
import random

trainval_percent = 0.8                          # 训练集+验证集总占比
train_percent = 0.875                           # 训练集在trainval_percent里的train占比,0.875*0.8=0.7,因此训练集在总样本中占比70%
VOCdevkit_path = 'VOCdevkit'                    # 数据集文件路径
random.seed(0)                                  # 设定种子,使得程序能够复现

print("Generate txt in ImageSets.")
xmlfilepath = os.path.join(VOCdevkit_path, 'VOC2007/Annotations')           # 标签文件路径
saveBasePath = os.path.join(VOCdevkit_path, 'VOC2007/ImageSets/Main')       # 训练集、验证集、测试集txt文件的所在路径
temp_xml = os.listdir(xmlfilepath)
total_xml = []
for xml in temp_xml:
    if xml.endswith(".xml"):
        total_xml.append(xml)

num = len(total_xml)                            # 获得数据集样本的总数量
list = range(num)                               # 获得数据集样本的索引
tv = int(num * trainval_percent)                # 验证集+训练集样本的总数量
tr = int(tv * train_percent)                    # 训练集样本的数量
trainval = random.sample(list, tv)              # 训练集+验证集样本索引构成的列表
train = random.sample(trainval, tr)             # 训练集样本索引构成的列表
# random.sample(list, tv) 表示从list中生成一个长度为tv新列表,新列表中的元素从list中取样获得
# 而list是一个range对象,表示数据集的索引

print("train and val size", tv)
print("train size", tr)

ftrainval = open(os.path.join(saveBasePath, 'trainval.txt'), 'w')
ftest = open(os.path.join(saveBasePath, 'test.txt'), 'w')
ftrain = open(os.path.join(saveBasePath, 'train.txt'), 'w')
fval = open(os.path.join(saveBasePath, 'val.txt'), 'w')

for i in list:
    name = total_xml[i][:-4] + '\n'  # total_xml[i][:-4]之所以只到-4,是因为最后4位是 .xml,这个我们暂时不需要
    if i in trainval:
        ftrainval.write(name)
        if i in train:
            ftrain.write(name)
        else:
            fval.write(name)
    else:
        ftest.write(name)

ftrainval.close()
ftrain.close()
fval.close()
ftest.close()
print("Generate txt in ImageSets done.")
输出
Generate txt in ImageSets.
train and val size 8404
train size 7353
Generate txt in ImageSets done.
此时VOCdevkit/VOC2007/ImageSets/Main多个几个文件,VOCdevkit的结构如下图所示:
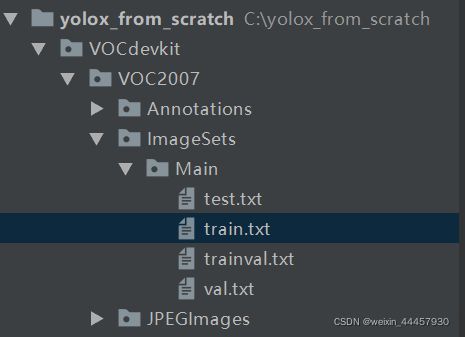
四个txt文件中是样本的去掉后缀后的文件名,例如train.txt如下图所示

(3)从xml文件中提取目标信息(边框和分类)
数据集划分好了,但目标的边框和分类却还在xml文件中,下面我们将其提取出来。
我们在yolox_from_scratch下建立一个名为model_data的文件夹,用于存放需要的分类信息,新建之后,项目结构如下:

在yolox_from_scratch下新建一个名为annotations_convert.py的程序,内容如下:
import os
import xml.etree.ElementTree as ET

VOCdevkit_sets = [('2007', 'train'), ('2007', 'val')]       # 数据集
VOCdevkit_path = 'VOCdevkit'                    			# 数据集文件路径
classes = ['D00', 'D10', 'D20', 'D40']                      # 类名


def convert_annotation(year, image_id, list_file):
    in_file = open(os.path.join(VOCdevkit_path, 'VOC%s/Annotations/%s.xml' % (year, image_id)), encoding='utf-8')
    tree = ET.parse(in_file)                # 解析xml文件
    root = tree.getroot()                   # 获得根目录

    for obj in root.iter('object'):
        difficult = 0
        if obj.find('difficult') != None:
            difficult = obj.find('difficult').text
        cls = obj.find('name').text                     # 获得目标的类名
        if cls not in classes:                          # 并非所有目标都是需要检测的
            continue
        cls_id = classes.index(cls)
        xmlbox = obj.find('bndbox')
        b = (int(float(xmlbox.find('xmin').text)), int(float(xmlbox.find('ymin').text)),
             int(float(xmlbox.find('xmax').text)), int(float(xmlbox.find('ymax').text)))
        list_file.write(" " + ",".join([str(a) for a in b]) + ',' + str(cls_id))
        # ",".join([str(a) for a in b])生生一个新的字符串,这个字符串用“,”列表进行分隔


if __name__ == '__main__':
    print("Generate 2007_train.txt and 2007_val.txt for train.")
    for year, image_set in VOCdevkit_sets:
        image_ids = open(os.path.join(VOCdevkit_path, 'VOC%s/ImageSets/Main/%s.txt' % (year, image_set)),
                         encoding='utf-8').read().strip().split()
        # os.path.join(VOCdevkit_path, 'VOC%s/ImageSets/Main/%s.txt' % (year, image_set))
        # 返回 VOCdevkit/VOC2007/ImageSets/Main/train.txt 或 VOCdevkit/VOC2007/ImageSets/Main/test.txt
        # read()是一次读取所有,它返回的是一个字符串,而readlines()返回的是一个列表,列表的每个元素都是一行
        # strip()是去掉头尾的空字符
        # split()使其能按\n符划分,因为read()返回的是所有行构成的一个字符串,也包括了换行符

        list_file = open('%s_%s.txt' % (year, image_set), 'w', encoding='utf-8')    # 打开2007_train.txt或者2007_val.txt
        for image_id in image_ids:
            list_file.write('%s/VOC%s/JPEGImages/%s.jpg' % (VOCdevkit_path, year, image_id))    # 将图片文件名写入
            convert_annotation(year, image_id, list_file)
            list_file.write('\n')
        list_file.close()
    print("Generate 2007_train.txt and 2007_val.txt for train done.")
    with open('model_data/voc_classes.txt', 'w+') as f:
        f.write('\n'.join(classes))
上面的程序之所以写的那么复杂,是因为从别的地方拷过来的,时间紧迫,没有来得及精简
程序运行之后,目录结构变成如下形式:

在yolox_from_scratch下多了两个txt文件,我们打开2007_train.txt,内容如下:

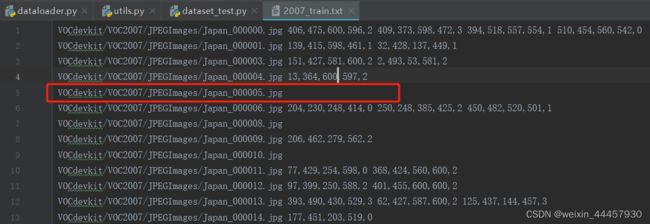
这个txt文件将图片名和对应的目标标签信息放在了同一行,2007_val.txt的内容也是类似。一张图片中可能存在多个目标(如Japan_00000.jpg),也有可能没有目标(如Japan_00005.jpg)。
在model_data下面多了一个名为voc_classes.txt的文件夹,内容如下:

2 数据集类
在yolox_from_scratch下新建一个程序包,名为utils,在里面新建一个名为dataloader.py的文件,新建后结构如下图所示:

(1)__init__与__len__函数
再dataloader.py中,先把要使用的包导入进来
from random import sample, shuffle

import cv2
import numpy as np
from PIL import Image
from torch.utils.data.dataset import Dataset
在这个py文件中定义一个数据集类,该类继承torch.utils.data中的Dataset类,自制的数据集类必须实现三个函数: __init__、__len__和__getitem__,分别是初始化类,求长度len(obj),通过索引获得单个样本及其标签。
先写__init__、__len__这两个函数:
import cv2
import numpy as np
from PIL import Image
from torch.utils.data.dataset import Dataset


class YoloDataset(Dataset):
    def __init__(self, annotation_lines, input_shape, num_classes,
                 is_train, mosaic=False, mixup=False, mosaic_prob=0.5, mixup_prob=0.5):
        """

        Args:
            annotation_lines:       这是标签文件(例如2007_train.txt)中每一行构成的列表,通过open后readlines()获得
            input_shape:            输入到模型的图像尺寸
            num_classes:            需要检测的类数
            is_train:               对应的模型是否为训练状态,这个对是否进行普通的数据增强有影响
                                    在训练状态下,无论是否使用mosaic和mix_up数据增强,都必须要使用普通数据增强
                                    普通的数据增强包括随机调整高宽比、随机镜像、色域扭曲等
                                    如果不在训练状态(即eval状态),那么任何形式的数据增强都不使用
            mosaic:                 是否使用马赛克数据增强
            mixup:                  是否使用mix_up数据增强
            mosaic_prob:            当mosaic=True时,图片进行马赛克数据增强的概率
            mixup_prob:             当mixup=True时,图片进行mixup数据增强的概率
        """
        super(YoloDataset, self).__init__()
        self.annotation_lines = annotation_lines
        self.length = len(self.annotation_lines)    # 标签长度,其实就是图片数量

        self.input_shape = input_shape      # 输入到模型的图像尺寸
        self.num_classes = num_classes      # 需要检测的类别数
        self.is_train = is_train            # 对应的模型是否为训练状态
        self.mosaic = mosaic                # 是否使用马赛克数据增强
        self.mixup = mixup                  # 是否使用mix_up数据增强
        self.mosaic_prob = mosaic_prob      # 当mosaic=True时,图片进行马赛克数据增强的概率
        self.mixup_prob = mixup_prob        # 当mixup=True时,图片进行mixup数据增强的概率

        self.step_now = -1                  # 用来对读取了多少张图片进行计数

    def __len__(self):
        return self.length
(2)__getitem__函数
接下来是__getitem__,通常来讲,自己定义的数据集类中,这个函数是最复杂的,因为在这个函数中,要对标签进行处理,将其转化成标准格式,如果涉及到了数据增强,也是在这个函数中进行处理。(一般在使用torch完成计算机视觉任务中,最难写的地方有两个,一个是这里的__getitem__函数,另一个是计算损失函数)
    def __getitem__(self, index):
        index = index % self.length  # 将索引调整到0-self.length,防止索引越界

        self.step_now += 1  # 读取图片计数+1
        # ---------------------------------------------------#
        #   训练时进行数据的随机增强
        #   验证时不进行数据的随机增强
        # ---------------------------------------------------#
        if self.is_train:
            if self.mosaic:
                # 我看原版的yolox代码中,mosaic和mixup并非独立,只有当mosaic为True时,才会讨论mixup是否为True
                # 但由于马赛克数据增强代码还没有整明白,所以这里先pass
                pass
            else:
                image, box = self.get_random_data(self.annotation_lines[index], self.input_shape, rand=True)
        else:
            image, box = self.get_random_data(self.annotation_lines[index], self.input_shape, rand=False)

        # 先将图片按ImageNet的均值与方差进行标准化,再将通道索引调到最前面
        from utils.utils import preprocess_input
        image = np.transpose(preprocess_input(np.array(image, dtype=np.float32)), (2, 0, 1))

        # 指定数据类型,经过数据增强后,box的类型为np.int32,这里将其转化成np.float32
        box = np.array(box, dtype=np.float32)
        # 若当前图片没有目标,那么box将是一个空数组,没有类型,上面的命令也可以对空数组指定类型

        # 将box的上下角点坐标转化成x,y,w,h
        if len(box) != 0:
            box[:, 2:4] = box[:, 2:4] - box[:, 0:2]
            box[:, 0:2] = box[:, 0:2] + box[:, 2:4] / 2

        return image, box
上面的程序中,调用了self.get_random_data和preprocess_input两个方法,我们先来讲self.get_random_data。
如果没有涉及到mosaic数据增强,那么都在self.get_random_data中进行处理,如果模型处于训练状态,那么就进行传统的数据增强(如随机缩放等),如果模型处于评估状态,那么就不做数据增强。
下面是函数get_random_data的注释
    def get_random_data(self, annotation_line, input_shape, jitter=.3, hue=.1, sat=1.5, val=1.5, rand=True):
        """
        传统数据增强策略,包括随机缩放、高宽扭曲、随机镜像、色域扭曲
        关于色域(HSV颜色模型),可以看这篇文章:https://www.cnblogs.com/lfri/p/10426113.html
        Args:
            annotation_line:self.annotation_lines中的一行,里面有图片的路径、box标签的信息
            input_shape:模型输入图片的尺寸,也就是说,这里要将图片转化成这个尺寸
            jitter:用于生成一个宽高的缩放因子,例如jitter是0.3的时候,缩放因子为从(1-0.3,1+0.3)中随机生成一个
            hue:色调
            sat:饱和度
            val:明亮度
            rand:是否需要进行随机数据增强,因为只有模型处于训练状态下才需要数据增强,
                所以这里的True、False代表模型是否处于训练状态

        Returns:

        """
我们可以先从annotation_line中获得图像和box,这些通用信息无论是训练状态和评估状态,都能使用
        """将图片和标注信息分割"""
        line = annotation_line.split()

        """读取图像并转换成RGB图像"""
        from utils.utils import cvtColor
        image = Image.open(line[0])
        image = cvtColor(image)

        """获得图像的高宽与模型的输入高宽"""
        iw, ih = image.size     # 原图像的宽高
        h, w = input_shape      # 模型的输入尺寸,输入模型的尺寸,是高在前

        """获得目标框,并转化为numpy数组"""
        box = np.array([np.array(list(map(int, box.split(',')))) for box in line[1:]])  # line是一个列表了
        # 若图片中没有目标,那么line这个列表中只有一个元素,即图片的路径字符串
        # 但是line[1:]不会报错,这会返回一个空列表,但line[1]会报错
        # 也就是说,对于列表索引越界,如果是取单个元素则会报错,但如果是取切片则不会报错
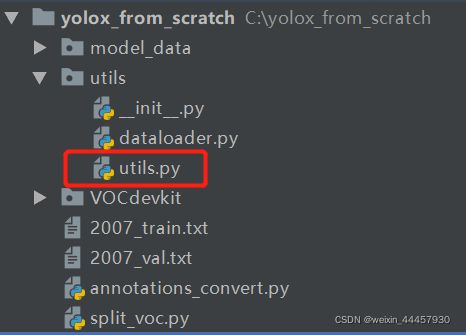
这里调用了cvtColor函数,我们在utils中新建一个名为utils.py的文件,建立后的项目结构为:
在utils.py中写入下面的函数:
import numpy as np


# ---------------------------------------------------------#
#   将图像转换成RGB图像,防止灰度图在预测时报错。
#   代码仅仅支持RGB图像的预测,所有其它类型的图像都会转化成RGB
# ---------------------------------------------------------#
def cvtColor(image):
    """image是PIL.Image.open的返回值,该函数的意义在于将图像转化成RGB三个通道"""
    if len(np.shape(image)) == 3 and np.shape(image)[-2] == 3:  # 检查image是否为3个通道
        return image
    else:
        image = image.convert('RGB')
        return image
回到get_random_data中,我们先来处理模型处于评估状态时的情形:
        """如果非训练状态,就不需要数据增强了,直接进行 letter_box 转化"""
        if not rand:
            scale = min(w/iw, h/ih)     # 按照原始图片的高宽中较大的一边来确定比例
            # 因为模型的输入尺寸都是正方形,所以 iw=ih,因此 w/iw 和 h/ih 的分母相同
            # 假如原图片中宽比较小,那么 w/iw 比较大,min(w/iw, h/ih)就是 h/ih
            # 也就是说,scale是按照原始图片的高宽中较大的一边来确定比例

            nw = int(iw*scale)          # 新的宽
            nh = int(ih*scale)          # 新的高
            dx = (w-nw)//2              # letter_box算法中左右两个灰条宽度
            dy = (h-nh)//2              # 上下两个灰条宽度
            # 因为横向和纵向,只有一个方向有灰条,因此dx和dy其中一个必然为0,
            # 如果原始图片是正方形,那么dx和dy两个都为0

            # 按照新的宽和高缩放图像
            image = image.resize((nw,nh), Image.BICUBIC)

            # 生成一个指定宽高的灰度图作为画布,其三个颜色通道都是128
            new_image = Image.new('RGB', (w, h), (128, 128, 128))   # (128, 128, 128)是灰条的三通道像素值

            # 将缩放后的图像粘贴到画布中央
            new_image.paste(image, (dx, dy))                        # 把缩放后的图片粘贴到new_image的指定位置
            image_data = np.array(new_image, np.float32)            # 转化成指定格式

            # 对真实框进行调整
            if len(box) > 0:
                np.random.shuffle(box)
                box[:, [0, 2]] = box[:, [0, 2]]*nw/iw + dx          # 将上下角点的横坐标转化成letter_box后的横坐标
                box[:, [1, 3]] = box[:, [1, 3]]*nh/ih + dy          # 将上下角点的纵坐标转化成letter_box后的纵坐标

                box[:, 0:2][box[:, 0:2] < 0] = 0                    # 负值检查(为何横坐标有负值检查,而纵坐标没有?)
                box[:, 2][box[:, 2] > w] = w                        # 越界检查
                box[:, 3][box[:, 3] > h] = h
                # 上面三项真的有必要吗?

                box_w = box[:, 2] - box[:, 0]                       #
                box_h = box[:, 3] - box[:, 1]
                box = box[np.logical_and(box_w > 1, box_h > 1)]     # discard invalid box 将宽高大于1的边框筛选出来

            return image_data, box
如果模型处于训练状态,那么就不会执行上面的if语句,而是要进行数据增强,这里的数据增强分成4个部分:随机缩放与高宽扭曲、随机镜像、色域扭曲。
下面的程序是 随机缩放与高宽扭曲
        """对图像进行缩放并且进行高宽扭曲"""
        new_ar = w/h * self.rand(1-jitter, 1+jitter) / self.rand(1-jitter, 1+jitter)    # 随机生成一个新的宽高比
        scale = self.rand(.25, 2)                                                       # 随机生成一个缩放因子

        # 高和宽哪个大(可以根据new_ar来获得),就缩放哪个,另一个按照高宽比来获得
        if new_ar < 1:                          #
            nh = int(scale*h)                   # 现将高按缩放因子缩放
            nw = int(nh*new_ar)                 # 根据新的高和新的高宽比,获得新的宽
        else:
            nw = int(scale*w)
            nh = int(nw/new_ar)

        # 根据新的宽和高,缩放图像
        image = image.resize((nw, nh), Image.BICUBIC)

        """将图像多余的部分加上灰条,这里左右(或上下)的灰条,未必一样厚"""
        dx = int(self.rand(0, w-nw))
        dy = int(self.rand(0, h-nh))
        # 上面的dx和dy有可能为负,因为scales有可能大于1,那么nh和nw有可能大于h和w

        new_image = Image.new('RGB', (w, h), (128, 128, 128))           # 生成指定宽高的画布
        new_image.paste(image, (dx, dy))                                # 将缩放后的图像粘贴到画布的指定位置
        # 如果dx大于0,那么说明w>nw,那么整个过程相当于是在横向缩小,然后在左右两边填充灰条
        # 如果dx小于0,那么说明w
        # dy也是类似的,总之,经过上面的命令之后,new_image的宽高就是(w, h)了

        image = new_image
这里调用了self.rand函数,这是YoloDataset类的一个成员方法,如果没有指定参数,则生成一个0-1之间的随机数,如果指定了a和b,那就生成一个a-b之间的随机数
    def rand(self, a=0, b=1):
        """生成一个a-b之间的随机数,比如要生成一个0-100的随机数,那么可以a=0, b=100"""
        return np.random.rand()*(b-a) + a
回到get_random_data中,接下来是色域扭曲:
        """色域扭曲"""
        hue = self.rand(-hue, hue)                                          # 新的色调比例
        sat = self.rand(1, sat) if self.rand()<.5 else 1/self.rand(1, sat)  # 新的饱和度
        val = self.rand(1, val) if self.rand()<.5 else 1/self.rand(1, val)  # 新的明亮度
        x = cv2.cvtColor(np.array(image, np.float32)/255, cv2.COLOR_RGB2HSV)    # 将RGB转HSV,获得新的图形(numpy数组)

        # 调整色调
        x[..., 0] += hue * 360
        x[..., 0][x[..., 0] > 360] -= 360  # 根据周期将色调调整到合理区间
        x[..., 0][x[..., 0] < 0] += 360  # 将色调调整到合理区间
        # x[..., 0]返回的是一个shape为(nw, nh)的numpy数组,
        # x[..., 0]>360返回的是一个shape为(nw, nh)的布尔数组
        # x[..., 0][x[..., 0] > 360] 和 x[..., 0][x[..., 0] < 360]是布尔索引
        # 因为x[..., 0] += hue之后,hue有可能大于360,也有可能小于0,这里是将其调整到0-360这个区间内

        # 调整饱和度与亮度
        x[..., 1] *= sat
        x[..., 2] *= val

        # 将饱和度、亮度调整到0-1之间
        x[:, :, 1:][x[:, :, 1:] > 1] = 1
        x[:, :, 1:][x[:, :, 1:] < 0] = 0

        # 将HSV转回RGB
        image_data = cv2.cvtColor(x, cv2.COLOR_HSV2RGB)*255                 # 将HSV转回RGB
上面的程序中,将RGB转化为HSV时,图像数据进行了归一化,这使得转化成HSV后,饱和度与亮度都归一化了,但色域却没有,转化后色域依然是0~360。
最后是根据数据增强的情况对目标框进行调整,并返回增强后的图像及目标框
        """对目标框进行调整"""
        if len(box) > 0:
            np.random.shuffle(box)

            # 根据图像缩放比例和灰条确定新的box的位置
            box[:, [0, 2]] = box[:, [0, 2]]*nw/iw + dx
            box[:, [1, 3]] = box[:, [1, 3]]*nh/ih + dy

            # 根据是否进行了镜像操作,对box的横坐标进行操作
            if flip:
                box[:, [0, 2]] = w - box[:, [2, 0]]

            # box的异常值检查
            box[:, 0:2][box[:, 0:2] < 0] = 0
            box[:, 2][box[:, 2] > w] = w
            box[:, 3][box[:, 3] > h] = h

            # 将宽和高合格的box筛选出来
            box_w = box[:, 2] - box[:, 0]
            box_h = box[:, 3] - box[:, 1]
            box = box[np.logical_and(box_w > 1, box_h > 1)]

        """返回图像数据(numpy数组)和边框(同样是numpy数组)"""
        return image_data, box
接下来写前面提到的preprocess_input方法
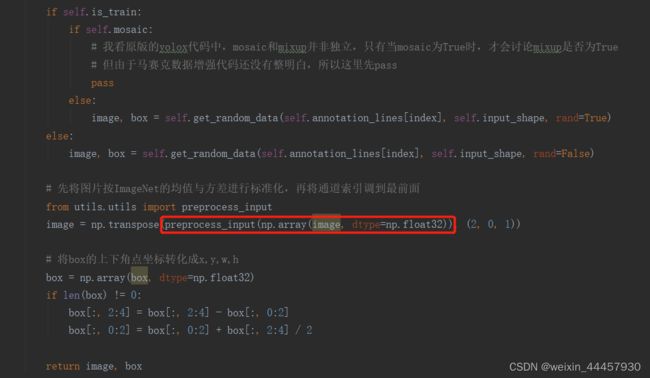
在utils.py中加入下面的函数
def preprocess_input(image):
    """在输入模型前,将图片先标准化(按imagenet)的均值与方差
    """
    image /= 255.0
    image -= np.array([0.485, 0.456, 0.406])     # imagenet的均值      # TODO 这里的均值和方差,是否需要修改成自己的数据集?
    image /= np.array([0.229, 0.224, 0.225])    # imagenet的标准差
    return image
(3)dataset测试脚本
好的,现在我们已经完成数据集类了,接下来写一个测试脚本。
在yolox_from_scratch下新建一个名为dataloader_test.py的文件,内容如下:
import numpy as np
import matplotlib.pyplot as plt
import matplotlib.patches as patches
from utils.dataloader import YoloDataset
import cv2

import os
os.environ["KMP_DUPLICATE_LIB_OK"] = "TRUE"

if __name__ == '__main__':
    """设置种子"""
    np.random.seed(0)

    """获得数据集类的相关初始化参数"""
    train_annotation_path = '2007_train.txt'
    with open(train_annotation_path) as f:
        train_lines = f.readlines()                     # train_lines将是一个列表

    input_shape = [640, 640]
    num_classes = 4
    mosaic = False
    mixup = False

    """建立数据集类对象"""
    train_dataset = YoloDataset(train_lines, input_shape, num_classes, is_train=True, mosaic=mosaic, mixup=mixup)

    """通过索引获得增强后的图像及标签"""
    img, boxes = train_dataset[2]
    img = np.transpose(img, (1, 2, 0))      # 将通道调整到最后
    print("boxes info after data_augmentation (center_x, center_y, w, h):")
    print(boxes)

    # 绘图
    ax1 = plt.subplot(1, 2, 1)
    ax1.imshow(img)
    for box in boxes:
        # center_x, center_y, w, h, _ = tuple(map(int, value) for value in box)
        center_x, center_y, w, h, _ = box[0], box[1], box[2], box[3], box[4]
        ax1.add_patch(patches.Rectangle((center_x-w//2, center_y-h//2), w, h, facecolor="red", alpha=0.3))
        # Rectangle的第一个参数最靠近0的点的坐标(这里是左上角),后面是宽和高,然后是颜色和透明度
    ax1.set_title("data_augmentation")

    """原始图片与标签"""
    orig_info = train_lines[2]
    line = orig_info.split()
    img_dir = line[0]               # 图片路径
    boxes = line[1:]                # 目标框信息
    boxes = np.array([np.array(list(map(int, box.split(',')))) for box in line[1:]])
    print("original boxes:")
    print(boxes)

    # 绘图
    ax2 = plt.subplot(1, 2, 2)
    img_orig = cv2.imread(img_dir)
    img_orig = cv2.cvtColor(img_orig, cv2.COLOR_BGR2RGB)
    ax2.imshow(img_orig)
    for box in boxes:
        top_left_x, top_left_y, low_right_x, low_right_y, _ = box[0], box[1], box[2], box[3], box[4]
        w = (top_left_x + low_right_x)//2
        h = (top_left_y + low_right_y)//2
        ax2.add_patch(patches.Rectangle((top_left_x, top_left_y), w, h, facecolor="red", alpha=0.3))
    ax2.set_title("original")

    plt.show()
终端输出为:
boxes info after data_augmentation (center_x, center_y, w, h):
[[383. 576. 514. 128.   2.]
 [  1. 622.   2.  36.   2.]]
Clipping input data to the valid range for imshow with RGB data ([0..1] for floats or [0..255] for integers).
original boxes:
[[151 427 581 600   2]
 [  2 493  53 581   2]]
这边注意一下,经过数据增强后的第二个box,它的宽仅仅是2个像素,通常情况下不可能是这么小,只有可能是随机裁剪,使得目标框被剪掉了,结合图形,我们可以看到目标框在增强图和原图中的情况:
在 2007_train.txt文件中,第五行只有图片路径,没有边框信息,我们将索引改为4,来debug一下程序,看看无边框时,__getitem__返回的box是什么,并且跟踪__getitem__中box的类型变化。
程序如下,因为这里不好显示debug过程,所以这里就直接运行,自己敲的时候,最好debug
import numpy as np
import matplotlib.pyplot as plt
import matplotlib.patches as patches
from utils.dataloader import YoloDataset
import cv2

import os
os.environ["KMP_DUPLICATE_LIB_OK"] = "TRUE"

if __name__ == '__main__':
    """设置种子"""
    np.random.seed(0)

    """获得数据集类的相关初始化参数"""
    train_annotation_path = '2007_train.txt'
    with open(train_annotation_path) as f:
        train_lines = f.readlines()                     # train_lines将是一个列表

    input_shape = [640, 640]
    num_classes = 4
    mosaic = False
    mixup = False

    """建立数据集类对象"""
    train_dataset = YoloDataset(train_lines, input_shape, num_classes, is_train=True, mosaic=mosaic, mixup=mixup)

    """通过索引获得增强后的图像及标签"""
    img, boxes = train_dataset[4]           # 索引为4,对应的图片名称为 VOCdevkit/VOC2007/JPEGImages/Japan_000005.jpg
    img = np.transpose(img, (1, 2, 0))      # 将通道调整到最后
    print("boxes info after data_augmentation (center_x, center_y, w, h):")
    print(boxes)
	print(type(boxes))						# 再增加一行打印boxes的类型

    # 绘图
    ax1 = plt.subplot(1, 2, 1)
    ax1.imshow(img)
    for box in boxes:
        # center_x, center_y, w, h, _ = tuple(map(int, value) for value in box)
        center_x, center_y, w, h, _ = box[0], box[1], box[2], box[3], box[4]
        ax1.add_patch(patches.Rectangle((center_x-w//2, center_y-h//2), w, h, facecolor="red", alpha=0.3))
        # Rectangle的第一个参数最靠近0的点的坐标(这里是左上角),后面是宽和高,然后是颜色和透明度
    ax1.set_title("data_augmentation")

    """原始图片与标签"""
    orig_info = train_lines[4]      # 索引为4,对应的图片名称为 VOCdevkit/VOC2007/JPEGImages/Japan_000005.jpg
    line = orig_info.split()
    img_dir = line[0]               # 图片路径
    boxes = line[1:]                # 目标框信息
    boxes = np.array([np.array(list(map(int, box.split(',')))) for box in line[1:]])
    print("original boxes:")
    print(boxes)

    # 绘图
    ax2 = plt.subplot(1, 2, 2)
    img_orig = cv2.imread(img_dir)
    img_orig = cv2.cvtColor(img_orig, cv2.COLOR_BGR2RGB)
    ax2.imshow(img_orig)
    for box in boxes:
        top_left_x, top_left_y, low_right_x, low_right_y, _ = box[0], box[1], box[2], box[3], box[4]
        w = (top_left_x + low_right_x)//2
        h = (top_left_y + low_right_y)//2
        ax2.add_patch(patches.Rectangle((top_left_x, top_left_y), w, h, facecolor="red", alpha=0.3))
    ax2.set_title("original")

    plt.show()
这边输出
boxes info after data_augmentation (center_x, center_y, w, h):
[]
<class 'numpy.ndarray'>
Clipping input data to the valid range for imshow with RGB data ([0..1] for floats or [0..255] for integers).
original boxes:
[]
显示的图像为:
3 collate_fn及测试脚本
在dataloader.py中增加一个函数,这样就能通过DataLoader一次性导入多张图片及其标签(即一个batch的data和targets)
# DataLoader中collate_fn使用
def yolo_dataset_collate(batch):
    images = []
    bboxes = []
    for img, box in batch:
        images.append(img)
        bboxes.append(box)
    images = np.array(images)
    return images, bboxes
上面的函数,将整个batch的所有图片整合成一个张量(numpy数组),而每张图片对应的box原来是是一个二维的numpy数组,但上面的函数将一个batch中的所有box都放到了同一个列表当中。
我们来写两个测试脚本
第一个脚本测试返回值类型:
代码如下:
import numpy as np
import matplotlib.pyplot as plt
import matplotlib.patches as patches
from torch.utils.data import DataLoader

from utils.dataloader import YoloDataset, yolo_dataset_collate

if __name__ == '__main__':
    """设置种子"""
    np.random.seed(0)

    """获得数据集类的相关初始化参数"""
    train_annotation_path = '2007_train.txt'
    with open(train_annotation_path) as f:
        train_lines = f.readlines()  # train_lines将是一个列表

    input_shape = [640, 640]
    num_classes = 4
    mosaic = False
    mixup = False

    """建立数据集类对象"""
    train_dataset = YoloDataset(train_lines, input_shape, num_classes, is_train=True, mosaic=mosaic, mixup=mixup)

    batch_size = 4
    num_workers = 4

    """建立导入器对象"""
    gen = DataLoader(train_dataset, batch_size=batch_size, num_workers=num_workers, pin_memory=True,
                     drop_last=True, collate_fn=yolo_dataset_collate)

    for iteration, batch in enumerate(gen):
        images, targets = batch[0], batch[1]
        print("images type", type(images))
        print("images shape", images.shape)
        print("targets type", type(targets))
        print(targets)
        print('-'*50)

        if iteration == 1:
            break
输出
images type <class 'numpy.ndarray'>
images shape (4, 3, 640, 640)
targets type <class 'list'>
[array([[570. , 541. ,  54. ,  78. ,   0. ],
       [505.5, 575. , 177. ,  32. ,   1. ],
       [535. , 574.5, 210. , 107. ,   2. ],
       [535.5, 474.5, 205. ,  87. ,   3. ]], dtype=float32), array([[ 59., 515., 118.,  30.,   1.],
       [380., 514., 520.,  66.,   1.]], dtype=float32), array([[492.5, 373. ,  39. ,  50. ,   2. ],
       [237. , 360. , 324. ,  98. ,   2. ]], dtype=float32), array([[322., 412., 636., 174.,   2.]], dtype=float32)]
--------------------------------------------------
images type <class 'numpy.ndarray'>
images shape (4, 3, 640, 640)
targets type <class 'list'>
[array([], dtype=float32), array([[348.5, 255.5, 155. , 299. ,   2. ],
       [244. , 230.5,  50. , 311. ,   0. ],
       [540. , 517. ,  80. ,  32. ,   1. ]], dtype=float32), array([], dtype=float32), array([[187.5, 411. ,  39. ,  58. ,   2. ]], dtype=float32)]
--------------------------------------------------
第二个脚本用来绘图,代码如下:
import numpy as np
import matplotlib.pyplot as plt
import matplotlib.patches as patches
from torch.utils.data import DataLoader

from utils.dataloader import YoloDataset, yolo_dataset_collate

import os
os.environ["KMP_DUPLICATE_LIB_OK"] = "TRUE"

if __name__ == '__main__':
    """设置种子"""
    np.random.seed(0)

    """获得数据集类的相关初始化参数"""
    train_annotation_path = '2007_train.txt'
    with open(train_annotation_path) as f:
        train_lines = f.readlines()  # train_lines将是一个列表

    input_shape = [640, 640]
    num_classes = 4
    mosaic = False
    mixup = False

    """建立数据集类对象"""
    train_dataset = YoloDataset(train_lines, input_shape, num_classes, is_train=True, mosaic=mosaic, mixup=mixup)

    batch_size = 4
    num_workers = 4

    """建立导入器对象"""
    gen = DataLoader(train_dataset, batch_size=batch_size, num_workers=num_workers, pin_memory=True,
                     drop_last=True, collate_fn=yolo_dataset_collate)

    for iteration, batch in enumerate(gen):
        images, targets = batch[0], batch[1]
        images = np.transpose(images, (0, 2, 3, 1))     # 将通道调整到最后,方便绘图

        ax = [0, 0, 0, 0]
        for index in range(4):
            ax[index] = plt.subplot(2, 2, index+1)
            ax[index].imshow(images[index])
            for box in targets[index]:
                # center_x, center_y, w, h, _ = tuple(map(int, value) for value in box)
                center_x, center_y, w, h, _ = box[0], box[1], box[2], box[3], box[4]
                ax[index].add_patch(patches.Rectangle((center_x - w // 2, center_y - h // 2), w, h, facecolor="red", alpha=0.3))
                # Rectangle的第一个参数最靠近0的点的坐标(这里是左上角),后面是宽和高,然后是颜色和透明度

        break

    plt.show()
