谷粒学院day06
一.阿里云存储
1.阿里云存储介绍
阿里云对象存储OSS(Object Storage Service)是一款海量、安全、低成本、高可靠的云存储服务,提供99.9999999999%(12个9)的数据持久性,99.995%的数据可用性。多种存储类型供选择,全面优化存储成本。
1.创建阿里云账号,开通对象存储oss服务
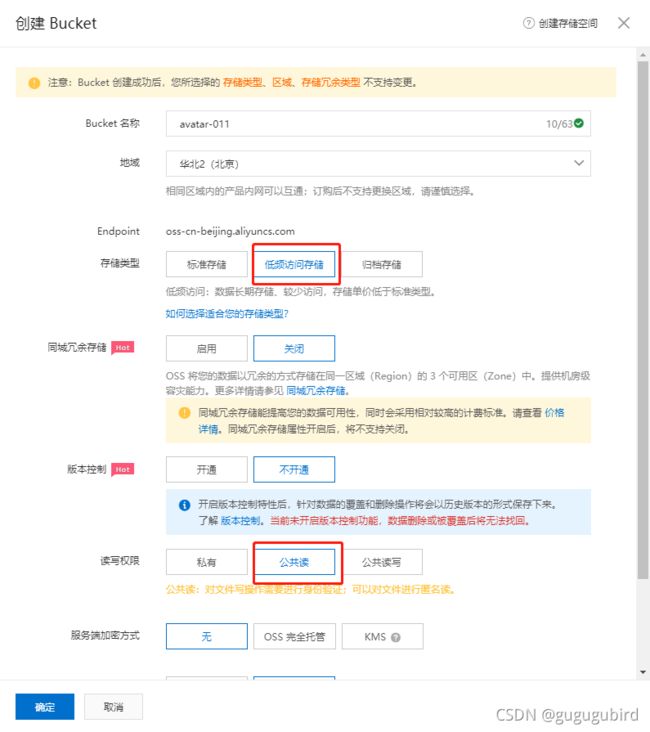
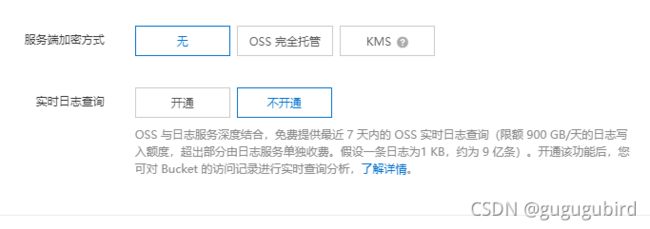
2.进入oss管理控制台,创建bucket
创建成功
3.创建AccessKey秘钥
2.java整合oss
1.创建Mavaen项目
2、pom文件中添加依赖
            com.aliyun.oss
            aliyun-sdk-oss


            joda-time
            joda-time
3.编写配置文件在resource文件下创建一个application.yml文件
#服务端口
server:
  port: 8002
#服务名
spring:
  application:
    name: service-oss
#环境设置:dev、test、prod
  profiles:
    active: dev


#阿里云 OSS
#不同的服务器,地址不同
OSS:
  endpoint: oss-cn-beijing.aliyuncs.com
  accessKeyId: LTAI5tNXoBMkvYovTt3UUpSL
  accessKeySecret: OcA7DwpvfGHQvyutS5m22ukta8hZPB
  bucketName: avatar-011
4.创建启动类,编写内容,启动测试
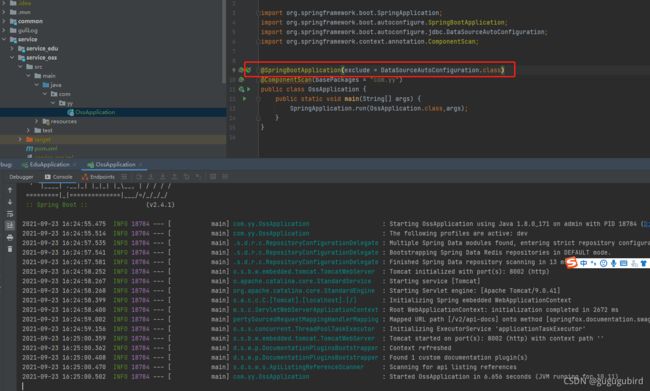
5.启动报错
该报错为在启动的时候,spring去找我们的数据源,但是我们这个模块不需要操作数据库,只需要做上传oss功能,没有配置数据库。
解决方式:
1.添加数据库配置
2.在启动类上添加配置,默认不去加载数据库(使用该方式)
启动成功!
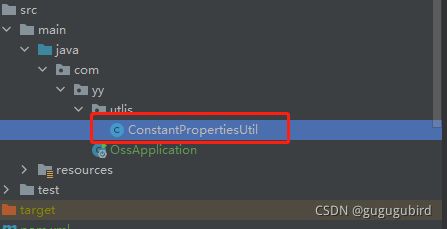
6.创建常量类,读取配置文件内容
创建常量读取工具类:ConstantPropertiesUtil.java 使用@Value读取application.properties里的配置内容
用spring的 InitializingBean 的 afterPropertiesSet 来初始化配置信息,这个方法将在所有的属性被初始化后调用。
package com.yy.utlis;

import org.springframework.beans.factory.InitializingBean;
import org.springframework.beans.factory.annotation.Value;
import org.springframework.stereotype.Component;

@Component
//当项目已启动,spring接口,spring加载之后,执行接口一个方法
public class ConstantPropertiesUtil implements InitializingBean {
    //读取配置文件内容
    @Value("${OSS.endpoint}")
    private String endpoint;

    @Value("${OSS.accessKeyId}")
    private String accessKeyId;

    @Value("${OSS.accessKeySecret}")
    private String accessKeySecret;

    @Value("${OSS.bucketName}")
    private String bucketName;

    //定义公开静态常量
    public static String END_POINT;
    public static String ACCESS_KEY_ID;
	public static String ACCESS_KEY_SECRET;
	public static String BUCKET_NAME;


    @Override
    public void afterPropertiesSet() throws Exception {
        END_POINT = endpoint;
        ACCESS_KEY_ID = accessKeyId;
        ACCESS_KEY_SECRET = accessKeySecret;
        BUCKET_NAME = bucketName;
    }
}
由于前边本人路径带上了eduService导致后边操作不方便,这边进行了修改
7.编写controller类
package com.yy.controller;

import com.yy.commonUtils.R;
import com.yy.service.OssService;
import org.springframework.beans.factory.annotation.Autowired;
import org.springframework.web.bind.annotation.CrossOrigin;
import org.springframework.web.bind.annotation.PostMapping;
import org.springframework.web.bind.annotation.RequestMapping;
import org.springframework.web.bind.annotation.RestController;
import org.springframework.web.multipart.MultipartFile;

@RestController
@RequestMapping("/eduOss/fileOss")
@CrossOrigin
public class OssController {

    @Autowired
    private OssService ossService;

    //上传头像
    @PostMapping("/uploadOssFile")
    public R uploadOssFile(MultipartFile file){
        //获取上传文件 MultipartFile
        String url = ossService.uploadFileAvatar(file);
        return R.ok().data("url", url);
    }
}
8.编写service类
package com.yy.service;

import org.springframework.web.multipart.MultipartFile;

public interface OssService {
    //上传头像
    String uploadFileAvatar(MultipartFile file);
}
9.编写imp类
package com.yy.service.impl;

import com.aliyun.oss.OSS;
import com.aliyun.oss.OSSClientBuilder;
import com.yy.service.OssService;
import com.yy.utlis.ConstantPropertiesUtil;
import org.springframework.web.multipart.MultipartFile;

import java.io.IOException;
import java.io.InputStream;

@Service
public class OssServiceImpl implements OssService {

    @Override
    public String uploadFileAvatar(MultipartFile file) {
        // yourEndpoint填写Bucket所在地域对应的Endpoint。以华东1(杭州)为例,Endpoint填写为https://oss-cn-hangzhou.aliyuncs.com。
        String endpoint = ConstantPropertiesUtil.END_POINT;
    // 阿里云账号AccessKey拥有所有API的访问权限,风险很高。强烈建议您创建并使用RAM用户进行API访问或日常运维,请登录RAM控制台创建RAM用户。
        String accessKeyId = ConstantPropertiesUtil.ACCESS_KEY_ID;
        String accessKeySecret = ConstantPropertiesUtil.ACCESS_KEY_SECRET;
        String bucketName = ConstantPropertiesUtil.BUCKET_NAME;


        try {
            // 创建OSSClient实例。
            OSS ossClient = new OSSClientBuilder().build(endpoint, accessKeyId, accessKeySecret);
            // 填写本地文件的完整路径。如果未指定本地路径,则默认从示例程序所属项目对应本地路径中上传文件流。
            InputStream inputStream = file.getInputStream();

            //获取文件名称
            String filename = file.getOriginalFilename();

            // 依次填写Bucket名称(例如examplebucket)和Object完整路径(例如exampledir/exampleobject.txt)。Object完整路径中不能包含Bucket名称。
            //第一个参数:bucket名称  第二个参数:上传到oss的文件和路径名称  aa/bb/cc.jpg   第三个参数:上传文件的输入流
            ossClient.putObject(bucketName, filename, inputStream);

            // 关闭OSSClient。
            ossClient.shutdown();

            //返回连接地址
            String url =bucketName+"."+endpoint+"/"+filename;
            return url;
        } catch (IOException e) {
            e.printStackTrace();
            return null;
        }
    }
}
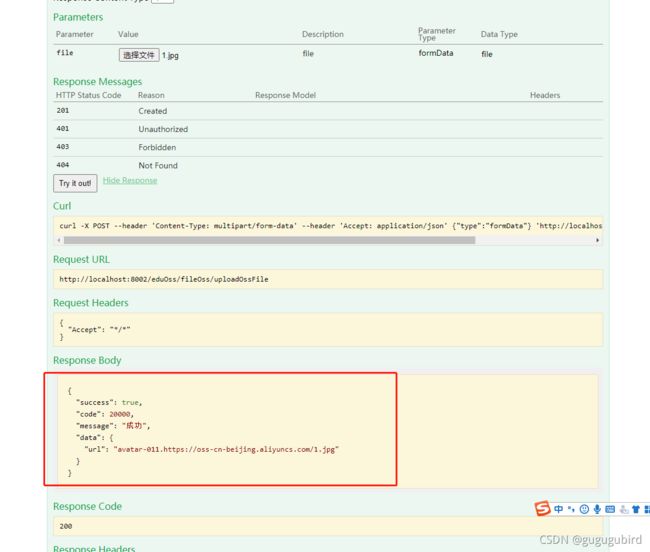
重启服务,进入http://localhost:8002/swagger-ui.htm测试
10.解决每次上传同一个文件,造成最后一次上传覆盖之前的文件
在文件名称添加随机的唯一值,让每个文件不一样
  //1.在文件名称上添加一个随机唯一值
            String uuid = UUID.randomUUID().toString().replaceAll("-", "");//将uuid的-替换掉
            String uuidFileName =uuid+filename;
11.把文件进行分类管理
根据日期进行分类,时间年月日分类
  //2.把文件按日期分类
            //获取当前日期时间
            String datePath = new DateTime().toString("yyyy/MM/dd");
            //拼接
            String filePathName = datePath+"/"+uuidFileName;
12.最终修改的实现类
package com.yy.service.impl;

import com.aliyun.oss.OSS;
import com.aliyun.oss.OSSClientBuilder;
import com.yy.service.OssService;
import com.yy.utlis.ConstantPropertiesUtil;
import org.joda.time.DateTime;
import org.springframework.stereotype.Service;
import org.springframework.web.multipart.MultipartFile;

import java.io.IOException;
import java.io.InputStream;
import java.util.UUID;

@Service
public class OssServiceImpl implements OssService {

    @Override
    public String uploadFileAvatar(MultipartFile file) {
        // yourEndpoint填写Bucket所在地域对应的Endpoint。以华东1(杭州)为例,Endpoint填写为https://oss-cn-hangzhou.aliyuncs.com。
        String endpoint = ConstantPropertiesUtil.END_POINT;
    // 阿里云账号AccessKey拥有所有API的访问权限,风险很高。强烈建议您创建并使用RAM用户进行API访问或日常运维,请登录RAM控制台创建RAM用户。
        String accessKeyId = ConstantPropertiesUtil.ACCESS_KEY_ID;
        String accessKeySecret = ConstantPropertiesUtil.ACCESS_KEY_SECRET;
        String bucketName = ConstantPropertiesUtil.BUCKET_NAME;


        try {
            // 创建OSSClient实例。
            OSS ossClient = new OSSClientBuilder().build(endpoint, accessKeyId, accessKeySecret);
            // 填写本地文件的完整路径。如果未指定本地路径,则默认从示例程序所属项目对应本地路径中上传文件流。
            InputStream inputStream = file.getInputStream();

            //获取文件实际的名称
            String filename = file.getOriginalFilename();

            //1.在文件名称上添加一个随机唯一值
            String uuid = UUID.randomUUID().toString().replaceAll("-", "");//将uuid的-替换掉
            String uuidFileName =uuid+filename;

            //2.把文件按日期分类
            //获取当前日期时间
            String datePath = new DateTime().toString("yyyy/MM/dd");
            //拼接
            String filePathName = datePath+"/"+uuidFileName;

            // 依次填写Bucket名称(例如examplebucket)和Object完整路径(例如exampledir/exampleobject.txt)。Object完整路径中不能包含Bucket名称。
            //第一个参数:bucket名称  第二个参数:上传到oss的文件和路径名称  aa/bb/cc.jpg   第三个参数:上传文件的输入流
            ossClient.putObject(bucketName, filePathName, inputStream);

            // 关闭OSSClient。
            ossClient.shutdown();

            //返回连接地址
            String url ="https://"+bucketName+"."+endpoint+"/"+filePathName;
            return url;
        } catch (IOException e) {
            e.printStackTrace();
            return null;
        }
    }
}
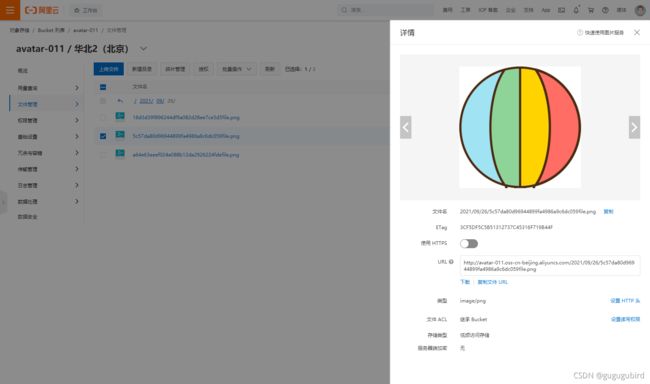
swagger测试
二.nginx
1.请求转发
当在一台主机上部署了多个不同的web服务器,并且需要能在80端口同时访问这些web服务器时,可以使用 nginx 的反向代理功能: 用 nginx 在80端口监听所有请求,并依据转发规则(比较常见的是以 URI 来转发)转发到对应的web服务器上。
2.负载均衡
nginx负载均衡有6中方式(轮询,权重,ip_hash,最少连接least_conn,fair,url_hash),使用upsteam模块实现负载均衡
nginx负载均衡的意思大概是指多台服务器部署一个服务,但是这几台服务器的负载压力不同,处理程序的效率不同,负载均衡的作用就是按服务器可承受的负载将请求转发到对于的服务器中。 从而分担服务器的压力,让用户可以更快得到访问的数据。得到更好的体验。
例如设置使用nginx发布两个不同的html文件,使用nginx设置负载均衡,使用本地电脑访问nginx负载均衡的地址,刷新页面,将轮流显示两个页面。
原文链接:https://blog.csdn.net/weixin_44707404/article/details/107444127
1.轮询
页面2
将用户的请求按顺序依次转发到不同的服务器上
在nginx配置文件中server模块上增加以下内容
  	 upstream  test-server { #test-server的名字自己起
  	 #每一个server对应一个负载服务
       server    localhost:8080 ;
       server    localhost:8081 ;
   }
2、权重
权重是基于轮询,利用weihgt设置服务的访问比例,此场景适用于服务器可承受的负载压力不一致时,例如A(192.168.42.174)服务器可承受1个访问请求,B(192.168.42.175)服务器可以承受两个访问请求,此时就可以使用weihgt方式设置比例为1:2。当有3个用户同时访问时,其中A服务器处理1个访问请求,B服务器处理2个访问请求,从而实现负载均衡。
nginx配置如下
  	 upstream  test-server { #test-server的名字自己起
  	 #每一个server对应一个负载服务
       server    192.168.42.174:8080 weight=1;
       server    192.168.42.175:8081 weight=2;
     }
3、ip_hash
ip_hash是将某台电脑的访问请求绑定到一个后端服务器上,如两个不一致的前端页面,设置ip_hash方式后,若访问到的时test2页面,则无论怎么刷新页面,至显示test2页面
nginx配置文件如下:
  	 upstream  test-server {
  	   ip_hash;
       server    localhost:8080 ;
       server    localhost:8081 ;
     }
ip_bash可与weight配合使用,使用ip_hash时,可以解决登录失效的情况
  	 upstream  test-server {
  	   ip_hash;
       server    localhost:8080 weight=2;
       server    localhost:8081 weight=1;
     }
4、最少连接least_conn
将用户的请求转发到有最少处理请求的服务器中,若A目前处理了5个请求,B处理了10个请求,当我的电脑再次访问nginx时,则我的请求将会转发到A服务器中,least_conn可与weight配合使用
nginx配置文件如下:
   upstream  test-server {
       least_conn;
       server    localhost:8080;
       server    localhost:8081;
   }
5.nginx.conf配置文件内容详解
upstream  test-server {
   #least_conn;
   server    localhost:8080;
   server    localhost:8081;
   }
server {
    listen       80;
    server_name  localhost;
    location / {
    proxy_pass http://test-server;
        proxy_redirect default;
    }
    error_page   500 502 503 504  /50x.html;
    location = /50x.html {
        root   html;
    }
}


server {
    listen       8080;
    server_name  localhost;
    location / {
        root   html;
        index  index.html index.htm;
    }
    error_page   500 502 503 504  /50x.html;
    location = /50x.html {
        root   html;
    }
}

server {
    listen       8081;
    server_name  localhost;
    location / {
        root   html2;
        index  index.html index.htm;
    }
    error_page   500 502 503 504  /50x.html;
    location = /50x.html {
        root   html;
    }
}
3.动静分离
动静分离主要是通过nginx+PHP-FPM来实现,其中nginx处理图片,html等静态的文件,PHP处理动态程序[PHP-FPM]
简单点来说,就是用户在请求的时候,如果只是简单的访问图片,html等静态的请求时,nginx直接返回,如果是发送动态请求时候,需要程序进行就由nginx把请求发送给程序,进行动态处理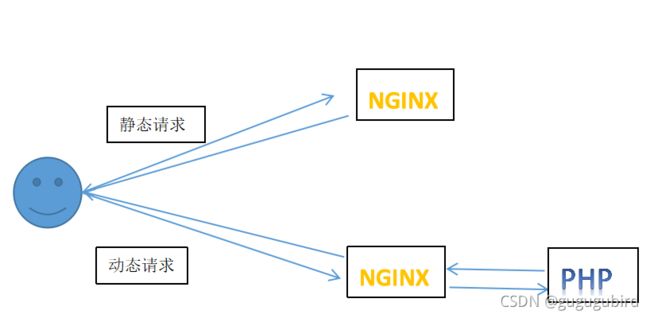
4.下载安装
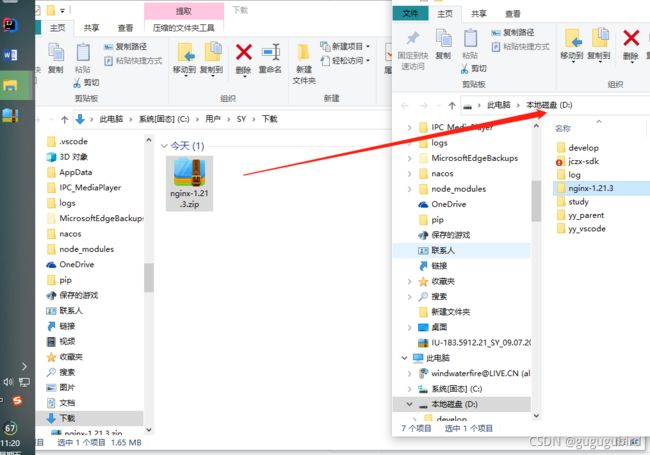
1.官网 nginx: download
下载之后解压到自己对应的目录即可
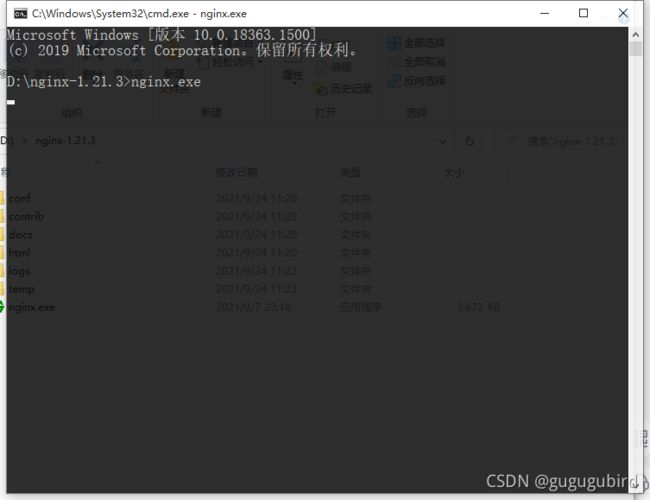
2.启动nginx
在该文件夹下输入cmd
启动成功!!!
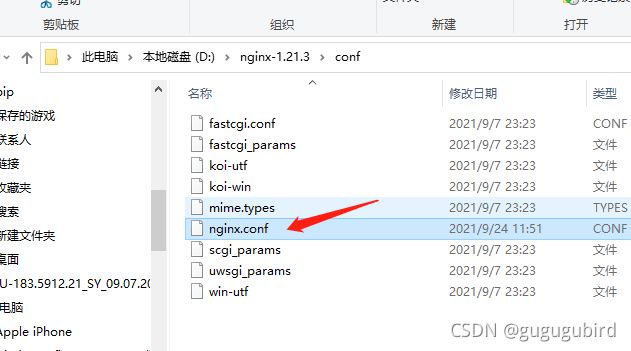
3.编写配置文件
在http里边修改端口
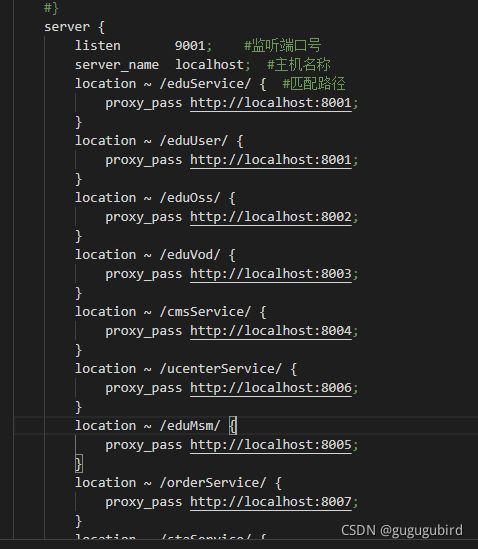
添加内容
server {
        listen       9001;    #监听端口号
        server_name  localhost;  #主机名称
        location ~ /eduService/ {  #匹配路径
            proxy_pass http://localhost:8001;
        }
        location ~ /eduUser/ {
            proxy_pass http://localhost:8001;
        }
        location ~ /eduOss/ {
            proxy_pass http://localhost:8002;
        }
        location ~ /eduVod/ {
            proxy_pass http://localhost:8003;
        }
        location ~ /cmsService/ {
            proxy_pass http://localhost:8004;
        }
        location ~ /ucenterService/ {
            proxy_pass http://localhost:8006;
        }
        location ~ /eduMsm/ {
            proxy_pass http://localhost:8005;
        }
        location ~ /orderService/ {
            proxy_pass http://localhost:8007;
        }
        location ~ /staService/ {
            proxy_pass http://localhost:8008;
        }
        location ~ /admin/ {
            proxy_pass http://localhost:8009;
        }
    }
4.重启nginx
nginx -s reload :修改配置后重新加载生效
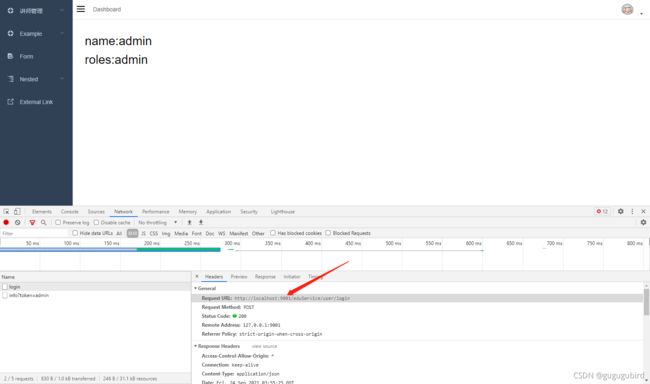
三.修改前端域名
重启访问登录接口
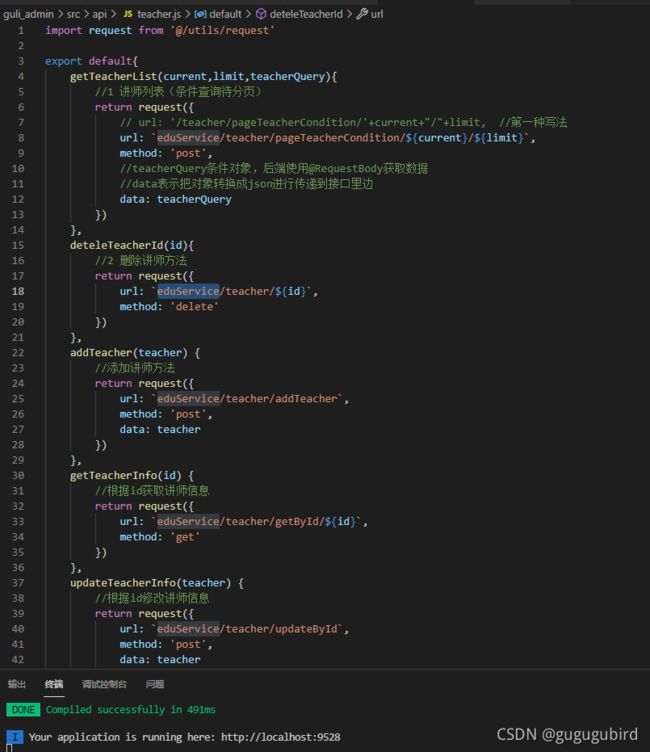
四,添加讲师头像整合前端
1.在添加讲师页面,创建上传组件,实现上传
从vue-element-admin复制组件:
vue-element-admin/src/components/ImageCropper vue-element-admin/src/components/PanThumb
复制到自己项目中的/src/components/文件下
2.添加讲师页面使用这个复制上传组件
在save.vue中《div》标签下添加
更换头像
在data方法中添加
        BASE_API:process.env.BASE_API,//获取dev.env.js里边的地址
        imagecropperShow:false,//上传弹框组件是否显示
        imagecropperKey:0,//上传组件的key值
在methods方法中添加
        close(){//关闭上传弹窗方法

        },
        cropSuccess(){//上传成功方法

        },
保存测试效果
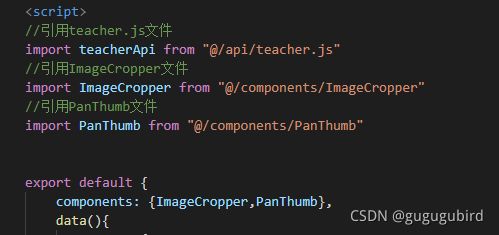
3.引入并声明组件
//引用ImageCropper文件
import ImageCropper from "@/components/ImageCropper"
//引用PanThumb文件
import PanThumb from "@/components/PanThumb"
在export下声明
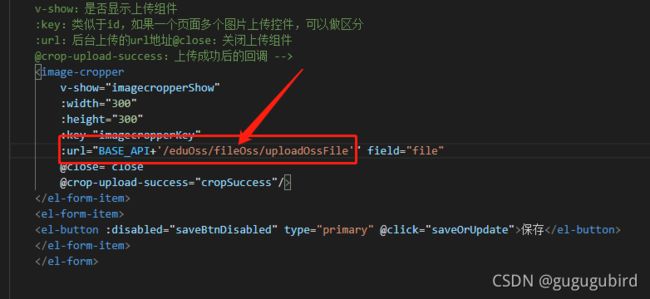
components: {ImageCropper,PanThumb},4.修改上传接口地址
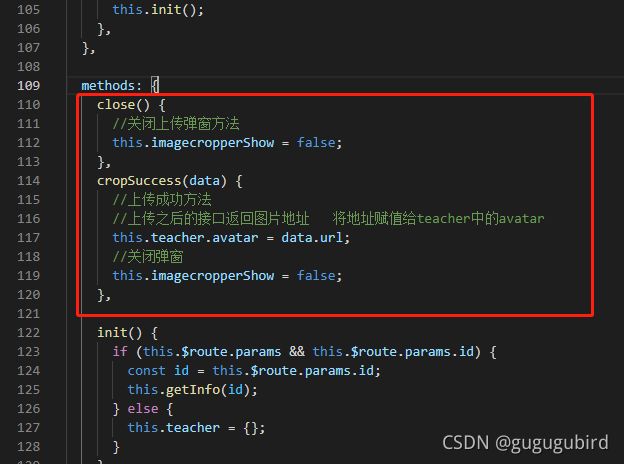
5.编写close和上传成功方法
close() {
      //关闭上传弹窗方法
      this.imagecropperShow = false;
    },
    cropSuccess(data) {
      //上传成功方法
      //上传之后的接口返回图片地址   将地址赋值给teacher中的avatar
      this.teacher.avatar = data.url;
      //关闭弹窗
      this.imagecropperShow = false;
    },
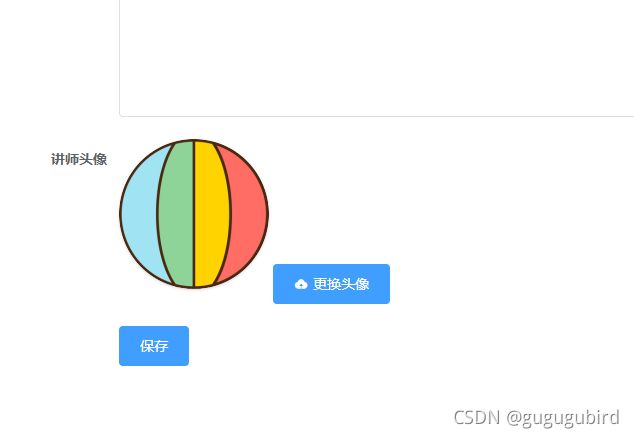
测试效果
五. 课程分类管理
1.创建edu_subject表
INSERT INTO `edu_subject` VALUES ('1293200126289928194', '前端开发', '0', '0', '2020-08-11 22:58:31', '2020-08-11 22:58:31');
INSERT INTO `edu_subject` VALUES ('1293200126319288322', 'vue', '1293200126289928194', '0', '2020-08-11 22:58:31', '2020-08-11 22:58:31');
INSERT INTO `edu_subject` VALUES ('1293200126365425666', 'JavaScript', '1293200126289928194', '0', '2020-08-11 22:58:31', '2020-08-11 22:58:31');
INSERT INTO `edu_subject` VALUES ('1293200126688387074', 'JQuery', '1293200126289928194', '0', '2020-08-11 22:58:31', '2020-08-11 22:58:31');
INSERT INTO `edu_subject` VALUES ('1293200126705164289', '后端开发', '0', '0', '2020-08-11 22:58:31', '2020-08-11 22:58:31');
INSERT INTO `edu_subject` VALUES ('1293200126730330114', 'java', '1293200126705164289', '0', '2020-08-11 22:58:31', '2020-08-11 22:58:31');
INSERT INTO `edu_subject` VALUES ('1293200126772273153', 'c++', '1293200126705164289', '0', '2020-08-11 22:58:31', '2020-08-11 22:58:31');
INSERT INTO `edu_subject` VALUES ('1293200126793244674', '数据库开发', '0', '0', '2020-08-11 22:58:31', '2020-08-11 22:58:31');
INSERT INTO `edu_subject` VALUES ('1293200126810021889', 'mysql', '1293200126793244674', '0', '2020-08-11 22:58:31', '2020-08-11 22:58:31');
INSERT INTO `edu_subject` VALUES ('1293200126289928194', '前端开发', '0', '0', '2020-08-11 22:58:31', '2020-08-11 22:58:31');
INSERT INTO `edu_subject` VALUES ('1293200126319288322', 'vue', '1293200126289928194', '0', '2020-08-11 22:58:31', '2020-08-11 22:58:31');
INSERT INTO `edu_subject` VALUES ('1293200126365425666', 'JavaScript', '1293200126289928194', '0', '2020-08-11 22:58:31', '2020-08-11 22:58:31');
INSERT INTO `edu_subject` VALUES ('1293200126688387074', 'JQuery', '1293200126289928194', '0', '2020-08-11 22:58:31', '2020-08-11 22:58:31');
INSERT INTO `edu_subject` VALUES ('1293200126705164289', '后端开发', '0', '0', '2020-08-11 22:58:31', '2020-08-11 22:58:31');
INSERT INTO `edu_subject` VALUES ('1293200126730330114', 'java', '1293200126705164289', '0', '2020-08-11 22:58:31', '2020-08-11 22:58:31');
INSERT INTO `edu_subject` VALUES ('1293200126772273153', 'c++', '1293200126705164289', '0', '2020-08-11 22:58:31', '2020-08-11 22:58:31');
INSERT INTO `edu_subject` VALUES ('1293200126793244674', '数据库开发', '0', '0', '2020-08-11 22:58:31', '2020-08-11 22:58:31');
INSERT INTO `edu_subject` VALUES ('1293200126810021889', 'mysql', '1293200126793244674', '0', '2020-08-11 22:58:31', '2020-08-11 22:58:31');2.Excel导入导出的应用场景
1、数据导入:减轻录入工作量
2、数据导出:统计信息归档
3、数据传输:异构系统之间数据传输
3.EasyExcel简介
1、EasyExcel特点
1.Java领域解析、生成Excel比较有名的框架有Apache poi、jxl等。但他们都存在一个严重的问题就是非常的耗内存。如果你的系统并发量不大的话可能还行,但是一旦并发上来后一定会OOM或者JVM频繁的full gc。
2.EasyExcel是阿里巴巴开源的一个excel处理框架,以使用简单、节省内存著称。EasyExcel能大大减 少占用内存的主要原因是在解析Excel时没有将文件数据一次性全部加载到内存中,而是从磁盘上一行行读取数据,逐个解析
3.EasyExcel采用一行一行的解析模式,并将一行的解析结果以观察者的模式通知处理
(AnalysisEventListener)
4.测试excel读取跟写入
1.创建一个普通的maven项目
项目名:excel_easydemo
2.pom中引入xml相关依赖
com.alibaba
easyexcel
2.1.1
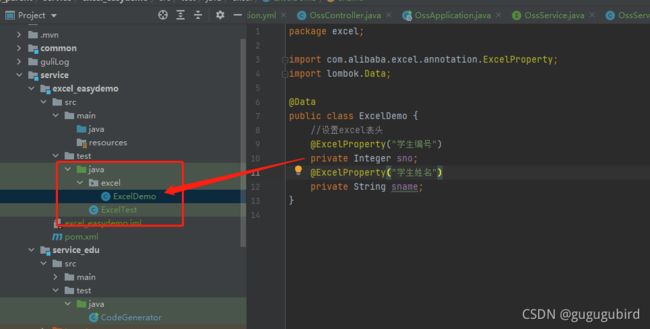
3.创建实体类跟excel表头对应
package excel;

import com.alibaba.excel.annotation.ExcelProperty;
import lombok.Data;

@Data
@AllArgsConstructor
@NoArgsConstructor
public class ExcelDemo {
    //设置excel表头
    @ExcelProperty("学生编号")
    private Integer sno;
    @ExcelProperty("学生姓名")
    private String sname;
}
4.在test模块中编写业务方法
import com.alibaba.excel.EasyExcel;
import excel.ExcelDemo;
import org.junit.Test;

import java.util.ArrayList;
import java.util.List;

public class ExcelTest {

    @Test
    public void Test(){
        //实现execl写入操作

        //1.设置写入文件夹的地址和文件名字
        String fileName = "D:\\excel\\testwrite.xlsx";

        //2.调用easyExcel工具类实现写入操作
        //write方法的2个参数,第一个参数是文件路径,第二个参数是实体类class
        EasyExcel.write(fileName, ExcelDemo.class).sheet("学生列表").doWrite(getData());
    }

    //创建方法返回list集合
    private static List getData(){
        List list = new ArrayList<>();
        list.add(new ExcelDemo(1, "lucy"));
        list.add(new ExcelDemo(2, "tom"));
        list.add(new ExcelDemo(3, "jerry"));
        list.add(new ExcelDemo(4, "mark"));
        list.add(new ExcelDemo(5, "jack"));
        list.add(new ExcelDemo(6, "pop"));
        list.add(new ExcelDemo(7, "哈利路亚"));
        list.add(new ExcelDemo(8, "二嘎子"));
        list.add(new ExcelDemo(9, "二傻子"));
        list.add(new ExcelDemo(10, "傻狍子"));
        return list;
    }
}
5.运行查看效果
6.读取操作,在实体类上标记对应信息
7.创建监听进行excel读取
package excel;


import com.alibaba.excel.context.AnalysisContext;
import com.alibaba.excel.event.AnalysisEventListener;

import java.util.Map;


public class ExcelListener extends AnalysisEventListener {

    //一行一行读取excel内容
    public void invoke(ExcelDemo excelDemo, AnalysisContext analysisContext) {
        System.out.println("***** = " + excelDemo);
    }
    //读取表头内容
    public void invokeHeadMap(Map headMap, AnalysisContext context) {
        System.out.println("表头内容 = " + headMap);
    }

    //读取完成之后
    public void doAfterAllAnalysed(AnalysisContext analysisContext) {

    }
}
8.实现excel读操作
   @Test
    public void readExcel(){
        String fileName = "D:\\excel\\testwrite.xlsx";
        EasyExcel.read(fileName, ExcelDemo.class,new ExcelListener()).sheet().doRead();
    }
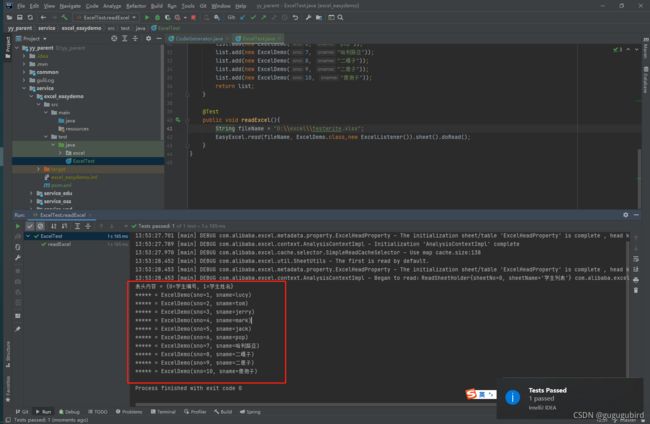
运行测试效果
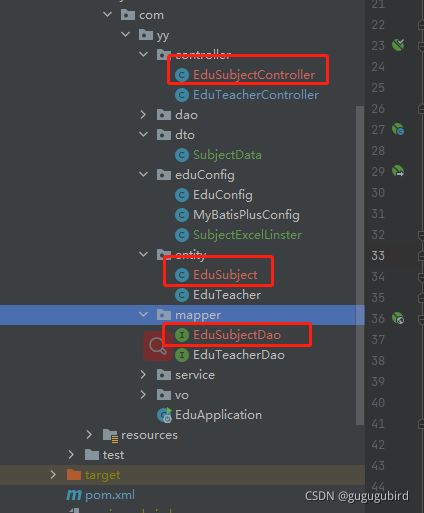
3.用代码生成器逆向生成controller,service,impl,dao,mapper文件
import com.baomidou.mybatisplus.core.exceptions.MybatisPlusException;
import com.baomidou.mybatisplus.core.toolkit.StringPool;
import com.baomidou.mybatisplus.generator.AutoGenerator;
import com.baomidou.mybatisplus.generator.InjectionConfig;
import com.baomidou.mybatisplus.generator.config.*;
import com.baomidou.mybatisplus.generator.config.po.TableInfo;
import com.baomidou.mybatisplus.generator.config.rules.NamingStrategy;
import com.baomidou.mybatisplus.generator.engine.VelocityTemplateEngine;
import org.apache.commons.lang3.StringUtils;

import java.util.ArrayList;
import java.util.List;
import java.util.Scanner;

//代码生成器
public class CodeGenerator {

    /**
     *
     * 读取控制台内容
     *
     */
    public static String scanner(String tip) {
        Scanner scanner = new Scanner(System.in);
        StringBuilder help = new StringBuilder();
        help.append("请输入" + tip + ":");
        System.out.println(help.toString());
        if (scanner.hasNext()) {
            String ipt = scanner.next();
            if (StringUtils.isNotBlank(ipt)) {
                return ipt;
            }
        }
        throw new MybatisPlusException("请输入正确的" + tip + "!");
    }

    public static void main(String[] args) {
        // 代码生成器
        AutoGenerator mpg = new AutoGenerator();

        // 全局配置
        GlobalConfig gc = new GlobalConfig();
        String projectPath = System.getProperty("user.dir");
        gc.setOutputDir(projectPath + "/service/service_edu/src/main/java");
        gc.setAuthor("yy");
        gc.setOpen(false);
        // 设置名字
        gc.setControllerName("%sController");
        gc.setServiceName("%sService");
        gc.setServiceImplName("%sServiceImpl");
        gc.setMapperName("%sDao");
        gc.setXmlName("%sDao");
        // 设置 resultMap
        gc.setBaseResultMap(true);
        gc.setBaseColumnList(true);
//        gc.setFileOverride(true);
        gc.setSwagger2(true); //实体属性 Swagger2 注解
        mpg.setGlobalConfig(gc);

        // 数据源配置
        DataSourceConfig dsc = new DataSourceConfig();
        dsc.setUrl("jdbc:mysql://localhost:3306/yytryproject?serverTimezone=UTC&serverTimeZone=GMT%2B8");
        dsc.setDriverName("com.mysql.cj.jdbc.Driver");
        dsc.setUsername("root");
        dsc.setPassword("root");


        mpg.setDataSource(dsc);

        // 自定义配置
        InjectionConfig cfg = new InjectionConfig() {
            @Override
            public void initMap() {
                // to do nothing
            }
        };

        // 包配置
        PackageConfig pc = new PackageConfig();
        //  pc.setModuleName(scanner("模块名"));
        pc.setParent("com.yy");
        pc.setMapper("dao");
        mpg.setPackageInfo(pc);

        // 如果模板引擎是 velocity
        String templatePath = "/templates/mapper.xml.vm";

        // 自定义输出配置
        List focList = new ArrayList<>();
        // 自定义配置会被优先输出
        focList.add(new FileOutConfig(templatePath) {
            @Override
            public String outputFile(TableInfo tableInfo) {
                // 自定义输出文件名 , 如果你 Entity 设置了前后缀、此处注意 xml 的名称会跟着发生变化!!
                return projectPath+"/service/service_edu/src/main/resources/mapper/"
                        + "/" + tableInfo.getEntityName() + "Dao" + StringPool.DOT_XML;
            }
        });
        cfg.setFileOutConfigList(focList);
        mpg.setCfg(cfg);

        // 配置模板
        TemplateConfig templateConfig = new TemplateConfig();

        templateConfig.setXml(null);
        mpg.setTemplate(templateConfig);

        // 策略配置
        StrategyConfig strategy = new StrategyConfig();
        strategy.setNaming(NamingStrategy.underline_to_camel);
        strategy.setColumnNaming(NamingStrategy.underline_to_camel);
        strategy.setEntityLombokModel(true);
        strategy.setRestControllerStyle(true);
        // 写于父类中的公共字段
//        strategy.setSuperEntityColumns("id");
        strategy.setInclude(scanner("表名,多个英文逗号分割").split(","));
        strategy.setControllerMappingHyphenStyle(true);
        strategy.setTablePrefix(pc.getModuleName() + "_");
        mpg.setStrategy(strategy);
        mpg.setTemplateEngine(new VelocityTemplateEngine());
        mpg.execute();
    }
}
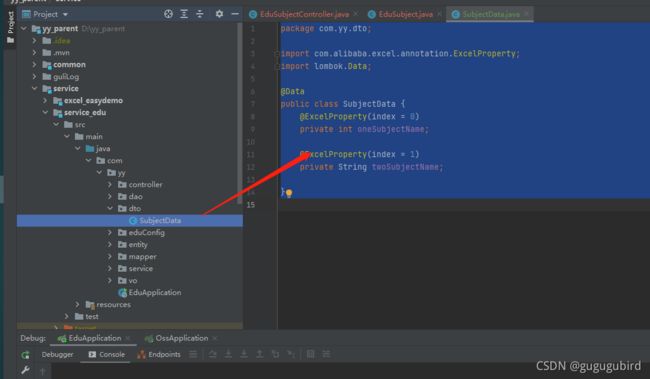
4.创建实体类和excel对应关系
package com.yy.dto;

import com.alibaba.excel.annotation.ExcelProperty;
import lombok.Data;

@Data
public class SubjectData {
    @ExcelProperty(index = 0)
    private int oneSubjectName;

    @ExcelProperty(index = 1)
    private String twoSubjectName;

}
记得在实体类中时间部分添加
5.编写业务层代码
1.controller类
@Autowired
    private EduSubjectService eduSubjectService;


    //添加课程分类
    //通过获取上传过来的文件,把文件读取出来
    @PostMapping("addSubject")
    @ApiOperation("添加课程分类")
    public R addSubject(MultipartFile file){
        //上传过来的excel文件
        eduSubjectService.saveSubject(file,eduSubjectService);

        return R.ok();
    }
2.service
//添加课程分类
    void saveSubject(MultipartFile file,EduSubjectService eduSubjectService);
3.impl
//添加课程分类
    public void saveSubject(MultipartFile file,EduSubjectService eduSubjectService) {
        try {
            InputStream in = file.getInputStream();
            EasyExcel.read(in, SubjectData.class,new SubjectExcelLinster(eduSubjectService)).sheet().doRead();
        }catch (Exception e){
            e.printStackTrace();
        }

    }
6.编写excel表格监听器
在eduConfig包下创建一个SubjectExcelLinster类继承AnalysisEventListener
package com.yy.eduConfig;

import com.alibaba.excel.context.AnalysisContext;
import com.alibaba.excel.event.AnalysisEventListener;
import com.baomidou.mybatisplus.core.conditions.query.LambdaQueryWrapper;
import com.yy.dto.SubjectData;
import com.yy.entity.EduSubject;
import com.yy.exceptionHandler.RRException;
import com.yy.service.EduSubjectService;

import java.util.Map;

//excel监听器
public class SubjectExcelLinster extends AnalysisEventListener {
    //因为SubjectExcelLinster不能交给spring管理,需要自己new出来,不能注入其他对象
    //不能实现数据库操作
    public EduSubjectService eduSubjectService;

    public SubjectExcelLinster(EduSubjectService eduSubjectService) {
        this.eduSubjectService = eduSubjectService;
    }
    public SubjectExcelLinster() {}

    //一行一行读取excel表格内容
    public void invoke(SubjectData subjectData, AnalysisContext analysisContext) {
        if (subjectData==null){
            throw new RRException(20001,"文件数据为空");
        }

        //一行一行读取,每次读取有2个值,第一个一级分类,第二个二级分类
        //判断一级分类是否重复
        EduSubject existOneSubject = this.existOneSubject(eduSubjectService, subjectData.getOneSubjectName());
        if (existOneSubject==null){ //没有相同一级目录进行添加
            existOneSubject = new EduSubject();
            existOneSubject.setParentId("0");
            existOneSubject.setTitle(subjectData.getOneSubjectName());
            eduSubjectService.save(existOneSubject);
        }

        //判断二级分类是否重复
        String pid= existOneSubject.getId();//获取一级分类id的值
        EduSubject existTwoSubject = this.existTwoSubject(eduSubjectService, subjectData.getTwoSubjectName(), pid);
        if (existTwoSubject==null){
            existTwoSubject = new EduSubject();
            existTwoSubject.setParentId(pid);
            existTwoSubject.setTitle(subjectData.getTwoSubjectName());
            eduSubjectService.save(existTwoSubject);
        }

    }

    //判断一级分类不能重复添加
    private EduSubject existOneSubject(EduSubjectService eduSubjectService,String name){
        LambdaQueryWrapper queryWrapper = new LambdaQueryWrapper();
            queryWrapper.eq(EduSubject::getTitle,name)
                    .eq(EduSubject::getParentId,"0");
        EduSubject one = eduSubjectService.getOne(queryWrapper);
        return one;

    }

    //判断二级分类不能重复添加
    private EduSubject existTwoSubject(EduSubjectService eduSubjectService,String name,String pid){
        LambdaQueryWrapper queryWrapper = new LambdaQueryWrapper();
        queryWrapper.eq(EduSubject::getTitle,name)
                .eq(EduSubject::getParentId,pid);
        EduSubject two = eduSubjectService.getOne(queryWrapper);
        return two;

    }

    public void invokeHeadMap(Map headMap, AnalysisContext context) {
    }
    public void doAfterAllAnalysed(AnalysisContext analysisContext) {

    }
}
重启,在网页输入http://localhost:8001/swagger-ui.html进行测试
1.网页显示上传成功,但是看到idea报错,
2.在实体类上主键上加上注解
添加成功,但是主键依旧为空,这边表中使用的是string类型
注解换成
重启测试
添加成功
