SSM 项目 ---------小米商城后台管理系统
目录
- 一、项目名称
- 二、使用技术
- 三、开发步骤
- 四、具体实现
-
- 1、创建数据库表
- 2、项目结构
- 3、配置文件
-
- pom.xml
- db.properties
- applicationContext-dao.xml
- applicationContext-services.xml
- springmvc.xml
- SqlMapConfig.xml
- web.xml
- 4、使用 MyBatis 逆向工程生成 pojo 类 和 dao 类
-
- 在 maven 中添加依赖
- 配置逆向工程核心配置文件 generatorConfig.xml
- 运行并生成 pojo类 和 dao类
- 5、utils 包下添加 MD5 加密算法工具类
- 6、登录功能
- 7、分页与翻页
一、项目名称
- 名称 :小米商城后台管理系统
本项目主要目的是使学员更深层的了解IT企业的文化和岗位需求、模拟企业的工作场景,分享研制成果,增加学员对今后工作岗位及计算机应用开发对客观世界影响的感性认识,使学员对技术有更深入的理解,在今后工作中能有更明确的目标和方向。并能为日后职业规划提供很好的指导作用。
二、使用技术
- 服务端:Spring+SpringMVC+MyBatis框架整合
- 数据库:MySql8.0
- web服务器:Tomcat
- 项目管理:Maven
- 前端:jQuery + BootStrap + JavaScript
- 开发工具:idea2021
三、开发步骤
- 介绍项目实现功能,使用到的技术点,使用到的框架,演示最终效果。
- 创建数据库和表,添加idea可视化。
- 完成SSM框架的搭建。
- 添加字符编码过滤器,实现中文编码解析。
- 使用数据库连接池技术,使用mybatis框架完成底层实体类的创建和数据访问层的实现。
- 实现登录功能。
- 实现登录成功后全部商品分页显示。
- 实现Ajax的翻页功能。
- 添加监听器,实现获取全部商品类型功能。
- 实现商品增加功能。
- 实现Ajax商品删除功能。
- 实现Ajax商品批量删除功能。
- 实现商品修改的回显功能。
- 实现商品修改功能。
- 实现按商品名称条件查询并分页功能,翻页使用Ajax技术。
- 实现按商品类型查询并分页功能,翻页使用Ajax技术。
- 实现按商品价格查询并分页功能,翻页使用Ajax技术。
- 实现按商品名称、商品类型、商品价格多条件查询并分页,翻页使用Ajax技术。
- 实现退出功能。
四、具体实现
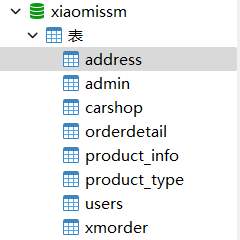
1、创建数据库表
DROP DATABASE IF EXISTS xiaomissm;
CREATE DATABASE xiaomissm DEFAULT CHARSET utf8;
/*打开DB*/
USE xiaomissm;
DROP TABLE IF EXISTS `orderdetail`;
DROP TABLE IF EXISTS `xmorder`;
DROP TABLE IF EXISTS `carshop`;
DROP TABLE IF EXISTS `address`;
DROP TABLE IF EXISTS `users`;
drop table if exists product_info;
drop table if exists product_type;
drop table if exists admin;
#DROP TABLE xiaomi_admin;
#管理员表
CREATE TABLE admin(
a_id INT AUTO_INCREMENT PRIMARY KEY,
a_name VARCHAR(20),
a_pass VARCHAR(20)
);
INSERT INTO admin(a_id,a_name,a_pass) VALUES(1,'admin','000000');
#商品类型表
CREATE TABLE product_type
(
type_id int auto_increment PRIMARY KEY,
type_name varchar(20)
);
#添加数据
insert into product_type(type_name) values('手机');
insert into product_type(type_name) values('电脑');
insert into product_type(type_name) values('电视');
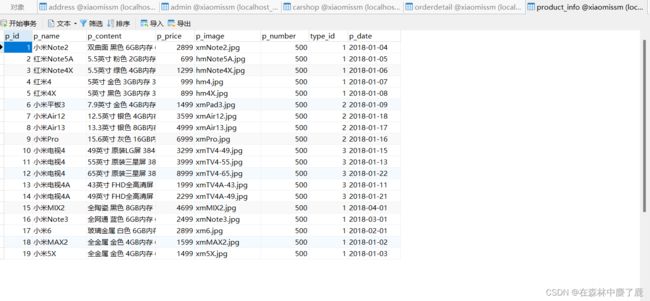
#创建商品表
create table product_info
(
p_id int auto_increment primary key,
p_name varchar(20),
p_content varchar(200), ##############33商品规格/简介
p_price int, ###############价格
p_image varchar(200), #############图片
p_number int, ########数量
type_id int,
p_date date,
FOREIGN KEY(type_id) REFERENCES product_type(type_id)
);
#添加商品
insert into product_info(p_name,p_content,p_price,p_image,p_number,type_id,p_date) values('小米Note2','双曲面 黑色 6GB内存 64GB闪存',2899,'xmNote2.jpg',500,1,'2018-01-04');
insert into product_info(p_name,p_content,p_price,p_image,p_number,type_id,p_date) values('红米Note5A','5.5英寸 粉色 2GB内存 16GB闪存',699,'hmNote5A.jpg',500,1,'2018-01-05');
insert into product_info(p_name,p_content,p_price,p_image,p_number,type_id,p_date) values('红米Note4X','5.5英寸 绿色 4GB内存 64GB闪存',1299,'hmNote4X.jpg',500,1,'2018-01-06');
insert into product_info(p_name,p_content,p_price,p_image,p_number,type_id,p_date) values('红米4','5英寸 金色 3GB内存 32GB闪存',999,'hm4.jpg',500,1,'2018-01-07');
insert into product_info(p_name,p_content,p_price,p_image,p_number,type_id,p_date) values('红米4X','5英寸 黑色 3GB内存 32GB闪存',899,'hm4X.jpg',500,1,'2018-01-08');
insert into product_info(p_name,p_content,p_price,p_image,p_number,type_id,p_date) values('小米平板3','7.9英寸 金色 4GB内存 64GB闪存',1499,'xmPad3.jpg',500,2,'2018-01-09');
insert into product_info(p_name,p_content,p_price,p_image,p_number,type_id,p_date) values('小米Air12','12.5英寸 银色 4GB内存 128GB闪存',3599,'xmAir12.jpg',500,2,'2018-01-18');
insert into product_info(p_name,p_content,p_price,p_image,p_number,type_id,p_date) values('小米Air13','13.3英寸 银色 8GB内存 256GB闪存',4999,'xmAir13.jpg',500,2,'2018-01-17');
insert into product_info(p_name,p_content,p_price,p_image,p_number,type_id,p_date) values('小米Pro','15.6英寸 灰色 16GB内存 256GB闪存',6999,'xmPro.jpg',500,2,'2018-01-16');
insert into product_info(p_name,p_content,p_price,p_image,p_number,type_id,p_date) values('小米电视4','49英寸 原装LG屏 3840×2160 真4K',3299,'xmTV4-49.jpg',500,3,'2018-01-15');
insert into product_info(p_name,p_content,p_price,p_image,p_number,type_id,p_date) values('小米电视4','55英寸 原装三星屏 3840×2160 真4K',3999,'xmTV4-55.jpg',500,3,'2018-01-13');
insert into product_info(p_name,p_content,p_price,p_image,p_number,type_id,p_date) values('小米电视4','65英寸 原装三星屏 3840×2160 真4K',8999,'xmTV4-65.jpg',500,3,'2018-01-22');
insert into product_info(p_name,p_content,p_price,p_image,p_number,type_id,p_date) values('小米电视4A','43英寸 FHD全高清屏 1920*1080',1999,'xmTV4A-43.jpg',500,3,'2018-01-11');
insert into product_info(p_name,p_content,p_price,p_image,p_number,type_id,p_date) values('小米电视4A','49英寸 FHD全高清屏 1920*1080',2299,'xmTV4A-49.jpg',500,3,'2018-01-21');
insert into product_info(p_name,p_content,p_price,p_image,p_number,type_id,p_date) values('小米MIX2','全陶瓷 黑色 8GB内存 128GB闪存',4699,'xmMIX2.jpg',500,1,'2018-04-01');
insert into product_info(p_name,p_content,p_price,p_image,p_number,type_id,p_date) values('小米Note3','全网通 蓝色 6GB内存 64GB闪存',2499,'xmNote3.jpg',500,1,'2018-03-01');
insert into product_info(p_name,p_content,p_price,p_image,p_number,type_id,p_date) values('小米6','玻璃金属 白色 6GB内存 128GB闪存',2899,'xm6.jpg',500,1,'2018-02-01');
insert into product_info(p_name,p_content,p_price,p_image,p_number,type_id,p_date) values('小米MAX2','全金属 金色 4GB内存 64GB闪存',1599,'xmMAX2.jpg',500,1,'2018-01-02');
insert into product_info(p_name,p_content,p_price,p_image,p_number,type_id,p_date) values('小米5X','全金属 金色 4GB内存 64GB闪存',1499,'xm5X.jpg',500,1,'2018-01-03');
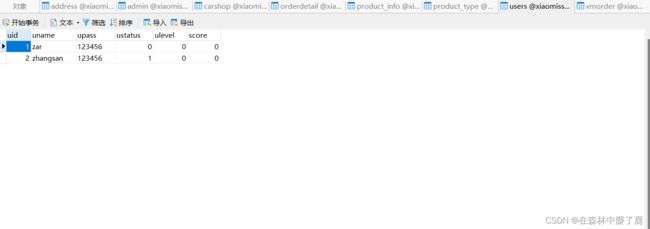
#创建前台用户表
CREATE TABLE `users` (
`uid` int(11) NOT NULL auto_increment,
`uname` varchar(50) default NULL,
`upass` varbinary(50) default NULL,
`ustatus` int(11) default NULL,
`ulevel` int(11) default NULL,
`score` int(11) default NULL,
PRIMARY KEY (`uid`)
) ENGINE=InnoDB DEFAULT CHARSET=utf8;
#增加用户数据
INSERT INTO `users` VALUES ('1', 'zar', 0x313233343536, '0', '0', '0');
INSERT INTO `users` VALUES ('2', 'zhangsan', 0x313233343536, '1', '0', '0');
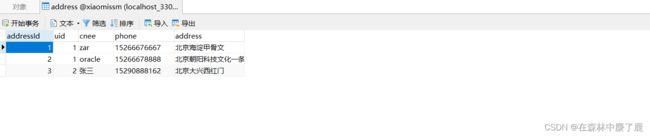
#创建地址表
CREATE TABLE `address` (
`addressId` int(11) NOT NULL auto_increment,
`uid` int(11) default NULL,
`cnee` varchar(50) default NULL,
`phone` varchar(11) default NULL,
`address` varchar(100) default NULL,
PRIMARY KEY (`addressId`),
KEY `FK_Reference_1` (`uid`),
CONSTRAINT `FK_Reference_1` FOREIGN KEY (`uid`) REFERENCES `users` (`uid`)
) ENGINE=InnoDB DEFAULT CHARSET=utf8;
#增加地址表数据
INSERT INTO `address` VALUES ('1', '1', 'zar', '15266676667', '北京海淀甲骨文');
INSERT INTO `address` VALUES ('2', '1', 'oracle', '15266678888', '北京朝阳科技文化一条街');
INSERT INTO `address` VALUES ('3', '2', '张三', '15290888162', '北京大兴西红门');
#创建购物车表
CREATE TABLE `carshop` (
`cid` int(11) NOT NULL auto_increment,
`uid` int(11) default NULL,
`pid` int(11) default NULL,
`numbers` int(11) default NULL,
PRIMARY KEY (`cid`),
KEY `FK_Reference_3` (`uid`),
KEY `FK_Reference_4` (`pid`),
CONSTRAINT `FK_Reference_4` FOREIGN KEY (`pid`) REFERENCES `product_info` (`p_id`),
CONSTRAINT `FK_Reference_3` FOREIGN KEY (`uid`) REFERENCES `users` (`uid`)
) ENGINE=InnoDB DEFAULT CHARSET=utf8;
#增加购物车数据
insert into carshop (uid,pid,numbers) values (1,1,2);
#创建订单表
CREATE TABLE `xmorder` (
`oid` char(32) NOT NULL ,
`uid` int(11) default NULL,
`addressId` int(11) default NULL,
`totalprice` double(10,2) default NULL,
`remarks` varchar(200) default NULL,
`status` varchar(6) default NULL,
`odate` TIMESTAMP DEFAULT CURRENT_TIMESTAMP ,
PRIMARY KEY (`oid`),
KEY `FK_Reference_5` (`uid`),
KEY `FK_Reference_6` (`addressId`),
CONSTRAINT `FK_Reference_6` FOREIGN KEY (`addressId`) REFERENCES `address` (`addressId`),
CONSTRAINT `FK_Reference_5` FOREIGN KEY (`uid`) REFERENCES `users` (`uid`)
) ENGINE=InnoDB DEFAULT CHARSET=utf8;
#订单表增加数据
insert into xmorder(oid,uid,addressid,totalprice,remarks,status,odate) values('abcd111222333444777888999000wwww',1,1,9996,'尽快送到','待发货',default);
#创建订单明细表
CREATE TABLE `orderdetail` (
`odid` int(11) NOT NULL auto_increment,
`oid` char(32) default NULL,
`pid` int(11) default NULL,
`pnumber` int(11) default NULL,
`ptotal` double(10,2) default NULL,
PRIMARY KEY (`odid`),
KEY `FK_Reference_7` (`oid`),
KEY `FK_Reference_8` (`pid`),
CONSTRAINT `FK_Reference_8` FOREIGN KEY (`pid`) REFERENCES `product_info` (`p_id`),
CONSTRAINT `FK_Reference_9` FOREIGN KEY (`oid`) REFERENCES `xmorder` (`oid`)
) ENGINE=InnoDB DEFAULT CHARSET=utf8;
insert into orderdetail(oid,pid,pnumber,ptotal) values ('abcd111222333444777888999000wwww',1,2,9996);
select * from admin;
select * from users;
select * from product_type;
select * from product_info ;
select * from orderdetail;
select * from xmorder;
select * from carshop;
select * from address;
用 Navicat 执行此 SQL文件 即可
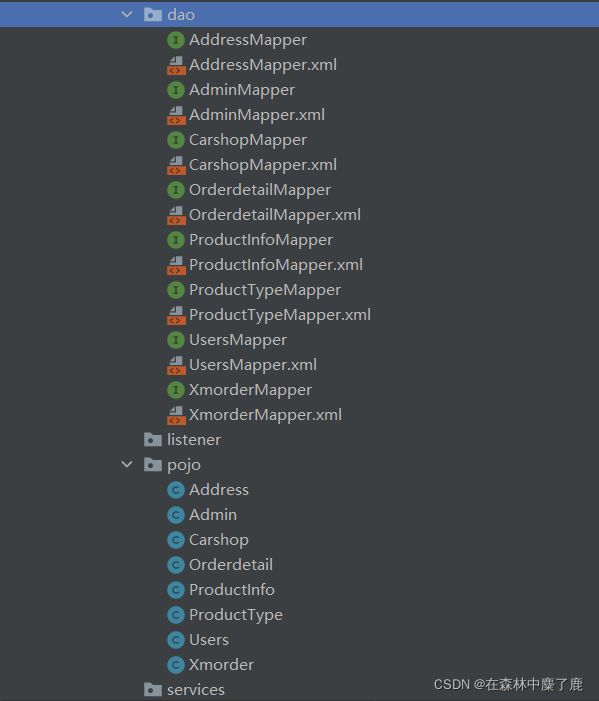
2、项目结构
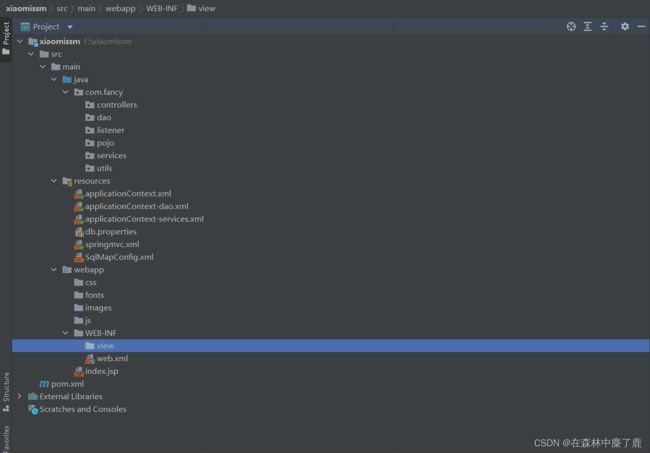
SSM 项目分层参考 : SSM框架下各个层的解释说明
3、配置文件
pom.xml
与之前不同整合项目不同的是,在此版本号进行集中管理,便于后续进行更改
<project xmlns="http://maven.apache.org/POM/4.0.0" xmlns:xsi="http://www.w3.org/2001/XMLSchema-instance"
  xsi:schemaLocation="http://maven.apache.org/POM/4.0.0 http://maven.apache.org/xsd/maven-4.0.0.xsd">
  <modelVersion>4.0.0modelVersion>

  <groupId>com.fancygroupId>
  <artifactId>xiaomissmartifactId>
  <version>1.0-SNAPSHOTversion>
  <packaging>warpackaging>

  <name>xiaomissm Maven Webappname>

  <url>http://www.example.comurl>

  <properties>
    <project.build.sourceEncoding>UTF-8project.build.sourceEncoding>
    <maven.compiler.source>1.7maven.compiler.source>
    <maven.compiler.target>1.7maven.compiler.target>

    <junit.version>4.12junit.version>
    <spring.version>5.2.5.RELEASEspring.version>
    <mybatis.version>3.5.1mybatis.version>
    <mybatis.spring.version>1.3.1mybatis.spring.version>
    <mybatis.paginator.version>1.2.15mybatis.paginator.version>
    <mysql.version>8.0.22mysql.version>
    <slf4j.version>1.6.4slf4j.version>
    <druid.version>1.1.12druid.version>
    <pagehelper.version>5.1.2pagehelper.version>
    <jstl.version>1.2jstl.version>
    <servlet-api.version>3.0.1servlet-api.version>
    <jsp-api.version>2.0jsp-api.version>
    <jackson.version>2.9.6jackson.version>
  properties>

  <dependencies>

      <dependency>
        <groupId>org.springframeworkgroupId>
        <artifactId>spring-contextartifactId>
        <version>${spring.version}version>
      dependency>
      <dependency>
        <groupId>org.springframeworkgroupId>
        <artifactId>spring-beansartifactId>
        <version>${spring.version}version>
      dependency>
      <dependency>
        <groupId>org.springframeworkgroupId>
        <artifactId>spring-webmvcartifactId>
        <version>${spring.version}version>
      dependency>
      <dependency>
        <groupId>org.springframeworkgroupId>
        <artifactId>spring-jdbcartifactId>
        <version>${spring.version}version>
      dependency>
      <dependency>
        <groupId>org.springframeworkgroupId>
        <artifactId>spring-aspectsartifactId>
        <version>${spring.version}version>
      dependency>
      <dependency>
        <groupId>org.springframeworkgroupId>
        <artifactId>spring-jmsartifactId>
        <version>${spring.version}version>
      dependency>
      <dependency>
        <groupId>org.springframeworkgroupId>
        <artifactId>spring-context-supportartifactId>
        <version>${spring.version}version>
      dependency>
      <dependency>
        <groupId>org.springframeworkgroupId>
        <artifactId>spring-testartifactId>
        <version>${spring.version}version>
      dependency>

      <dependency>
        <groupId>org.mybatisgroupId>
        <artifactId>mybatisartifactId>
        <version>${mybatis.version}version>
      dependency>
      <dependency>
        <groupId>org.mybatisgroupId>
        <artifactId>mybatis-springartifactId>
        <version>${mybatis.spring.version}version>
      dependency>
      <dependency>
        <groupId>com.github.miemiedevgroupId>
        <artifactId>mybatis-paginatorartifactId>
        <version>${mybatis.paginator.version}version>
      dependency>
      <dependency>
        <groupId>com.github.pagehelpergroupId>
        <artifactId>pagehelperartifactId>
        <version>${pagehelper.version}version>
      dependency>

      <dependency>
        <groupId>mysqlgroupId>
        <artifactId>mysql-connector-javaartifactId>
        <version>${mysql.version}version>
      dependency>

      <dependency>
        <groupId>com.alibabagroupId>
        <artifactId>druidartifactId>
        <version>${druid.version}version>
      dependency>


      <dependency>
        <groupId>junitgroupId>
        <artifactId>junitartifactId>
        <version>${junit.version}version>
        <scope>testscope>
      dependency>


      <dependency>
        <groupId>jstlgroupId>
        <artifactId>jstlartifactId>
        <version>${jstl.version}version>
      dependency>
      <dependency>
        <groupId>javax.servletgroupId>
        <artifactId>javax.servlet-apiartifactId>
        <version>3.0.1version>
        <scope>providedscope>
      dependency>
      <dependency>
        <groupId>javax.servletgroupId>
        <artifactId>jsp-apiartifactId>
        <scope>providedscope>
        <version>${jsp-api.version}version>
      dependency>

      <dependency>
        <groupId>com.fasterxml.jackson.coregroupId>
        <artifactId>jackson-databindartifactId>
        <version>${jackson.version}version>
      dependency>
      <dependency>
        <groupId>commons-iogroupId>
        <artifactId>commons-ioartifactId>
        <version>2.4version>
      dependency>
      <dependency>
        <groupId>commons-fileuploadgroupId>
        <artifactId>commons-fileuploadartifactId>
        <version>1.3.1version>
      dependency>

  dependencies>

  <build>

      <resources>
          <resource>
              <directory>src/main/javadirectory>
              <includes>
                  <include>**/*.propertiesinclude>
                  <include>**/*.xmlinclude>
              includes>
              <filtering>falsefiltering>
          resource>
          <resource>
              <directory>src/main/resourcesdirectory>
              <includes>
                  <include>**/*.propertiesinclude>
                  <include>**/*.xmlinclude>
              includes>
              <filtering>falsefiltering>
          resource>
      resources>
    <finalName>xiaomissmfinalName>
    <pluginManagement>
      <plugins>
        <plugin>
          <artifactId>maven-clean-pluginartifactId>
          <version>3.1.0version>
        plugin>

        <plugin>
          <artifactId>maven-resources-pluginartifactId>
          <version>3.0.2version>
        plugin>
        <plugin>
          <artifactId>maven-compiler-pluginartifactId>
          <version>3.8.0version>
        plugin>
        <plugin>
          <artifactId>maven-surefire-pluginartifactId>
          <version>2.22.1version>
        plugin>
        <plugin>
          <artifactId>maven-war-pluginartifactId>
          <version>3.2.2version>
        plugin>
        <plugin>
          <artifactId>maven-install-pluginartifactId>
          <version>2.5.2version>
        plugin>
        <plugin>
          <artifactId>maven-deploy-pluginartifactId>
          <version>2.8.2version>
        plugin>
      plugins>
    pluginManagement>
  build>
project>
db.properties
在此需要在 password、username等前加上前缀 jdbc. ,以防与登录界面中的username、password的相冲突
jdbc.driver=com.mysql.cj.jdbc.Driver
jdbc.url=jdbc:mysql://localhost:3306/xiaomissm?useSSL=false&serverTimezone=Asia/Shanghai&allowPublicKeyRetrieval=true
jdbc.username=root
jdbc.password=123456
application-services.xml 配置文件中的 ${ } 可以取到全局域所有的username与password#
applicationContext-dao.xml
此文件主要完成 Spring 在 dao 包(持久层)相关配置,主要分为以下四步
(1) 配置属性文件 :读取数据库配置文件 db.properties ,引入连接数据库的相关属性
(2) 配置数据源 :数据库连接池用到阿里旗下 druid 连接池,读取数据库属性,完成数据库的连接
(3) 配置 MyBatis 工厂 : 需要用到数据源与mybatis核心配置文件
(4) 创建动态代理对象 :代码中有解释
<beans xmlns="http://www.springframework.org/schema/beans"
       xmlns:xsi="http://www.w3.org/2001/XMLSchema-instance"
       xmlns:context="http://www.springframework.org/schema/context"
       xsi:schemaLocation="http://www.springframework.org/schema/beans http://www.springframework.org/schema/beans/spring-beans.xsd http://www.springframework.org/schema/context https://www.springframework.org/schema/context/spring-context.xsd">

      <context:property-placeholder location="classpath:db.properties">context:property-placeholder>

      <bean id="dataSource" class="com.alibaba.druid.pool.DruidDataSource">
          <property name="driverClassName" value="${jdbc.driver}">property>
          <property name="url" value="${jdbc.url}">property>
          <property name="username" value="${jdbc.username}">property>
          <property name="password" value="${jdbc.password}">property>
      bean>

      <bean  id="SqlSessionFactory" class="org.mybatis.spring.SqlSessionFactoryBean">

          <property name="dataSource" ref="dataSource">property>

          <property name="configLocation" value="classpath:SqlMapConfig.xml">property>
      bean>


      <bean class="org.mybatis.spring.mapper.MapperScannerConfigurer">
          <property name="sqlSessionFactoryBeanName" value="sqlSessionFactory">property>
          <property name="basePackage" value="com.fancy.dao">property>
      bean>
beans>
applicationContext-services.xml
此文件主要完成 Spring 在 services 包 (业务层) 相关配置,主要分为以下几步操作
(1) 配置组件扫描器,完成对于 services 包的扫描,使注解生效
(2) 设置事务管理器
(3) 添加事务切面
(4) 完成切面和切入点的织入
至于为什么要在 services 包而不是 dao 包下添加事务,可以参考此文章:
https://blog.csdn.net/m0_51111980/article/details/123140072?spm=1001.2014.3001.5501
<beans xmlns="http://www.springframework.org/schema/beans"
       xmlns:xsi="http://www.w3.org/2001/XMLSchema-instance"
       xmlns:context="http://www.springframework.org/schema/context" xmlns:tx="http://www.springframework.org/schema/tx"
       xmlns:aop="http://www.springframework.org/schema/aop"
       xsi:schemaLocation="http://www.springframework.org/schema/beans http://www.springframework.org/schema/beans/spring-beans.xsd http://www.springframework.org/schema/context https://www.springframework.org/schema/context/spring-context.xsd http://www.springframework.org/schema/tx http://www.springframework.org/schema/tx/spring-tx.xsd http://www.springframework.org/schema/aop https://www.springframework.org/schema/aop/spring-aop.xsd">

    <import resource="classpath:applicationContext-dao.xml">import>

    <context:component-scan base-package="com.fancy.services">context:component-scan>


    <bean id="transactionManager" class="org.springframework.jdbc.datasource.DataSourceTransactionManager">
        <property name="dataSource" ref="dataSource">property>
    bean>


    <tx:advice id="myAdvice" transaction-manager="transactionManager">
        <tx:attributes>
            <tx:method name="select*" read-only="true"/>
            <tx:method name="insert*" propagation="REQUIRED">tx:method>
            <tx:method name="delete*" propagation="REQUIRED">tx:method>
            <tx:method name="update*" propagation="REQUIRED">tx:method>
            <tx:method name="*" propagation="SUPPORTS">tx:method>
        tx:attributes>
    tx:advice>


    <aop:config>
        <aop:pointcut id="myPointcut" expression="execution(* com.fancy.services.*.*(..))"/>
        <aop:advisor advice-ref="myAdvice" pointcut-ref="myPointcut">aop:advisor>
    aop:config>
beans>
springmvc.xml
springmvc.xml 配置文件主要完成 Spring 在 controllers 包(控制层) 需要的相关配置,分为以下四步
(1) 注册组件扫描器:使 controllers 包下注解生效
(2) 指定视图解析器:简化视图路径,便于开发
(3) 设置文件上传核心组件:使用MultipartFile这个类主要是来实现以表单的形式进行多文件上传功能
(4) 注册注解驱动:
<beans xmlns="http://www.springframework.org/schema/beans"
       xmlns:xsi="http://www.w3.org/2001/XMLSchema-instance"
       xmlns:context="http://www.springframework.org/schema/context" xmlns:mvc="http://www.alibaba.com/schema/stat"
       xsi:schemaLocation="http://www.springframework.org/schema/beans http://www.springframework.org/schema/beans/spring-beans.xsd http://www.springframework.org/schema/context https://www.springframework.org/schema/context/spring-context.xsd http://www.alibaba.com/schema/stat http://www.alibaba.com/schema/stat.xsd">


    <context:component-scan base-package="com.fancy.controllers">context:component-scan>


    <bean class="org.springframework.web.servlet.view.InternalResourceViewResolver">

        <property name="prefix" value="/WEB-INF/view">property>
        <property name="suffix" value=".jsp">property>
    bean>


    <bean id="multipartResolver" class="org.springframework.web.multipart.commons.CommonsMultipartResolver">bean>


    <mvc:annotation-driven/>
beans>
SqlMapConfig.xml
SqlMapConfig.xml 作为 MyBatis 全局配置文件,一般完成两个设置别名、指定 sql 映射文件。由于我们要在项目中用到分页功能,在此我们要注册分页插件。
DOCTYPE configuration
        PUBLIC "-//mybatis.org//DTD Config 3.0//EN"
        "http://mybatis.org/dtd/mybatis-3-config.dtd">
<configuration>

    <typeAliases>
        <package name="com.fancy.pojo"/>
    typeAliases>


    <plugins>
        <plugin interceptor="com.github.pagehelper.PageInterceptor">plugin>
    plugins>


    <mappers>
        <package name="com.fancy.dao"/>
    mappers>
configuration>
web.xml
我们需要在 web.xml 配置文件中完成注册字符编码过滤器、注册Spring框架、注册 SpringMVC 框架的代码,以便在web项目启动时框架可以正常使用。
注册Spring框架主要完成 注册监听器和加载applicationContext.xml配置文件 两个部分
注册SpringMVC框架主要完成注册中央调度器和拦截匹配的请求两部分,Servlet拦截匹配规则要自已定义,把拦截下来的请求,依据某某规则分发到目标Controller(我们写的Action)来处理。
<web-app xmlns="http://xmlns.jcp.org/xml/ns/javaee"
         xmlns:xsi="http://www.w3.org/2001/XMLSchema-instance"
         xsi:schemaLocation="http://xmlns.jcp.org/xml/ns/javaee http://xmlns.jcp.org/xml/ns/javaee/web-app_4_0.xsd"
         version="4.0">

    <filter>
        <filter-name>characterEncodingFilterfilter-name>
        <filter-class>org.springframework.web.filter.CharacterEncodingFilterfilter-class>
        <init-param>
            <param-name>encodingparam-name>
            <param-value>utf-8param-value>
        init-param>
        <init-param>
            <param-name>forceRequsetEncodingparam-name>
            <param-value>trueparam-value>
        init-param>
        <init-param>
            <param-name>forceResponseEncodingparam-name>
            <param-value>trueparam-value>
        init-param>
    filter>
    <filter-mapping>
        <filter-name>characterEncodingFilterfilter-name>
        <url-pattern>/*url-pattern>
    filter-mapping>


    <servlet>
        <servlet-name>SpringMVCservlet-name>
        <servlet-class>org.springframework.web.servlet.DispatcherServletservlet-class>
        <init-param>
            <param-name>contextConfigLocationparam-name>
            <param-value>classpath:springmvc.xmlparam-value>
        init-param>
    servlet>
    <servlet-mapping>
        <servlet-name>SpringMVCservlet-name>
        <url-pattern>*.actionurl-pattern>
    servlet-mapping>


    <listener>
        <listener-class>org.springframework.web.context.ContextLoaderListenerlistener-class>
    listener>
    <context-param>
        <param-name>contextConfigLocationparam-name>
        <param-value>classpath:applicationContext.xmlparam-value>
    context-param>
web-app>
4、使用 MyBatis 逆向工程生成 pojo 类 和 dao 类
在 maven 中添加依赖
分别是mybatis-generator-maven-plugin插件,log4j、mybatis、mysql、mybatis-generator的依赖
依赖:
<dependency>
	<groupId>mysqlgroupId>
	<artifactId>mysql-connector-javaartifactId>
	<version>8.0.22version>
dependency>
<dependency>
	<groupId>org.mybatis.generatorgroupId>
	<artifactId>mybatis-generator-coreartifactId>
	<version>1.3.6version>
dependency>
<dependency>
	<groupId>log4jgroupId>
	<artifactId>log4jartifactId>
	<version>1.2.17version>
dependency>
<dependency>
	<groupId>org.mybatisgroupId>
	<artifactId>mybatisartifactId>
	<version>3.5.1version>
dependency>
插件:
<plugins>

<plugin>
    <groupId>org.mybatis.generatorgroupId>
    <artifactId>mybatis-generator-maven-pluginartifactId>
    <version>1.3.6version>
    <dependencies>
        <dependency>
            <groupId>mysqlgroupId>
            <artifactId>mysql-connector-javaartifactId>
            <version>8.0.22version>
        dependency>
    dependencies>
    <configuration>
        <verbose>trueverbose>
        <overwrite>trueoverwrite>
    configuration>
plugin>
插件无法显示怎么办? 参考文章 https://blog.csdn.net/chenyao1994/article/details/85916642
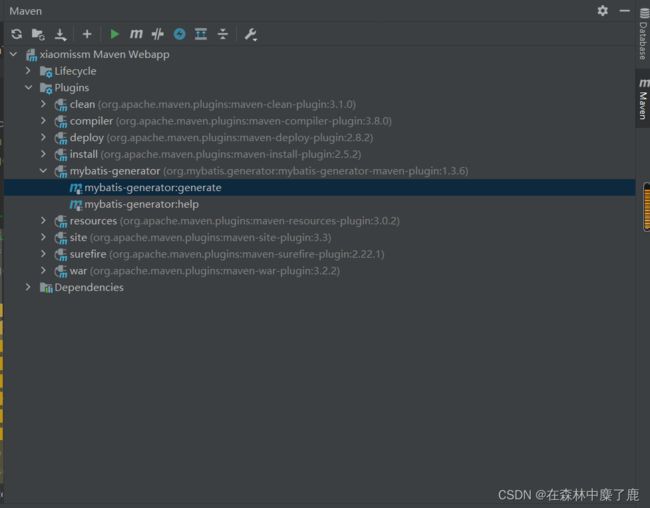
同时需要在插件中再次加入 mysq-connector-java 依赖,否则在运行时会出现以下错误
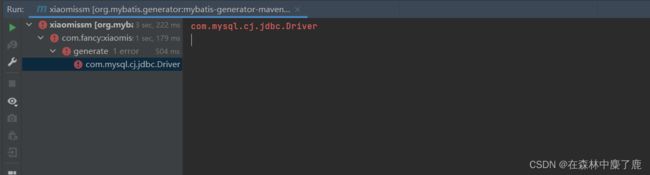
配置成功后出现以下插件
配置逆向工程核心配置文件 generatorConfig.xml
根据下方注释进行配置即可
DOCTYPE generatorConfiguration
        PUBLIC "-//mybatis.org//DTD MyBatis Generator Configuration 1.0//EN"
        "http://mybatis.org/dtd/mybatis-generator-config_1_0.dtd">
<generatorConfiguration>


    <context id="tables" targetRuntime="MyBatis3">
        <commentGenerator>


            <property name="suppressAllComments" value="true" />
        commentGenerator>


        <jdbcConnection driverClass="com.mysql.cj.jdbc.Driver"
                        connectionURL="jdbc:mysql://localhost:3306/xiaomissm?useSSL=false&serverTimezone=Asia/Shanghai&allowPublicKeyRetrieval=true"
                        userId="root"
                        password="aszhuo123">

            <property name="nullCatalogMeansCurrent" value="true" />
        jdbcConnection>


        <javaTypeResolver>
            <property name="forceBigDecimals" value="false" />
        javaTypeResolver>


        <javaModelGenerator targetPackage="com.fancy.pojo"	targetProject="src/main/java">

            <property name="enableSubPackages" value="true" />

            <property name="trimStrings" value="true" />
        javaModelGenerator>


        <sqlMapGenerator targetPackage="com.fancy.dao"  	 targetProject="./src/main/java">
            <property name="enableSubPackages" value="false" />
        sqlMapGenerator>


        <javaClientGenerator type="XMLMAPPER"
                             targetPackage="com.fancy.dao"  targetProject="./src/main/java">
            <property name="enableSubPackages" value="false" />
        javaClientGenerator>


        <table tableName="address"
               enableCountByExample="false" enableUpdateByExample="false"
               enableDeleteByExample="false" enableSelectByExample="false"
               selectByExampleQueryId="false">table>
        <table tableName="admin"
               enableCountByExample="false" enableUpdateByExample="false"
               enableDeleteByExample="false" enableSelectByExample="false"
               selectByExampleQueryId="false">table>
        <table tableName="carshop"
               enableCountByExample="false" enableUpdateByExample="false"
               enableDeleteByExample="false" enableSelectByExample="false"
               selectByExampleQueryId="false">table>
        <table tableName="orderdetail"
               enableCountByExample="false" enableUpdateByExample="false"
               enableDeleteByExample="false" enableSelectByExample="false"
               selectByExampleQueryId="false">table>
        <table tableName="product_info"
               enableCountByExample="false" enableUpdateByExample="false"
               enableDeleteByExample="false" enableSelectByExample="false"
               selectByExampleQueryId="false">table>
        <table tableName="product_type"
               enableCountByExample="false" enableUpdateByExample="false"
               enableDeleteByExample="false" enableSelectByExample="false"
               selectByExampleQueryId="false">table>
        <table tableName="users"
               enableCountByExample="false" enableUpdateByExample="false"
               enableDeleteByExample="false" enableSelectByExample="false"
               selectByExampleQueryId="false">table>
        <table tableName="xmorder"
               enableCountByExample="false" enableUpdateByExample="false"
               enableDeleteByExample="false" enableSelectByExample="false"
               selectByExampleQueryId="false">table>
    context>
generatorConfiguration>
运行并生成 pojo类 和 dao类
鼠标移到插件,右键 Run Maven Build
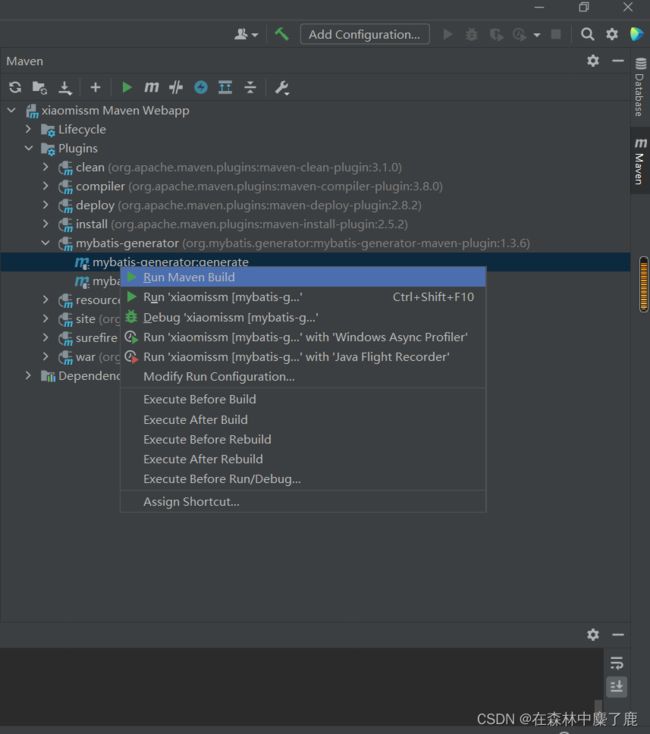
生成代码如图

5、utils 包下添加 MD5 加密算法工具类
此算法主要在注册登录页面的表单提交数据时使用
package com.fancy.utils;

import java.security.MessageDigest;
import java.security.NoSuchAlgorithmException;

public class MD5Util {
    /**
     * 1.MD5(message-digest algorithm 5)信息摘要算法,
     *   它的长度一般是32位的16进制数字符串(如81dc9bdb52d04dc20036dbd8313ed055)
     * 2.由于系统密码明文存储容易被黑客盗取
     * 3.应用:注册时,将密码进行md5加密,存到数据库中,防止可以看到数据库数据的人恶意篡改。
     *       登录时,将密码进行md5加密,与存储在数据库中加密过的密码进行比对
     * 4.md5不可逆,即没有对应的算法,从产生的md5值逆向得到原始数据。
     *   但是可以使用暴力破解,这里的破解并非把摘要还原成原始数据,如暴力枚举法。
     *
     */
    public final static String getMD5(String str){
        try {
            MessageDigest md = MessageDigest.getInstance("SHA");//创建具有指定算法名称的摘要
            md.update(str.getBytes());                    //使用指定的字节数组更新摘要
            byte mdBytes[] = md.digest();                 //进行哈希计算并返回一个字节数组

            String hash = "";
            for(int i= 0;i<mdBytes.length;i++){           //循环字节数组
                int temp;
                if(mdBytes[i]<0)                          //如果有小于0的字节,则转换为正数
                    temp =256+mdBytes[i];
                else
                    temp=mdBytes[i];
                if(temp<16)
                    hash+= "0";
                hash+=Integer.toString(temp,16);         //将字节转换为16进制后,转换为字符串
            }
            return hash;
        } catch (NoSuchAlgorithmException e) {
            e.printStackTrace();
        }
        return null;
    }
}
6、登录功能
我们先编写登录界面 login.jsp
<%@ page language="java" contentType="text/html; charset=UTF-8"
pageEncoding="UTF-8"%>

DOCTYPE html>
<html>

	<head>
		<meta charset="UTF-8">
		<link rel="stylesheet" href="${pageContext.request.contextPath}/css/bootstrap.css" />
		<link rel="stylesheet" href="${pageContext.request.contextPath}/css/login.css" />
		<script type="text/javascript" src="${pageContext.request.contextPath}/js/jquery-3.3.1.js">script>
		<script type="text/javascript" src="${pageContext.request.contextPath}/js/bootstrap.js">script>
		<title>title>

	head>

	<body>
		<div id="login">
			<div id="top">
				<img src="${pageContext.request.contextPath}/images/cloud.jpg" /><span>LOGINspan>
			div>
			<div id="bottom">
				<form  action="${pageContext.request.contextPath}/admin/login.action" method="post">
					<table border="0px" id="table">
						<tr>
							<td class="td1">用户名:td>
							<td><input type="text" placeholder="Username" class="td2" name="name">td>
						tr>
						<tr>
							<td>td>
							<td><span id="nameerr">span>td>
						tr>
						<tr>
							<td class="td1">密码:td>
							<td><input type="password"  placeholder="Password" class="td2" name="pwd">td>
						tr>
						<tr>
							<td>td>
							<td><span id="pwderr">span>td>
						tr>
						<tr>
							<td>td>
							<td><input type="submit" value="登录" class="td3">
								<a href="${pageContext.request.contextPath}/regist.jsp"><input type="button" value="注册" class="td3	">a>
							td>
						tr>
					table>
				form>
				${errmsg}
			div>
		div>
	body>
html>
如图所示
接下来是做登录判断,如果表单提交数据与数据库表中数据相符,则登录成功;反之,则登录失败。
做登录判断的功能函数属于业务层范围,我们在services包下定义 AdminService 接口及其实现类 AdminServiceImpl,其内部封装 login() 作为登录判断的函数。
做业务层开发时,我们知道业务层函数是基于持久层操作数据库方法的,所以业务层实现类一定会有持久层的对象。
既然要判断表中是否存在该数据,我们需要到 MyBatis 逆向工程生成的 AdminMapper 接口中寻找 根据用户名称查询 的方法。
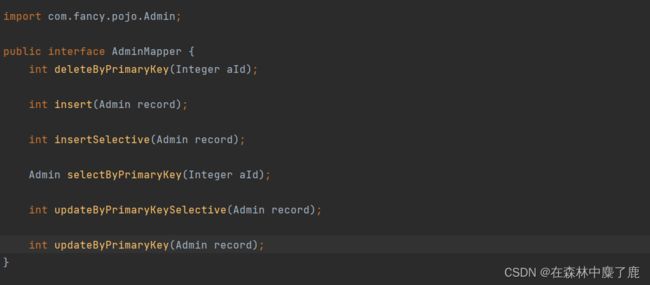
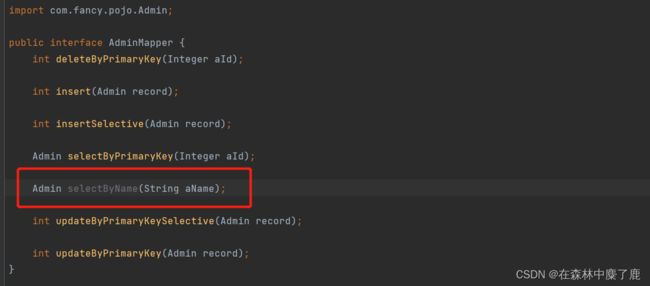
我们发现其中只有根据主键查询数据的方法,而 admin 表中 aName属性不是主键,在此我们需要额外再创建方法
Admin selectByName(String aName) 来根据用户提交的username来查询
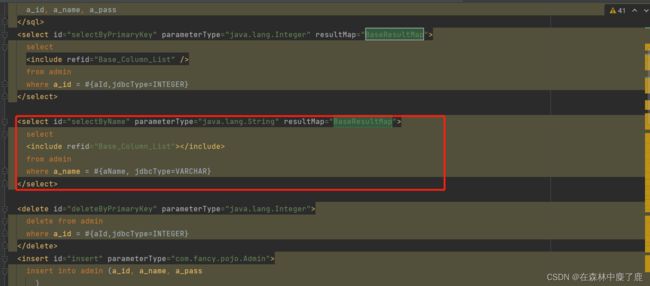
mapper 映射文件中同时定义
<select id="selectByName" parameterType="java.lang.String" resultType="BaseResultMap">
  select
  <include refid="Base_Column_List">include>
  from admin
  where a_name = #{aName, jdbcType=VARCHAR}
select>
仿照原有的方法 selectByPrimaryKey 进行定义
AdminService.java
package com.fancy.services;

import com.fancy.pojo.Admin;

public interface AdminService {
    // 完成登录判断
    Admin login(String name, String pwd);

}
AdminServiceImpl.java
package com.fancy.services;

import com.fancy.dao.AdminMapper;
import com.fancy.pojo.Admin;
import com.fancy.utils.MD5Util;
import org.springframework.beans.factory.annotation.Autowired;
import org.springframework.stereotype.Service;

import java.util.List;

@Service
public class AdminSeriviceImpl implements AdminService{
    //在业务层中, 一定有持久层对象
    @Autowired
    AdminMapper adminMapper;


    @Override
    public Admin login(String name, String pwd) {

        //根据传入的用户或到DB中查询相应用户对象
        Admin admin = adminMapper.selectByName(name);

        if(admin != null) {
           //如果查询到用户对象, 在进行密码比对, 注意密码是密文
            String mPwd = MD5Util.getMD5(pwd);
            //在进行密码对比时,要将传入的pwd进行md5加密,再与数据库中查到的对象的密码进行对比
            if (mPwd.equals(admin.getaPass())) {
                return admin;
            }
        }
        return  null;
    }
}
从数据库中取出数据后,我们需要与前端提交的数据进行比对。接收浏览器数据属于控制层范畴,此时比对的操作需要在控制层完成,然而我们也需要刚刚从数据库中获取的数据对象,所以我们又可以得到一个结论:控制层中一定有业务层对象。 AdminService 实现类 AdminServiceImpl 我们通过注解 @Service 已经创建好了对象 adminServiceImpl
我们在控制层AdminAction类中定义 AdminService adminService,上方加上 @Autowired 注解进行扫描,当扫描到adminServiceImpl 这个对象由于是其实现类对象,会自动进行注入。这种写法起到了解耦合的作用。
如不理解可以参考一下文章:https://blog.csdn.net/qq_32224047/article/details/107082167
package com.fancy.controllers;

import com.fancy.pojo.Admin;
import com.fancy.services.AdminService;
import org.springframework.beans.factory.annotation.Autowired;
import org.springframework.stereotype.Controller;
import org.springframework.web.bind.annotation.RequestMapping;

import javax.servlet.http.HttpServletRequest;

@Controller
@RequestMapping("/admin")
public class AdminAction {
    //在所有控制层中一定有业务层对象
    @Autowired
    AdminService adminService;

    @RequestMapping("/login.action")
    public String login(String name, String pwd, HttpServletRequest request) {
        Admin admin = adminService.login(name, pwd);
        if (admin != null) {
            request.setAttribute("admin", admin);
            return "main";
        } else {
            request.setAttribute("errmsg", "用户名或密码不正确");
            return "login";
        }
    }
}
登录测试:
登录成功:
登录失败:
7、分页与翻页
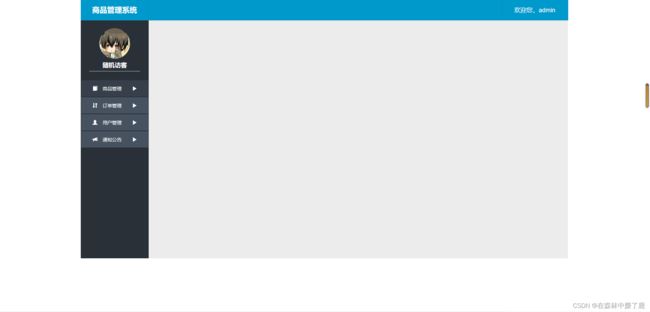
步骤: 将全部商品不分页显示出来 -----> 分页显示 ------> 翻页功能
首先我们给出商品管理总界面
<%@ page language="java" contentType="text/html; charset=UTF-8"
pageEncoding="UTF-8"%>
DOCTYPE html>
<html>
<head>
<meta charset="UTF-8">
<link rel="stylesheet" href="${pageContext.request.contextPath}/css/bootstrap.css" />
<link rel="stylesheet" href="${pageContext.request.contextPath}/css/index.css" />
<script type="text/javascript" src="${pageContext.request.contextPath}/js/jquery-3.3.1.js">script>
<script type="text/javascript" src="${pageContext.request.contextPath}/js/bootstrap.js">script>
<title>title>
<%--<link href="${pageContext.request.contextPath}/css/main.css" rel="stylesheet" >--%>
<style type="text/css">
style>
head>
<body>
<div id="all">
<div id="top">
<div id="top1">
<span>商品管理系统span>
div>
<div id="top2">div>
<div id="top3">
<span>欢迎您,${name}span>
div>
div>
<div id="bottom">
<div id="bleft">
<div id="ltop">
<div id="lts">
<img src="${pageContext.request.contextPath}/images/logo.jpg" /><br />
<p style="text-align: center;">随机访客p>
div>
div>
<div id="lbottom">
<ul>
<a href="${pageContext.request.contextPath}/prod/split.action" target="myright" >
<li class="two"><span class="glyphicon glyphicon-book" style="color: white;">span> 商品管理 <span class="glyphicon glyphicon-play" style="color: white;">span> li>
a>
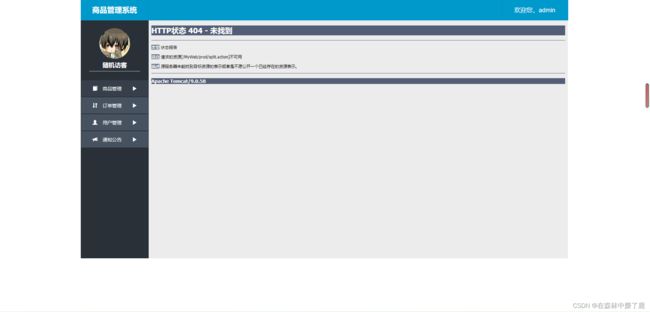
<a href="${pageContext.request.contextPath}/admin/err.jsp" target="myright">
<li class="one"><span class="glyphicon glyphicon-sort" style="color: white;">span> 订单管理 <span class="glyphicon glyphicon-play" style="color: white;">span> li>
a>
<a href="${pageContext.request.contextPath}/admin/err.jsp" target="myright">
<li class="one"><span class="glyphicon glyphicon-user" style="color: white;">span> 用户管理 <span class="glyphicon glyphicon-play" style="color: white;">span> li>
a>
<a href="${pageContext.request.contextPath}/admin/err.jsp" target="myright">
<li class="one"><span class="glyphicon glyphicon-bullhorn" style="color: white">span> 通知公告 <span class="glyphicon glyphicon-play" style="color: white;">span> li>
a>
ul>
div>
div>
<div id="bright">
<iframe frameborder="0" scrolling="no" name="myright" width="1235px" height="700px" >iframe>
div>
div>
div>
body>
html>
同上一个实现登录的步骤,我们先开发 service 接口及其实现类,先编写 getAll() 方法以获取所有商品数据
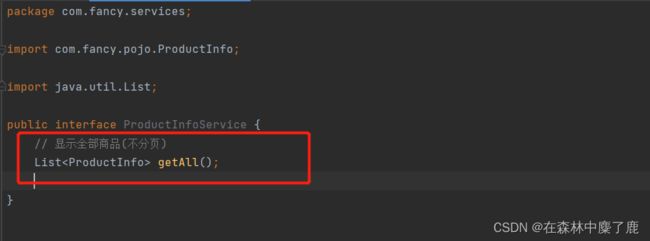
然后我们在实现类 ProductInfoServiceImpl 中将 getAll() 方法进行实现,实际上是调用 mapper 类中 selectAll()方法,如没有请自行定义。
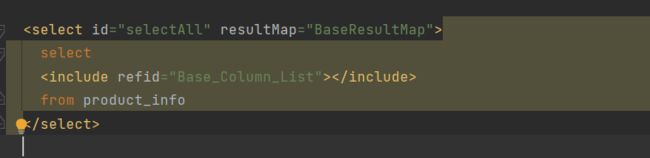
getAll() 方法的实现。

在控制层中,我们接受到浏览器的请求之后,调用通过业务层对象调用getAll()方法从数据库中获取所有商品的数据,添加到 request 作用域中,并提交给 Product.jsp 界面,在 Product.jsp 中所有商品的数据显现出来。
Product.jsp 界面
<%@ page contentType="text/html;charset=UTF-8" language="java" %>
<%@page import="com.oracle.xiaomi.pojo.*" %>
<%@page import="java.util.*" %>
<%@taglib prefix="c" uri="http://java.sun.com/jsp/jstl/core" %>
DOCTYPE html>
<html>
<head>
<meta charset="UTF-8">
<script type="text/javascript">
if ("${msg}" != "") {
alert("${msg}");
}
script>
<c:remove var="msg">c:remove>
<link rel="stylesheet" href="${pageContext.request.contextPath}/css/bootstrap.css"/>
<link rel="stylesheet" href="${pageContext.request.contextPath}/css/bright.css"/>
<link rel="stylesheet" href="${pageContext.request.contextPath}/css/addBook.css"/>
<script type="text/javascript" src="${pageContext.request.contextPath}/js/jquery-3.3.1.js">script>
<script type="text/javascript" src="${pageContext.request.contextPath}/js/bootstrap.js">script>
<title>title>
head>
<body>
<div id="brall">
<div id="nav">
<p>商品管理>商品列表p>
div>
<div id="condition" style="text-align: center">
<form id="myform">
商品名称:<input name="pname" id="pname">
商品类型:<select name="typeid" id="typeid">
<option value="-1">请选择option>
<c:forEach items="${ptlist}" var="pt">
<option value="${pt.typeId}">${pt.typeName}option>
c:forEach>
select>
价格:<input name="lprice" id="lprice">-<input name="hprice" id="hprice">
<input type="button" value="查询" onclick="ajaxsplit(${pb.pageNum})">
form>
div>
<br>
<div id="table">
<c:choose>
<c:when test="${pb.list.size()!=0}">
<div id="top">
<input type="checkbox" id="all" onclick="allClick()" style="margin-left: 50px"> 全选
<a href="${pageContext.request.contextPath}/admin/addproduct.jsp">
<input type="button" class="btn btn-warning" id="btn1"
value="新增商品">
a>
<input type="button" class="btn btn-warning" id="btn1"
value="批量删除" onclick="deleteBatch(${pb.pageNum})">
div>
<div id="middle">
<table class="table table-bordered table-striped">
<tr>
<th>th>
<th>商品名th>
<th>商品介绍th>
<th>定价(元)th>
<th>商品图片th>
<th>商品数量th>
<th>操作th>
tr>
<c:forEach items="${list}" var="p">
<tr>
<td valign="center" align="center"><input type="checkbox" name="ck" id="ck" value="${p.pId}" onclick="ckClick()">td>
<td>${p.pName}td>
<td>${p.pContent}td>
<td>${p.pPrice}td>
<td><img width="55px" height="45px"
src="${pageContext.request.contextPath}/image_big/${p.pImage}">td>
<td>${p.pNumber}td>
<%--<td><a href="${pageContext.request.contextPath}/admin/product?flag=delete&pid=${p.pId}" onclick="return confirm('确定删除吗?')">删除a>--%>
<%-- <a href="${pageContext.request.contextPath}/admin/product?flag=one&pid=${p.pId}">修改a>td>--%>
<td>
<button type="button" class="btn btn-info "
onclick="one(${p.pId},${pb.pageNum})">编辑
button>
<button type="button" class="btn btn-warning" id="mydel"
onclick="del(${p.pId},${pb.pageNum})">删除
button>
td>
tr>
c:forEach>
table>
<div id="bottom">
<div>
<nav aria-label="..." style="text-align:center;">
<ul class="pagination">
<li>
<%-- <a href="${pageContext.request.contextPath}/prod/split.action?page=${pb.prePage}" aria-label="Previous">--%>
<a href="javascript:ajaxsplit(${pb.prePage})" aria-label="Previous">
<span aria-hidden="true">«span>a>
li>
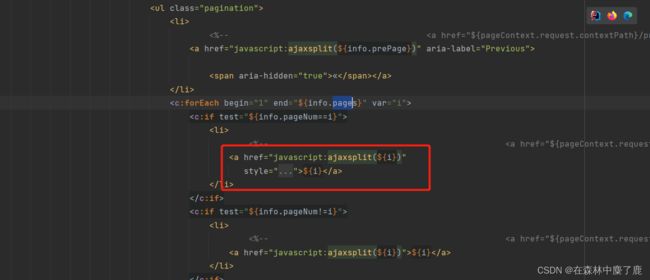
<c:forEach begin="1" end="${pb.pages}" var="i">
<c:if test="${pb.pageNum==i}">
<li>
<%-- <a href="${pageContext.request.contextPath}/prod/split.action?page=${i}" style="background-color: grey">${i}a>--%>
<a href="javascript:ajaxsplit(${i})"
style="background-color: grey">${i}a>
li>
c:if>
<c:if test="${pb.pageNum!=i}">
<li>
<%-- <a href="${pageContext.request.contextPath}/prod/split.action?page=${i}">${i}a>--%>
<a href="javascript:ajaxsplit(${i})">${i}a>
li>
c:if>
c:forEach>
<li>
<%-- <a href="${pageContext.request.contextPath}/prod/split.action?page=1" aria-label="Next">--%>
<a href="javascript:ajaxsplit(${pb.nextPage})" aria-label="Next">
<span aria-hidden="true">»span>a>
li>
<li style=" margin-left:150px;color: #0e90d2;height: 35px; line-height: 35px;">总共 <font
style="color:orange;">${pb.pages}font> 页
<c:if test="${pb.pageNum!=0}">
当前 <font
style="color:orange;">${pb.pageNum}font> 页
c:if>
<c:if test="${pb.pageNum==0}">
当前 <font
style="color:orange;">1font> 页
c:if>
li>
ul>
nav>
div>
div>
div>
c:when>
<c:otherwise>
<div>
<h2 style="width:1200px; text-align: center;color: orangered;margin-top: 100px">暂时没有符合条件的商品!h2>
div>
c:otherwise>
c:choose>
div>
div>
<div class="modal fade" id="myModal" tabindex="-1" role="dialog" aria-labelledby="myModalLabel" aria-hidden="true">
<div class="modal-dialog">
<div class="modal-content">
<div class="modal-header">
<button type="button" class="close" data-dismiss="modal" aria-hidden="true">×button>
<h4 class="modal-title" id="myModalLabel">新增商品h4>
div>
<div class="modal-body" id="addTD">
<form action="${pageContext.request.contextPath}/admin/product?flag=save" enctype="multipart/form-data"
method="post" id="myform">
<table>
<tr>
<td class="one">商品名称td>
<td><input type="text" name="pname" class="two" class="form-control">td>
tr>
<tr class="three">
<td class="four">td>
<td><span id="pnameerr">span>td>
tr>
<tr>
<td class="one">商品介绍td>
<td><input type="text" name="pcontent" class="two" class="form-control">td>
tr>
<tr class="three">
<td class="four">td>
<td><span id="pcontenterr">span>td>
tr>
<tr>
<td class="one">定价td>
<td><input type="number" name="pprice" class="two" class="form-control">td>
tr>
<tr class="three">
<td class="four">td>
<td><span id="priceerr">span>td>
tr>
<tr>
<td class="one">图片介绍td>
<td><input type="file" name="pimage" class="form-control">td>
tr>
<tr class="three">
<td class="four">td>
<td><span>span>td>
tr>
<tr>
<td class="one">总数量td>
<td><input type="number" name="pnumber" class="two" class="form-control">td>
tr>
<tr class="three">
<td class="four">td>
<td><span id="numerr">span>td>
tr>
<tr>
<td class="one">类别td>
<td>
<select name="typeid" class="form-control">
<c:forEach items="${typeList}" var="type">
<option value="${type.typeId}">${type.typeName}option>
c:forEach>
select>
td>
tr>
<tr class="three">
<td class="four">td>
<td><span>span>td>
tr>
<tr>
<td>
<input type="submit" class="btn btn-success" value="提交" class="btn btn-success">
td>
<td>
<button type="button" class="btn btn-info" data-dismiss="modal">取消button>
td>
tr>
table>
form>
div>
div>
div>
div>
body>
html>
结果如图:

所有商品显示在一页中。
接下来,我们需要完成的是分页操作。分页操作实际上就是要在函数中实现 select * from product_info limit 10,5查询,在此我们使用 PageHelper 插件来辅助完成分页操作。
在 ProductService 接口中添加 splitPage 方法并在 ProductServiceImpl 进行实现
@Override
public PageInfo splitPage(int pageNum, int pageSize) {
    //使用分页插件 PageHelper 工具类完成分页设置
    PageHelper.startPage(pageNum, pageSize);

    List<ProductInfo> list = productInfoMapper.selectAll();

    //将查询到的集合封装进 PageInfo 对象中
    PageInfo<ProductInfo> pageInfo = new PageInfo<>(list);

    return pageInfo;
}
在控制层中,我们只需要将 splitPage() 方法执行即可,并将结果提交到 product.jsp 页面中
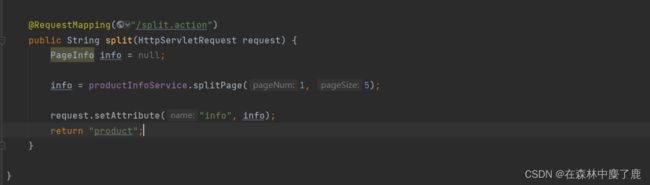
结果如图,第一页的数据就显现出来了

不过,此方法只能得到第一页的数据,要想得到第2、3、4等页的数据,我们需要定义 ajax 进行翻页操作。
翻页事实上是修改 PageHelper.startPage(pageNum, pageSize) 的 pageNum 属性,在定义 ajax 请求时我们要特别地将页数 page 进行传入。
每次将 page 传入 ajaxSplit(page) 函数中,并将数据提交控制器给 ajaxSplit.action 中,新的page数据存入到session中,EL表达式${}的原理是每次刷新页面都重新从session中取出数据。
ajax请求:
<script type="text/javascript">
    function ajaxsplit(page) {
        //向服务发出ajax请求,请示page页中的所有数据,在当前页面上局部刷新显示
        $.ajax({
            url: "${pageContext.request.contextPath}/prod/ajaxSplit.action",
            data: {"page": page},
            type: "post",
            success: function () {
                //重新加载显示分页数据的容器
                $("#table").load("http://localhost:8080/MyWeb/admin/product.jsp #table");
            }
        });
    }
</script>
控制器方法:
@RequestMapping("/ajaxSplit.action")
@ResponseBody
public void ajaxSplit(int page, HttpSession session) {
         PageInfo info = productInfoService.splitPage(page, 5);
         session.setAttribute("info", info);
}
结果:
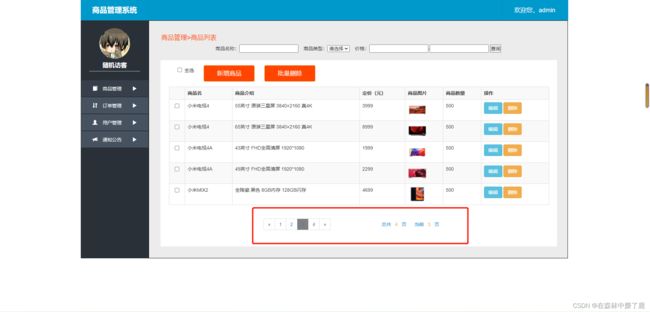
未完待续