Zabbix 5.0 部署
原创作者:运维工程师 谢晋
zabbix 5.0安装部署
- 安装前准备
-
- 环境信息规划
- Zabbix 5.0的安装
-
- zabbix Server安装
- Mysql数据库安装
- zabbix服务配置
- Zabbix web端部署
-
- Zabbix web配置
安装前准备
环境信息规划
详细信息规划如下:
| 操作系统 | CentOS Linux release 7.9.2009 (Core) |
|---|---|
| 主机名 | zabbix |
| 专用 IP 地址 | 192.168.10.172 |
| mysql数据库版本 | 8.0.26 |
| 文件系统 | 本地文件系统 |
| 数据库名 | zabbix |
配置网络环境
根据信息规划表的要求配置操作系统的主机名、IP地址、hosts文件。
- 配置hosts文件
# cat /etc/hosts
192.168.10.172 zabbix
- 配置防火墙和selinux
关闭系统的iptables服务,以及selinux防火墙,以确保oracle对外提供服务端口(默认1521)不被阻塞,请注意,确认以上两项服务的关闭是必须的选项。
检查iptables服务是否运行:
# systemctl status firewalld
# getenforce
如果返回的结果不是disabled,请运行以下命令,然后重启机器:
# systemctl stop firewalld
# systemctl disable firewalld
# setenforce 0
# sed -i -e 's/SELINUX=enforcing/SELINUX=disabled/' /etc/selinux/config
Zabbix 5.0的安装
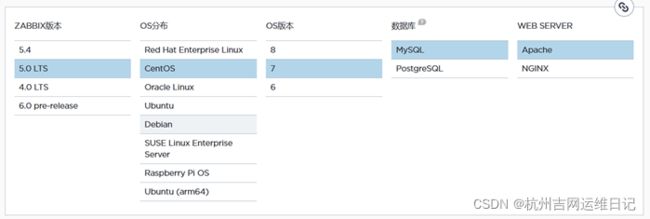
官网下载zabbix版本https://www.zabbix.com/download?zabbix=5.0&os_distribution=centos&os_version=7&db=mysql&ws=apache
zabbix Server安装
- 下载并安装zabbix安装包
# cd /etc/yum.repos.d/
# rpm -Uvh https://repo.zabbix.com/zabbix/5.0/rhel/7/x86_64/zabbix-release-5.0-1.el7.noarch.rpm
# yum clean all
# yum makecache
正常安装该rpm包后,关于zabbix的yum文件已经自动生成在yum源配置文件目录中。
- 使用yum命令安装zabbix服务端
# yum install -y zabbix-server-mysql zabbix-web-mysql zabbix-get httpd zabbix-agent
- 启用红帽软件集合
# yum install -y centos-release-scl
# vim /etc/yum.repos.d/zabbix.repo
[zabbix-frontend]
  name=Zabbix Official Repository frontend - $basearch
  baseurl=http://repo.zabbix.com/zabbix/5.0/rhel/7/$basearch/frontend
  enabled=1 (将0修改为1)
  gpgcheck=1
  gpgkey=file:///etc/pki/rpm-gpg/RPM-GPG-KEY-ZABBIX-A14FE591
# yum install -y zabbix-web-mysql-scl zabbix-apache-conf-scl
Mysql数据库安装
- 安装Mysql 8.0
首先安装 epel:
# yum install -y https://mirrors.aliyun.com/epel/epel-release-latest-7.noarch.rpm
mysql 安装:
# wget https://repo.mysql.com/mysql80-community-release-el7.rpm
# yum -y localinstall mysql80-community-release-el7.rpm
# yum install mysql-server -y
# systemctl start mysqld && systemctl status mysqld
# systemctl enable mysqld
# cat /var/log/mysqld.log |grep password
	2021-09-27T10:16:21.928728Z 6 [Note] [MY-010454] [Server] A temporary password is generated for root@localhost: E:FB-itdA6qo
# mysql -uroot -p
  Enter password:  (输入上条命令查看到的密码E:FB-itdA6qo)
mysql> ALTER USER 'root'@'localhost' IDENTIFIED BY 'Abc1234!';
- 创建数据库
# mysql -uroot -p
password
mysql> create database zabbix character set utf8 collate utf8_bin;
mysql> create user zabbix@localhost identified by 'Abc1234!';
//这样创建的用户,zabbix 无法连接,需加上下面的语句。
mysql> ALTER USER 'zabbix'@'localhost' IDENTIFIED WITH mysql_native_password BY 'Abc1234!';
mysql> grant all privileges on zabbix.* to zabbix@localhost;
mysql> quit;
- 初始化数据库
导入初始架构和数据,系统将提示您输入新创建的密码:
# zcat /usr/share/doc/zabbix-server-mysql*/create.sql.gz | mysql -uzabbix -p zabbix
密码输入 Abc1234!
- 配置数据库
修改zabbixserver配置文本 :
# vim /etc/zabbix/zabbix_server.conf
去掉前面#符号:
DBHost=localhost
不需要修改:
DBName=zabbix
不需要修改:
DBUser=zabbix
去掉前面#符号,修改数据库密码=Abc1234!
DBPassword=Abc1234!
zabbix服务配置
- Zabbix前端配置PHP
编辑配置文件 /etc/opt/rh/rh-php72/php-fpm.d/zabbix.conf
 # vim /etc/opt/rh/rh-php72/php-fpm.d/zabbix.conf
   php_value[date.timezone] = Asia/Shanghai
- 启动zabbix服务及设置开机自启动
启动zabbix服务:
# systemctl restart zabbix-server zabbix-agent httpd rh-php72-php-fpm
设置开机自启动:
# systemctl enable zabbix-server zabbix-agent httpd rh-php72-php-fpm
Zabbix web端部署
访问zabbix服务端,默认地址:http://192.168.10.172/zabbix
默认用户名:Admin
密码:zabbix
登录成功后,进入zabbix配置页面:

检查预配置信息是否正确,如果有错误会有报错,需要修改配置信息,刷新该页面使所有状态项均为OK,才能进入下一步操作。
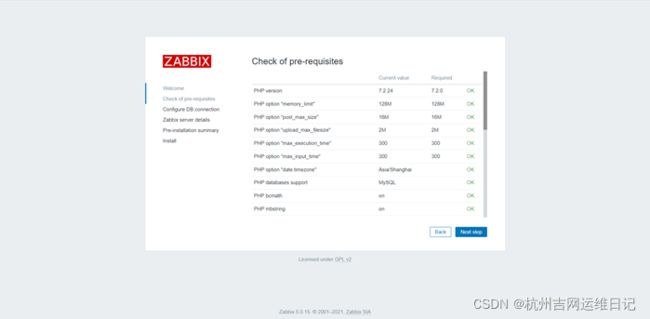
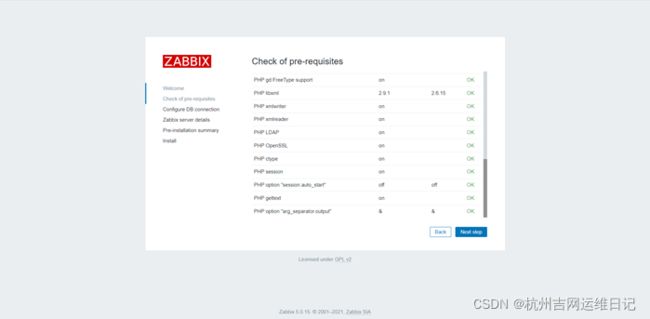
【检测各项指标是否ok】

【配置zabbix数据库信息,需要和之前的配置信息保持一致】

【再次确认,名字忽略】
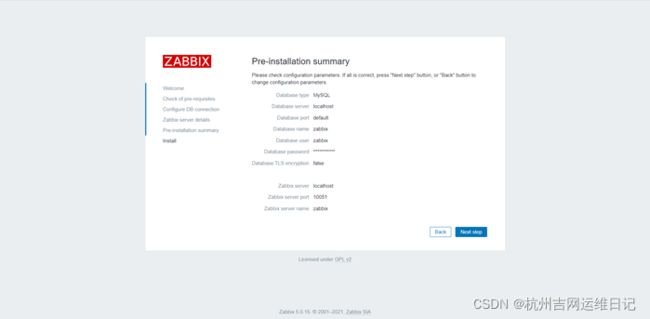
【配置zabbix server信息】

预安装信息的汇总显示,没有问题即可点击下一步,进入zabbix主页:

【用户名默认为:Admin 密码根据设定的zabbix】
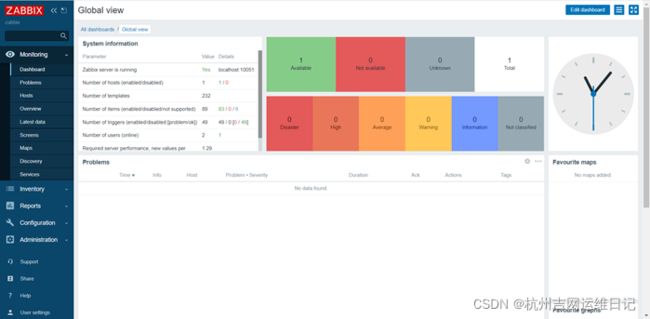
【成功登入,配置成功】
Zabbix web配置
- Zabbix前端界面设置成中文
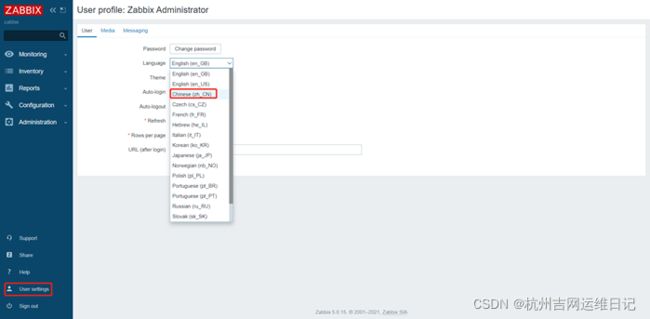
【选择-User settings-Chinese】
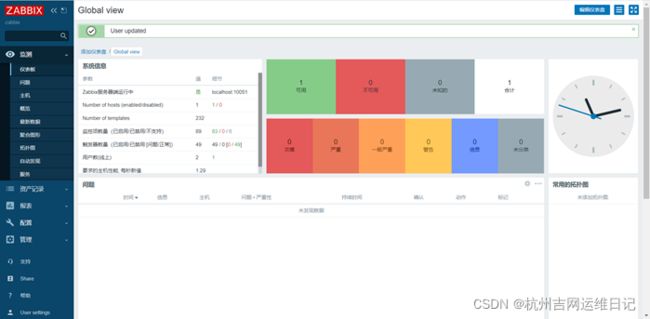
【显示已切换中文界面】 - 显示中文乱码解决方法(特别是图表那块的汉字)
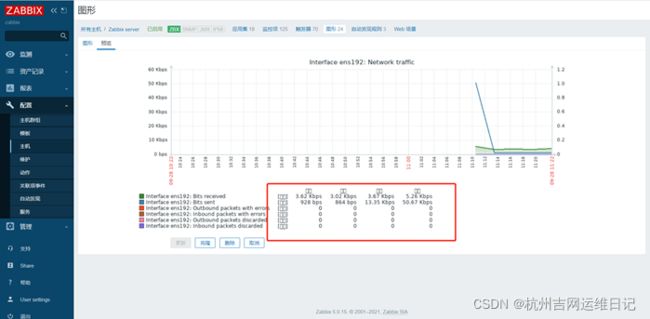
从 windows 拷贝字体:

拷贝到 zabbix-server 上
 # ls -l /usr/share/zabbix/assets/fonts
  -rw-r--r--. 1 root root 18214472 9月  28 11:43 simsun.ttc
  lrwxrwxrwx. 1 root root 33 9月  28 10:39 graphfont.ttf -> /etc/alternatives/zabbix-web-font
zabbix server 配置
备份之前的字体
# mv /usr/share/zabbix/assets/fonts/{graphfont.ttf,graphfont.ttf.bak}
创建字体链接文件
# ln -sv /usr/share/zabbix/assets/fonts/{simsun.ttc,graphfont.ttf}
- 安装监控客户端
下载rpm安装包
# rpm -Uvh https://repo.zabbix.com/zabbix/5.0/rhel/7/x86_64/zabbix-release-5.0-1.el7.noarch.rpm
安装agent客户端
# yum install -y zabbix-agent zabbix-sender
配置客户端
# vim /etc/zabbix/zabbix_agentd.conf
修改此文件中的下面三个值
Server=192.168.10.172     //安装zabbix服务端的机器的IP
ServerActive=192.168.10.172 //安装zabbix服务端的机器的IP
Hostname= Zabbix server  //建议以被监控的机器主机名或ip作为Hostname
启动agent客户端
# systemctl start zabbix-agent
# systemctl enable zabbix-agent

