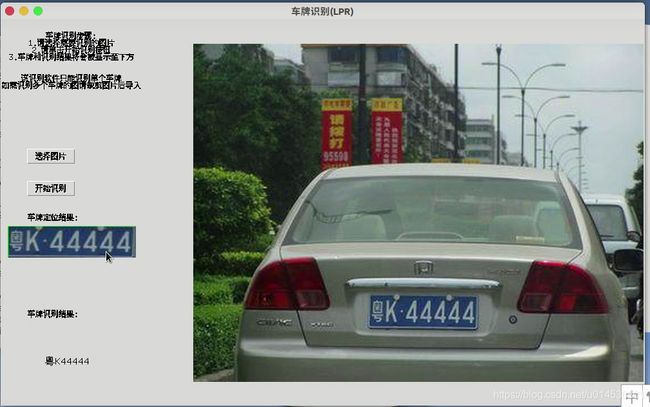
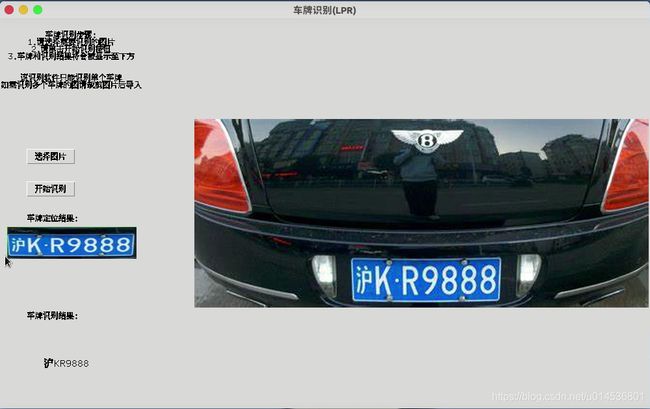
车牌识别(车牌提取+调用百度api+OCR识别)
车牌识别过程
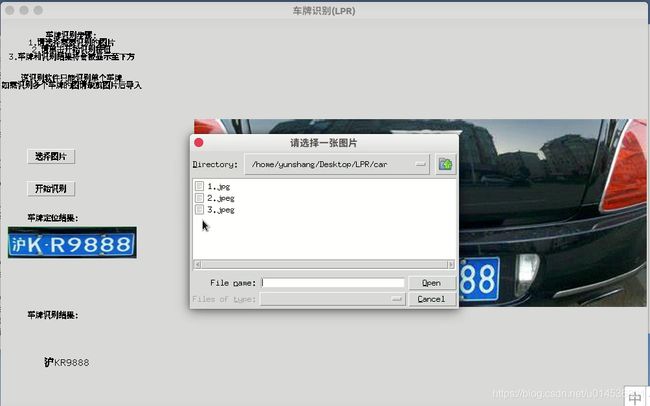
- 图片导入
- 图片灰度
- 车牌定位
- 车牌识别
分析
车牌的大小固定,宽高比在2~5.5之间
这是一个十分重要的训练数据。
大致流程:
- 颜色查找(蓝色区域)
- 高斯模糊
- 灰度化
- 二阈值处理
- 边缘处理
- 闭运算
- 矩形筛选
- 车牌切割
- 车牌识别(调用百度aip实现)
调用百度aip请点击‘百度aip’进行注册获取对应的所需数据
颜色查找代码放在下方:
def color_find(img):                                                                            #寻找蓝色,其他颜色均掩码
    boundaries = [([86, 31, 4], [220, 88, 50])]                                                 #定义边界列表(lower[r, g, b], upper[r, g, b])
    for (lower,upper) in boundaries:                                                            #遍历所有的边界
        lower = np.array(lower, dtype = "uint8")
        upper = np.array(upper, dtype = "uint8")
    mask = cv2.inRange(img, lower, upper)                                                       #在指定边界内查找颜色并掩码
    result_color_find = cv2.bitwise_and(img, img, mask = mask)
    return result_color_find
接下来是车牌识别的代码:
def pre_img(result_color_find,img):                                                                 #对颜色处理后的车牌进行预处理
    os.mkdir('license')
    img_gaus=cv2.GaussianBlur(result_color_find,(1,1),9)                                        #高斯模糊
    img_gray=cv2.cvtColor(img_gaus,cv2.COLOR_BGR2GRAY)                                          #灰度化
    ret,img_binary=cv2.threshold(img_gray,127,255,cv2.THRESH_BINARY+cv2.THRESH_OTSU)            #二阈值处理
    img_canny=cv2.Canny(img_binary, 200, 255)                                                   #边缘处理
    kernel=cv2.getStructuringElement(cv2.MORPH_RECT,(50,20))
    img_close=cv2.morphologyEx(img_canny,cv2.MORPH_CLOSE,kernel)                                #闭运算
    contours,hierarchy=cv2.findContours(img_close,cv2.RETR_EXTERNAL,cv2.CHAIN_APPROX_SIMPLE)
    result_pre_img=[]
    for i in range(len(contours)):
        x,y,w,h=cv2.boundingRect(contours[i])
        ratio=w/h
        if ratio > 2 and ratio < 5.5:                                                           #筛选出宽高比在2~5.5之间的矩形
            cv2.rectangle(img,(x,y),(x+w,y+h),(0,255,0),1)
            result=img[y:y+h,x:x+w]                                                             #预处理
            pre_result=cv2.resize(result,(200,50))
            result_pre_img.append(pre_result)
    for o in range(len(result_pre_img)):
        cv2.imwrite('license/license%d.jpg'%(o+1), result_pre_img[o])
    return o+1
以上代码需调用:
- import cv2
- import numpy as np
- import os
- import shutil**
附上ui界面源码:
界面非原创设计,界面参考
import tkinter as tk
from tkinter import filedialog
from tkinter import *
from tkinter import Button,Label,filedialog
import License_import
import cv2
from PIL import Image,ImageTk
from aip import AipOcr
import shutil
import os

srcPath=''
api='填写你的百度aip'
api_id='这里写id'
api_key='这里写apikey值'
secret_key='这里写secretkey值'
license_dir='license/'
client = AipOcr(api_id, api_key, secret_key)
result=[]
window=tk.Tk()
window.title('车牌识别(LPR)')
window.geometry('1000x600')
canvas_pic = tk.Canvas(window, width=700, height=600)
canvas_pic.pack(side='right')
canvas_plate = tk.Canvas(window, width=200, height=50)
canvas_plate.place(x=10, y=320)

def resize( resize_width, resize_height, pil_image):
  w, h = pil_image.size
  f1 = 1.0*resize_width/w
  f2 = 1.0*resize_height/h
  factor = min([f1, f2])
  width = int(w*factor)
  height = int(h*factor)
  return pil_image.resize((width, height), Image.ANTIALIAS)

def printcoords():
    File = filedialog.askopenfilename(parent=window, title='请选择一张图片')
    global srcPath
    srcPath=File
    src = Image.open(File)
    resizePic=resize(700,600,src)
    filename=ImageTk.PhotoImage(resizePic)
    canvas_pic.image=filename
    canvas_pic.create_image(350,300,image=filename)

btn_choosePic = tk.Button(window, text='选择图片',command=printcoords).place(x=40, y=200)

def location():
    if os.path.exists('license'):
        shutil.rmtree('license')
    global pictureName
    img=cv2.imread(srcPath)
    result_file=License_import.color_find(img)
    for i in range(License_import.pre_img(result_file,img)):
        image = get_file_content(license_dir+'license%d.jpg'%(i+1))
        src = Image.open(license_dir+'license%d.jpg'%(i+1))
        text=client.basicGeneral(image)
        for j in text.get('words_result'):
            var_returnTxt.set(j['words'])
    resizePic = resize(200, 50, src)
    filename = ImageTk.PhotoImage(resizePic)
    canvas_plate.image = filename
    canvas_plate.create_image(100, 25, image=filename)

btn_location = tk.Button(window, text='开始识别', command=location).place(x=40, y=250)
tk.Label(window, text='车牌定位结果: ', width=18).place(x=20, y= 300)
tk.Label(window, text='车牌识别结果: ', width=18).place(x=20, y= 450)
tk.Label(window, text='车牌识别步骤:\n'
                      '1.请选择需要识别的图片\n'
                      '2.请单击开始识别按钮\n'
                      '3.车牌和识别结果将会被显示至下方\n\n\n'
                      '该识别软件只能识别单个车牌\n'
                      '如需识别多个车牌的图请裁剪图片后导入').place(x=0, y=18)
var_returnTxt = tk.StringVar()
var_returnTxt.set("等待识别......")
tk.Label(window,textvariable=var_returnTxt,font=('Arial', 11),width=18, height=8).place(x=20, y=470)

def get_file_content(filePath):
    with open(filePath, 'rb') as fp:
        return fp.read()

if __name__ == '__main__':
    window.mainloop()


