主流消息中间件RabbitMQ教程(作者原创)
个人简介
作者是一个来自河源的大三在校生,以下笔记都是作者自学之路的一些浅薄经验,如有错误请指正,将来会不断的完善笔记,帮助更多的Java爱好者入门。
文章目录
-
- 个人简介
- RabbitMQ
-
- 安装RabbitMQ环境
- RabbitMQ的5种模型(重点**)
-
- 导入依赖
- 基本消息模型(hello world)
- work queue模型
-
- 未实现能者多劳机制
- 实现了能者多劳机制
- fanout模型(广播模型)性能最好
- direct模型(直连)(默认)
- topic模型(通配符)
- SpringBoot+RabbitMQ
-
- 导入启动器
- application.yml
- 自定义RabbitTemplate
- RabbitTemplate实现发送消息
-
- 最简单的使用HelloWorld
- workqueue
- fanout模式
- direct模式
- topic模式
- RabbitMQ高级特性
-
- 消息队列的过期时间ttl
-
- 队列里的消息的过期时间(有点坑)
- 指定消息的过期时间
- 死信队列
- 固定长度的消息队列
- 延时队列
RabbitMQ
在目前主流的消息队列中有(ActiveMQ,RocketMQ,RabbitMQ,kafka)
RabbitMQ在上面的各种消息队列中对于消息的保护是十分到位的(不会丢失消息),相对于kafka,虽然kafka性能十分强悍,在大数据中处理海量数据游刃有余,但是kafka容易丢失消息,而RabbitMQ虽然性能不及kafka,但是也不会很差,对于消息要求完整性很高的系统中用RabbitMQ十分好。
安装RabbitMQ环境
总教程:https://www.cnblogs.com/saryli/p/9729591.html
1.安装erlang
(1.)下载erlang
官网地址:https://www.erlang.org/
下载教程:https://www.cnblogs.com/minily/p/7398445.html
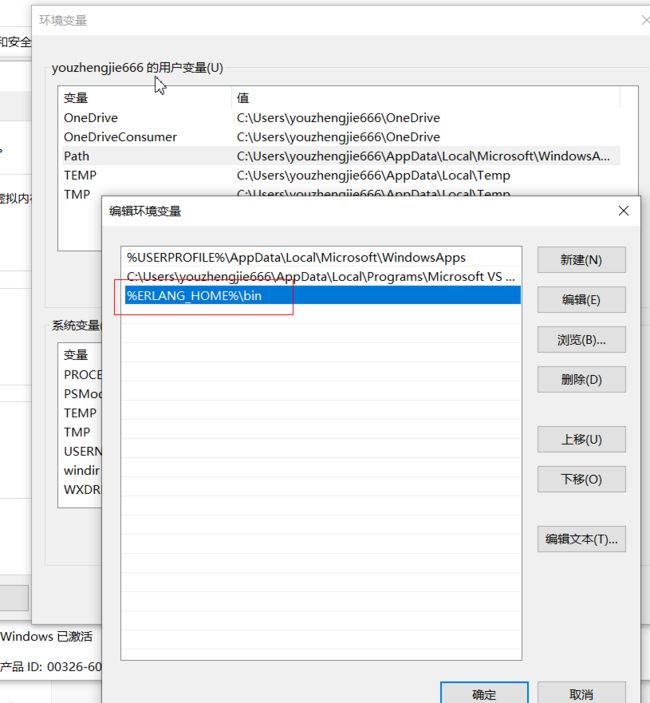
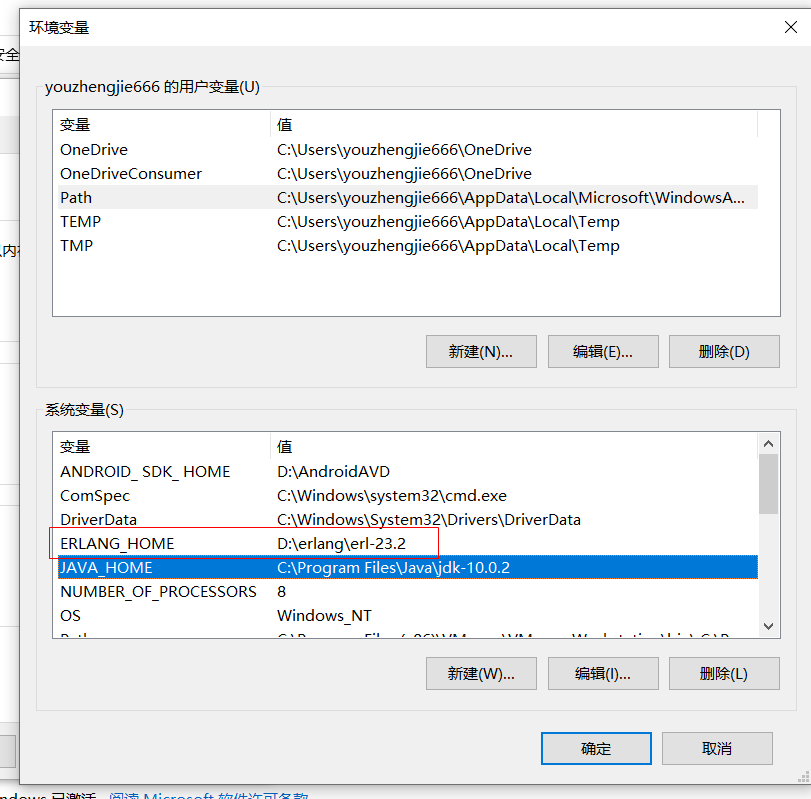
(2.)配置erlang环境
配置教程:https://blog.csdn.net/g6256613/article/details/80191402
需要配置环境变量
(3.)检查是否安装成功
打开cmd,输入erl,有输出说明成功
(4.)下载rabbitMQ
下载地址:https://www.cnblogs.com/saryli/p/9729591.html
。。。。。。。。。。。。省略,在总教程都有。
(5.)最后访问http://localhost:15672,如果访问成功,说明rabbitMQ安装成功
RabbitMQ的5种模型(重点**)
导入依赖
		 <dependency>
            <groupId>com.rabbitmqgroupId>
            <artifactId>amqp-clientartifactId>
            <version>5.7.3version>
        dependency>
基本消息模型(hello world)
生产者
public class provider {
    /**
     * 最基本的消息队列模型
     *
     * 消息生产者
     * @param args
     */

    public static void main(String[] args) throws IOException, TimeoutException {
        //1.先new一个连接工厂
        ConnectionFactory factory = new ConnectionFactory();
        //定义指定rabbitmq配置的工厂
        factory.setUsername("ems");
        factory.setPassword("123456");
        factory.setVirtualHost("/ems"); //虚拟主机
        factory.setHost("127.0.0.1");  //rabbitMQ的主机名(ip)
        //2.通过连接工厂创建一个connection
        Connection connection = factory.newConnection();
        //3.通过connection对象create一个channel通道,以后我们的操作就是channel
        Channel channel = connection.createChannel();

        //4.声明队列,如果没有这个队列则会自动生成
        /**
         *   queueDeclare(String queue, boolean durable, boolean exclusive, boolean autoDelete, Map arguments)
         *   参数1:队列名字
         *   参数2:队列是否持久化
         *   参数3:是否排斥(也就是一个队列是否只能由一个消费者消费)
         *   参数4:自动删除,当所有消费者消费完之后是否把队列删除
         *   参数5:额外参数
         */
        channel.queueDeclare("hello",true,false,false,null);

        //5.发布消息
        /**
         * 参数1:交换机名称,空字符串代表使用默认交换机。。。。
         * 参数2:路由键(在没有指定交换机的情况下(不包括空字符串),路由键是发送消息队列的名字
         * 参数3:额外参数===通常用MessageProperties.PERSISTENT_TEXT_PLAIN,意思是发送的消息在没有消费完也能持久化
         * *****参数4(最重要):发送的消息内容(要转换成byte类型)
         */
        channel.basicPublish("","hello", MessageProperties.PERSISTENT_TEXT_PLAIN,"第一个RabbitMQ程序!!!".getBytes());

        channel.close();
        connection.close();

    }
}
消费者
public class comsumer {
    /**
     * 消息消费者
     */

    public static void main(String[] args) throws IOException, TimeoutException {
        ConnectionFactory connectionFactory = new ConnectionFactory();
        connectionFactory.setUsername("ems");
        connectionFactory.setPassword("123456");
        connectionFactory.setVirtualHost("/ems");
        connectionFactory.setHost("127.0.0.1");
        Connection connection = connectionFactory.newConnection();
        Channel channel = connection.createChannel();

        //这里的配置参数一定要和生产者一模一样,不然会报错
        channel.queueDeclare("hello",true,false,false,null);

        //进行消费
        /**
         * 参数1:队列名字
         * 参数2:是否自动确认消息
         * 参数3:通常用DefaultConsumer匿名内部类,实现handleDelivery接收消息
         */
        channel.basicConsume("hello",true,new DefaultConsumer(channel){
            /**
             *参数3:接收的消息
             */
            @Override
            public void handleDelivery(String consumerTag, Envelope envelope, AMQP.BasicProperties properties, byte[] body) throws IOException {
                System.out.println("=======消费者取出消息===>"+new String(body));

            }
        });


        /**
         * 消费者端最好不要关闭channel和connection,不然可能读取不到消息
         */
//        channel.close();
//        connection.close();

    }

}
work queue模型
为什么会引入这么一个消息队列模型????
我们可以想象一下,如果按照第一个模型,点对点的,生产者发消息经过消息队列再到消费者,此时消费者只有1个,如果我们生产者发送60条消息,假设每条消息要1秒钟才能执行完,那么hello world模型就要60秒才能消费完所有消息,如果我们用workqueue模型呢,我们假如再引入一个消费者,也就是1个生产者发送60条信息到2个消费者,默认负载均衡,每个队列处理30条,而且还是异步处理,那么我们只需要30秒就处理好了,效率大大的提高
未实现能者多劳机制
public class provider {
    /**
     * 生产者
     * ====workQueue模型
     */
    public static void main(String[] args) throws IOException, TimeoutException {
        ConnectionFactory connectionFactory = new ConnectionFactory();
        connectionFactory.setHost("127.0.0.1");
        connectionFactory.setUsername("ems");
        connectionFactory.setPassword("123456");
        connectionFactory.setVirtualHost("/ems");
        Connection connection = connectionFactory.newConnection();
        Channel channel = connection.createChannel();

        //生产者声明了队列,消费者也都要声明
        channel.queueDeclare("workqueue",true,false,false,null);
        //basicPublish(String exchange, String routingKey, BasicProperties props, byte[] body)
        for (int i = 0; i < 10; i++) {
            channel.basicPublish("","workqueue",null,("hello=="+i+"").getBytes());
        }

        channel.close();
        connection.close();


    }

}
public class comsumer1 {
    /**
     * 消费者1
     * @param args
     */

    public static void main(String[] args) throws IOException, TimeoutException {
        ConnectionFactory connectionFactory = new ConnectionFactory();
        connectionFactory.setVirtualHost("/ems");
        connectionFactory.setUsername("ems");
        connectionFactory.setPassword("123456");
        connectionFactory.setHost("127.0.0.1");

        Connection connection = connectionFactory.newConnection();

        Channel channel = connection.createChannel();
        //queueDeclare(String queue, boolean durable, boolean exclusive, boolean autoDelete, Map arguments)
        channel.queueDeclare("workqueue",true,false,false,null);
        //basicConsume(String queue, boolean autoAck, Consumer callback)
        channel.basicConsume("workqueue",true,new DefaultConsumer(channel){
            @Override
            public void handleDelivery(String consumerTag, Envelope envelope, AMQP.BasicProperties properties, byte[] body) throws IOException {
                System.out.println("===comsumer1===>"+new String(body));
            }
        });

    }


}
public class comsumer2 {
    /**
     * 消费者2
     */
    public static void main(String[] args) throws IOException, TimeoutException {
        ConnectionFactory connectionFactory = new ConnectionFactory();
        connectionFactory.setVirtualHost("/ems");
        connectionFactory.setHost("127.0.0.1");
        connectionFactory.setUsername("ems");
        connectionFactory.setPassword("123456");

        Connection connection = connectionFactory.newConnection();

        Channel channel = connection.createChannel();

        channel.queueDeclare("workqueue",true,false,false,null);

        channel.basicConsume("workqueue",true,new DefaultConsumer(channel){
            @Override
            public void handleDelivery(String consumerTag, Envelope envelope, AMQP.BasicProperties properties, byte[] body) throws IOException {
                System.out.println("===comsumer2===>"+new String(body));
            }
        });


    }

}
输出结果:(默认是类似负载均衡的轮询算法)
===comsumer1===>hello==0
===comsumer1===>hello==2
===comsumer1===>hello==4
===comsumer1===>hello==6
===comsumer1===>hello==8
实现了能者多劳机制
要实现能者多劳,只需要在消费者修改几处代码即可
1. channel.basicQos(1);
2. channel.basicConsume(“workqueue”,false,new DefaultConsumer(channel)
3. channel.basicAck(envelope.getDeliveryTag(),false); //手动确认
public class comsumer1 {
    /**
     * 消费者1 能者多劳
     * @param args
     */

    public static void main(String[] args) throws IOException, TimeoutException {
        ConnectionFactory connectionFactory = new ConnectionFactory();
        connectionFactory.setVirtualHost("/ems");
        connectionFactory.setUsername("ems");
        connectionFactory.setPassword("123456");
        connectionFactory.setHost("127.0.0.1");

        Connection connection = connectionFactory.newConnection();

        Channel channel = connection.createChannel();

        //每次收到一条消息
        channel.basicQos(1);

        //queueDeclare(String queue, boolean durable, boolean exclusive, boolean autoDelete, Map arguments)
        channel.queueDeclare("workqueue",true,false,false,null);
        //basicConsume(String queue, boolean autoAck, Consumer callback)
        channel.basicConsume("workqueue",false,new DefaultConsumer(channel){ //第二个参数修改为false,取消自动avk
            @Override
            public void handleDelivery(String consumerTag, Envelope envelope, AMQP.BasicProperties properties, byte[] body) throws IOException {
                System.out.println("===comsumer1===>"+new String(body));
                channel.basicAck(envelope.getDeliveryTag(),false); //手动确认
            }
        });

    }


}
public class comsumer2 {
    /**
     * 消费者2 能者多劳
     */
    public static void main(String[] args) throws IOException, TimeoutException {
        ConnectionFactory connectionFactory = new ConnectionFactory();
        connectionFactory.setVirtualHost("/ems");
        connectionFactory.setHost("127.0.0.1");
        connectionFactory.setUsername("ems");
        connectionFactory.setPassword("123456");

        Connection connection = connectionFactory.newConnection();

        Channel channel = connection.createChannel();

        //每次只能收一条消息
        channel.basicQos(1);

        channel.queueDeclare("workqueue",true,false,false,null);

        channel.basicConsume("workqueue",false,new DefaultConsumer(channel){
            @Override
            public void handleDelivery(String consumerTag, Envelope envelope, AMQP.BasicProperties properties, byte[] body) throws IOException {
                System.out.println("===comsumer2===>"+new String(body));
                channel.basicAck(envelope.getDeliveryTag(),false); //手动确认消息
            }
        });


    }

}
输出结果:
===comsumer1===>hello==0
===comsumer1===>hello==6
===comsumer1===>hello==8
fanout模型(广播模型)性能最好
特点:凡是和这个fanout交换机绑定的临时队列,都能收到消息
public class provider {
    /**
     * fanout模型(广播模型)
     *
     */
    public static void main(String[] args) throws IOException, TimeoutException {
        ConnectionFactory connectionFactory = new ConnectionFactory();
        connectionFactory.setVirtualHost("/ems");
        connectionFactory.setUsername("ems");
        connectionFactory.setPassword("123456");
        connectionFactory.setHost("127.0.0.1");
        Connection connection = connectionFactory.newConnection();
        Channel channel = connection.createChannel();

        //生产者声明交换机==>exchangeDeclare(String exchange, String type, boolean durable, boolean autoDelete, Map arguments)
        /**
         * exchangeDeclare:
         * 参数一:交换机名字
         * 参数二:交换机类型:
         * 有这几种类型:""   , "fanout" , "direct" ,  "topic"
         * 参数三:交换机是否持久化。(重启rabbitmq服务如果交换机没有删除就是持久化)
         * 参数四:是否自动删除
         * 参数五:额外参数
         */
        channel.exchangeDeclare("hello_exchange_fanout","fanout",true,false,null);

        //这里不用声明消息队列,只需要声明交换机即可,消费者需要声明消息队列(临时队列)
        //basicPublish(String exchange, String routingKey, BasicProperties props, byte[] body)
        channel.basicPublish("hello_exchange_fanout","",null,"exchange_fanout".getBytes());
        channel.close();
        connection.close();

    }


}
public class comsumer1 {
    /**
     * fanout模型(广播模型)
     *
     */
    public static void main(String[] args) throws IOException, TimeoutException {
        ConnectionFactory connectionFactory = new ConnectionFactory();
        connectionFactory.setVirtualHost("/ems");
        connectionFactory.setHost("127.0.0.1");
        connectionFactory.setUsername("ems");
        connectionFactory.setPassword("123456");
        Connection connection = connectionFactory.newConnection();
        Channel channel = connection.createChannel();

        //声明交换机
        /**
         * exchangeDeclare:
         * 参数一:交换机名字
         * 参数二:交换机类型:
         * 有这几种类型:""   , "fanout" , "direct" ,  "topic"
         * 参数三:交换机是否持久化。(重启rabbitmq服务如果交换机没有删除就是持久化)
         * 参数四:是否自动删除
         * 参数五:额外参数
         */
        channel.exchangeDeclare("hello_exchange_fanout","fanout",true,false,null);

        //创建一个临时队列
        String queueName = channel.queueDeclare().getQueue();

        //把交换机和临时队列绑定在一起
        //queueBind(String queue, String exchange, String routingKey)
        channel.queueBind(queueName,"hello_exchange_fanout","");

        //然后就可以通信了
        //basicConsume(String queue, boolean autoAck, Map arguments, Consumer callback)
        channel.basicConsume(queueName,true,new DefaultConsumer(channel){
            @Override
            public void handleDelivery(String consumerTag, Envelope envelope, AMQP.BasicProperties properties, byte[] body) throws IOException {
                System.out.println(new String(body));
            }
        });


    }


}
public class comsumer2 {

    public static void main(String[] args) throws IOException, TimeoutException {
        ConnectionFactory connectionFactory = new ConnectionFactory();
        connectionFactory.setVirtualHost("/ems");
        connectionFactory.setHost("127.0.0.1");
        connectionFactory.setUsername("ems");
        connectionFactory.setPassword("123456");
        Connection connection = connectionFactory.newConnection();
        Channel channel = connection.createChannel();

        channel.exchangeDeclare("hello_exchange_fanout","fanout",true,false,null);

        String queueName = channel.queueDeclare().getQueue();

        channel.queueBind(queueName,"hello_exchange_fanout","");

        channel.basicConsume(queueName,true,new DefaultConsumer(channel){
            @Override
            public void handleDelivery(String consumerTag, Envelope envelope, AMQP.BasicProperties properties, byte[] body) throws IOException {
                System.out.println(new String(body));
            }
        });


    }

}
direct模型(直连)(默认)
特点:根据路由键直接匹配
fanout、direct、topic 交换机类型都是可以把同一条消息路由到多个消费者身上的。而hello world、work queue不行。work queue和hello world模型同一条消息只能路由到某一个消费者身上
public class provider {
    /**
     * direct模式(直连交换机)
     * @param args
     */
    public static void main(String[] args) throws IOException, TimeoutException {
        ConnectionFactory connectionFactory = new ConnectionFactory();
        connectionFactory.setVirtualHost("/ems");
        connectionFactory.setHost("127.0.0.1");
        connectionFactory.setUsername("ems");
        connectionFactory.setPassword("123456");
        Connection connection = connectionFactory.newConnection();

        Channel channel = connection.createChannel();

        channel.exchangeDeclare("direct_exchange","direct",true,false,null);

        /**
         * 参数2:路由键,如果消费者有符合的则可以接收消息
         */
        channel.basicPublish("direct_exchange","user_log", MessageProperties.PERSISTENT_TEXT_PLAIN,

                "hello,direct".getBytes());

        channel.close();
        connection.close();


    }

}
public class comsumer1 {


    public static void main(String[] args) throws IOException, TimeoutException {
        ConnectionFactory connectionFactory = new ConnectionFactory();
        connectionFactory.setVirtualHost("/ems");
        connectionFactory.setHost("127.0.0.1");
        connectionFactory.setUsername("ems");
        connectionFactory.setPassword("123456");
        Connection connection = connectionFactory.newConnection();

        Channel channel = connection.createChannel();

        channel.exchangeDeclare("direct_exchange","direct",true,false,null);

        String queueName = channel.queueDeclare().getQueue();

        //可以绑定多个路由,只要符合一个就可以接收到消息
        channel.queueBind(queueName,"direct_exchange","user_log");
//        channel.queueBind(queueName,"direct_exchange","user_money");

        channel.basicConsume(queueName,true,new DefaultConsumer(channel){
            @Override
            public void handleDelivery(String consumerTag, Envelope envelope, AMQP.BasicProperties properties, byte[] body) throws IOException {
                System.out.println("comsumer1===>"+new String(body));

            }
        });


    }

}
public class comsumer2 {

    public static void main(String[] args) throws IOException, TimeoutException {
        ConnectionFactory connectionFactory = new ConnectionFactory();
        connectionFactory.setVirtualHost("/ems");
        connectionFactory.setHost("127.0.0.1");
        connectionFactory.setUsername("ems");
        connectionFactory.setPassword("123456");
        Connection connection = connectionFactory.newConnection();

        Channel channel = connection.createChannel();

        channel.exchangeDeclare("direct_exchange","direct",true,false,null);

        String queueName = channel.queueDeclare().getQueue();

        //可以绑定多个路由,只要符合一个就可以接收到消息
//        channel.queueBind(queueName,"direct_exchange","user_log");
        channel.queueBind(queueName,"direct_exchange","user_money");

        channel.basicConsume(queueName,true,new DefaultConsumer(channel){
            @Override
            public void handleDelivery(String consumerTag, Envelope envelope, AMQP.BasicProperties properties, byte[] body) throws IOException {
                System.out.println("comsumer2===>"+new String(body));

            }
        });
    }
}
topic模型(通配符)
特点:通配符(#号和*号),也可以不使用通配符。
public class provider {
    /**
     * topic模式
     * topic和direct相比,基本差不多,只不过topic可以使用通配符进行匹配
     * 在topic模式下,生产者发送的路由键是user.log.test,消费者可以用user.#或者#.log.test或者*.*.test 。。。等等来匹配
     * #:代表一个或多个单词的占位符
     * *:代表一个单词的占位符,如上面,user.*是匹配不了user.log.test的。。。。。
     * 交换机性能:fanout>direct>topic
     */

    public static void main(String[] args) throws IOException, TimeoutException {
        ConnectionFactory connectionFactory = new ConnectionFactory();
        connectionFactory.setVirtualHost("/ems");
        connectionFactory.setHost("127.0.0.1");
        connectionFactory.setUsername("ems");
        connectionFactory.setPassword("123456");
        Connection connection = connectionFactory.newConnection();
        Channel channel = connection.createChannel();

        channel.exchangeDeclare("topic_exchange","topic",true,false,null);
        for (int i = 0; i < 10; i++) {
            String msg="topic_hello_"+i;
            channel.basicPublish("topic_exchange","log.order.money", MessageProperties.PERSISTENT_TEXT_PLAIN,msg.getBytes());

        }

        channel.close();
        connection.close();

    }
}
public class consumer1 {


    public static void main(String[] args) throws IOException, TimeoutException {
        ConnectionFactory connectionFactory = new ConnectionFactory();
        connectionFactory.setVirtualHost("/ems");
        connectionFactory.setHost("127.0.0.1");
        connectionFactory.setUsername("ems");
        connectionFactory.setPassword("123456");

        Connection connection = connectionFactory.newConnection();

        Channel channel = connection.createChannel();

        String queueName = channel.queueDeclare().getQueue();

        channel.exchangeDeclare("topic_exchange","topic",true,false,null);

        channel.queueBind(queueName,"topic_exchange","log.order.money");

        channel.basicConsume(queueName,true,new DefaultConsumer(channel){

            @Override
            public void handleDelivery(String consumerTag, Envelope envelope, AMQP.BasicProperties properties, byte[] body) throws IOException {
                System.out.println("consumer1==>"+new String(body));
            }
        });


    }


}
public class consumer2 {


    public static void main(String[] args) throws IOException, TimeoutException {
        ConnectionFactory connectionFactory = new ConnectionFactory();
        connectionFactory.setVirtualHost("/ems");
        connectionFactory.setHost("127.0.0.1");
        connectionFactory.setUsername("ems");
        connectionFactory.setPassword("123456");

        Connection connection = connectionFactory.newConnection();

        Channel channel = connection.createChannel();

        String queue = channel.queueDeclare().getQueue();

        channel.exchangeDeclare("topic_exchange","topic",true,false,null);

        /**
         * log.#===>#代表后面可以有一个或多个。
         * log,* ==>代表后面只能有一个,也就是类似log.xx 才能匹配上
         */
        channel.queueBind(queue,"topic_exchange","log.#");

        channel.basicConsume(queue,true,new DefaultConsumer(channel){

            @Override
            public void handleDelivery(String consumerTag, Envelope envelope, AMQP.BasicProperties properties, byte[] body) throws IOException {
                System.out.println("consumer2====>"+new String(body));
            }
        });

    }


}
SpringBoot+RabbitMQ
导入启动器
		<dependency>
            <groupId>org.springframework.bootgroupId>
            <artifactId>spring-boot-starter-amqpartifactId>
            <version>2.3.9.RELEASEversion>
        dependency>
application.yml
spring:
  rabbitmq:
    username: ems
    password: 123456
    virtual-host: /ems
    host: localhost
自定义RabbitTemplate
SpringBoot默认使用CachingConnectionFactory连接工厂
@Configuration
public class rabbitTemplateConfig {

    //注入SpringBoot默认的CachingConnectonFactory
    @Bean
    public RabbitTemplate rabbitTemplate(@Qualifier("rabbitConnectionFactory") CachingConnectionFactory cachingConnectionFactory){
        RabbitTemplate rabbitTemplate = new RabbitTemplate(cachingConnectionFactory);
        /**
         * 当mandatory标志位设置为true时
         * 如果exchange根据自身类型和消息routingKey无法找到一个合适的queue存储消息
         * 那么broker会调用basic.return方法将消息返还给生产者
         * 当mandatory设置为false时,出现上述情况broker会直接将消息丢弃
         */
        rabbitTemplate.setMandatory(true);
        //使用单独的发送连接,避免生产者由于各种原因阻塞而导致消费者同样阻塞
        rabbitTemplate.setUsePublisherConnection(true);

        return rabbitTemplate;
    }

}
RabbitTemplate实现发送消息
最简单的使用HelloWorld
经过SpringBoot整合的RabbitMQ,发送消息只要一条语句
对比如下:
原生RabbitMQ:(11行)
 public static void main(String[] args) throws IOException, TimeoutException {
        ConnectionFactory factory = new ConnectionFactory();
        factory.setUsername("ems");
        factory.setPassword("123456");
        factory.setVirtualHost("/ems"); //虚拟主机
        factory.setHost("127.0.0.1");  //rabbitMQ的主机名(ip)
        Connection connection = factory.newConnection();
        Channel channel = connection.createChannel();
        channel.queueDeclare("hello",true,false,false,null);
        channel.basicPublish("","hello", MessageProperties.PERSISTENT_TEXT_PLAIN,"第一个RabbitMQ程序!!!".getBytes());
        channel.close();
        connection.close();
    }
SpringBoot整合RabbitMQ:(1行)
@SpringBootTest
@RunWith(SpringRunner.class)
public class provider {

    @Autowired
    private RabbitTemplate rabbitTemplate;

    @Test
    public void send(){
        //一条代码即可发送消息
        /**
         * 参数1:交换机名称
         * 参数2:路由键
         * 参数3:消息内容(不需要转换成byte数组)
         */
        rabbitTemplate.convertAndSend("","boot_hello","boot_helloWorld");
    }
}
@Component   //所有RabbitMQ的消费者都需要“”加上“”Spring的组件注解,RabbitMQ消费者监听方法不用运行都可以被自动生效。。。。
public class consumer {


    //RabbitMQ消费者监听方法
    @RabbitListener(queuesToDeclare = {@Queue(name = "boot_hello",durable = "true",exclusive = "false"
    ,autoDelete = "false")})
    public void receive(String msg){
        System.out.println(msg);
    }
}
workqueue
@SpringBootTest
@RunWith(SpringRunner.class) //加载上下文
public class workqueueTest {

    @Autowired
    private RabbitTemplate rabbitTemplate;

    @Test
    public void send(){

//        System.out.println(rabbitTemplate);
        for (int i = 0; i < 10; i++) {
            rabbitTemplate.convertAndSend("","boot_work","workqueue===>"+i);
        }
    }


}
@Component
public class consumer1 {

    @RabbitListener(queuesToDeclare = @Queue(name = "boot_work",durable = "true"))
    public void receive1(String msg1){
        System.out.println("consumer1===>"+msg1);
    }

}

@Component
class consumer2{

    @RabbitListener(queuesToDeclare = @Queue(name = "boot_work",durable = "true"))
    public void receive2(String msg2){
        System.out.println("consumer2===>"+msg2);
    }

}
fanout模式
@SpringBootTest
@RunWith(SpringRunner.class)
public class fanoutTest {

    @Autowired
    private RabbitTemplate rabbitTemplate;

    @Test
    public void test(){
        rabbitTemplate.convertAndSend("boot_fanout","","hello");


    }

}
@Component
public class consumer3 {

    @RabbitListener(bindings = {
            @QueueBinding(value = @Queue,exchange = @Exchange(value = "boot_fanout",type = "fanout"),key = "")
    })
    public void receive(String msg){
        System.out.println("consumer1===>"+msg);

    }


}
@Component
class consumer4{

    @RabbitListener(bindings = @QueueBinding(value = @Queue,exchange = @Exchange(value = "boot_fanout",type = "fanout"),key = ""))
    public void receive(String msg){
        System.out.println("consumer2===>"+msg);
    }
}
direct模式
@SpringBootTest
@RunWith(SpringRunner.class)
public class directTest {

    @Autowired
    private RabbitTemplate rabbitTemplate;

    @Test
    public void test(){
        rabbitTemplate.convertAndSend("direct_boot","user.log","direct");

    }


}
@Component
public class directConsumer1 {

    @RabbitListener(bindings = @QueueBinding(exchange = @Exchange(name = "direct_boot",type = "direct")
            ,value = @Queue,key = "user")
    )
    public void receive(String msg){
        System.out.println("consumer1===>"+msg);
    }


}
@Component
class directConsumer2{

    @RabbitListener(bindings = @QueueBinding(exchange = @Exchange(name = "direct_boot",type = "direct")
    ,value = @Queue,key = "user.log"
    ))
    public void receive(String msg){
        System.out.println("consumer2==>"+msg);

    }


}
topic模式
@SpringBootTest
@RunWith(SpringRunner.class)
public class topicTest {
    @Autowired
    private RabbitTemplate rabbitTemplate;

    @Test
    public void test(){
        rabbitTemplate.convertAndSend("topic_boot","user.hello.log","hello");
    }

}
@Component
public class topicConsumer1 {

    @RabbitListener(bindings = @QueueBinding(exchange = @Exchange(value = "topic_boot",type = "topic")
    ,value = @Queue,key = "user.#"
    ))
    public void receive(String msg){
        System.out.println("consumer1==>"+msg);
    }


}
@Component
class topicConsumer2{


    @RabbitListener(bindings = @QueueBinding(exchange = @Exchange(value = "topic_boot",type = "topic")
    ,value = @Queue,key = "user.*"
    ))
    public void receive(String msg){
        System.out.println("consumer2==>"+msg);
    }


}
RabbitMQ高级特性
消息队列的过期时间ttl
如果我们设置了消息队列的过期时间,假设我们设置了5000ms,5000ms过去了,如果这个队列还有未被消费的消息,那么这些消息将会被自动丢弃(无法找回)。。。。
队列里的消息的过期时间(有点坑)
消费者的消息的过期时间
设置消息队列的argument为x-message-ttl 为xxx值,比如value=“5000”,就是5秒过去了,消息队列未被消费的消息将会直接丢弃
坑:@argument注解设置参数一定要指定类型为Number子类,比如java.lang.Integer,不然会报错
比如:arguments = {@Argument(name = “x-message-ttl”,value = “5000”,type = “java.lang.Integer”)}
spring:
  rabbitmq:
    username: ems
    password: 123456
    virtual-host: /ems
    host: localhost
    listener:
      direct:
        acknowledge-mode: manual #手动确认
      simple:
        acknowledge-mode: manual #手动确认
@Test
    public void test1(){
        MessageProperties messageProperties = new MessageProperties();
        String msg = "hello_ttl";
        Message message = new Message(msg.getBytes(),messageProperties);
        rabbitTemplate.convertAndSend("ttl_queue","ttl_a",message);

    }
/**
     *  ==小坑:
     * 使用RabbitListener实现队列的过期时间ttl必须要指定argument的“type”为Number类的子类,比如java.lang.Integer
     * =======切记,ttl和消息队列长度都要用Number的子类,使用默认的会报错======
     * 因为argument默认是java.lang.String类型,必须修改。。。。。。。。。。。。。。。。。。。。。。。。。。。。。。。。
     * 。。。
     */

    //@Queue和@Exchange指定value就会使这个队列和交换机设置为不过期的,没有value就是暂时的
    @RabbitListener(bindings = @QueueBinding(value = @Queue(value = "ttl_temp",durable = "true"
    ,arguments = {@Argument(name = "x-message-ttl",value = "5000",type = "java.lang.Integer")}//一定要指定类型
    )
    ,exchange = @Exchange(value = "ttl_queue",type = "direct"),key = {"ttl_a"}
    ))
    public void receive(String msg,Message message,Channel channel){
        System.out.println("msg==="+msg);
        System.out.println("message==="+message);
        System.out.println("channel==="+channel);

//        try {
//            channel.basicAck(message.getMessageProperties().getDeliveryTag(),false); //手动确认
//        } catch (IOException e) {
//            e.printStackTrace();
//        }
    }
指定消息的过期时间
生产者消息的过期时间
核心代码:messageProperties.setExpiration(“5000”);
@Test
    public void test2(){
        MessageProperties messageProperties = new MessageProperties();

        messageProperties.setExpiration("5000"); //设置指定消息的过期时间

        String str="ttl_test2";
        Message message = new Message(str.getBytes(),messageProperties);
        rabbitTemplate.convertAndSend("","ttl_declare",message);

    }
@RabbitListener(queuesToDeclare = @Queue(name = "ttl_declare"))
    public void  receive1(String msg,Message message,Channel channel) throws IOException {
        System.out.println(msg);
//        channel.basicAck(message.getMessageProperties().getDeliveryTag(),false);
    }
死信队列
消息放进死信队列的条件:
1:消息过期了,如果有死信队列则放入死信队列,如果没有死信队列则直接丢弃无法找回。
2:某个消息队列长度已经达到最大值,此时在把消息发送到这个队列中,如果有死信队列则放入死信队列,没有则丢弃
3:消息被拒绝(basic.reject / basic.nack)
**================创建死信队列步骤**
1:创建一个普通队列
@SpringBootTest
@RunWith(SpringRunner.class)
public class deadLetter {

    @Autowired
    private RabbitTemplate rabbitTemplate;

    @Test
    public void test(){


        Message message = new Message("deadLetter".getBytes(),new MessageProperties());
        rabbitTemplate.convertAndSend("","nomal_dead",message);


    }

}
@Component
public class nomalQueue {


    /**
     * 这里我们只演示一种消息放入死信队列的情况(当消息过期后)
     * 在某个队列设置了x-dead-letter-exchange和x-dead-letter-routing-key后,如果出现丢弃消息就会
     * 通过x-dead-letter-exchange和x-dead-letter-routing-key找到指定的队列,这个队列就会默认是死信队列
     * 其实死信队列也是正常的队列。。。。配置全都一样
     */
    @RabbitListener(queuesToDeclare = @Queue(value = "nomal_dead",arguments = {
            @Argument(name = "x-message-ttl",value = "5000",type = "java.lang.Integer"),
            @Argument(name = "x-dead-letter-exchange",value = "deadletter_exchange1"),
            @Argument(name = "x-dead-letter-routing-key",value = "deadletter_key1")
    }
    ))
    public void receive(String msg, Message message, Channel channel){
        System.out.println("msg1="+msg);

    }

}
@Component
public class deadLetterQueue {


    /**
     * 这里的交换机和路由key都要和配置的死信交换机、死信路由key一样。
     */
    @RabbitListener(bindings = @QueueBinding(value = @Queue("deadLetterQueue")
    ,exchange = @Exchange(value = "deadletter_exchange1",type = "direct")
    ,key = "deadletter_key1"
    ))
    public void receive_deadLetter(String msg){
        System.out.println(msg);
    }


}
固定长度的消息队列
核心代码:arguments = @Argument(name = “x-max-length”,value = “6”,type = “java.lang.Integer”)
  @Test
    public void test(){
            Message message = new Message(("max").getBytes(),new MessageProperties());
            rabbitTemplate.convertAndSend("","maxLength_queue",message);
    }
 @RabbitListener(queuesToDeclare = @Queue(value = "maxLength_queue",durable = "true"
    ,arguments = @Argument(name = "x-max-length",value = "6",type = "java.lang.Integer")
    ))
    public void receive(String msg, Message message, Channel channel) throws IOException {
        System.out.println(msg);

    }
延时队列
应用场景:下了订单过了30分钟未支付,然后就自动取消订单
rabbitmq本身是没有延迟队列的,我们可以通过ttl过期时间和死信队列(DLX)来实现