Python + opencv + mediapipe 实现手势识别
Python + opencv + mediapipe 实现手势识别
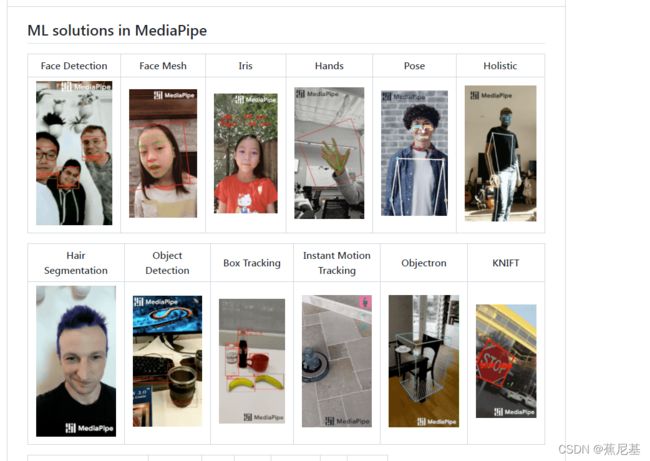
MediaPipe是一款由 Google Research 开发并开源的多媒体机器学习模型应用框架。在谷歌,一系列重要产品,如 YouTube、Google Lens、ARCore、Google Home 以及 Nest,都已深度整合了 MediaPipe。
https://google.github.io/mediapipe/

环境安装
编辑器:VS code
依赖组件:opencv 、mediapipe
python -m pip install --upgreade pip
pip install msvc-runtime
pip install python-opencv
pip install mediapipe
先测试一下安装是否成功以及摄像头是否正常。
代码
import cv2
import mediapipe as mp

cap = cv2.VideoCapture(0,cv2.CAP_DSHOW)
while True:
    ret,img = cap.read()
    if ret:
        cv2.imshow('img',img)
    if cv2.waitKey(1) == ord('q') :
        break
上面验证了 安装mediapipe 和 opencv 并且摄像头正常,那么就可以接下面的步骤了:
我们要使用mediapipe 的手势识别模型,所以定义一个模型
mpHaands = mp.solutions.hands.Hands()
mediapipe 处理的是RGB的img,但是摄像头侦测的图片都是BGR,所以要进行转换。然后将转换的图片放到hand处理程序中,进行处理,然后将侦测到的手部坐标打印出来。然后利用mediapipe提供的draw功能将坐标点画出来。
import cv2
import mediapipe as mp

hands = mp.solutions.hands.Hands()
draw = mp.solutions.drawing_utils
handlmsstyle = draw.DrawingSpec(color = (0,0,255),thickness = 5)
handconstyle = draw.DrawingSpec(color = (0,255,0),thickness = 5)
cap = cv2.VideoCapture(0,cv2.CAP_DSHOW)
while True:
    ret,img = cap.read()
    if ret:
        imgRGB = cv2.cvtColor(img,cv2.COLOR_BGR2RGB)
        result = hands.process(imgRGB)
        print(result.multi_hand_landmarks)
        if result.multi_hand_landmarks:
            for handlms in result.multi_hand_landmarks:
                draw.draw_landmarks(img,handlms,mp.solutions.hands.HAND_CONNECTIONS,handlmsstyle,handconstyle)
        cv2.imshow('img',img)
    if cv2.waitKey(1) == ord('q') :
        break

最后,也可以简单扼计算一下它的FPS,以下就是完整的测试代码。知道了每个点的坐标,那么我们就可以用坐标点来做一下项目的实际应用了, 比如手语的翻译,手势指令之类的。
from turtle import pu
import cv2
import mediapipe as mp
import time
hands = mp.solutions.hands.Hands()
draw = mp.solutions.drawing_utils
handlmsstyle = draw.DrawingSpec(color = (0,0,255),thickness = 5)
handconstyle = draw.DrawingSpec(color = (0,255,0),thickness = 5)
ctime =0
ptime = 0

cap = cv2.VideoCapture(0,cv2.CAP_DSHOW)
while True:
    ret,img = cap.read()
    if ret:
        imgRGB = cv2.cvtColor(img,cv2.COLOR_BGR2RGB)
        result = hands.process(imgRGB)
        #print(result.multi_hand_landmarks)
        imgHeight = img.shape[0]
        imgWight = img.shape[1]
        if result.multi_hand_landmarks:
            for handlms in result.multi_hand_landmarks:
                draw.draw_landmarks(img,handlms,mp.solutions.hands.HAND_CONNECTIONS,handlmsstyle,handconstyle)
                for i,lm in enumerate(handlms.landmark):
                    xPos = int(lm.x * imgHeight)
                    yPos = int(lm.y * imgWight)
                    print(i,xPos,yPos)
                    #cv2.putText(img,str(i),(xPos+25,yPos+25),cv2.FONT_HERSHEY_SIMPLEX,0.4,(0,0,255),2)
        ctime = time.time()
        fps = 1/(ctime-ptime)
        ptime = ctime
        cv2.putText(img,f"FPS:{int(fps)}",(30,50),cv2.FONT_HERSHEY_SIMPLEX,1,(255,0,0),3)
        cv2.imshow('img',img)
    if cv2.waitKey(1) == ord('q') :
        break