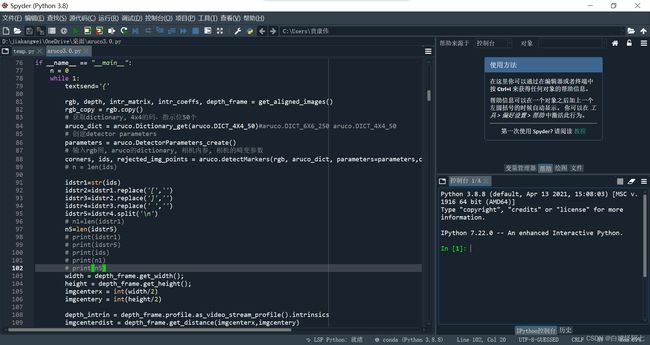
aruco识别,python实现
需要配置anaconda,用spyder进行python语言编辑,实现对aruco码的编写。代码比较垃圾,不喜勿喷。
配置过程如下:
视觉系统的运行需要搭建视觉环境,包括,软件的下载安装、Opencv环境的搭建、插件的下载、执行文件的打包等等。首先需要下载安装Anaconda软件,建立可运行python程序的Spyder的环境。
在下在安装好Anaconda后,通过install下载Spyder,建立python开发环境。然后通过命令版Ananconda Prompt下载安装视觉开发环境所需的插件,安装命令为 pip install xx。例如:pip install opencv-contrib-python。
通过命令板的pip install 命令下载插件,根据功能需要进行下载。本系统中需要的视觉插件包括Opencv、Opencv-contrib-python、Pyserial、Pyrelsense2、PyQt5、Pyinstaller等插件。在进行完视觉的python程序开发之后,需要将程序打包为exe执行文件,以便于lattepanda对程序的执行,所需要的模块PyQt5、Pyinstaller。通过Pyinstaller -F xxx.Py命令进行打包,生成exe后即可在lattepanda上运行程序。
视觉系统python程序及基于Opencv的Aruco码识别环境的搭建和执行文件的生成流程如下:
python的代码 如下:
import pyrealsense2 as rs
import serial
import numpy as np
import cv2
import cv2.aruco as aruco
import math
# import socket
# import wmi
# import sys

# c = wmi.WMI()
# for physical_disk in c.Win32_DiskDrive():
#       if physical_disk.SerialNumber=='6b13130f' :#and board_id.SerialNumber=='Default string':#shibeiquanxian
#           print('go on')
#       else:
#           print('The computer is not authorized ')
#           sys.exit()

 #波特率,标准值之一:50,75,110,134,150,200,300,600,1200,1800,2400,4800,9600,19200,38400,57600,115200

#超时设置,None:永远等待操作,0为立即返回请求结果,其他值为等待超时时间(单位为秒)

# 打开串口,并得到串口对象


ser = serial.Serial('COM8', 57600, timeout=0)  # COM8

def send(val):
    data = bytes(val, 'UTF8')
    ser.write(data)


# 配置摄像头与开启pipeline

pipeline = rs.pipeline()
config = rs.config()
config.enable_stream(rs.stream.depth, 640, 480, rs.format.z16, 30)
config.enable_stream(rs.stream.color, 640, 480, rs.format.bgr8, 30)
profile = pipeline.start(config)
align_to = rs.stream.color
align = rs.align(align_to)

# 获取对齐的rgb和深度图

def get_aligned_images():
    frames = pipeline.wait_for_frames()
    depth_frame = frames.get_depth_frame()
    aligned_frames = align.process(frames)
    aligned_depth_frame = aligned_frames.get_depth_frame()
    color_frame = aligned_frames.get_color_frame()
    # 获取intelrealsense参数
    intr = color_frame.profile.as_video_stream_profile().intrinsics
    # 内参矩阵,转ndarray方便后续opencv直接使用
    intr_matrix = np.array([
        [intr.fx, 0, intr.ppx], [0, intr.fy, intr.ppy], [0, 0, 1]
    ])
    # 深度图-16位
    depth_image = np.asanyarray(aligned_depth_frame.get_data())
    # 深度图-8位
    depth_image_8bit = cv2.convertScaleAbs(depth_image, alpha=0.03)
    pos = np.where(depth_image_8bit == 0)
    depth_image_8bit[pos] = 255
    # rgb图
    color_image = np.asanyarray(color_frame.get_data())
    # return: rgb图,深度图,相机内参,相机畸变系数(intr.coeffs)
    return color_image, depth_image, intr_matrix, np.array(intr.coeffs), depth_frame


te=[0 for x in range(0, 21)]
t=np.array(te,dtype='uint8')  #uint8型矩阵
cs=[0 for x in range(0, 6)]
D=0x00ff
H=0xff00
R=50

if __name__ == "__main__":
    n = 0
    while 1:
        textsend='{'

        rgb, depth, intr_matrix, intr_coeffs, depth_frame = get_aligned_images()
        rgb_copy = rgb.copy()
        # 获取dictionary, 4x4的码,指示位50个
        aruco_dict = aruco.Dictionary_get(aruco.DICT_4X4_50)#aruco.DICT_6X6_250 aruco.DICT_4X4_50
        # 创建detector parameters
        parameters = aruco.DetectorParameters_create()
        # 输入rgb图, aruco的dictionary, 相机内参, 相机的畸变参数
        corners, ids, rejected_img_points = aruco.detectMarkers(rgb, aruco_dict, parameters=parameters,cameraMatrix=intr_matrix, distCoeff=intr_coeffs)
        # n = len(ids)

        idstr1=str(ids)
        idstr2=idstr1.replace('[','')
        idstr3=idstr2.replace(']','')
        idstr4=idstr3.replace(' ','')
        idstr5=idstr4.split('\n')
        # n1=len(idstr1)
        n5=len(idstr5)
        # print(idstr1)
        # print(idstr5)
        # print(ids)
        # print(n1)
        # print(n5)
        width = depth_frame.get_width();
        height = depth_frame.get_height();
        imgcenterx = int(width/2)
        imgcentery = int(height/2)

        depth_intrin = depth_frame.profile.as_video_stream_profile().intrinsics
        imgcenterdist = depth_frame.get_distance(imgcenterx,imgcentery)
        depth_pointimgcenter = rs.rs2_deproject_pixel_to_point(depth_intrin, [imgcenterx, imgcentery], imgcenterdist)
        cx=depth_pointimgcenter[0]
        cy=depth_pointimgcenter[1]
        cz=depth_pointimgcenter[2]

        # print(depth_pointimgcenter)
        # 估计出aruco码的位姿,0.045对应markerLength(二维码的真实大小)参数,单位是meter
        rvec, tvec, markerPoints = aruco.estimatePoseSingleMarkers(corners, 0.045, intr_matrix, intr_coeffs)
        # print(rvec)
        # print(tvec)

        if idstr3==str(None):
          t[0]=(0xeb)
          t[1]=(0x90)
          t[2]=(0x11)
          t[3]=(0x10)
          t[4]=(0x00)
          t[17]=(0xff)
          t[18]=(0xff)
          S=sum(t,0)
          t[19]=(S&D)
          text=str(t)
          print(text)
          send(text)
        try:
            for i in range(rvec.shape[0]):
                aruco.drawAxis(rgb_copy, intr_matrix, intr_coeffs, rvec[i, :, :], tvec[i, :, :], 0.1)
                aruco.drawDetectedMarkers(rgb_copy, corners,ids)
                #print()
        	# 在图片上标出aruco码的位置
            # aruco.drawDetectedMarkers(rgb, corners,ids)
            # # 根据aruco码的位姿标注出对应的xyz轴, 0.05对应length参数,代表xyz轴画出来的长度
            # aruco.drawAxis(rgb, intr_matrix, intr_coeffs, rvec, tvec, 0.05)
            for i in range(len(corners)):
                # print(corner[0][0])
                cornerdist = depth_frame.get_distance(corners[i][0][0][0],corners[i][0][0][1])
                xyz_corner = rs.rs2_deproject_pixel_to_point(depth_intrin, corners[i][0][0], cornerdist)
                pointx0=int(corners[i][0][0][0])
                pointy0=int(corners[i][0][0][1])
                pointy1=int(corners[i][0][1][1])
                pointx1=int(corners[i][0][1][0])
                pointy2=int(corners[i][0][2][1])
                Lx01=pointx1 - pointx0
                Ly01=pointy1 - pointy0
                tan=Ly01 / Lx01
                Ls=int((((Ly01)**2)+(Lx01)**2)**0.5)
                sin=Ly01 /Ls
                pianhang=int(math.degrees((math.asin(sin)) )) #偏航角角度值
                if  pointy2 < pointy1:
                    phcorner=180-(abs(pianhang))
                else:
                    phcorner=abs(pianhang)
                if pianhang<0:
                    phcorner=abs(360-phcorner)
                dx = 100*round(xyz_corner[0]-cx,3)#-depth_pointimgcenter[0]
                xi=int(dx)
                xz=abs(int(dx))
                x=hex(abs(xz))

                if xi>0:
                    a=0x01
                elif xi==00:
                    a=0x00
                else:
                    a=0x02
                dy = 100*round(xyz_corner[1]-cy,3)#-depth_pointimgcenter[1]
                yi=int(dy)
                yz=abs(int(dy))
                y=hex(abs(yz))
                if yi>0:
                    b=0x01
                elif yi==0:
                    b=0x00
                else:
                    b=0x02
                # dz = round(depth_pointcenter[2]-depth_pointimgcenter[2],3)
                h  = 100*round((xyz_corner[2]+cz)/2,3)#((xyz_corner[2]+depth_pointimgcenter[2])/2,3)
                # print(depth_pointimgcenter)
                hi=int(h)
                hz=abs(int(h))
                z=hex(abs(int(h)))
                if hi>0:
                    c=0x01
                elif hi==0:
                    c=0x00
                else:
                    c=0x02
                # print(dx,dy,h)

                if pianhang>0:
                    d=0x01
                elif pianhang==0:
                    d=0x00
                else:
                    d=0x02
                if hi>=320 and hi<1100:
                    hz=hz-620
                elif hi>1100:
                    hz=hz-750
                elif hz<320 :
                    hz=hz
                point=np.array(idstr5,dtype='uint8')
                n6=len(point)
                t[0]=(0xeb)
                t[1]=(0x90)
                t[2]=(0x11)
                t[3]=(0x10)
                t[4]=(0x01)
                t[5]=(xz&H)>>8
                t[6]=(xz&D)
                t[7]=(yz&H)>>8
                t[8]=(yz&D)
                t[9]=(hz&H)>>8
                t[10]=(hz&D)
                t[11]=(phcorner&H)>>8
                t[12]=(phcorner&D)
                t[13]=(a)
                t[14]=(b)
                t[15]=(c)
                t[16]=(d)
                t[17]=(int(idstr5[i]))
                t[18]=(n5)
                S=sum(t,0)
                t[19]=(S&D)
                t[20]=(0xff)
                idl=1
                idb=6
                cp=300
                hdpian=math.radians(phcorner)
                bujiao=math.radians(45)
               #text="id:"+idstr5[i]+" x:"+str(x)+" y:"+str(y)+" z:"+str(z)+" a:"+str(a)+" b:"+str(b)+" c:"+str(c)
                textsend=textsend+text
                textsend=textsend+';'
                # print(text)
                cv2.putText(rgb_copy, text, (int(corners[i][0][0][0]),int(corners[i][0][0][1])), cv2.FONT_HERSHEY_COMPLEX, 0.5, (255, 20, 20), 2)

                # text3="dy:"+str(dy)
                # cv2.putText(image_copy, text3, (200, 20), cv2.FONT_HERSHEY_COMPLEX, 0.5, (255, 20, 20), 2)
                # text2="h:"+str(h)
                # cv2.putText(image_copy, text2, (10, 60), cv2.FONT_HERSHEY_COMPLEX, 0.5, (255, 20, 20), 2)
                # text4="dz:"+str(dz)
                # cv2.putText(image_copy, text4, (200, 60), cv2.FONT_HERSHEY_COMPLEX, 0.5, (255, 20, 20), 2)

            cv2.imshow('RGB image', rgb_copy)

           # send(text)
        except:
            cv2.imshow('RGB image', rgb_copy)
        key = cv2.waitKey(1)
        # 按键盘q退出程序
        if key & 0xFF == ord('q') or key == 27:
            pipeline.stop()
            ser.close()
            break
        # 按键盘s保存图片
        elif key == ord('s'):
            n = n + 1
            # 保存rgb图
           # cv2.imwrite('D:/Anaconda/spyderchengxu/gongxun/arucoresult/rgb' + str(n) + '.jpg', rgb_copy)

    cv2.destroyAllWindows()
奥对了,摄像头用的是D435i深度摄像头,采用的红外测距,你也可以用普通的双目。


