【毕设】基于CycleGAN的风格迁移【一】环境搭建及运行代码
源代码地址:CycleGAN源码
因为该篇内容包含Anaconda的环境管理及包的管理,可以选择参考:Anaconda安装+环境管理+包管理+实际演练例子(全网最详细)_MrRoose1的博客-CSDN博客
一、搭配环境
1.首先把代码包下载并解压到本地(我是直接放到桌面)。
2.打开Anaconda prompt,先切换路径到代码包解压的路径中。
3. 然后通过使用作者的环境包来搭建设定好的环境,输入:
conda env create -f environment.yml随后产生一个叫pytorch-CycleGAN-and-pix2pix的环境名称。我们可以通过输入:
conda info --envs来查看已有的虚拟环境名称。
4.由于CycleGAN源码中用到了visdom,但此时pytorch-CycleGAN-and-pix2pix环境中却没有visdom这个包,我们需要手动安装。先进入到pytorch-CycleGAN-and-pix2pix虚拟环境中,输入:
activate pytorch-CycleGAN-and-pix2pix再通过pip来安装visdom,输入:
pip install -r requirements.txt注:期间会有一些提示,显示一些包的版本,那些不用管,因为pip中的requirement.txt与conda中的environment.yml之间有一些包版本不一致,但不耽误我们搭配环境哈,你们按照我的步骤来,保准没问题。
上述就是先把基础环境搭配好了
二、数据集下载
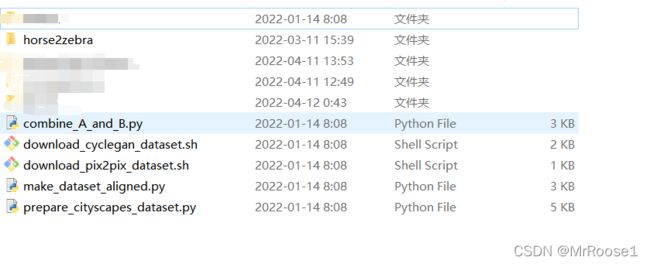
从解压后的代码包中,找到download_cyclegan_dataset.sh文件![]()
(我的地址是:D:\桌面\pytorch-CycleGAN-and-pix2pix-master\datasets\download_cyclegan_dataset.sh)
其中复制’$‘前面的地址并打开:(地址:Index of /cyclegan/datasets)
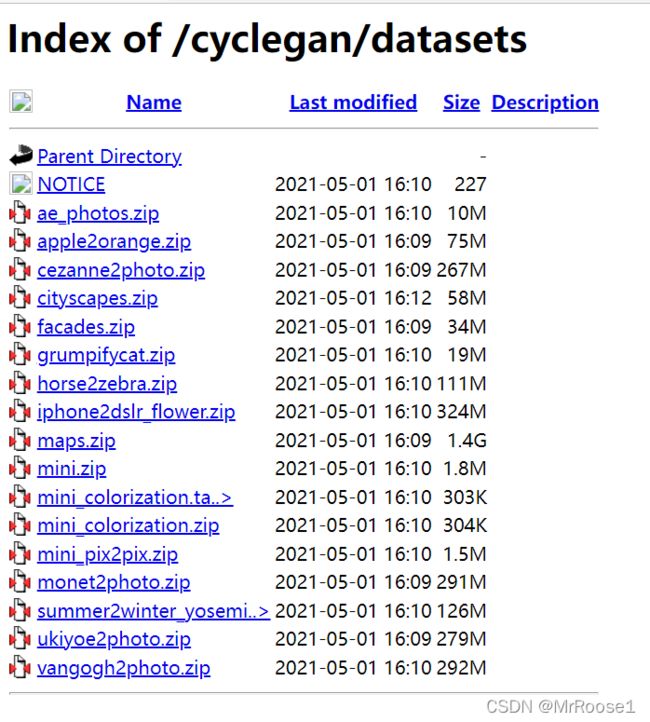 以我为例,下载horse2zebra这个压缩包,把这个数据集解压并保存在解压后的代码包的dataset文件中(我的地址:D:\桌面\毕业设计-图像风格迁移\Neural-Style-GAN\pytorch-CycleGAN-and-pix2pix-master\pytorch-CycleGAN-and-pix2pix-master\datasets)
此时数据集和环境已经准备好了,我们可以打开pycharm进行最后的参数调试。
三、调用Visdom及运行pycharm前的参数搭建
Train.py
首先需要参考Pycharm中如何配置已有的环境_MrRoose1的博客-CSDN博客把刚刚在anaconda中安装的pytorch-CycleGAN-and-pix2pix虚拟环境配置在pycharm中。
随后由下图可得,如果想保证训练正常运行,得先python -m visdom.server,启动服务器(可以,有tensorboard那味儿了)
注:我后期把代码包转移位置,放到了桌面一个名叫毕业设计-风格迁移内部的一个叫Neural-Style-GAN文件夹中,此时代码包的路径是 (D:\桌面\毕业设计-图像风格迁移\Neural-Style-GAN\pytorch-CycleGAN-and-pix2pix-master\pytorch-CycleGAN-and-pix2pix-master)
从图片中我们可以看到“It's Alive!”代表启动成功,点击terminal中的地址,就可以在train代码的时候看见页面的变化(此时还没有run代码,所以页面内啥也看不到)。
最后看一下这个训练参数设置
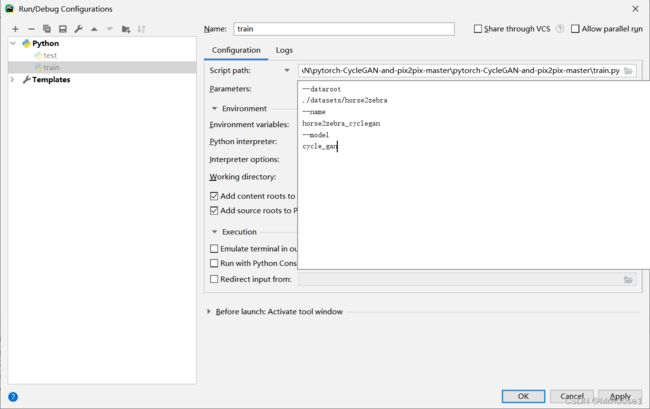
python train.py --dataroot ./datasets/horse2zebra --name horse2zebra_cyclegan --model cycle_gan这里说一下以前没说的,类似这种附加参数在pycharm里打开文件后(注意现在活跃的脚本和你想添加参数的脚本要一致,比如我们要添加train文件中的参数,那我们就应该注意红色框内的文件名是否是train) run/Edit Configurations/
打开然后把后面的参数塞到里面,当然,因为数据集不同,所以需要稍微改改
--dataroot ./datasets/horse2zebra --name horse2zebra_cyclegan --model cycle_gan然后直接训练。
(可能会出现的问题)
第一个
UserWarning: Argument interpolation should be of type InterpolationMode instead of int. Please, use InterpolationMode enum.
“Argument interpolation should be of type InterpolationMode instead of int. “
关于这个问题,在网上找了一圈,在base_dataset添加InterpolationMode,并代替PIL.Image。
你说它没事插什么值啊!
from torchvision.transforms import InterpolationMode定位到dataset的transform里(base_dataset.py),添加引用,然后改一下
def get_transform(opt, params=None, grayscale=False, method=Image.BICUBIC, convert=True):原81行
def get_transform(opt, params=None, grayscale=False, method=InterpolationMode.BICUBIC, convert=True):改81行
第二个
UserWarning: Detected call of lr_scheduler.step() before optimizer.step(). In PyTorch 1.1.0 and later, you should call them in the opposite order: optimizer.step() before lr_scheduler.step(). Failure to do this will result in PyTorch skipping the first value of the learning rate schedule.
这说的就很明白了,就是说pytorch1.1.0之后,优化器的更新要放到学习率更新的前面,定位到就在train里(还好这俩玩意没被放一块)把学习率更新扔后面
# model.update_learning_rate() # update learning rates in the beginning of every epoch.注释掉train43行
model.update_learning_rate() # update learning rates in the ending of every epoch.放到78行运行完一个epoch后
然后就应该没问题可以正常运行了。
Test.py
我们可以下载作者已经训练好的模型来直接上手跑。地址:Index of /cyclegan/pretrained_models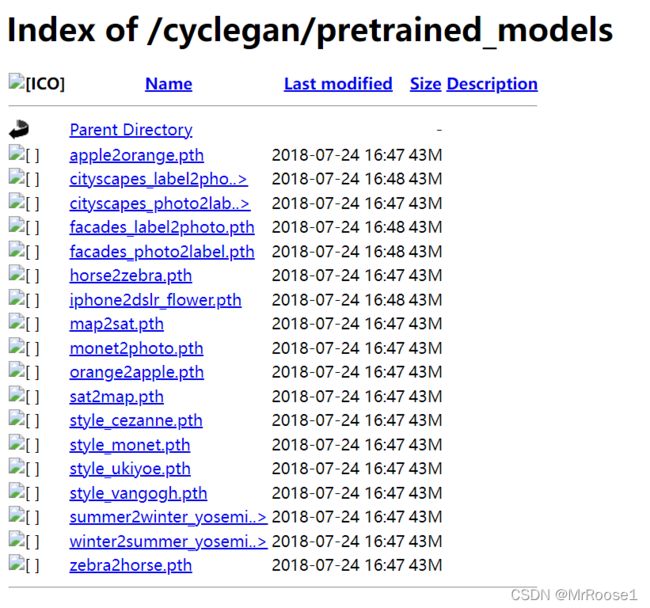
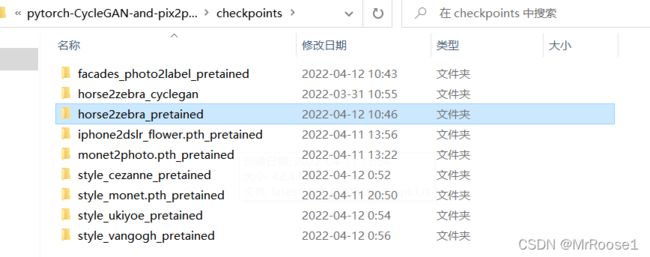
这里我下载的是horse2zebra.pth文件。随后在解压后的代码包中找到checkpoints文件夹,在里面新建一个叫{name}_pretrained的文件夹(其中{name}此时是horse2zebra),把下载好的文件重命名为latest_net_G.pth,并保存在{name}_pretrained(horse2zebra_pretrained)中。
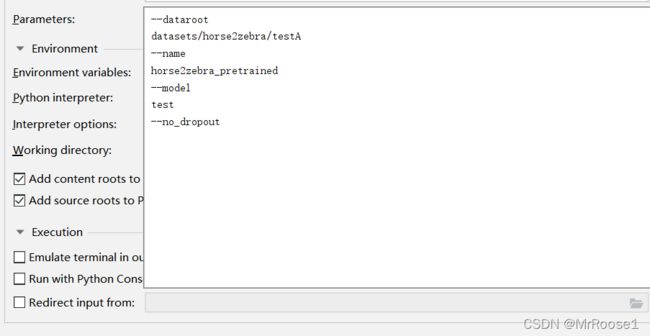
 然后与train.py训练一样,添加pycharm参数即可(text.py不需要开启visdom)
--dataroot datasets/horse2zebra/testA --name horse2zebra_pretrained --model test --no_dropout注:这里稍微注意一下dataroot中的路径,最后的是testA,为什么不是testB呢,因为这个模型是马转换成斑马的单向转换模型,textA中全都是马的数据集,而testB中都是斑马的数据集。
test.py运行后的结果(风格迁移后的图片)在D:\桌面\毕业设计-图像风格迁移\Neural-Style-GAN\pytorch-CycleGAN-and-pix2pix-master\pytorch-CycleGAN-and-pix2pix-master\results\horse2zebra_pretained\test_latest\images路径中查询。


