智能识别系统----视频人脸检测(一)
文章目录
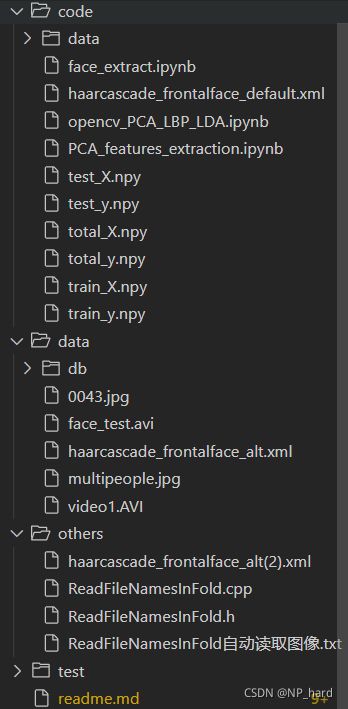
- 项目目录
- 提取人脸
- 特征提取
-
- PCA
- LDA
- LBPH+直方图特征
- 训练分类器
-
- SVC
- 可视化
- 利用分类器进行视频人像分类
有空的时候把项目部署到github上
项目目录
提取人脸
首先编写一个人脸检测的算法
import cv2 as cv
import matplotlib.pyplot as plt
import numpy as np
from PIL import Image, ImageDraw
import traceback
def face_detection_(image,scaleFactor_,minNeighbors_):
    '''
    输入图像,返回人脸图片
    '''
	# 转成灰度图像
    gray = cv.cvtColor(image, cv.COLOR_BGR2GRAY)
    # 创建一个级联分类器 加载一个.xml分类器文件 它既可以是Haar特征也可以是LBP特征的分类器
    face_detecter = cv.CascadeClassifier('haarcascade_frontalface_default.xml')
    # 多个尺度空间进行人脸检测   返回检测到的人脸区域坐标信息
    faces = face_detecter.detectMultiScale(image=gray, scaleFactor=scaleFactor_, minNeighbors=minNeighbors_)
    # print('检测人脸信息如下:\n', faces)
    image=cv.cvtColor(image, cv.COLOR_BGR2RGB)
    # for x, y, w, h in faces:
    #     # 在原图像上绘制矩形标识
    #     cv.rectangle(img=image, pt1=(x, y), pt2=(x+w, y+h), color=(0, 0, 255), thickness=2)
    # plt.imshow(image)
    # assert faces.shape[0]==1
    try:
        (x,y,w,h)=faces[0]
        face_=image[y:y+h,x:x+w,:]
    except Exception as e:
        # print('faces: ',faces)
        # print('it may be cause by scaleFactor or minNeighbors, that the face is not be recognize')
        # print('so i would just return null')
        # traceback.print_exc()
        return None
    return face_# 返回单张人脸
    '''这是多张人脸的提取,以后再搞'''
    # image_list=[]
    # try:
    #     # 提取多张人脸传入list
    #     for (x, y, w, h) in faces:
    #         image_list.append(image[y:y+h,x:x+w,:])
    # except Exception as e:
    #     print('faces: ',faces)
    #     print('it may be cause by scaleFactor or minNeighbors, that the face is not be recognize')
    #     print('so i would just return null')
    #     traceback.print_exc()
    #     return None
    # # 返回人脸图像list
    # return image_list
测试的效果
filepath=r'..\data\db\6_FaceOcc2\train\0003.jpg'
src=cv.imread(filepath)
face_detecter = cv.CascadeClassifier('haarcascade_frontalface_default.xml')
# 多个尺度空间进行人脸检测   返回检测到的人脸区域坐标信息
faces = face_detecter.detectMultiScale(image=src, scaleFactor=1.03, minNeighbors=20)
for x, y, w, h in faces:
        # 在原图像上绘制矩形标识
        cv.rectangle(img=src, pt1=(x, y), pt2=(x+w, y+h), color=(0, 0, 255), thickness=2)
plt.imshow(src)
faces
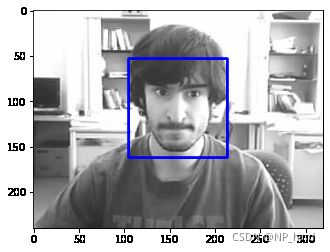
下一步,我们要将这个算法自动化,即自动对图像数据集进行人脸检测与分割,并将分割好的人脸图像保存在人脸数据集目录
首先创建这个人脸数据集目录
import os

def mkdir(path):
	folder = os.path.exists(path)
	if not folder :
		os.makedirs(path)
	else:
		print('dir is existed')

file_path=r'data\db_face\\'
dir_list=os.listdir(r'..\data\db')
for dir in dir_list:
	filePath=file_path+dir
	mkdir(filePath)
	mkdir(filePath+'\\train')
	mkdir(filePath+'\\test')
然后写了一个全自动的人脸提取器,可以对所有类别的人的图像进行人脸提取
data_path=r'..\data\db\\'

for db_name in os.listdir(data_path):
    tt_path=os.path.join(data_path,db_name)
    for data_set in os.listdir(tt_path):
        data_set_path=os.path.join(tt_path,data_set)
        for img_name in os.listdir(data_set_path):
            img_path=os.path.join(data_set_path,img_name)
            # ok 终于得到了这个图片的路径
            save_path=os.path.join('data\db_face',db_name,data_set,img_name)
            src=cv.imread(img_path)
            roi=face_detection_(src,scaleFactor_=1.01,minNeighbors_=100)# 提取人脸
            if roi is None:
                print('can not detect faces')
                continue
            print(save_path)
            if os.path.exists(save_path):
                continue# 已经有图片了
            else:
                plt.imsave(save_path,roi)
            # 这是roi_list 多张人脸检测 以后再搞
            # for roi in roi_list:
            #     if os.path.exists(save_path):
            #         continue# 已经有图片了
            #     else:
            #         plt.imsave(save_path,roi)
还写了一个半自动的人脸提取,只对一个人的人脸图像进行提取,这是为了方便调整人脸检测器的参数,毕竟不同的人的图像数据集干净程度不一样
def auto_draw_face(data_path,db_name,scaleFactor_=1.03,minNeighbors_=3):
    for data_set in os.listdir(data_path):
        data_set_path=os.path.join(data_path,data_set)
        for img_name in os.listdir(data_set_path):
            img_path=os.path.join(data_set_path,img_name)
            # ok 终于得到了这个图片的路径
            save_path=os.path.join('data\db_face\\'+db_name+'\\',data_set,img_name)
            print(save_path)
            src=cv.imread(img_path)
            roi=face_detection_(src,scaleFactor_,minNeighbors_)# 提取人脸
            if roi is None:
                print('can not detect faces')
                continue
            if os.path.exists(save_path):
                continue
            else:
                print(save_path)
                plt.imsave(save_path,roi)
            # 这是roi_list 多张人脸检测 以后再搞
            # for roi in roi_list:
            #     if os.path.exists(save_path):
            #         continue# 已经有图片了
            #     else:
            #         plt.imsave(save_path,roi)
测试以下在8_Girl这个人的数据集中提取情况如何
data_path=r'..\data\db\\8_Girl'
auto_draw_face(data_path,'8_Girl',scaleFactor_=1.01,minNeighbors_=5)
全部人都提取完了之后看看都提取了多少人脸
file_path='data/db_face//'
db_name=os.listdir('data/db_face')
for db in db_name:
    filePath=os.path.join(file_path,db)
    print(db,':')
    print('train',len(os.listdir(filePath+'//train')))
    print('test',len(os.listdir(filePath+'//test')))
10_Mhyang :
train 200
test 1290
1_BlurFace :
train 200
test 286
2_ClifBar :
train 150
test 175
3_David :
train 258
test 272
4_Dudek :
train 271
test 765
5_FaceOcc1 :
train 242
test 254
6_FaceOcc2 :
train 110
test 113
7_FleetFace :
train 272
test 211
8_Girl :
train 124
test 187
9_Jumping :
train 138
test 153
。。。数据有点不平衡,有的人多有的人少,不过没关系,我们到时候都只取100张人脸就行了
接下来要处理以下图像,都转换为单通道灰度图且大小都调整为100x100
data_path='data/db_face'

re_shape=(100,100)

for db_name in os.listdir(data_path):
    tt_path=os.path.join(data_path,db_name)
    for data_set in os.listdir(tt_path):
        data_set_path=os.path.join(tt_path,data_set)
        for img_name in os.listdir(data_set_path):
            img_path=os.path.join(data_set_path,img_name)
            # ok 终于得到了这个图片的路径
            save_path=os.path.join(data_path,db_name,data_set,img_name)
            print(save_path)
            # 处理图像
            files=cv.imread(img_path,0)
            tmp_img=cv.resize(files,re_shape,cv.INTER_LINEAR)
            cv.imwrite(save_path,tmp_img)
最后,我们把图像数据集转化为X(nums,high,weight)这样的ndarrary,然后把每张图像的类别也整理为y(nums,1)
data_path='data/db_face'
img_list=[]
label_list=[]
for types,db_name in enumerate(os.listdir(data_path)):
    tt_path=os.path.join(data_path,db_name)
    # for data_set in os.listdir(tt_path):
    data_set_path=os.path.join(tt_path,'train')
    for img_name in os.listdir(data_set_path)[:100]:
        img_path=os.path.join(data_set_path,img_name)
        print(img_path)
        print(types)
        img=cv.imread(img_path,0)
        img_list.append(img)
        label_list.append(types)

X=np.array(img_list)
y=np.array(label_list)[:,np.newaxis]
np.save('train_X.npy',X)
np.save('train_y.npy',y)
上边是处理训练集的,我们对测试集也同样处理
data_path='data/db_face'
img_list=[]
label_list=[]
for types,db_name in enumerate(os.listdir(data_path)):
    tt_path=os.path.join(data_path,db_name)
    # for data_set in os.listdir(tt_path):
    data_set_path=os.path.join(tt_path,'test')
    for img_name in os.listdir(data_set_path)[:110]:
        img_path=os.path.join(data_set_path,img_name)
        print(img_path)
        print(types)
        img=cv.imread(img_path,0)
        img_list.append(img)
        label_list.append(types)
X=np.array(img_list)
y=np.array(label_list)[:,np.newaxis]
np.save('test_X.npy',X)
np.save('test_y.npy',y)
特征提取
这里我烦了,直接把train和test的数据混成一堆算了
import cv2 as cv
import os
import matplotlib.pyplot as plt
from sklearn.decomposition import PCA
import numpy as np
from sklearn import utils
from sklearn.model_selection import train_test_split
from sklearn.svm import SVC
from sklearn.model_selection import GridSearchCV
X=np.load('train_X.npy')
y=np.load('train_y.npy')

X_t=np.load('test_X.npy')
y_t=np.load('test_y.npy')

X=np.concatenate((X,X_t))
y=np.concatenate((y,y_t))

np.save('total_X',X)
np.save('total_y',y)
好的,现在X,y就是我们的人脸数据集和label了
可视化一下
#传入一张图片(10000,1)numpy数组,转化为(100,100)的图像
def getDatumImg(row):
    width, height = 100,100
    square = row.reshape(width,height)
    return square

#可视化数据
def displayData(myX, mynrows = 40, myncols = 40):
    width, height = 100,100
    nrows, ncols = mynrows, myncols
    #大图片
    big_picture = np.zeros((height*nrows,width*ncols))

    irow, icol = 0, 0
    for idx in range(nrows*ncols):#每10张图片换行一次,遍历100张图片
        if icol == ncols:
            irow += 1
            icol  = 0
        # iimg = getDatumImg(myX[idx])#读取图片的numpy数组(32,32)
        iimg=myX[idx,:,:]
        big_picture[irow*height:irow*height+iimg.shape[0],icol*width:icol*width+iimg.shape[1]] = iimg
        icol += 1
    fig = plt.figure(figsize=(15,15))
    plt.imshow(big_picture,cmap ='gray')
X,y=utils.shuffle(X,y)
displayData(X)
上面的一堆人脸就是我们的数据
下面我们要构建一下人脸向量,把数据集X由(nums,high,weight)的图像序列变为(nums,hegh*weight)的二维表(标准的X)
# X_vec=np.array([X[i,:,:].ravel()[:,np.newaxis] for i in range(X.shape[0])])
X_vec=np.array([X[i,:,:].ravel() for i in range(X.shape[0])])
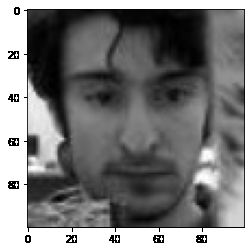
随便可视化一张人脸看看
img=getDatumImg(X_vec[1424,:])
plt.imshow(img,cmap='gray')
PCA
PCA可以看我这篇
分割一下训练集和测试集
X_train, X_test, y_train, y_test = train_test_split(
    X_vec, y, test_size=0.3, random_state=42
)
n_components = 150

print(
    "Extracting the top %d eigenfaces from %d faces" % (n_components, X.shape[0])
)
pca = PCA(n_components=n_components, whiten=True).fit(X_train)

# 得到前150个特征向量,每个特征向量10000维(协方差矩阵10000x10000)

eigenfaces = pca.components_.reshape((n_components, 100, 100))
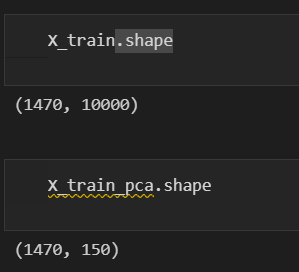
无脑调包,结果长这样,X的维度由10000降维到了150
看看提取出来的特征脸
其实就是把PCA搞出来的几个特征向量(
10000x1)搞成了脸的形状(100x100)
displayData(eigenfaces,mynrows = 10, myncols = 10)
然后把训练集和测试集降维一下
X_train_pca = pca.transform(X_train)
X_test_pca = pca.transform(X_test)
LDA
LDA可以看我这篇
太懒了,之后搞
LBPH+直方图特征
LBP可以看我这篇
太懒了,之后搞
训练分类器
SVC
太懒了,就先只用svm分类了
import warnings
warnings.filterwarnings('ignore')
param_grid = {
    "C": [1e3, 5e3, 1e4, 5e4, 1e5],
    "gamma": [0.0001, 0.0005, 0.001, 0.005, 0.01, 0.1],
}
clf = GridSearchCV(SVC(kernel="rbf", class_weight="balanced"), param_grid)
clf = clf.fit(X_train_pca, y_train)
print(clf.best_estimator_)
输出
SVC(C=1000.0, class_weight='balanced', gamma=0.0001)
打印看看准确率如何
print('test score: ',clf.score(X_test_pca,y_test))
输出
test score: 1.0
有点小高,怕怕
可视化
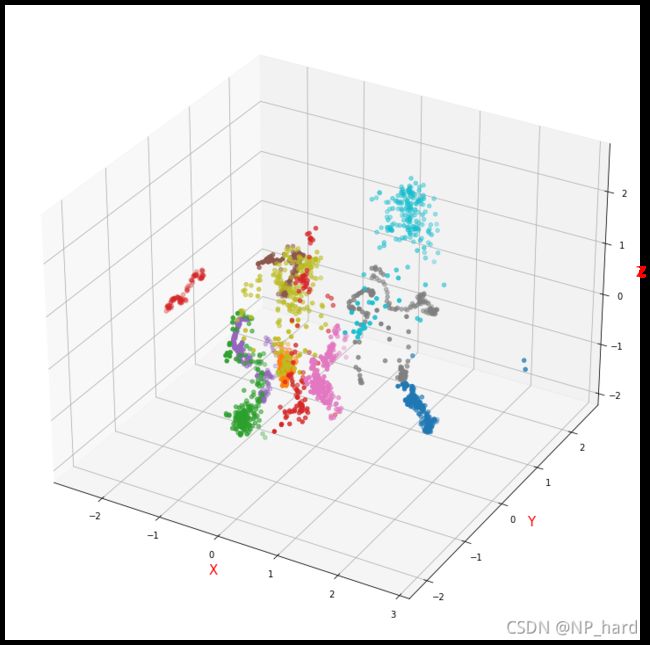
可视化看看样本在低维空间的分布情况
pca = PCA(n_components=3, whiten=True).fit(X_vec)
X_vec_pca=pca.transform(X_vec)

X_list=[]
label_set=set(y.ravel())
for label in label_set:
    tmp_list=[X_vec_pca[i] for i in range(X_vec_pca.shape[0]) if y[i][0]==label]
    X_list.append(tmp_list)
X_list=np.array(X_list)

X_list.shape
输出
(10, 210, 3)
from mpl_toolkits.mplot3d import Axes3D

%matplotlib inline

# %matplotlib auto

fig = plt.figure(figsize=[10,15])
ax = Axes3D(fig)
#ax.legend(loc='best')
ax.set_zlabel('Z', fontdict={'size': 15, 'color': 'red'})
ax.set_ylabel('Y', fontdict={'size': 15, 'color': 'red'})
ax.set_xlabel('X', fontdict={'size': 15, 'color': 'red'})
for i in range(X_list.shape[0]):
    ax.scatter(X_list[i,:,0],X_list[i,:,1],X_list[i,:,2])
利用分类器进行视频人像分类
懒了,以后再搞s
