【学习笔记】SpringBoot容器功能
【学习笔记】SpringBoot容器功能

文章目录
- 【学习笔记】SpringBoot容器功能
-
- 一、组件的添加
-
- @Configuration
- @Bean
- @ComponentScan、@Import
- @Conditional
- 二、原生配置文件的引入
-
- @ImportResource
- 三、配置绑定
-
- @ConfigurationProperties
- @EnableConfigurationProperties
- 附—SpringBoot项目的创建
一、组件的添加
@Configuration
Configuration: 配置。
@Configuration是Spring3.0推出来的注解,用来代替xml配置文件。使用本注解则是告诉 SpringBoot 此类是一个配置类 == 配置文件。
Full模式: proxyBeanMethods = true 直接从IOC容器之中取得对象,保证每个@Bean方法被调用多少次返回的组件都是单实例的,即对象都是一样的。
@Configuration(proxyBeanMethods = true)
public class MyConfig {

    @Bean("xiaobao")
    public User user1(){
        User user = new User("小宝", 18);
        return user;
    }
}
//======================//
MyConfig bean = run.getBean(MyConfig.class);
User user = bean.user1();
User user1 = bean.user1();
System.out.println(user == user1); //true
Lite模式: proxyBeanMethods = false 如果设置为false,也就是不使用注解,每次调用@Bean标注的方法获取到的对象和IOC容器中的都不一样,是一个新的对象。
@Configuration(proxyBeanMethods = false)
public class MyConfig {

    @Bean("xiaobao")
    public User user1(){
        User user = new User("小宝", 18);
        return user;
    }
}
//======================//
MyConfig bean = run.getBean(MyConfig.class);
User user = bean.user1();
User user1 = bean.user1();
System.out.println(user == user1); //false
注: 通过查看 @Configuration 的源码我们能知道 proxyBeanMethods 默认为 true。
@Target({ElementType.TYPE})
@Retention(RetentionPolicy.RUNTIME)
@Documented
@Component
public @interface Configuration {
    @AliasFor(
        annotation = Component.class
    )
    String value() default "";
    boolean proxyBeanMethods() default true;
}
@Bean
作用: 给容器中添加组件。以方法名作为组件的id。返回类型就是组件类型。返回的值,就是组件在容器中的实例。
@ComponentScan、@Import
 * 4、@Import({User.class, DBHelper.class})
 *      给容器中自动创建出这两个类型的组件、默认组件的名字就是全类名
 *
 *
 *
 */

@Import({User.class, DBHelper.class})
@Configuration(proxyBeanMethods = false) //告诉SpringBoot这是一个配置类 == 配置文件
public class MyConfig {
}
@Conditional
@ConditionalOnMissingBean(name = "tom")
@Import({User.class})
public class MyConfig {

    @Bean
    public User user (){
        User xiaobao = new User("xiaobao", 18);
        return xiaobao;
    }
}
ConfigurableApplicationContext run = SpringApplication.run(SpringBootDemo02Application.class, args);
boolean user = run.containsBean("user");
System.out.println("Bean中的user"+user);
二、原生配置文件的引入
@ImportResource
@ImportResource: 可以导入原生配置文件。
<beans xmlns="http://www.springframework.org/schema/beans"
       xmlns:xsi="http://www.w3.org/2001/XMLSchema-instance"
       xmlns:context="http://www.springframework.org/schema/context"
       xsi:schemaLocation="http://www.springframework.org/schema/beans http://www.springframework.org/schema/beans/spring-beans.xsd http://www.springframework.org/schema/context https://www.springframework.org/schema/context/spring-context.xsd">

    <bean id="haha" class="com.xiaobao.boot.pojo.User">
        <property name="name" value="zhangsan">property>
        <property name="age" value="18">property>
    bean>

beans>
测试:
@ImportResource("classpath:beans.xml")
@SpringBootApplication
public class MainApplication {

    //固定写法,让SpringBoot跑起来
    public static void main(String[] args) {

        ConfigurableApplicationContext run = SpringApplication.run(MainApplication.class, args);
        Object hahah = run.containsBean("haha");
        System.out.println(hahah);//true

    }
}
三、配置绑定
如何使用Java读取到properties文件中的内容,并且把它封装到JavaBean中,以供随时使用;
public class getProperties {
     public static void main(String[] args) throws FileNotFoundException, IOException {
         Properties pps = new Properties();
         pps.load(new FileInputStream("a.properties"));
         Enumeration enum1 = pps.propertyNames();//得到配置文件的名字
         while(enum1.hasMoreElements()) {
             String strKey = (String) enum1.nextElement();
             String strValue = pps.getProperty(strKey);
             System.out.println(strKey + "=" + strValue);
             //封装到JavaBean。
         }
     }
 }
@ConfigurationProperties
首先配置实体类:
@Component
@ConfigurationProperties(prefix = "car")
public class Car {
    private String brand;
    private Integer price;

    public String getBrand() {
        return brand;
    }

    public void setBrand(String brand) {
        this.brand = brand;
    }

    public Integer getPrice() {
        return price;
    }

    public void setPrice(Integer price) {
        this.price = price;
    }

    @Override
    public String toString() {
        return "Car{" +
                "brand='" + brand + '\'' +
                ", price=" + price +
                '}';
    }

}
在 properties 中配置参数。
car.brand=BWM
car.price = 1000000
测试:
    @Autowired
    Car car;

    @RequestMapping("/car")
    public Car car(){
        return car;
    }
结果:
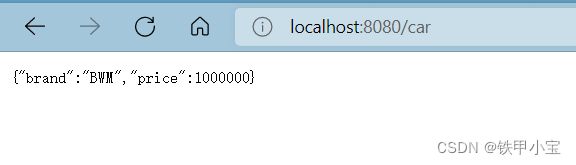
@EnableConfigurationProperties
@EnableConfigurationProperties(Car.class)
//1、开启Car配置绑定功能
//2、把这个Car这个组件自动注册到容器中
public class MyConfig {
}
附—SpringBoot项目的创建
工具: IDEA专业版即可。
首先打开左上角的 File—>Project。

第二步选择 Spring initializr ,并开始创建自己的项目名。
注: Java本版最好选择8版本,不然可能导致版本冲突!!!

然后选择自己所需要的工具,一下只是博主自己的配置,大家可以参考,且其他配置也可以使用的!

创建成功后删除目前没有用的配置。

删除后我们记得一定要使用3.3版本以上的 maven 来进行导包!!!