SpringCloud Feign远程调用
一、引入nacos依赖
    com.alibaba.cloud
    spring-cloud-starter-alibaba-nacos-discovery
二、使用RestTemplate
方式一:
package com.consumer.code.controller;

import org.springframework.beans.factory.annotation.Autowired;
import org.springframework.cloud.client.loadbalancer.LoadBalanced;
import org.springframework.web.bind.annotation.RequestMapping;
import org.springframework.web.bind.annotation.RestController;
import org.springframework.web.client.RestTemplate;

@RestController
public class ConsumerController {

    private RestTemplate restTemplate;

    @Autowired
    public ConsumerController(RestTemplate restTemplate) {
        this.restTemplate = restTemplate;
    }

    @RequestMapping("/run")
    public String run(){
        return restTemplate.getForObject("http://127.0.0.1:8081/run", String.class);
    }

}
方式二:(集群加负载均衡)
    org.springframework.cloud
    spring-cloud-starter-loadbalancer
使用Feign (开启负载均衡)
    org.springframework.cloud
    spring-cloud-starter-openfeign
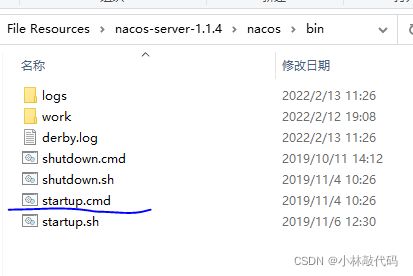
注:运行项目前一定要先运行nacos启动文件startup.cmd
在生产者定义User实体类
package com.provider.code.pojo;

import lombok.AllArgsConstructor;
import lombok.Data;
import lombok.NoArgsConstructor;
import lombok.experimental.Accessors;

@AllArgsConstructor
@NoArgsConstructor
@Data
@Accessors(chain = true)
public class User {

    private String account;
    private String password;

}
步骤一: 生产者提供接口
可以使用以下几个注解接收远程调用的参数值:
@PathVariable
@RequestParam
@RequestBody
package com.provider.code.controller;

import com.provider.code.pojo.User;
import org.springframework.beans.factory.annotation.Autowired;
import org.springframework.web.bind.annotation.*;

import java.util.Map;

@RestController
@RequestMapping("/user")
public class UserController {

    @RequestMapping("/{account}")
    public String getByPath(@PathVariable String account){
        System.out.println("account:"+account);
        return "provider: yes";
    }

    @RequestMapping("/param")
    public String getByParam(@RequestParam("account") String account,@RequestParam("password") String password){
        System.out.println("account:"+account+"password:"+password);
        return "provider: yes";
    }

    @RequestMapping("/pojo")
    public String getByPojo(@RequestBody User user){
        System.out.println("pojo:"+user);
        return "provider: yes";
    }

    @RequestMapping("/more")
    public String getByMore(@RequestBody Map map){
        System.out.println("more:"+map);
        return "provider: yes";
    }
步骤二:
消费者需要开启Feign功能
在消费者启动类加上 @EnableFeignClients
package com.consumer.code;

import org.springframework.boot.SpringApplication;
import org.springframework.boot.autoconfigure.SpringBootApplication;
import org.springframework.cloud.client.discovery.EnableDiscoveryClient;
import org.springframework.cloud.client.loadbalancer.LoadBalanced;
import org.springframework.cloud.openfeign.EnableFeignClients;
import org.springframework.context.annotation.Bean;
import org.springframework.web.client.RestTemplate;

@SpringBootApplication
@EnableDiscoveryClient
@EnableFeignClients
public class NacosConsumerApplication {

    public static void main(String[] args) {
        SpringApplication.run(NacosConsumerApplication.class, args);
    }

    @Bean
    @LoadBalanced
    public RestTemplate restTemplate(){
        return new RestTemplate();
    }

}
创建Server,并使用Feign表示其需要远程对接的服务名称,并使用@RequestMapping表示其映射的 路径
package com.consumer.code.service;


import com.cloud_02.code.dto.UserDto;
import org.springframework.cloud.openfeign.FeignClient;
import org.springframework.web.bind.annotation.*;

import java.util.Map;

@FeignClient("nacos-provider")
public interface FeignUserService {

    @RequestMapping("/user/{account}")
    String getByPath(@PathVariable(value = "account") String account);

    @RequestMapping("/user/param")
    String getByParam(@RequestParam("account") String account,@RequestParam("password") String password);

    @RequestMapping("/user/pojo")
    String getByPojo(@RequestBody UserDto user);

    @RequestMapping("/user/more")
    String getByMore(@RequestBody Map map);


}
注:
FeignClient接口,不能使用@GettingMapping之类的组合注解
FeignClient接口中,如果使用到@PathVariable必须指定其value
当使用feign传参数的时候,需要加上@RequestParam注解,否则对方服务无法识别参数
DTO封装
VO(View Object):视图对象,用于展示层,它的作用是把某个指定页面(或组件)的所有数据 封装起来。
DTO(Data Transfer Object):数据传输对象,这个概念来源于J2EE的设计模式,原来的目的是 为了EJB的分布式应用提供粗粒度的数据实体,以减少分布式调用的次数,从而提高分布式调用的 性能和降低网络负载,但在这里,我泛指用于展示层与服务层之间的数据传输对象。
DO(Domain Object):领域对象,就是从现实世界中抽象出来的有形或无形的业务实体。
PO(Persistent Object):持久化对象,它跟持久层(通常是关系型数据库)的数据结构形成一 一对应的映射关系,如果持久层是关系型数据库,那么,数据表中的每个字段(或若干个)就对应 PO的一个(或若干个)属性。
消费者 远程调用 生产者 : 需要网络传输,使用DTO同一封装对象
原理与SpringBoot启动类相同:
1.将DTO对象封装到公共DTO模块
2.为需要的项目引入公共DTO模块
创建公共模块 在父pom文件中引入公共模块
    nacos_provider
    nacos_consumer
    commons
注:
1.不需要继承父模块(重复引用问题)
2.打包方式为jar
3.不需要添加启动类的编译
在公共模块创建UserDto类
package com.cloud_02.code.dto;

import lombok.AllArgsConstructor;
import lombok.Data;
import lombok.NoArgsConstructor;
import lombok.experimental.Accessors;

@AllArgsConstructor
@NoArgsConstructor
@Data
@Accessors(chain = true)
public class UserDto {

    private String name; //User-->account
    private String password;

}
Orika
Orika是java Bean映射框架,可以实现从一个对象递归拷贝数据至另一个对象。
在开发多层应用程序中非常有用。在这些层之间交换数据时,通常为了适应不同API需要转换一个实例至 另一个实例。
在生产者pom文件引入Orika依赖
    ma.glasnost.orika
    orika-core
    1.4.6
在生产者启动类 new默认字段工厂
使用@Scope注解 属性prototype表示每次获得bean都会生成一个新的对象
package com.provider.code;

import ma.glasnost.orika.MapperFactory;
import ma.glasnost.orika.impl.DefaultMapperFactory;
import org.springframework.boot.SpringApplication;
import org.springframework.boot.autoconfigure.SpringBootApplication;
import org.springframework.cloud.client.discovery.EnableDiscoveryClient;
import org.springframework.cloud.openfeign.EnableFeignClients;
import org.springframework.context.annotation.Bean;
import org.springframework.context.annotation.Scope;

@SpringBootApplication
@EnableDiscoveryClient
public class NacosProviderApplication {

    public static void main(String[] args) {
        SpringApplication.run(NacosProviderApplication.class, args);
    }

    @Bean
    @Scope("prototype")
    public MapperFactory mapperFactory(){
        return new DefaultMapperFactory.Builder().build();
    }

}
对象属性两种判断
@RequestMapping("/pojo")
public String getByPojo(@RequestBody UserDto dto){
    //dto属性与实体user一致时
    //User user=new User();
    //user.setAccount(dto.getAccount()).setPassword(dto.getPassword());
    //User u = mapperFactory.getMapperFacade().map(dto, User.class);

    //不一致时 使用orika复制工具将A集合复制到B集合中
    mapperFactory.classMap(UserDto.class, User.class)
            .field("name", "account")
            .byDefault().register();
    User u = mapperFactory.getMapperFacade().map(dto, User.class);
    System.out.println("pojo:"+dto);
    return "provider: yes";
}