安装如下几个工具:
- R
- ANTs
- AFNI
- FSL
- python中的torchbiomed库
- FreeSurfer)
- ITK-SNAP
- MRIcron
- Fiji
- mrtrix3和dipy
参考链接
https://zhuanlan.zhihu.com/p/...
https://cxybb.com/article/wei...
- 安装R
1) 安装必要的包及添加软件源
$ sudo apt install dirmngr gnupg apt-transport-https ca-certificates software-properties-common2) 将CRAN软件源添加到本机系统源列表
$ sudo apt-key adv --keyserver keyserver.ubuntu.com --recv-keys E298A3A825C0D65DFD57CBB651716619E084DAB9

$ sudo add-apt-repository 'deb https://cloud.r-project.org/bin/linux/ubuntu focal-cran40/'
3) 以下命令安装R
$ sudo apt install r-base4) 验证R安装是否成功
$ R --version输出
R version 4.2.0 (2022-04-22) -- "Vigorous Calisthenics"
Copyright (C) 2022 The R Foundation for Statistical Computing
Platform: x86_64-pc-linux-gnu (64-bit)

R is free software and comes with ABSOLUTELY NO WARRANTY.
You are welcome to redistribute it under the terms of the
GNU General Public License versions 2 or 3.
For more information about these matters see
https://www.gnu.org/licenses/.
5) 编译R软件包
先进行
$ sudo apt install build-essential安装软件包前注意,当root下安装的时候软件包会被全局安装,对所有用户有效。当启动R时不加sudo,我这里运行是会出问题的。以安装stringr软件包为例:
不加sudo开启R
$ R输入以下命令进行安装
> install.packages("stringr")出现
> install.packages("stringr")
Installing package into ‘/usr/local/lib/R/site-library’
(as ‘lib’ is unspecified)
Warning in install.packages("stringr") :
  'lib = "/usr/local/lib/R/site-library"' is not writable
Would you like to use a personal library instead? (yes/No/cancel)
Error in install.packages("stringr") : unable to install packages
退出后加sudo开启R
$ sudo -i R再次安装stringr包
> install.packages("stringr")此时不会出错,加载包并试着调用一个str_length函数看看结果
> library("stringr")
> x <- c("Hi", "have", "fun", "with", "R", "in", "Ubuntu20.04")
> str_length(x)
[1] 2 4 3 4 1 2 11- 安装ANTs
参考并致谢
http://stnava.github.io/ANTsDoc/
http://stnava.github.io/ANTs/
https://zhuanlan.zhihu.com/p/...
https://blog.csdn.net/clancy_...
https://cxybb.com/article/wei...
1) ANTs简介
ANTs全称:Advanced Normalization Tools,基于C语言,配准效果较好。
2) ANTs安装
cd
#github上下载ANTs
git clone https://github.com/ANTsX/ANTs.git
#下载cmake
wget https://cmake.org/files/v3.21/cmake-3.21.0-linux-x86_64.sh
#修改权限
chmod u+x cmake-3.21.0-Linux-x86_64.sh
#安装cmake
sh cmake-3.21.0-Linux-x86_64.sh
#安装cmake GUI
sudo apt-get install cmake-curses-gui

#创建文件夹build和install
mkdir build install
cd build
#执行ccmake
ccmake ../ANTs
#按字母c进入configuration
#SuperBuild_ANTS_USE_GIT_PROTOCOL设为OFF,否则后续编译自动适配下载ITK会超时
#RUN_LONG_TESTS 和 RUN_SHORT_TESTS设为OFF,否则后续编译报错recipe for target...
#再次按c进行再一轮的configuration,如无错,按g进行generation生成make files

#编译,看有的教程是make -j 4
#官网是make 2>&1 | tee build.log,但建议为了加速编译可以多线程
make -j 2 2>&1 | tee build.log
如果编译成功,make打印后将退出并显示代码0
[100%] Built target ANTS
这个build.log用于记录运行的日志,报错信息记录在log里。
编译完成后,build目录下将出现一个子目录ANTS-build,这是运行安装的位置。
cd ANTS-build
make install 2>&1 | tee install.log
编译完成后,如要使用ANTs scripts,须将原ANTs文件夹下Scripts/里所有内容拷贝到build/bin下。如果build目录下没有bin,则创建一个bin目录。看到有的教程是要求把以下内容都复制进build/bin
cd build
cp -r ./ANTS-build/Examples/* ./bin
cp -r ./staging/bin/* ./bin
cp -r ../ANTs/Scripts/* ./bin
或者,为了方便调用ANTs/Scripts路径下各种.sh文件,可将.sh文件路径添加到环境变量中,再source一下。
export PATH=$PATH:/home/xxx/ANTs/Scripts3) 环境设置
安装完毕,设置环境变量PATH和ANTSPATH
如果按照前述步骤安装,则二进制文件路径应在/home/xxx/build/bin,其中包含了编译好的程序及上一步从ANTs复制过去的文件。
添加路径到.bashrc或者.zshrc
export ANTSPATH=${HOME}/build/bin/
export PATH=${ANTSPATH}:$PATH
保存退出并source。此时,可检查路径是否设置成功
which antsRegistration
/home/xxx/build/bin/antsRegistration
后续如需更新ANTs,可进入ANTs文件夹,输入
git pull origin master
有教程还提到,还可在命令行输入
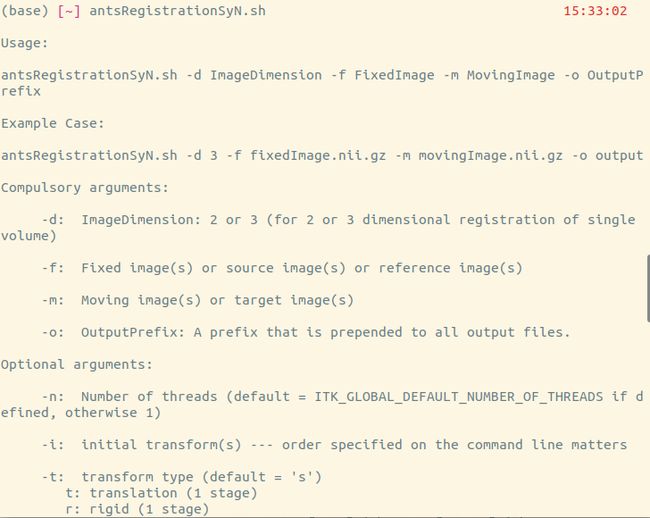
antsRegistrationSyN.sh
会输出该script的使用说明,像这样
4) ANTs使用
- 配准:antsRegistration,具体命令
antsRegistrationSyN.sh -d 2 -f fixed_img.jpg -m moving_img.jpg -o output
其中 -d 2 表示数据是 2 维图像,
-f fixed_img.jpg 是 fixed image 对应的图像名称,
-m moving_img.jpg 是 moving image 对应的图像名称,
-o output 是输出结果的前缀名。输出的数据如下:
output0GenericAffine.mat , output1Warp.nii.gz 分别表示线性变换和非线性变换估计出的映射关系,outputWarped.nii.gz 表示将 moving_img.jpg 配准到 fixed_img.jpg 后的图像,outputInverseWarped.nii.gz 表示将 fixed_img.jpg 配准到 moving_img.jpg 后的图像。
- 利用矩阵进行形变:antsApplyWarp
- 把配准生成的transformation的.mat文件变成可读的格式:ConvertTransformFile
5) 安装antspyx
参考并致谢
https://antspy.readthedocs.io...
https://buildmedia.readthedoc...
https://cxymm.net/article/xj4...
pip install antspyx

#或者

pip install antspyx -i https://pypi.mirrors.ustc.edu.cn/simple/ 有一个关于antspy做配准的代码
import os
import glob
import ants
import numpy as np
import SimpleITK as sitk

# ants图片的读取

f_img = ants.image_read("./data/f_img.nii.gz")
m_img = ants.image_read("./data/m_img.nii.gz")
f_label = ants.image_read("./data/f_label.nii.gz")
m_label = ants.image_read("./data/m_label.nii.gz")

'''
ants.registration()函数的返回值是一个字典:
    warpedmovout: 配准到fixed图像后的moving图像
    warpedfixout: 配准到moving图像后的fixed图像
    fwdtransforms: 从moving到fixed的形变场
    invtransforms: 从fixed到moving的形变场

type_of_transform参数的取值可以为:
    Rigid:刚体
    Affine:仿射配准,即刚体+缩放
    ElasticSyN:仿射配准+可变形配准,以MI为优化准则,以elastic为正则项
    SyN:仿射配准+可变形配准,以MI为优化准则
    SyNCC:仿射配准+可变形配准,以CC为优化准则
'''

# 图像配准

mytx = ants.registration(fixed=f_img, moving=m_img, type_of_transform='SyN')

# 将形变场作用于moving图像,得到配准后的图像,interpolator也可以选择"nearestNeighbor"等

warped_img = ants.apply_transforms(fixed=f_img, moving=m_img, transformlist=mytx['fwdtransforms'],
                                   interpolator="linear")

# 对moving图像对应的label图进行配准

warped_label = ants.apply_transforms(fixed=f_img, moving=m_label, transformlist=mytx['fwdtransforms'],
                                     interpolator="linear")

# 将配准后图像的direction/origin/spacing和原图保持一致

warped_img.set_direction(f_img.direction)
warped_img.set_origin(f_img.origin)
warped_img.set_spacing(f_img.spacing)
warped_label.set_direction(f_img.direction)
warped_label.set_origin(f_img.origin)
warped_label.set_spacing(f_img.spacing)
img_name = "./result/warped_img.nii.gz"
label_name = "./result/warped_label.nii.gz"

# 图像的保存

ants.image_write(warped_img, img_name)
ants.image_write(warped_label, label_name)

# 将antsimage转化为numpy数组

warped_img_arr = warped_img.numpy(single_components=False)

# 从numpy数组得到antsimage

img = ants.from_numpy(warped_img_arr, origin=None, spacing=None, direction=None, has_components=False, is_rgb=False)

# 生成图像的雅克比行列式

jac = ants.create_jacobian_determinant_image(domain_image=f_img, tx=mytx["fwdtransforms"][0], do_log=False, geom=False)
ants.image_write(jac, "./result/jac.nii.gz")

# 生成带网格的moving图像,实测效果不好

m_grid = ants.create_warped_grid(m_img)
m_grid = ants.create_warped_grid(m_grid, grid_directions=(False, False), transform=mytx['fwdtransforms'],
                                 fixed_reference_image=f_img)
ants.image_write(m_grid, "./result/m_grid.nii.gz")

'''
以下为其他不常用的函数:

ANTsTransform.apply_to_image(image, reference=None, interpolation='linear')
ants.read_transform(filename, dimension=2, precision='float')

# transform的格式是".mat"

ants.write_transform(transform, filename)

# field是ANTsImage类型

ants.transform_from_displacement_field(field)
'''

print("End")
- 安装AFNI
参考链接里的安装教程
1) 下载
cd
curl -O https://raw.githubusercontent.com/afni/afni/master/src/other_builds/OS_notes.linux_ubuntu_20_64_a_admin.txt
curl -O https://raw.githubusercontent.com/afni/afni/master/src/other_builds/OS_notes.linux_ubuntu_20_64_b_user.tcsh
curl -O https://raw.githubusercontent.com/afni/afni/master/src/other_builds/OS_notes.linux_ubuntu_20_64_c_nice.tcsh
2) 依次执行以下命令
sudo bash OS_notes.linux_ubuntu_20_64_a_admin.txt 2>&1 | tee o.ubuntu_20_a.txt

tcsh OS_notes.linux_ubuntu_20_64_b_user.tcsh 2>&1 | tee o.ubuntu_20_b.txt

tcsh OS_notes.linux_ubuntu_20_64_c_nice.tcsh 2>&1 | tee o.ubuntu_20_c.txt
设置环境
cp $HOME/abin/AFNI.afnirc $HOME/.afnirc
#在这里重新打开terminal,或者source一下,让环境生效

suma -update_env

rPkgsInstall -pkgs ALL
3) 检查是否安装好
afni_system_check.py -check_all
check之后,我的结果是这样的
(base) [~] afni_system_check.py -check_all                            10:43:52
-------------------------------- general ---------------------------------
architecture:         64bit ELF
system:               Linux
release:              5.13.0-41-generic
version:              #46~20.04.1-Ubuntu SMP Wed Apr 20 13:16:21 UTC 2022
distribution:         Ubuntu 20.04.4 LTS
number of CPUs:       16
apparent login shell: zsh
shell RC file:        .zshrc (exists)

--------------------- AFNI and related program tests ---------------------
which afni           : /home/miau/abin/afni
afni version         : Precompiled binary linux_ubuntu_16_64: May 10 2022
                     : AFNI_22.1.09 'Antoninus Pius'
AFNI_version.txt     : AFNI_22.1.09, linux_ubuntu_16_64, May 10 2022
which python         : /home/miau/anaconda3/bin/python
python version       : 3.9.7
which R              : /usr/bin/R
R version            : R version 4.2.0 (2022-04-22) -- "Vigorous Calisthenics"
which tcsh           : /usr/bin/tcsh

instances of various programs found in PATH:
    afni    : 1   (/home/miau/abin/afni)
    R       : 1   (/usr/bin/R)
    python  : 2
      /home/miau/anaconda3/bin/python3.9
      /usr/bin/python3.8
    python2 : 1   (/usr/bin/python2.7)
    python3 : 2
      /home/miau/anaconda3/bin/python3.9
      /usr/bin/python3.8


testing ability to start various programs...
    afni                 : success
    suma                 : success
    3dSkullStrip         : success
    uber_subject.py      : success
    3dAllineate          : success
    3dRSFC               : success
    SurfMesh             : success
    3dClustSim           : success
    3dMVM                : success

checking for R packages...
    rPkgsInstall -pkgs ALL -check : success

R RHOME : /usr/lib/R

checking for $HOME files...
    .afnirc                   : found
    .sumarc                   : found
    .afni/help/all_progs.COMP : found

------------------------------ python libs -------------------------------
** failed to load module PyQt4
-- PyQt4 is no longer needed for an AFNI bootcamp

++ module loaded: matplotlib.pyplot
   module file : /home/miau/anaconda3/lib/python3.9/site-packages/matplotlib/pyplot.py
   matplotlib version : 3.4.3

-------------------------------- env vars --------------------------------
PATH = /home/miau/build/bin:/usr/local/MATLAB/R2022a/bin:/home/miau/anaconda3/bin:/home/miau/build/bin:/usr/local/MATLAB/R2022a/bin:/home/miau/anaconda3/bin:/home/miau/anaconda3/bin:/home/miau/anaconda3/condabin:/home/miau/build/bin:/usr/local/MATLAB/R2022a/bin:/home/miau/anaconda3/bin:/home/miau/bin:/usr/local/sbin:/usr/local/bin:/usr/sbin:/usr/bin:/sbin:/bin:/usr/games:/usr/local/games:/snap/bin:/usr/local/cuda/bin:/home/miau/abin:/usr/local/cuda/bin:/home/miau/abin:/usr/local/cuda/bin:/home/miau/abin

PYTHONPATH =
R_LIBS = /home/miau/R

LD_LIBRARY_PATH = :/usr/local/cuda/lib64:/usr/local/cuda/lib64:/usr/local/cuda/lib64

DYLD_LIBRARY_PATH =
DYLD_FALLBACK_LIBRARY_PATH =

------------------------------ data checks -------------------------------
data dir : missing AFNI_data6
data dir : missing AFNI_demos
data dir : missing suma_demo
data dir : missing afni_handouts
atlas    : found TT_N27+tlrc  under /home/miau/abin

------------------------------ OS specific -------------------------------
which apt-get        : /usr/bin/apt-get
apt-get version      : apt 2.0.8 (amd64)

have Ubuntu system: Ubuntu 20.04.4 LTS
have Ubuntu afni  : Precompiled binary linux_ubuntu_16_64: May 10 2022

=========================  summary, please fix:  =========================
*  just be aware: login shell 'zsh', but our code examples use 'tcsh'
*  insufficient data for AFNI bootcamp
   (see "Prepare for Bootcamp" on install pages)
就是说data checks这里,出现missing
打开AFNI和SUMA的GUI看看
afni
suma
命令afni之后,是这样的
(base) [~] afni                                                       10:46:31
Precompiled binary linux_ubuntu_16_64: May 10 2022 (Version AFNI_22.1.09 'Antoninus Pius')


** Version check disabled: AFNI_VERSION_CHECK forbids
Thanks go to MM Klosek for you-know-what

Initializing: X11[The X.Org Foundation v 12013000].
++++++++ IMAGE SAVE SETUP WARNINGS ++++++++
++ Can't find program ffmpeg for Save to MPEG-1
++ To disable these warnings, set environment
++  variable AFNI_IMSAVE_WARNINGS to 'NO'.
+++++++++++++++++++++++++++++++++++++++++++++
. Widgets...... Input files:
** Searching subdirectories of './' for data+./Downloads/
 session #  1  = ./Downloads/ ==> 2 datasets+./Music/
 session #  2  = ./Music/ ==> 1 dataset +./Pictures/
 session #  3  = ./Pictures/ ==> 4 datasets+./abin/
 session #  4  = ./abin/ ==> 58 datasets++ AFNI is detached from terminal.
(base) [~]                                                            10:49:25
 dataset count = 65
 Timeseries.1D = 0 files readfind: ‘./Nutstore’: No such file or directory
find: ‘Files/’: No such file or directory

 .[tc]sv data  = 51 files read
Path(s) to be searched for plugins:
/home/miau/abin /home/miau/abin/../lib

 Plugins       = 49 libraries read

++ NOTE: This version of AFNI was built May 10 2022 ++
++ NOTE: 'Define Markers' is hidden: right-click 'DataDir' to see it
++ NOTE: Use '-seehidden' option to see which plugins are hidden


------------------------- AFNI Startup Tip (45/112)----------------------------
Set environment variable AFNI_DATASET_BROWSE to YES and then when you
click on a dataset name in the OverLay or UnderLay popup chooser, AFNI
will switch to viewing that dataset immediately (rather than waiting for
you to press 'Set'). You can also browse through datasets in these
choosers using the keyboard up/down arrows.
-------------------------------------------------------------------------------

** AFNI concludes: I recall the experience sweet and sad!  [81/895]
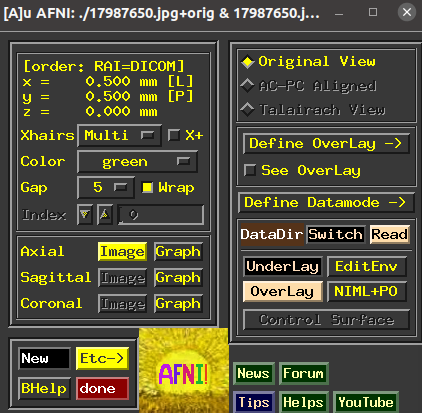
界面是这样的,还有一个大的图形窗口未截图
命令suma之后是这样的
(base) [~] suma                                                       11:01:54

suma:
     No input specified, loading some toy surfaces...
     Use '.' and ',' to cycle between them.
     See suma -help for assistance.

SUMA_Engine: Starting to listen ...
界面是这样的
4) 版本及更新
查看AFNI版本
(base) [~] afni -ver                                                  11:05:33
Precompiled binary linux_ubuntu_16_64: May 10 2022 (Version AFNI_22.1.09 'Antoninus Pius')
如须更新AFNI,输入
@update.afni.binaries -d
- 安装FSL
参考并致谢
https://fsl.fmrib.ox.ac.uk/fs...
https://blog.csdn.net/qq_3642...
https://cxybb.com/article/wei...
http://learning-archive.org/w...
1) 官网注册下载fslinstaller.py 安装文件
2) 安装FSL,需要挺久时间
#为了保证FSL可以安装到默认的/usr/local下,先开启权限
su

cd ~/Downloads
python fslinstaller.py
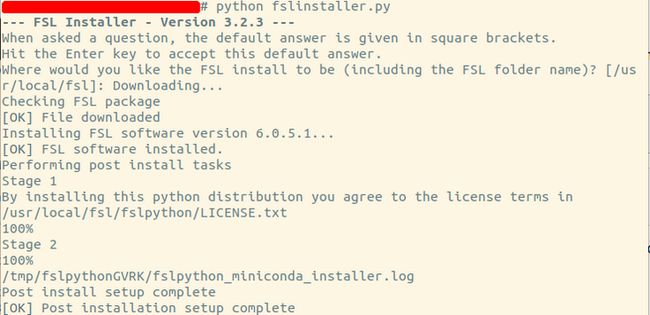
安装成功显示如下:
3) 设置路径并source生效
#在.bashrc或.zshrc中输入以下命令并source

FSLDIR=/usr/local/fsl
. ${FSLDIR}/etc/fslconf/fsl.sh
PATH=${FSLDIR}/bin:${PATH}
export FSLDIR PATH
4) 验证FSL是否安装成功
(base) [Downloads] echo $FSLDIR/                                      14:03:25
/usr/local/fsl/
(base) [Downloads] flirt -version                                     14:03:33
FLIRT version 6.0
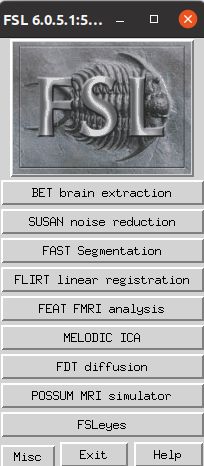
5) 开启FSL,直接输入命令fsl,弹出界面
6) 使用FSL
- 查看MRI图像,用mrview命令。例如:mrview XX.nii.gz
- 去脑壳,用bet命令。例如:
bet T1.nii.gz T1_r20_f015.nii.gz -r 20 -f 0.15 -B -S -m -R -o- 配准,用flirt命令。
- 缩放视野,用robustfov命令。
- 应用变换矩阵,用convert_xhm命令。
- 为了把flirt_import或itk_import的transformation变换成mrtrix库可以认识的形式,用transformconvert命令。
- 选择某张功能像,用fslroi命令。
- 进行subcortical的分割,用first命令。
- 安装python中的torchbiomed库
python -m pip install git+https://github.com/mattmacy/torchbiomed.git参考并致谢
https://zhuanlan.zhihu.com/p/...
1) 下载FreeSurfer并解压
wget ftp://surfer.nmr.mgh.harvard.edu/pub/dist/freesurfer/7.1.1/freesurfer-linux-centos7_x86_64-7.1.1.tar.gz

#将下载数据移动到/usr/local文件夹下
sudo mv freesurfer-linux-centos7_x86_64-7.1.1.tar.gz /usr/local

#进入文件夹并解压
cd /usr/local
sudo tar xzvf freesurfer-linux-centos7_x86_64-7.1.1.tar.gz
2) 官网填写相关信息申请license
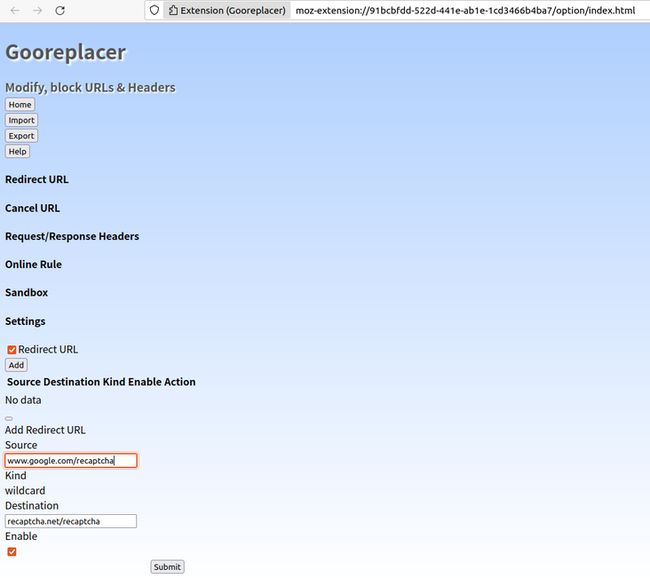
填写信息发现Firefox无法加载reCaptcha验证码。此时,在浏览器的Add-ons and themes中搜索gooreplacer,安装并启用。在打开的窗口中选择“Redirect URL”,点击“Add”,在弹出的窗口中按以下设置后点击【submit】提交保存
- Source输入www.google.com/recaptcha
- Kind选择wildcard
- Destination输入recaptcha.net/recaptcha
- Enable勾选
查收邮件,附件包含一份license.txt文档,下载该文件,复制其中的内容
cd /usr/local

#创建license文本
sudo touch freesurfer/license.txt

sudo su
cd /usr/local/freesurfer
vi license.txt
#复制下载的license.txt文档内容,粘贴后保存
3) 环境配置
vi .zshrc

#
export FREESURFER_HOME=/usr/local/freesurfer

#
export FREESURFER_HOME=/usr/local/freesurfer
source $FREESURFER_HOME/SetUpFreeSurfer.sh
source
4) 验证FreeSurfer安装是否正确
输入以下命令验
cp $FREESURFER_HOME/subjects/sample-001.mgz .
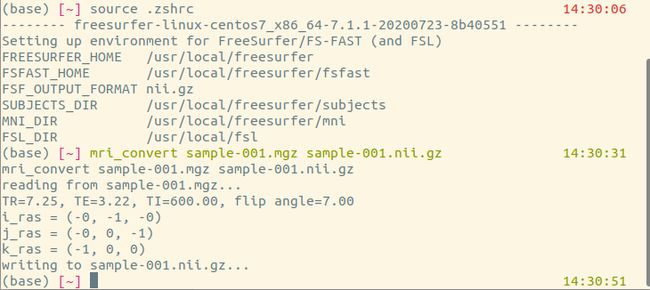
mri_convert sample-001.mgz sample-001.nii.gz
会打印出以下语句
reading from sample-001.mgz...
  TR=7.25, TE=3.22, TI=600.00, flip angle=7.00
  i_ras = (-0, -1, -0)
  j_ras = (-0, 0, -1)
  k_ras = (-1, 0, 0)
  writing to sample-001.nii.gz...
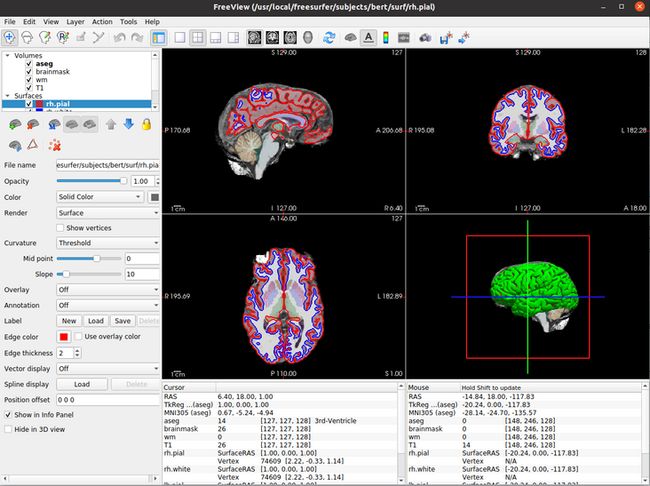
输入以下语句
cd $SUBJECTS_DIR

freeview -v \                                      14:33:38
   bert/mri/T1.mgz \
   bert/mri/wm.mgz \
   bert/mri/brainmask.mgz \
   bert/mri/aseg.mgz:colormap=lut:opacity=0.2 \
   -f \
   bert/surf/lh.white:edgecolor=blue \
   bert/surf/lh.pial:edgecolor=red \
   bert/surf/rh.white:edgecolor=blue \
   bert/surf/rh.pial:edgecolor=red
出现界面
- 安装ITK-SNAP
参考并致谢
https://cxymm.net/article/qq_...
我尝试几种方法都不行,最后只能装非最新版本的
sudo apt-get install aptitude
sudo aptitude install itksnap- 安装MRIcron
1) 官网下载MRIcron的安装包MRIcron_linux.zip
2) 解压后得到文件夹mricron,直接双击MRIcron图标即可打开使用,界面如下
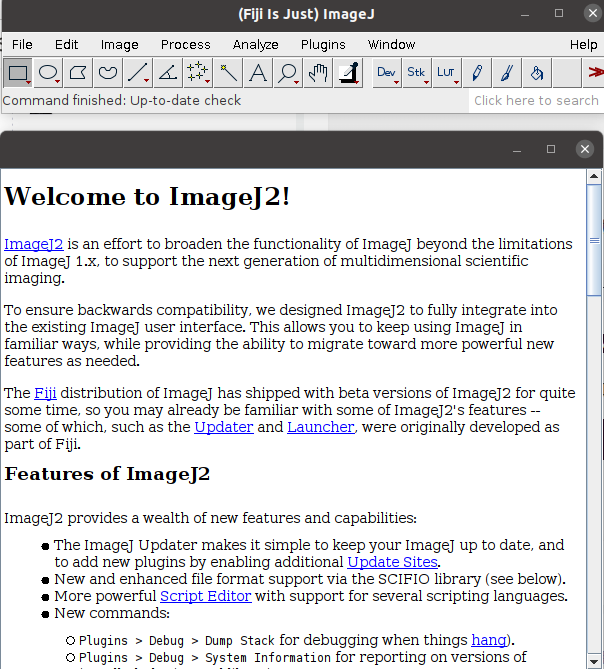
(base) [~] sudo ln -s ~/Fiji/ImageJ-linux64  /usr/local/bin/imagej    15:38:29
(base) [~] whereis imagej                                             15:38:38
imagej: /usr/local/bin/imagej
(base) [~] imagej - 安装mrtrix3和dipy
conda create -n mri
conda activate mri

conda install -c mrtrix3 mrtrix3
conda install -c conda-forge dipy
在虚拟环境中直接输入mrview即可出来界面


