第9篇:ElasticSearch分布式搜索6大能力
背景:目前国内有大量的公司都在使用 Elasticsearch,包括阿里、京东、滴滴、今日头条、小米、vivo等诸多知名公司。除了搜索功能之外,Elasticsearch还结合Kibana、Logstash、Elastic Stack还被广泛运用在大数据近实时分析领域,包括日志分析、指标监控等多个领域。
本节内容:了解企业实际业务当中ElasticSearch的六大搜索能力。
目录
Elasticsearch的六大搜索能力
0 准备工作
创建一个student演示索引
创建索引演示数据
1、轻量搜索
2、表达式搜索
3、复杂搜索
4、全文搜索(相关性分析)
5、短语搜索
6、高亮搜索
Elasticsearch的六大搜索能力
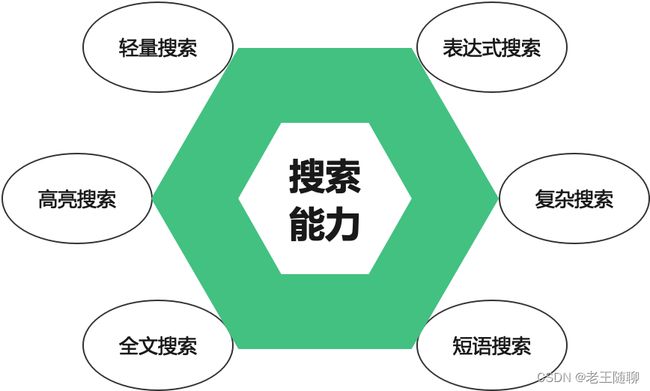
前面文章提到过,Elasticsearch最大的优势在于其检索能力。那为了适配日常不同业务的多种查询需求,Elasticsearch为我们提供了六大搜索方式: 轻量搜索、表达式搜索、复杂搜索、全文搜索、短语搜索和高亮搜索。
0 准备工作
基础工具参考前文 7.X增删改查实战
创建一个student演示索引
{
  "mappings": {
    "properties": {
      "name": {
        "type": "keyword"
      },
      "age": {
        "type": "integer"
      },
      "love": {
        "type": "keyword"
      },
      "createTime": {
        "format": "yyyy-MM-dd HH:mm:ss",
        "type": "date"
      }
    }
  }
}
创建索引演示数据
1)索引实体对象
import java.util.Date;

public class Student extends BaseDto {
    private String name;
    private Integer age;
    private String love;
    private Date createTime;
    // get set方法省略
}
2)索引数据
//2、添加文档
for(int i = 1; i<=20; i++) {
    Student student = new Student();
    student.setId(""+i);
    student.setCreateTime(new Date());
    student.setName("test"+i);
    student.setAge(i+10);
    if(i%2 == 0) {
        student.setLove("I love to go rock climbing");
    }else{
        student.setLove("I like to collect rock albums");
    }
    Boolean add = IndexOperateUtil.addDocument(student, indexName);
    System.out.println("文档新增结果" + add);
}
1、轻量搜索
我们先用GET 尝试一个几乎是最简单的搜索。如下使用下列请求来搜索所有学生:
http://127.0.0.1:9200/student/_search可以看到,我们仍然使用索引库student ,但与指定一个文档 ID 不同的是,使用 _search返回结果包括了所有三个文档放在数组 hits 中。(一个搜索默认返回十条结果)
{
    "took": 1,
    "timed_out": false,
    "_shards": {
        "total": 1,
        "successful": 1,
        "skipped": 0,
        "failed": 0
    },
    "hits": {
        "total": {
            "value": 30,
            "relation": "eq"
        },
        "max_score": 1,
        "hits": [
            {
                "_index": "student",
                "_type": "_doc",
                "_id": "21",
                "_score": 1,
                "_source": {
                    "love": "I like to collect rock albums",
                    "createTime": "2022-05-27 09:47:38",
                    "name": "test9",
                    "id": "21",
                    "age": 11
                }
            },
            {
                "_index": "student",
                "_type": "_doc",
                "_id": "22",
                "_score": 1,
                "_source": {
                    "love": "I love to go rock climbing",
                    "createTime": "2022-05-27 09:47:38",
                    "name": "test9",
                    "id": "22",
                    "age": 12
                }
            },
            ...省略
        ]
    }
}
从上面的结果可以看出,返回结果不仅告知匹配了哪些文档,还包含了整个文档本身,将显示搜索结果给最终用户所需的全部信息。
接下来,我们搜索学生姓名为 “test9”的学生。因此,需要使用一个高亮搜索。这个方法一般涉及到一个查询字符串搜索(query-string), 因为我们通过一个URL参数来传递查询信息给搜索接口。
http://127.0.0.1:9200/student/_search?q=name:test9我们仍然在请求路径中使用_search,并将查询本身赋值给参数 q= 。返回结果给出了所有的 test9。
{
    "took": 275,
    "timed_out": false,
    "_shards": {
        "total": 1,
        "successful": 1,
        "skipped": 0,
        "failed": 0
    },
    "hits": {
        "total": {
            "value": 11,
            "relation": "eq"
        },
        "max_score": 1.4060969,
        "hits": [
            {
                "_index": "student",
                "_type": "_doc",
                "_id": "21",
                "_score": 1.4060969,
                "_source": {
                    "love": "I like to collect rock albums",
                    "createTime": "2022-05-27 09:47:38",
                    "name": "test9",
                    "id": "21",
                    "age": 11
                }
            },
            {
                "_index": "student",
                "_type": "_doc",
                "_id": "22",
                "_score": 1.4060969,
                "_source": {
                    "love": "I love to go rock climbing",
                    "createTime": "2022-05-27 09:47:38",
                    "name": "test9",
                    "id": "22",
                    "age": 12
                }
            },
            ...省略
        ]
    }
}
综上,轻量搜索就介绍完了。那在实际生产当中,轻量搜索也是经常使用的一种搜索方式。Query-string 搜索通过命令虽然非常方便地进行临时性的及时搜索 ,但它有自身的局限性,参数传递不是很灵活,比如不利于我们传输一些复杂的查询。
2、表达式搜索
Elasticsearch 提供一个丰富灵活的查询语言叫做 查询表达式 , 它支持构建更加复杂和健壮的查询。这中查询也叫做领域特定语言(DSL), 会使用 JSON 构造了一个请求。
http://127.0.0.1:9200/student/_search

{
    "query": {
        "match": {
            "name": "test9"
        }
    }
}
返回结果与轻量搜索的查询一样,但还是可以看到有一些变化。请求不再使用 query-string 参数,而是一个JSON 体替代。同时使用了一个 match 查询(属于查询类型之一,老王会在后面文章继续介绍)。
3、复杂搜索
前面我们以及大致了解了Elasticsearch基本的一些查询方式,接下来我们尝试一些稍微复杂的搜索。
现在有这样一个业务场景:需要搜索名字为test9且年龄大于20岁以上的学生。那在表达式查询需要稍作调整下,此处需要使用过滤器filter,它可以支持高效执行一个结构化的JSON查询。
我们造几条测试数据,代码如下:
 //2、添加文档
for(int i = 21; i<=30; i++) {
    Student student = new Student();
    student.setId(""+i);
    student.setCreateTime(new Date());
    student.setName("test9");
    student.setAge(i-10);
    if(i%2 == 0) {
        student.setLove("I love to go rock climbing");
    }else{
        student.setLove("I like to collect rock albums");
    }
    Boolean add = IndexOperateUtil.addDocument(student, indexName);
    System.out.println("文档新增结果" + add);
}
请求如下,
http://127.0.0.1:9200/student/_search{
"query": {
"bool": {
"must": {
"match": {
"name": "test9"
}
},
"filter": {
"range": {
"age": {
"gt": 20
}
}
}
}
}
}此时查询结果如下,
{
    "took": 2,
    "timed_out": false,
    "_shards": {
        "total": 1,
        "successful": 1,
        "skipped": 0,
        "failed": 0
    },
    "hits": {
        "total": {
            "value": 11,
            "relation": "eq"
        },
        "max_score": 0.9916401,
        "hits": [
            {
                "_index": "student",
                "_type": "_doc",
                "_id": "9",
                "_score": 0.9916401,
                "_source": {
                    "love": "I like to collect rock albums",
                    "createTime": "2022-05-27 06:04:53",
                    "name": "test9",
                    "id": "9",
                    "age": 19
                }
            },
            {
                "_index": "student",
                "_type": "_doc",
                "_id": "21",
                "_score": 0.9916401,
                "_source": {
                    "love": "I love to go rock climbing",
                    "createTime": "2022-05-27 06:50:38",
                    "name": "test9",
                    "id": "21",
                    "age": 11
                }
            },
            ...省略
        ]
    }
}
其中这里的match与我们之前使用到的match查询是一样的,不同之处在于引入了range 过滤器 , 它可以根据范围进行检索,类似的查询还比较多,在这里就不逐一给大家介绍了,有兴趣的可以看官网。
4、全文搜索(相关性分析)
前面的搜索相对都很简单。现在我们来尝试一个稍微高级的全文搜索,这个搜索对于传统数据比较难搞定——模糊查询性能比较差。
业务场景:需要搜索所有学生中喜欢收集摇滚唱片的学生:
http://127.0.0.1:9200/student/_search{
"query" : {
"match" : {
"love" : "rock albums"
}
}
}我们依然使用之前的match查询在 love 属性上搜索 “rock albums” , 匹配到的文档如下:
{
    "took": 1,
    "timed_out": false,
    "_shards": {
        "total": 1,
        "successful": 1,
        "skipped": 0,
        "failed": 0
    },
    "hits": {
        "total": {
            "value": 30,
            "relation": "eq"
        },
        "max_score": 1,
        "hits": [
            {
                "_index": "student",
                "_type": "_doc",
                "_id": "21",
                "_score": 0.016878020, //相关性得分
                "_source": {
                    "love": "I like to collect rock albums",
                    "createTime": "2022-05-27 09:47:38",
                    "name": "test9",
                    "id": "21",
                    "age": 11
                }
            },
            {
                "_index": "student",
                "_type": "_doc",
                "_id": "22",
                "_score": 0.016878019, //相关性得分
                "_source": {
                    "love": "I love to go rock climbing",
                    "createTime": "2022-05-27 09:47:38",
                    "name": "test9",
                    "id": "22",
                    "age": 12
                }
            },
            ...省略
        ]
    }
}
我们发现,查询结果除了“rock albums”的数据外,还包含了“rock climbing”。
为什么会这样呢?
这里面有一个很重要的概念——相关性分析(_score)。Elasticsearch 默认按照相关性得分排序,即每个文档跟查询的匹配程度。最高得分的结果会排在最前面,以此类推。
但为什么 climbing 也作为结果返回了? 原因是love属性里提到了 “rock” 。因为只有 “rock” 而没有 albums ,所以相关性得分低于前者。
Elasticsearch中的相关性概念非常重要,这也是完全区别于传统关系型数据库的一个概念,传统数据库中一条记录要么匹配要么不匹配。
5、短语搜索
上面的需求找出一个属性中的独立单词是问题的,但有时候业务当中需要精确匹配一系列单词或者_短语_ 。 这时候该怎么办呢?
比如, 现在业务需要仅匹配同时包含 “rock” 和 “albums” ,并且二者是以短语 “rock albums” 的形式紧挨着的学生记录。
为此我们需要对match查询进行稍作调整,使用 match_phrase的查询:
http://127.0.0.1:9200/student/_search{
"query" : {
"match_phrase" : {
"love" : "rock albums"
}
}
}此时我们发现,仅返回了需要的“rock albums”。
{
    "took": 2,
    "timed_out": false,
    "_shards": {
        "total": 1,
        "successful": 1,
        "skipped": 0,
        "failed": 0
    },
    "hits": {
        "total": {
            "value": 11,
            "relation": "eq"
        },
        "max_score": 0.9916401,
        "hits": [
            {
                "_index": "student",
                "_type": "_doc",
                "_id": "9",
                "_score": 0.9916401,
                "_source": {
                    "love": "I like to collect rock albums",
                    "createTime": "2022-05-27 06:04:53",
                    "name": "test9",
                    "id": "9",
                    "age": 19
                }
            },
            ...省略
        ]
    }
}
6、高亮搜索
有些情况下,许多应用都会在每个搜索结果中高亮部分文本片段,以便让用户知道为何该文档符合查询条件。比如日常我们都会去百度搜索一下自己需要的关键内容。
那在 Elasticsearch 中检索出高亮片段也很容易。再次执行前面的查询,并增加一个新的 highlight 参数:
http://127.0.0.1:9200/student/_search{
"query" : {
"match_phrase" : {
"love" : "rock climbing"
}
},
"highlight": {
"fields" : {
"love" : {}
}
}
}当执行该查询时,返回结果与之前一样,此时返回结果中多了一个叫做 highlight 的节点。这个部分包含了love属性匹配的文本片段,并以 HTML 标签 封装。
{
    "took": 2,
    "timed_out": false,
    "_shards": {
        "total": 1,
        "successful": 1,
        "skipped": 0,
        "failed": 0
    },
    "hits": {
        "total": {
            "value": 11,
            "relation": "eq"
        },
        "max_score": 0.9916401,
        "hits": [
            {
                "_index": "student",
                "_type": "_doc",
                "_id": "9",
                "_score": 0.9916401,
                "_source": {
                    "love": "I like to collect rock albums",
                    "createTime": "2022-05-27 06:04:53",
                    "name": "test9",
                    "id": "9",
                    "age": 19
                },
                 "highlight": {
                    "about": [
                        "I love to go rock albums"
                    ]
                }
            },
            ...省略
        ]
    }
}
