pytorch生成的pth文件转成onnx文件再转成ncnn最后真机调试
官方与训练pth文件代码如下
import torch
import torchvision
import torch.nn as nn
import collections
from torchsummary import summary
from model import vgg
from torchvision import models

out_onnx = './vgg16Net.onnx'
model = models.vgg16(pretrained=True)
params = model.state_dict()
for k, v in params.items():
     print(k)
x = torch.randn(1, 3, 224, 224)
#define input and output nodes, can be customized
input_names = ["input"]
output_names = ["output"]
#convert pytorch to onnx
torch_out = torch.onnx.export(model, x, out_onnx, input_names=input_names, output_names=output_names)
自己的网络以及自己训练出来的pth模型代码
model_weight_path = "./vgg16Net.pth"   #自己的pth文件路径
out_onnx = './vgg16Net.onnx'           #保存生成的onnx文件路径
model = vgg(model_name="vgg16", num_classes=11)   # 加载自己的的网络
model.load_state_dict(torch.load(model_weight_path)) #加载自己的pth文件
model.eval()

x = torch.randn(1, 3, 224, 224)
#define input and output nodes, can be customized
input_names = ["input"]
output_names = ["output"]
#convert pytorch to onnx
torch_out = torch.onnx.export(model, x, out_onnx, input_names=input_names, output_names=output_names)
亲测可用
onnx文件装ncnn
首先需要编译ncnn:https://github.com/Tencent/ncnn
我是win10,按照readme的步骤一步一步进行:
1.下载代码:git clone https://github.com/Tencent/ncnn.git
2.cd ncnn (这里是你下载后解压的目录)
3.git init (没装git的需要装git)
4.git submodule update --init
编译protobuf
1.下载VS2015,VS2017都可以
2.安装protobuf( https://github.com/google/protobuf/archive/v3.4.0.zip)
3.解压后使用VS2015 x64本机工具命令提示符进入到解压目录(protobuf-3.4.0)


4然后依次输入下列命令
mkdir build-vs2015
cd build-vs2015
cmake -G"NMake Makefiles" -DCMAKE_BUILD_TYPE=Release -DCMAKE_INSTALL_PREFIX=%cd%/install -Dprotobuf_BUILD_TESTS=OFF -Dprotobuf_MSVC_STATIC_RUNTIME=OFF ../cmake
nmake
nmake install
如果其中有错误,自行百度,我在做这一步还是很流畅的
编译NCNN
1.依旧使用VS2015 x64本机工具命令提示符,然后进入到ncnn目录
cd ncnn
mkdir build-vs2015
cd build-vs2015
# 注意,这里换成自己的路径!
cmake -G"NMake Makefiles" -DCMAKE_BUILD_TYPE=Release -DCMAKE_INSTALL_PREFIX=%cd%/install
    -DProtobuf_INCLUDE_DIR=D:/1Aqilei/fy_classification/CNN/protobuf-3.4.0/build-vs2015/install/include
    -DProtobuf_LIBRARIES=D:/1Aqilei/fy_classification/CNN/protobuf-3.4.0/build-vs2015/install/lib/libprotobuf.lib
    -DProtobuf_PROTOC_EXECUTABLE=D:/workspace/protobuf-3.4.0/build-vs2015/install/bin/protoc.exe ..
    nmake
	nmake install
如果没有问题就编译好了
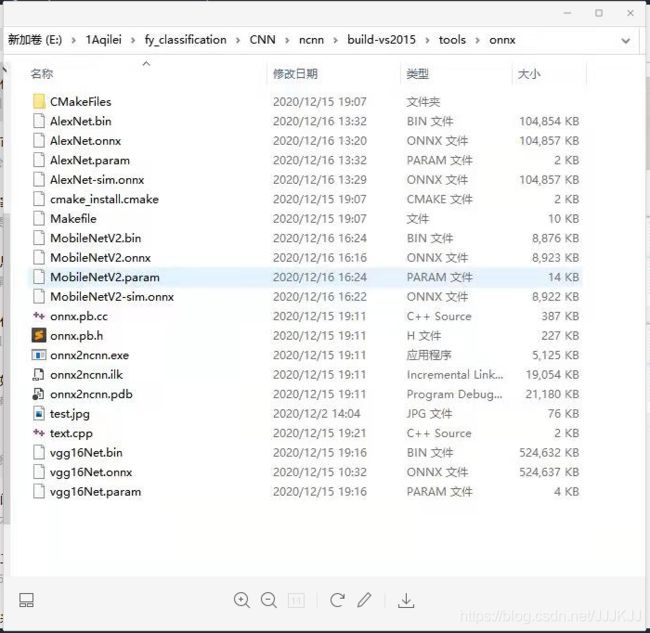
此使进入ncnn ->build-2015 ->tools->onnx目录下有onnx2ncnn.exe

然后执行命令:
onnx2ncnn vgg16Net.onnx vgg16Net.param vgg16Net.bin
生成resnet18的param文件和bin文件,其中,param文件保存了模型结构,bin文件保存了模型参数。
继续进行,回到tools目录下,会有ncnn2mem.exe可执行文件,对模型加密:
./ncnn2mem vgg16Net.param vgg16Net.bin vgg16Net.id.h vgg16Net.men.h
会生成vgg16Net.param.bin, vgg16Net.id.h, vgg16Net.mem.h。
android移植
下载编译好的工程https://github.com/chehongshu/ncnnforandroid_objectiondetection_Mobilenetssd/tree/master/MobileNetSSD_demo_single
1.首先将自己的模型文件vgg16Net.param.bin,vgg16Net.bin,标签文件label.txt(每行对应标签名) 拷贝到ncnnforandroid_objectiondetection_Mobilenetssd/MobileNetSSD_demo_single/app/src/main/asset/.
2.将vgg16Net.id.h文件拷贝到ncnnforandroid_objectiondetection_Mobilenetssd/MobileNetSSD_demo_single/app/src/main/cpp/
3.修改ncnnforandroid_objectiondetection_Mobilenetssd/MobileNetSSD_demo_single/app/src/main/cpp/MobileNetssd.cpp
文件:
修改include “MobileNetSSD_deploy.id.h” 为include “vgg16Net.id.h”
还有修改是
ex.input(vgg16Net_param_id::BLOB_input, in)
ex.extract(vgg16Ne_param_id::BLOB_output, out);
其实这里的修改是参考生成的vgg16Net.id.h
下一步就是下载Android Studio 我的是3.5.2,还要下载SDK,我下载的是最新版,然后NDK,我下载的是19c版本
这里我配置了一天!!!!