mysql的一些知识点
首先是mysql的必知必会 ,mysql必知必会包含了mysql的基础语法,模糊查询,触发器,视图,等常用的写法,
具体可以查看这一篇文章,写的是mysql必知必会源文档的代码;
https://hiszm.blog.csdn.net/article/details/119540143?spm=1001.2014.3001.5506
大量的数据插入,哪种效率比较高;
一亿条数据插入,用什么方法效率比较高
结论是 用批处理+事务性,事务性是保证一些列的SQL都执行成功,也可以理解为是一次“批处理”,强强联手,批处理+批处理,效率杠杠的。
JDBC手动开启事务:一定要注意。
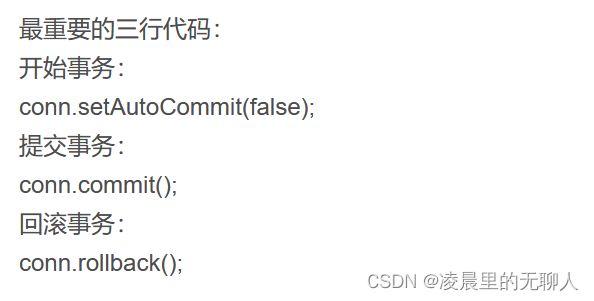 MySQL默认关闭批处理
开启方法
在原始的URL尾部添加开启指令,如下标注语句
url = jdbc:mysql://localhost:3306/mydb3 ?rewriteBatchedStatements=true
添加批处理
调用preparedStatement中的addBatch()方法,将一句sql添加到批中,循环调用,则可添加大量sql语句到批中。
执行批处理
调用executeBatch()方法,此方法为继承父类Statament中的方法。
批处理可将sql的执行效率大大提升
再回到 原文的代码里:
/该代码为开启事务
 private long begin = 33112001;//起始id
    private long end = begin+100000;//每次循环插入的数据量
    private String url = "jdbc:mysql://localhost:3306/bigdata?useServerPrepStmts=false&rewriteBatchedStatements=true&useUnicode=true&characterEncoding=UTF-8";
    private String user = "root";
    private String password = "0203";


@org.junit.Test
    public void insertBigData3() {
        //定义连接、statement对象
        Connection conn = null;
        PreparedStatement pstm = null;
        try {
            //加载jdbc驱动
            Class.forName("com.mysql.jdbc.Driver");
            //连接mysql
            conn = DriverManager.getConnection(url, user, password);
             //将自动提交关闭
             conn.setAutoCommit(false);
            //编写sql
            String sql = "INSERT INTO person VALUES (?,?,?,?,?,?,?)";
            //预编译sql
            pstm = conn.prepareStatement(sql);
            //开始总计时
            long bTime1 = System.currentTimeMillis();

            //循环10次,每次一万数据,一共10万
            for(int i=0;i<10;i++) {
                //开启分段计时,计1W数据耗时
                long bTime = System.currentTimeMillis();
                //开始循环
                while (begin < end) {
                    //赋值
                    pstm.setLong(1, begin);
                    pstm.setString(2, RandomValue.getChineseName());
                    pstm.setString(3, RandomValue.name_sex);
                    pstm.setInt(4, RandomValue.getNum(1, 100));
                    pstm.setString(5, RandomValue.getEmail(4, 15));
                    pstm.setString(6, RandomValue.getTel());
                    pstm.setString(7, RandomValue.getRoad());
                    //执行sql
                    pstm.execute();
                    begin++;
                }
                //提交事务
                conn.commit();
                //边界值自增10W
                end += 10000;
                //关闭分段计时
                long eTime = System.currentTimeMillis();
                //输出
                System.out.println("成功插入1W条数据耗时:"+(eTime-bTime));
            }
            //关闭总计时
            long eTime1 = System.currentTimeMillis();
            //输出
            System.out.println("插入10W数据共耗时:"+(eTime1-bTime1));
        } catch (SQLException e) {
            e.printStackTrace();
        } catch (ClassNotFoundException e1) {
            e1.printStackTrace();
        }
    }
可以看到不仅加了批处理,还加了事务的情况下,效率提高。
mybatis的批处理
<insert id="batchInsert" parameterType="java.util.List">
<!--        foreach 是专门对parameterType传入中的list集合进行遍历的-->
        INSERT INTO t_goods(title, sub_title, original_cost, current_price, discount, is_free_delivery, category_Id)
        VALUES
        <foreach collection="list" item="item" index="index" separator=",">
            (#{item.title},#{item.subTitle}, #{item.originalCost}, #{item.currentPrice}, #{item.discount}, #{item.isFreeDelivery}, #{item.categoryId})
<!--             -->
        </foreach>
    </insert>
可以看到写起来还是比较麻烦的,用mybatis-plus则可以很好的提高效率
在我们写springboot项目的时候,通常用到的是它整合的MP,MP里自带了批处理的方法,不需要我们重新去写Sql,而且通过注解的方式开启事务,很方面,具体如下:
使用 @Transactional 开启事务,
使用事务注解@Transactional 之前,应该先了解它的相关属性,避免在实际项目中踩中各种各样的坑点。
常见坑点1:遇到检测异常时,事务默认不回滚。
因分析:因为Spring的默认的事务规则是遇到运行异常(RuntimeException及其子类)和程序错误(Error)才会进行事务回滚,显然SQLException并不属于这个范围。如果想针对检测异常进行事务回滚,可以在@Transactional 注解里使用
rollbackFor 属性明确指定异常。例如下面这样,就可以正常回滚:
@Transactional(rollbackFor = Exception.class)
public void addMoney()
throws Exception {
//先增加余额
accountMapper.addMoney();
//然后遇到故障
throw new SQLException(“发生异常了…”);
}
常见坑点2: 在业务层捕捉异常后,发现事务不生效。
这是许多新手都会犯的一个错误,在业务层手工捕捉并处理了异常,你都把异常“吃”掉了,Spring自然不知道这里有错,更不会主动去回滚数据。例如:下面这段代码直接导致增加余额的事务回滚没有生效。
 @Transactional
 public void addMoney() throws Exception {
 //先增加余额 accountMapper.addMoney();
  //谨慎:尽量不要在业务层捕捉异常并处理
  try {
  throw new SQLException("发生异常了..");
  }
   catch (Exception e) {
   e.printStackTrace();
     }
  }
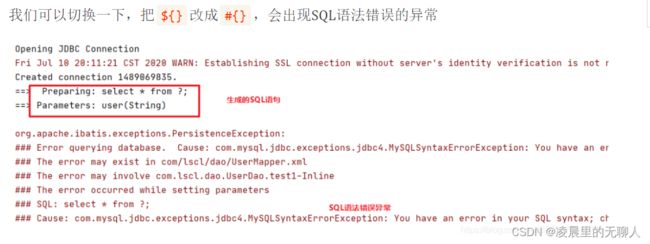
MyBaits中#{}和 的 真 正 区 别 , {}的真正区别, 的真正区别,{}的使用场景,#{}如何防止注入?
${}和#{}的区别
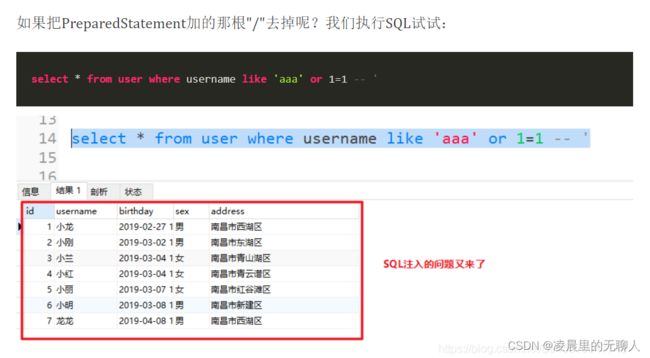
#{}匹配的是一个占位符,相当于JDBC中的一个?,会对一些敏感的字符进行过滤,编译过后会对传递的值加上双引号,因此可以防止SQL注入问题。
匹 配 的 是 真 实 传 递 的 值 , 传 递 过 后 , 会 与 s q l 语 句 进 行 字 符 串 拼 接 。 {}匹配的是真实传递的值,传递过后,会与sql语句进行字符串拼接。 匹配的是真实传递的值,传递过后,会与sql语句进行字符串拼接。{}会与其他sql进行字符串拼接,不能预防sql注入问题。
#{}底层是如何防止SQL注入的?
网上关于这类问题非常多,总结出来就两个原因:
1)#{}底层采用的是PreparedStatement,会预编译,因此不会产生SQL注入问题;
其实预编译是MySQL自己本身的功能,和PreparedStatement没关系;而且预编译也不是咱们理解的那个预编译,再者PreparedStatement底层默认根本没有用到预编译(要我们手动开启)!详细往下看
2)#{}不会产生字符串拼接, 会 产 生 字 符 串 拼 接 , 因 此 {}会产生字符串拼接,因此 会产生字符串拼接,因此{}会出现SQL注入问题;
这两个答案都经不起深究,最终答案也只是停留在表面,也没人知道具体是为什么。
为什么能防止SQL注入?
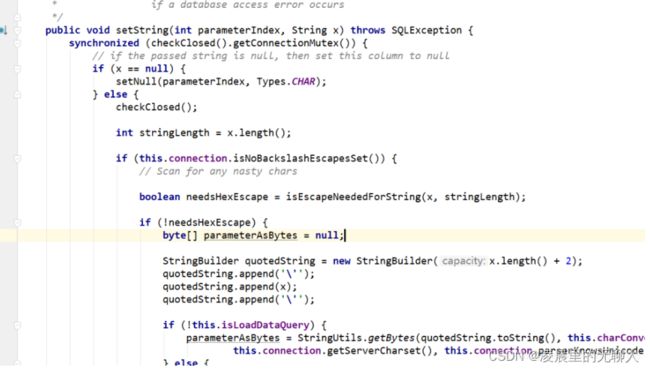
打开PreparedStatement类的setString()方法(MyBatis在#{}传递参数时,是借助setString()方法来完成,${}则不是):
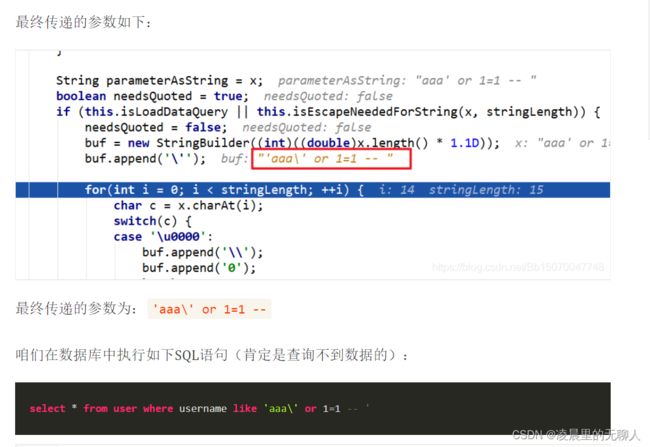
我们执行#{}的查询语句,打断点观察:


${}和#{}用法上的区别
例如现在要进行模糊查询,查询user表中姓张的所有员工的信息
sql语句为:select * from user where name like ‘张%’
此时如果传入的参数是 “张”
如果使用 : s e l e c t ∗ f r o m u s e r w h e r e n a m e l i k e ′ {}:select * from user where name like ' :select∗fromuserwherenamelike′{value}%’
生成的sql语句:select * from user where name like ‘张%’
如果使用#{}:select * from user where name like #{value}“%”
生成的sql语句:select * from user where name like ‘张’“%”
如果传入的参数是 “张%”
使用#{}:select * from user where name like #{value}
生成的sql语句:select * from user where name like ‘张%’
使用 : s e l e c t ∗ f r o m u s e r w h e r e n a m e l i k e ′ {}:select * from user where name like ' :select∗fromuserwherenamelike′{value}’
生成的sql语句:select * from user where name like ‘张%’
通过上面的SQL语句我们能够发现#{}是会加上双引号,而${}匹配的是真实的值。
还有一点就是如果使用 的 话 , 里 面 必 须 要 填 v a l u e , 即 : {}的话,里面必须要填value,即: 的话,里面必须要填value,即:{value},#{}则随意
什么情况下用${}?
参考文章:
https://blog.csdn.net/weixin_39789646/article/details/110265386?ops_request_misc=%257B%2522request%255Fid%2522%253A%2522165451571216781667851046%2522%252C%2522scm%2522%253A%252220140713.130102334.pc%255Fall.%2522%257D&request_id=165451571216781667851046&biz_id=0&utm_medium=distribute.pc_search_result.none-task-blog-2allfirst_rank_ecpm_v1~rank_v31_ecpm-1-110265386-null-null.142v11pc_search_result_control_group,157v13new_3&utm_term=url%E9%93%BE%E6%8E%A5%E5%BC%80%E5%90%AF%E4%BA%8B%E5%8A%A1&spm=1018.2226.3001.4187
https://mp.weixin.qq.com/s?__biz=MzkyNjI1OTI0Mw==&mid=2247495705&idx=1&sn=edf1735f6de606382e3d3bf8bbe54ede&chksm=c238b15df54f384becd82f4c13a6835e50b45dfc10cc43a726b5f35150b81758dfa69973a111&mpshare=1&scene=23&srcid=0527pcNuP9wyssbXhvErnfDV&sharer_sharetime=1654446507521&sharer_shareid=5e1f720976235b1e81fd0d6731dbec3a#rd
https://mp.weixin.qq.com/s?__biz=Mzk0MzIxNTMxNA==&mid=2247488734&idx=1&sn=6e839877d852c54531d81934b7180096&chksm=c3361363f4419a75e442e4523a687f4a19c1cf5779e81d9661df84c1cedd27ecf1ddb17c74dd&mpshare=1&scene=23&srcid=0112YCNjUfGJPyuKZYIzIvOI&sharer_sharetime=1654468248606&sharer_shareid=5e1f720976235b1e81fd0d6731dbec3a#rd


