利用redis解决恶意刷新和暴力请求
在实际项目使用中,要考虑服务被恶意请求和暴力攻击的情况,下面的教程,通过intercept和redis针对url+ip在一定时间内访问的次数来将ip禁用,可以根据自己的需求进行相应的修改,来打到自己的目的;
下边代码利用redis在拦截器解决暴力刷新
首先创建一个自定义的拦截器类,也是最核心的代码:
package com.example.springbootredis.config;

import com.alibaba.fastjson.JSON;
import com.example.springbootredis.util.IpAdrressUtil;
import com.example.springbootredis.util.RedisUtil;
import com.example.springbootredis.util.Result;
import lombok.RequiredArgsConstructor;
import lombok.extern.slf4j.Slf4j;
import org.springframework.stereotype.Component;
import org.springframework.web.servlet.HandlerInterceptor;
import org.springframework.web.servlet.ModelAndView;

import javax.servlet.http.HttpServletRequest;
import javax.servlet.http.HttpServletResponse;
import java.io.IOException;
import java.io.PrintWriter;

/**
 * springboot-study
 * ip+url重复请求现在拦截器
 *
 * @author : ZhangYuJie
 * @date : 2022-05-29 17:29
 **/
@Slf4j
@Component
@RequiredArgsConstructor
public class IpUrlLimitInterceptor implements HandlerInterceptor {
    private final RedisUtil redisUtil;

    private static final String LOCK_IP_URL_KEY = "lock_ip_";

    private static final String IP_URL_REQ_TIME = "ip_url_times_";

    private static final long LIMIT_TIMES = 5;

    private static final String IP_LOCK_TIME = "60";

    @Override
    public boolean preHandle(HttpServletRequest httpServletRequest, HttpServletResponse httpServletResponse, Object o) throws Exception {
        log.info("request请求地址uri={},ip={}", httpServletRequest.getRequestURI(), IpAdrressUtil.getIpAddr(httpServletRequest));
        if (ipIsLock(IpAdrressUtil.getIpAddr(httpServletRequest))) {
            log.info("ip访问被禁止={}", IpAdrressUtil.getIpAddr(httpServletRequest));
            returnJson(httpServletResponse, JSON.toJSONString(Result.success("ip访问被禁止")));
            return false;
        }
        if (!addRequestTime(IpAdrressUtil.getIpAddr(httpServletRequest), httpServletRequest.getRequestURI())) {
            returnJson(httpServletResponse, JSON.toJSONString(Result.success("ip访问被禁止")));
            return false;
        }
        return true;
    }

    @Override
    public void postHandle(HttpServletRequest httpServletRequest, HttpServletResponse httpServletResponse, Object o, ModelAndView modelAndView) throws Exception {

    }

    @Override
    public void afterCompletion(HttpServletRequest httpServletRequest, HttpServletResponse httpServletResponse, Object o, Exception e) throws Exception {

    }

    /**
     * 判断ip是否被禁用
     *
     * @param ip
     * @return
     */
    private Boolean ipIsLock(String ip) {
        if (redisUtil.hasKey(LOCK_IP_URL_KEY + ip)) {
            return true;
        }
        return false;
    }

    /**
     * 记录请求次数
     *
     * @param ip
     * @param uri
     * @return
     */
    private Boolean addRequestTime(String ip, String uri) {
        String key = IP_URL_REQ_TIME + ip + uri;
        if (redisUtil.hasKey(key)) {
            // 如果key存在,次数+1
            long time = redisUtil.incr(key, (long) 1);
            log.info("time:{}", time);
            if (time >= LIMIT_TIMES) {
                // 如果超过限制次数,则设置ip被禁用 60秒
                redisUtil.getLock(LOCK_IP_URL_KEY + ip, ip, IP_LOCK_TIME);
                return false;
            }
        } else {
            // ip+uri请求次数为1,1秒后过期
            redisUtil.getLock(key, "1", "1");
            log.info("记录请求次数1");
        }
        return true;
    }

    private void returnJson(HttpServletResponse response, String json) throws Exception {
        PrintWriter writer = null;
        response.setCharacterEncoding("UTF-8");
        response.setContentType("text/json; charset=utf-8");
        try {
            writer = response.getWriter();
            writer.print(json);
        } catch (IOException e) {
            log.error("LoginInterceptor response error ---> {}", e.getMessage(), e);
        } finally {
            if (writer != null) {
                writer.close();
            }
        }
    }

}
代码中redis的使用的是分布式锁的形式,这样可以最大程度保证线程安全和功能的实现效果。代码中设置的是1S内同一个接口通过同一个ip访问5次,就将该ip禁用60S,根据自己项目需求可以自己适当修改,实现自己想要的功能;
redis分布式锁的关键代码:
package com.example.springbootredis.util;

import lombok.RequiredArgsConstructor;
import lombok.extern.slf4j.Slf4j;
import org.springframework.data.redis.core.RedisTemplate;
import org.springframework.data.redis.core.script.DefaultRedisScript;
import org.springframework.data.redis.core.script.RedisScript;
import org.springframework.stereotype.Component;

import java.util.Collections;

/**
 * springboot-study
 *
 *
 * @author : ZhangYuJie
 * @date : 2022-05-29 17:30
 **/
@Component
@Slf4j
@RequiredArgsConstructor
public class RedisUtil {

    private static final Long SUCCESS = 1L;

    private final RedisTemplate<String, Object> redisTemplate;

    /**
     * 获取锁
     *
     * @param lockKey
     * @param value
     * @param expireTime:单位-秒
     * @return
     */
    public boolean getLock(String lockKey, Object value, String expireTime) {
        boolean ret = false;
        try {
            String script = "if redis.call('setNx',KEYS[1],ARGV[1]) then if redis.call('get',KEYS[1])==ARGV[1] then return redis.call('expire',KEYS[1],ARGV[2]) else return 0 end end";

            RedisScript<Long> redisScript = new DefaultRedisScript<>(script, Long.class);
            Long result = redisTemplate.execute(redisScript, Collections.singletonList(lockKey), value, expireTime);
            log.info("result:{}", result);
            if (SUCCESS.equals(result)) {
                return true;
            }

        } catch (Exception e) {
            log.error("getLock error:{}", e.getMessage(), e);
        }
        return ret;
    }

    /**
     * 释放锁
     *
     * @param lockKey
     * @param value
     * @return
     */
    public boolean releaseLock(String lockKey, String value) {

        String script = "if redis.call('get', KEYS[1]) == ARGV[1] then return redis.call('del', KEYS[1]) else return 0 end";

        RedisScript<String> redisScript = new DefaultRedisScript<>(script, String.class);

        Object result = redisTemplate.execute(redisScript, Collections.singletonList(lockKey), value);
        if (SUCCESS.equals(result)) {
            return true;
        }

        return false;

    }

    /**
     * 设置一个自增的数据
     *
     * @param key
     * @param num
     */
    public Long incr(String key, Long num) {
        return redisTemplate.opsForValue().increment(key, num);
    }

    public Boolean hasKey(String key) {
        return redisTemplate.hasKey(key);
    }

}
最后将上面自定义的拦截器通过registry.addInterceptor添加一下,就生效了;
package com.example.springbootredis.config;

import lombok.RequiredArgsConstructor;
import lombok.extern.slf4j.Slf4j;
import org.springframework.context.annotation.Configuration;
import org.springframework.web.servlet.config.annotation.InterceptorRegistry;
import org.springframework.web.servlet.config.annotation.WebMvcConfigurer;

/**
 * springboot-study
 *
 *
 * @author : ZhangYuJie
 * @date : 2022-05-29 17:31
 **/
@Configuration
@Slf4j
@RequiredArgsConstructor
public class MyWebAppConfig implements WebMvcConfigurer {
    private final IpUrlLimitInterceptor ipUrlLimitInterceptor;

    @Override
    public void addInterceptors(InterceptorRegistry registry) {
        registry.addInterceptor(ipUrlLimitInterceptor).addPathPatterns("/**");
    }
}
写个测试controller测试一下
package com.example.springbootredis.controller;

import com.example.springbootredis.util.Result;
import lombok.RequiredArgsConstructor;
import lombok.extern.slf4j.Slf4j;
import org.springframework.web.bind.annotation.GetMapping;
import org.springframework.web.bind.annotation.RequestMapping;
import org.springframework.web.bind.annotation.RestController;

/**
 * springboot-study
 *
 *
 * @author : ZhangYuJie
 * @date : 2022-05-29 18:08
 **/
@Slf4j
@RestController
@RequestMapping("/test")
@RequiredArgsConstructor
public class TestController {
    @GetMapping("/ip_test")
    public Result<String> tabCnt() {
        return Result.success("成功");
    }
}
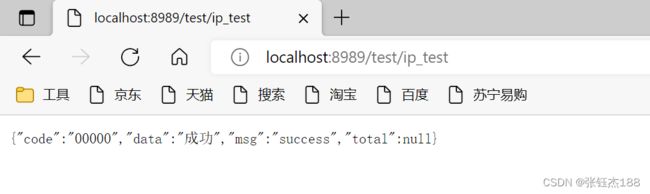
一次请求:
模拟暴力请求:

我在浏览器不停刷新,可以看到已经被拦到了。
当然如果有人不停变换IP去刷量,现在做法是拦不到的。
以上代码地址