SpringBoot框架学习(六)——数据访问
文章目录
- 十、数据访问
-
- 1.整合基本JDBC与数据源
- 2.DataSourceInitializer
- 3.案例
- 4.配置Druid
-
- <1>配置属性
- <2>配置Druid数据源监控
- 5.整合Mybatis与springboot
-
- <1>搭建环境
- <2>封装表的数据
- <3>使用注解来用mybatis进行crud操作
-
- 1.创建两张表的接口
- 2.向页面发送请求,执行请求对应的数据
- 3.自定义Mybatis的Config
- <4>使用配置文件来用mybatis进行crud操作
-
- 1.创建一个接口
- 2.写配置文件
- 3.写Sql映射文件
- 4.要让Mybatis检索到映射文件的存在
- 5.可以在2的配置 文件中设置自己想实现的设置
- 6.Spring Data JPA
-
- <1>SpringData简介
- <2>JPA与SpringData
- <3>导入环境
- <4>整合JPA案例
-
- 1.首先创建一个User类,创建几个私有属性,并且生成get Set方法
- 2.编写一个DAO接口来操作实体类对应的数据表(Repository)
- 3.在yml文件中进行基本的配置
- 4.测试
- 5.crud
十、数据访问
1.整合基本JDBC与数据源
创建工程,导入基本的jar包
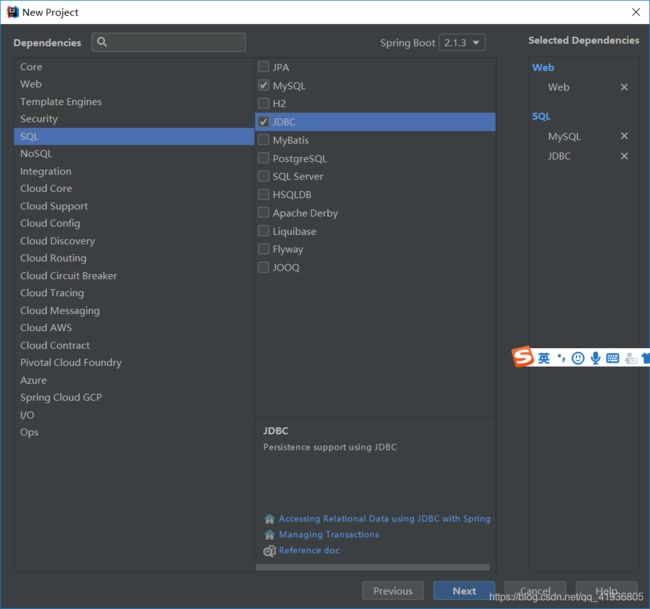
然后再resource目录下新建一个yml配置文件连接到我们的oracle数据库
spring:
  datasource:
    username: SYSTEM
    password: xxx
    url: jdbc:oracle:thin:@127.0.0.1:1521:xe
    driver-class-name: oracle.jdbc.OracleDriver
2.DataSourceInitializer
首先,DataSourceInitializer是ApplicationListener的一个继承类,是一个监听器
作用
1.runSchemaScripts()运行建表语句
2.runDataScripts() 运行插入数据的sql语句
生效方法
只需要将resource目录下的sql文件命名为schema-xx.sql或者data-xx.sql就可以进行自动识别了
3.案例
首先再resource目录下创建一个.sql文件
create table springTest(id NUMBER(8),interest NUMBER(5,2),seven NUMBER(5,2))
然后把这个sql文件添加路径到我们的yml文件中
    schema:
      - classpath:160900.sql
然后测试我们的代码
@Controller
public class HelloController {
    @Autowired
    JdbcTemplate jdbcTemplate;

    @ResponseBody
    @GetMapping("/query")
    public Map<String, Object> map() {
        List<Map<String, Object>> list =
                jdbcTemplate.queryForList("SELECT id,interest from springTest");
        return list.get(0);
    }
}
向/query发送一个get请求,然后去进入到localhost:10101/就可以看见一个json格式的数据显示出来
(这里已经像表中自动填入了一行数据,并且设置了端口号是10101,不然会出405错误)
4.配置Druid
<1>配置属性
首先先用maven日常引入druid的配置在pom文件里
	<dependency>
            <groupId>com.alibabagroupId>
            <artifactId>druidartifactId>
            <version>1.1.12version>
        dependency>
接下来在yml文件里把数据源地址改成druid
type: com.alibaba.druid.pool.DruidDataSource
然后再进行一些其他配置
#   数据源其他配置
    initialSize: 5
    minIdle: 5
    maxActive: 20
    maxWait: 60000
    timeBetweenEvictionRunsMillis: 60000
    minEvictableIdleTimeMillis: 300000
    validationQuery: SELECT 1 FROM DUAL
    testWhileIdle: true
    testOnBorrow: false
    testOnReturn: false
    poolPreparedStatements: true
#   配置监控统计拦截的filters,去掉后监控界面sql无法统计,'wall'用于防火墙
    filters: stat,wall,log4j
    maxPoolPreparedStatementPerConnectionSize: 20
    useGlobalDataSourceStat: true
    connectionProperties: druid.stat.mergeSql=true;druid.stat.slowSqlMillis=500
然后重新运行发现还是老样子,并没有提示以上属性,那是因为我们需要手动配置
@Configuration
public class DruidConfig {

    @ConfigurationProperties(prefix = "spring.dataSource")
    @Bean
    public DataSource druid(){
        return new DruidDataSource();
    }
}
重新进行debug
发现已经包含了上面的属性
<2>配置Druid数据源监控
	#配置druid的监控
    #1.配置一个管理后台的Servlet
    @Bean
    public ServletRegistrationBean statViewServlet(){
        ServletRegistrationBean bean = new ServletRegistrationBean(new StatViewServlet(), "/druid/*");
        Map<String, String> initParams = new HashMap<>();
        initParams.put("loginUsername","admin");
        initParams.put("loginPassword", "123456");
        initParams.put("allow", "");//默认所有人都能访问
        initParams.put("deny", "192.168.243.1");//设置谁不能访问

        bean.setInitParameters(initParams);
        return bean;
    }


    #2.配置一个监控的filter
    @Bean
    public FilterRegistrationBean webStatFilter() {
        FilterRegistrationBean filterRegistration = new FilterRegistrationBean();
        filterRegistration.setFilter(new WebStatFilter());
        Map<String, String> initParams = new HashMap<>();
        initParams.put("exclusion", "*.js,*.css,/druid/*");//设置谁可以不被拦截
        filterRegistration.setInitParameters(initParams);

        filterRegistration.setUrlPatterns(Arrays.asList("/*"));
        return filterRegistration;
    }
}
重新运行打开localhost:10101/druid会自动跳转到login界面,进行登录即可,然后就可以看到监控后台的界面了。
5.整合Mybatis与springboot
<1>搭建环境
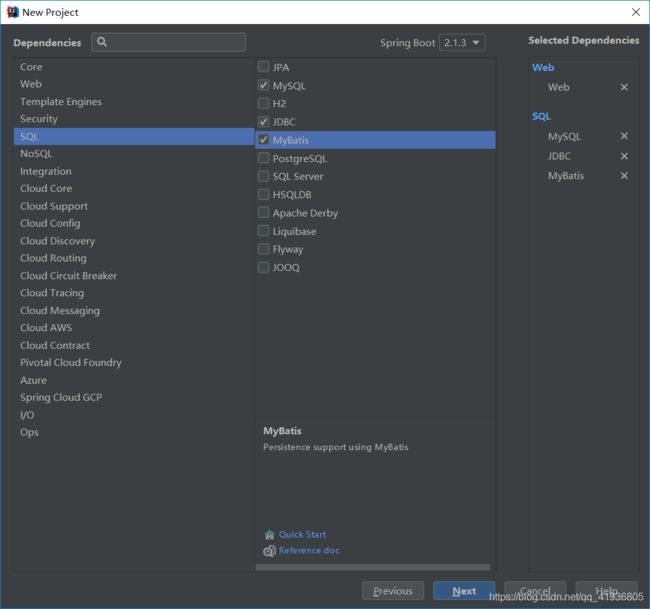
新建工程,添加mybatis依赖,然后建立之后再添加druid依赖
        <dependency>
            <groupId>com.alibabagroupId>
            <artifactId>druidartifactId>
            <version>1.1.8version>
        dependency>
然后重新新建yml文件,连接数据库,并且配置druid,书写druid的config类进行配置,可以参考上面,这里不多解释了。
添加sql文件的路径
    schema:
      - classpath:sql/160900.sql
然后添加log4j的pom依赖,不然会报错说找不到log4j,然后运行,来到localhost:druid,熟悉的界面
<2>封装表的数据
Employee
package springbootmybatis.mybatisdruid.bean;

public class Employee {
    private Integer id;
    private String lastName;
    private Integer gender;
    private String email;
    private Integer dId;

    public Integer getId() {
        return id;
    }

    public String getLastName() {
        return lastName;
    }

    public Integer getGender() {
        return gender;
    }

    public String getEmail() {
        return email;
    }

    public Integer getdId() {
        return dId;
    }
}
department
package springbootmybatis.mybatisdruid.bean;

public class department {
    private Integer id;
    private String departmentName;

    public Integer getId() {
        return id;
    }

    public String getDepartmentName() {
        return departmentName;
    }
}
<3>使用注解来用mybatis进行crud操作
1.创建两张表的接口
#指定是一个操作数据库的mapper
@Mapper
public interface DepartmentMapper {

}
另一张表也一样,以这张表为例
@Mapper
public interface DepartmentMapper {
    @Select("select * from department where id =#{id}")
    public Department getDeptById(Integer id);

    @Delete("select * from department where id=#{id}")
    public Department deleteDeptById(Integer id);

    @Insert("insert into department(departmentName)values (#{departmentName})")
    public Department insertDept(Department department);

    @Update("update department set departmentName =#{departmentName} where id=")
    public Department updateDept(Department department);

}
2.向页面发送请求,执行请求对应的数据
@RestController#不返回页面直接返回json
public class DeptController {
    @Autowired
    DepartmentMapper departmentMapper;

    @GetMapping("/dept/{id}")
    public Department getDepartment(@PathVariable("id") Integer id) {
        return departmentMapper.getDeptById(id);
    }

    @GetMapping("/dept")
    public Department insertDept(Department department) {
        departmentMapper.insertDept(department);
        return department;
    }
}
然后运行来到对应页面测试即可(不要忘了创建表)
localhost:10101/dept/1
localhost:10101/dept?departmentName=LO
这时如果我们想要获得自增主键的话,只要在对应的语句前设置一个Option注解即可
    @Options(useGeneratedKeys = true,keyProperty = "id")
    @Insert("insert into department(departmentName)values (#{departmentName})")
    public int insertDept(Department department);
3.自定义Mybatis的Config
#设置驼峰命名法
@org.springframework.context.annotation.Configuration
public class MybatisConfig {
    @Bean
    public ConfigurationCustomizer configurationCustomizer(){
        return new ConfigurationCustomizer(){
            @Override
            public void customize(Configuration configuration) {
                configuration.setMapUnderscoreToCamelCase(true);
            }
        };
    }
}
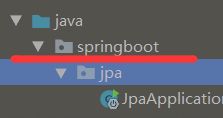
在主类中设置一个注解MapperScan可以扫描所有的Mapper接口
@MapperScan(value = "springbootmybatis.mybatisdruid.mapper")
<4>使用配置文件来用mybatis进行crud操作
1.创建一个接口
public interface EmployeeMapper {

    public Employee getEmpById(Integer id);

    public void insertEmp(Employee employee);

}
2.写配置文件
<configuration >

configuration>
3.写Sql映射文件
<mapepr namespace="org.mybatis.example.BlogMapper">
    <select id="selectBlog" resultType="Blog">
        select * from Blog where id=#{id}
    select>
mapepr>
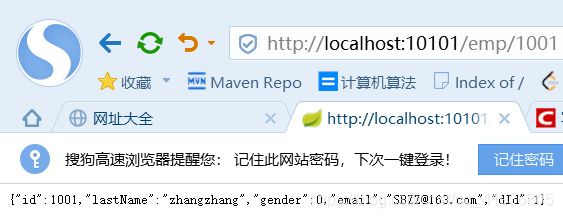
4.要让Mybatis检索到映射文件的存在
来到配置界面
@Autowired
EmployeeMapper employeeMapper;

@GetMapping("/emp/{id}")
    public Employee getEmp(@PathVariable("id") Integer id) {
        return employeeMapper.getEmpById(id);

    }
5.可以在2的配置 文件中设置自己想实现的设置
<settings>
        <setting name="mapUnderscoreToCamelCase" value="true"/>
    settings>
6.Spring Data JPA
<1>SpringData简介
概念:
SpringData项目的目的是为了简化构建基于Spring框架应用的数据访问技术,包括非关系型数据库,MapReduce框架,云服务等等;另外也包含对关系型数据库的访问支持
特点:
SpringData提供统一的API来对数据访问层进行操作;这主要是SpringDataCommons项目来实现的。SpringDataCommons让我们在使用sql,nosql的时候都有基于spring的统一标准,标准包括crud等等相关操作。
统一接口:
Repository
RevisionRepository
PS:
乐观锁机制:
认为数据一般情况下不会造成冲突,所以在数据进行提交更新的时候,才会正式对数据的冲突与否进行检测,如果发现冲突了,则让用户返回错误的信息,让用户决定如何去做。
CrudRepository
PagingAndSortingRepository
提供数据访问模板xxxTemplate
就像JDBCTemplate…
JPA与SpringData
<2>JPA与SpringData
(1)JPARepositor基本功能
(2)定义符合规范的方法命名
(3)@Query自定义查询,定制查询Sql
(4)Specifications查询(SpringDataJPA支持JPA2.0 的Criteria查询)
<3>导入环境
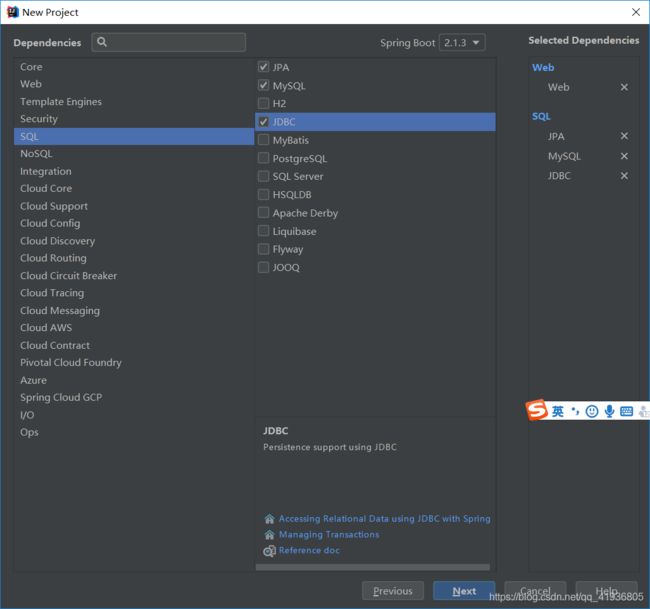
继续在resource目录下创建application.yml进行我们的数据库连接
spring:
  datasource:
    username: SYSTEM
    password: 1
    url: jdbc:oracle:thin:@127.0.0.1:1521:xe
    driver-class-name: oracle.jdbc.OracleDriver
<4>整合JPA案例
1.首先创建一个User类,创建几个私有属性,并且生成get Set方法
package springboot.entity;

public class User {

    private Integer id;
    private String name;
    private String email;

    public Integer getId() {
        return id;
    }

    public void setId(Integer id) {
        this.id = id;
    }

    public String getName() {
        return name;
    }

    public void setName(String name) {
        this.name = name;
    }

    public String getEmail() {
        return email;
    }

    public void setEmail(String email) {
        this.email = email;
    }
}
在此基础上,使用JPA注解配置映射关系,并且标记主键属性,列属性,和其他属性
package springboot.entity;


import javax.persistence.*;

#使用JPA注解配置映射关系
@Entity #告诉JPA这是一个实体类(和数据表映射的类)
@Table(name = "tbq_user")  #@Table来指定和哪个数据表对应;如果省略默认表名默认就叫所谓的类名也就是user(还得小写)
public class User {

    @Id #这是一个主键
    @GeneratedValue(strategy = GenerationType.IDENTITY)#自增主键
    private Integer id;

    @Column(name = "last_Name",length = 50)#这是和数据表对应的一个列
    private String name;
    @Column #默认列名就是属性名
    private String email;

    public Integer getId() {
        return id;
    }

    public void setId(Integer id) {
        this.id = id;
    }

    public String getName() {
        return name;
    }

    public void setName(String name) {
        this.name = name;
    }

    public String getEmail() {
        return email;
    }

    public void setEmail(String email) {
        this.email = email;
    }
}
2.编写一个DAO接口来操作实体类对应的数据表(Repository)
//继承JpaRepository来完成对数据库的操作
public interface UserRepository extends
									JpaRepository<User,Integer> {//传入操作的数据表和主键类型

}
3.在yml文件中进行基本的配置
  jpa:
    hibernate:
      ddl-auto: update
#      更新或者创建数据表结构
    show-sql: true
#    控制台显示代码
4.测试
运行后![]()
的确创建出来了
5.crud
写一个UserController方法,向里面注入userRepository,这里面封装好了crud操作,直接调用即可
package springboot.controller;

import org.springframework.beans.factory.annotation.Autowired;
import org.springframework.web.bind.annotation.GetMapping;
import org.springframework.web.bind.annotation.PathVariable;
import org.springframework.web.bind.annotation.RestController;
import springboot.entity.User;
import springboot.repository.UserRepository;

@RestController
public class UserController {
    //想要进行增删改查,直接注入userRepository即可
    @Autowired
    UserRepository userRepository;

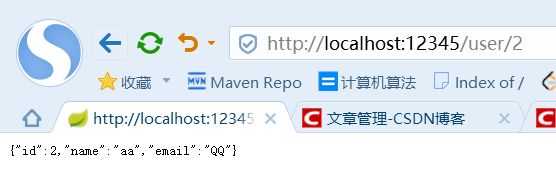
    @GetMapping("/user/{id}")
    public User getUserById(@PathVariable("id") Integer id) {
        User user = userRepository.findOne(id);
        return user;
    }

    @GetMapping("/user")
    public User insertUser(User user) {
        User save = userRepository.save(user);
        return save;
    }
}
