一、为什么打包
关于此问题,网上众说纷纭。结合个人理解以及网上说法,打成jar包是为了方便别人使用。 如果是运行java程序,就不需要在寻找包含main方法的类去执行;如果是使用第三方jar包,直接在自己项目中导入jar包,而不是复制一堆类文件。打成war包是真实生产环境选择的web应用部署方式,网上说这样不会像直接复制文件夹那样可能造成文件丢失,而且服务器会对应用做优化,如删除空文件夹等。以上仅供了解。
二、如何打包
本机环境windows 10, jdk 1.8
打成jar或war包使用的是相同的工具 jdk/bin/jar.exe
1、打成jar包
|-----------------可以略过,仅为了方便理解打包需要注意的事项------------------|
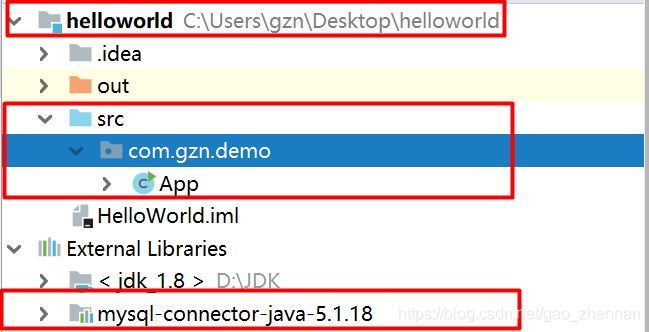
项目简介
数据库表结构及其建表语句
CREATE TABLE `customer`  (
  `cust_id` int(11) NOT NULL AUTO_INCREMENT,
  `cust_name` char(50) CHARACTER SET utf8 COLLATE utf8_general_ci NOT NULL,
  `cust_address` char(50) CHARACTER SET utf8 COLLATE utf8_general_ci NULL DEFAULT NULL,
  `cust_city` char(50) CHARACTER SET utf8 COLLATE utf8_general_ci NULL DEFAULT NULL,
  `cust_state` char(5) CHARACTER SET utf8 COLLATE utf8_general_ci NULL DEFAULT NULL,
  `cust_zip` char(10) CHARACTER SET utf8 COLLATE utf8_general_ci NULL DEFAULT NULL,
  `cust_country` char(50) CHARACTER SET utf8 COLLATE utf8_general_ci NULL DEFAULT NULL,
  `cust_contact` char(50) CHARACTER SET utf8 COLLATE utf8_general_ci NULL DEFAULT NULL,
  `cust_email` char(255) CHARACTER SET utf8 COLLATE utf8_general_ci NULL DEFAULT NULL,
  PRIMARY KEY (`cust_id`) USING BTREE
) ENGINE = InnoDB AUTO_INCREMENT = 10006 CHARACTER SET = utf8 COLLATE = utf8_general_ci ROW_FORMAT = Compact;

INSERT INTO `customer` VALUES (10001, 'Coyote Inc.', '200 Maple Lane', 'Detroit', 'MI', '44444', 'china', 'Y Lee', '[email protected]');
INSERT INTO `customer` VALUES (10002, 'Mouse House', '333 Fromage Lane', 'Columbus', 'OH', '43333', '', 'Jerry Mouse', NULL);
INSERT INTO `customer` VALUES (10003, 'Wascals', '1 Sunny Place', 'Muncie', 'IN', '42222', 'USA', 'Jim Jones', '[email protected]');
INSERT INTO `customer` VALUES (10004, 'Yosemite Place', '829 Riverside Drive', 'Phoenix', 'AZ', '88888', 'UK', 'Y Sam', '[email protected]');
INSERT INTO `customer` VALUES (10005, 'gzn or 1=1', '4545 53rd Street', 'Chicago', 'IL', '54545', '', 'E Fudd', NULL);
项目结构
app.java
package com.gzn.demo;

import java.sql.*;
import java.util.Scanner;

/**
 * @author: gzn
 * @date: 2019/4/13 10:53
 */
public class App {
    public static void main(String[] args) {

        int count = Integer.valueOf(args[0]);
        System.out.println("请输入要查询用户的条数?(0到5之间):");
        Scanner sc = new Scanner(System.in);
        int count = sc.nextInt();

        String driver = "com.mysql.jdbc.Driver";
        String url = "jdbc:mysql://localhost:3306/corejava";
        String username = "root";
        String password = "root";
        String sql = "select cust_id, cust_name, cust_address, cust_city from customer limit 0, ? ";

        try {
            Class.forName(driver);
            Connection conn = DriverManager.getConnection(url, username, password);
            PreparedStatement pstat = conn.prepareStatement(sql);
            pstat.setInt(1, count);
            ResultSet rs = pstat.executeQuery();
            while(rs.next()) {
                System.out.println("cust_id:" + rs.getObject("cust_id").toString());
                System.out.println("cust_name: " + rs.getObject("cust_name").toString());
                System.out.println("cust_address: " + rs.getObject("cust_address").toString());
                System.out.println("cust_city:" + rs.getObject("cust_city").toString());
                System.out.println("----------------------" +"\n");
            }

        } catch (ClassNotFoundException e) {
            e.printStackTrace();
        } catch (SQLException e) {
            e.printStackTrace();
        }
    }

}
|---------------------------------------------------------------------------|
1.1、使用jar手动打包
(1)使用cmd找到项目编译输出的路径
(2) 在该目录下运行命令 jar -cvf helloworld.jar .
-c (create,创建)表时要创建文件
-v (verbose,冗长的,详细的) 在控制台打印压缩详情
-f (filename)指定压缩文件名
helloworld.jar 文件名可以自定义
. 表示helloworld目录下的所有文件,这里一定要写“.”,其他可能出错。(补充,*星号也可以)
至此打包成功,但不能运行。想要可以运行还要修改helloword.jar中的MANIFEST.MF文件。
(3)使用解压缩工具打开helloword.jar并编辑META-INF/MANIFEST.MF添加属性
MANIFEST.MF初始状态
Manifest-Version: 1.0
Created-By: 1.8.0_161 (Oracle Corporation)
添加属性:(注意,冒号为英文冒号且冒号后有空格)
Main-Class: 包含main方法的类
Class-Path: 依赖的jar包的路径,如果依赖多个jar包,使用空格隔开
路径:相对路径,jar包相对于helloworld.jar文件的路径
绝对路径,jar包在操作系统中的路径
常用相对路径,将依赖的jar包和自己的jar包放在同一级目录下,这样Class-Path直接写依赖jar包的名字即可。
添加属性后状态:
Manifest-Version: 1.0
Created-By: 1.8.0_161 (Oracle Corporation)
Class-Path: mysql-connector-java-5.1.18.jar
Main-Class: com.gzn.demo.App
(4)运行测试
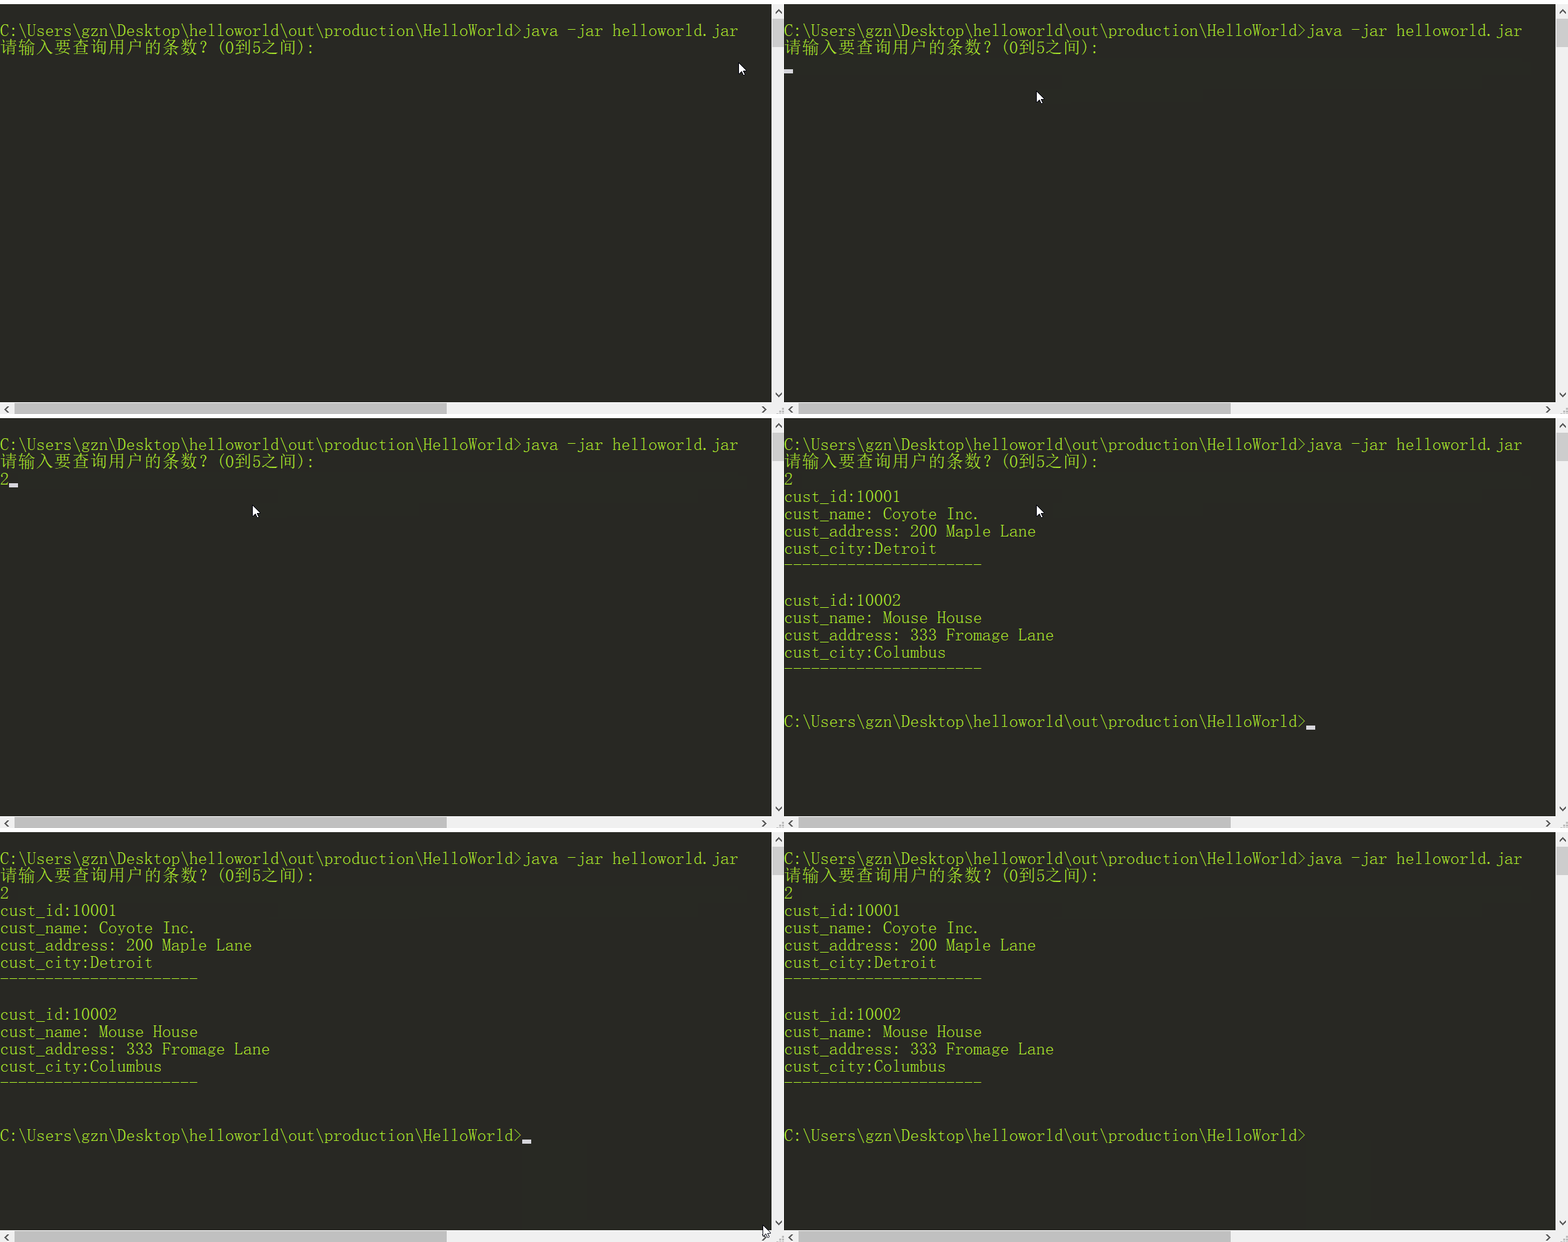
将依赖复制到helloworld.jar 同级目录下,使用 java -jar helloworld.jar 运行程序。
如果jar包仅是为了供其他开发者使用,不需要运行,则进行到第(2)步即可。
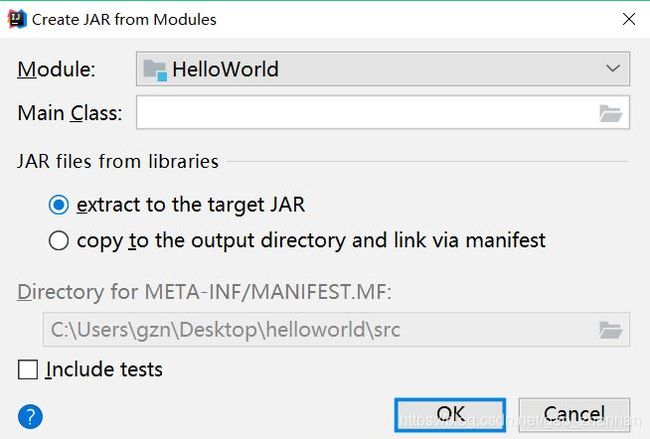
1. 2、使用IDEA进行打包
Main Class: 包含main方法的类;
extract to the target JAR: 提取目标jar,此选项需要你为依赖的jar配置绝对路径。
copy to the output directory and link via manifest: 将依赖的jar复制到输出目录中,即和你项目打包的jar在同一级目录。这样IDEA就可以在MENIFEST.MF为Class-Path属性直接配置相对路径。
Output Directory: 打包后的输出路径。
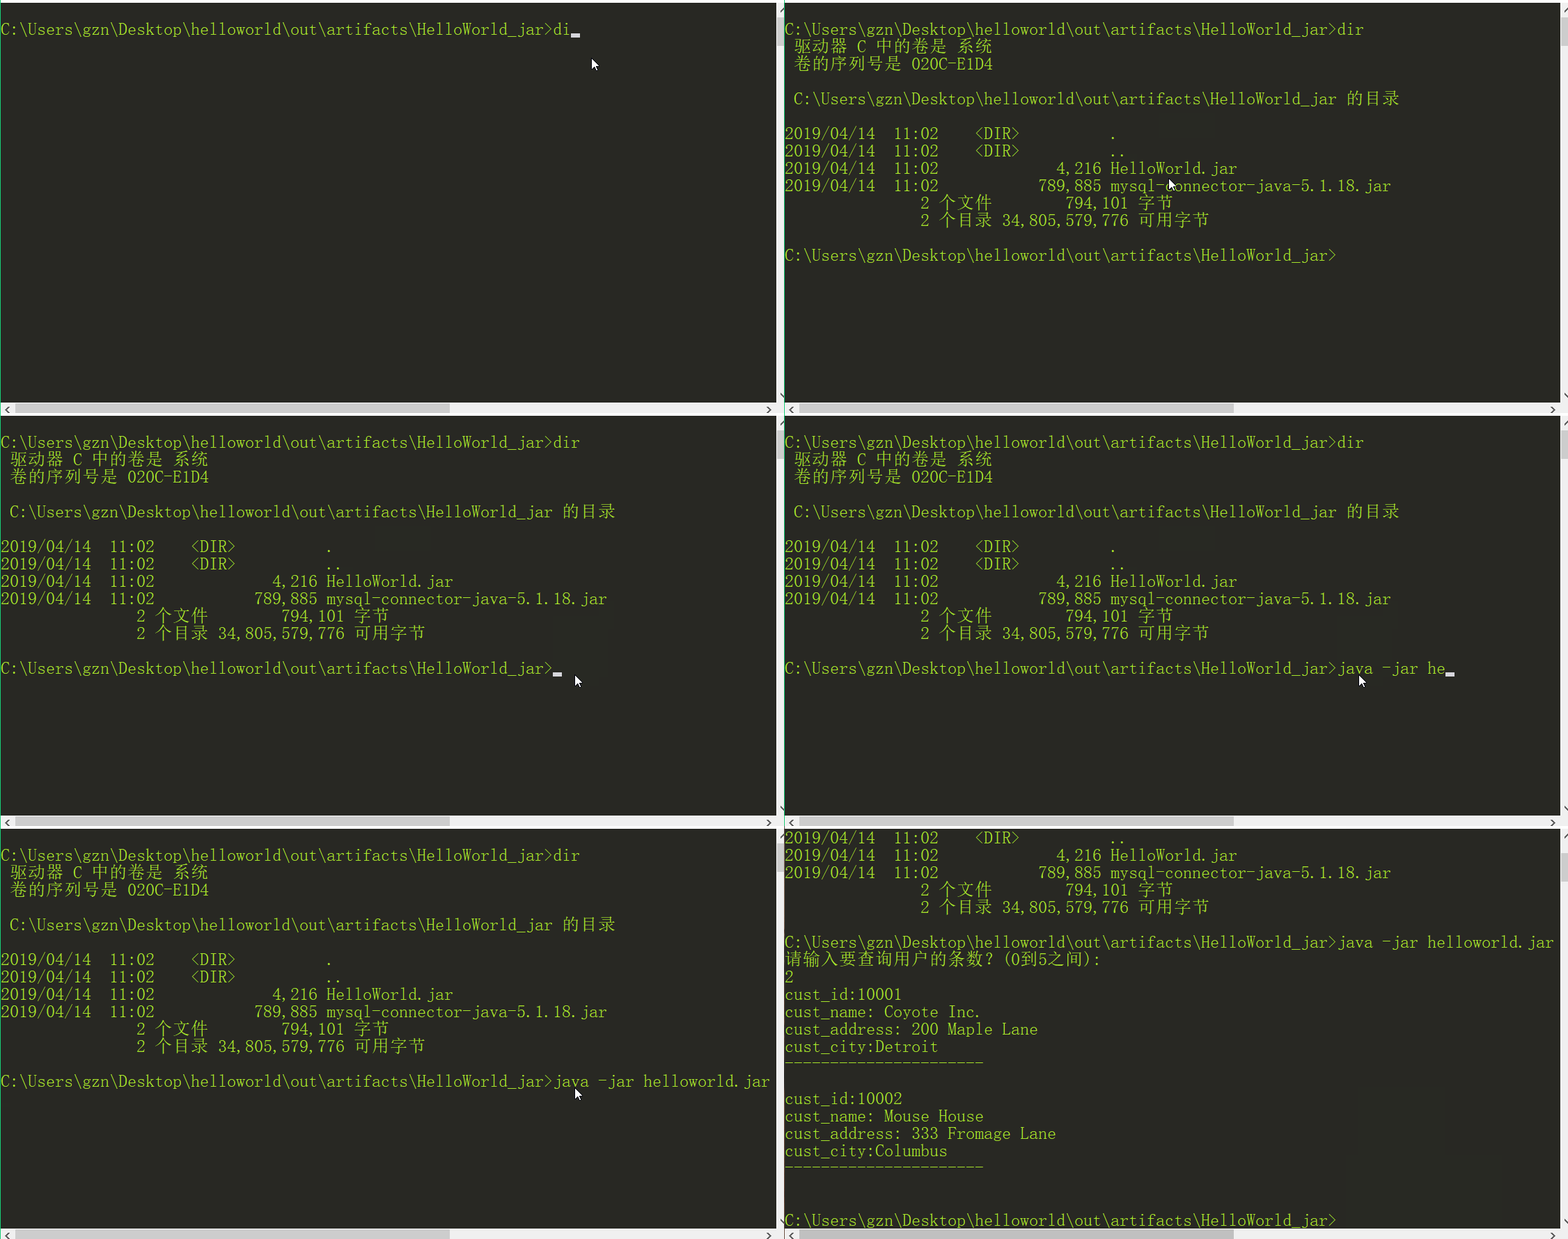
运行测试:
首先进入jar包输入路径C:\Users\gzn\Desktop\helloworld\out\artifacts\HelloWorld_jar;
运行 java -jar helloworld.jar;
2、打成war包
comment是我的一个已将编译好的web项目,使用cmd进入comment目录下执行命令
jar -cvf comment.war .
![]()
注意在项目目录下执行命令, “.” 表示对项目目录下的所有文件进行打包,将打包好的项目复制到Tomcat/webapps目录下,启动Tomcat服务器,就可以进行测试了。
到此这篇关于如何将java或javaweb项目打包为jar包或war包的文章就介绍到这了,更多相关java打包为jar包或war包内容请搜索脚本之家以前的文章或继续浏览下面的相关文章希望大家以后多多支持脚本之家!


