iOS开发——图形编程OC篇&(五)Quartz 2D高级使用(一)
Quartz2D高级使用
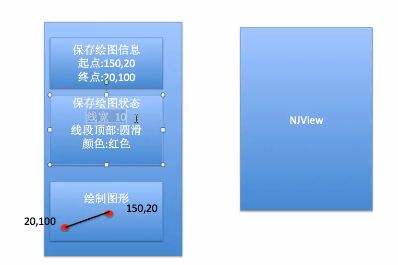
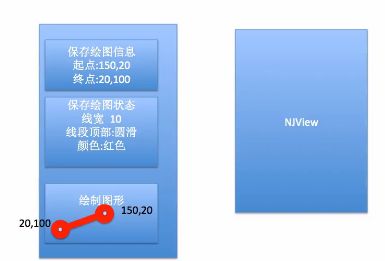
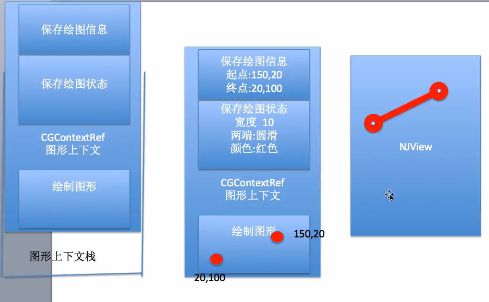
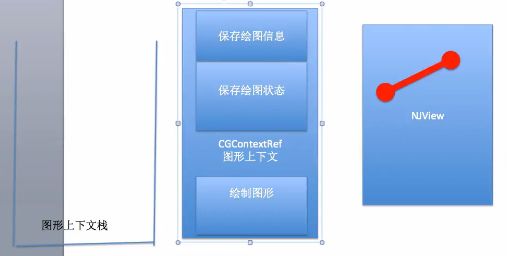
一、qurza2d是怎么将绘图信息和绘图的属性绘制到图形上下文中去的?
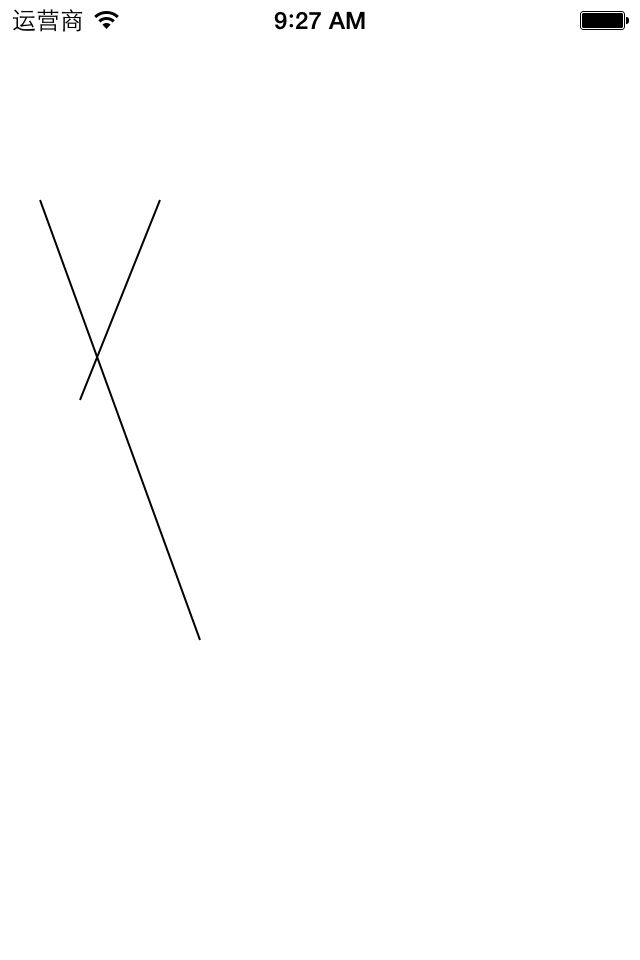
说明:
1 - (void)drawRect:(CGRect)rect 2 { 3 //获取上下文 4 CGContextRef ctx=UIGraphicsGetCurrentContext(); 5 //绘图 6 //第一条线 7 CGContextMoveToPoint(ctx, 20, 100); 8 CGContextAddLineToPoint(ctx, 100, 320); 9 10 //第二条线 11 CGContextMoveToPoint(ctx, 40, 200); 12 CGContextAddLineToPoint(ctx, 80, 100); 13 //渲染 14 CGContextStrokePath(ctx); 15 16 }
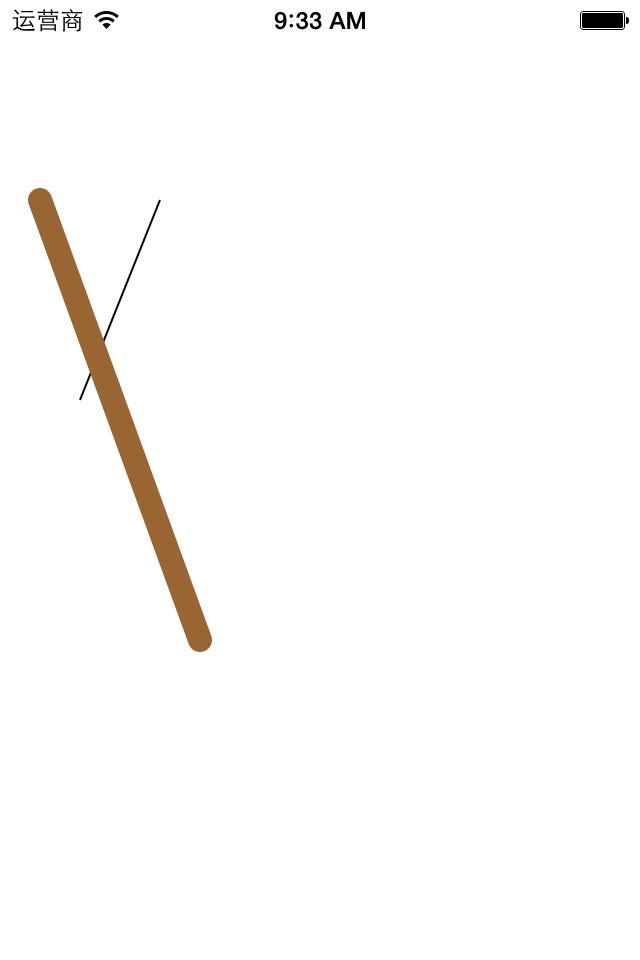
1 - (void)drawRect:(CGRect)rect 2 { 3 //获取上下文 4 CGContextRef ctx=UIGraphicsGetCurrentContext(); 5 //绘图 6 //第一条线 7 CGContextMoveToPoint(ctx, 20, 100); 8 CGContextAddLineToPoint(ctx, 100, 320); 9 10 //设置第一条线的状态 11 //设置线条的宽度 12 CGContextSetLineWidth(ctx, 12); 13 //设置线条的颜色 14 [[UIColor brownColor]set]; 15 //设置线条两端的样式为圆角 16 CGContextSetLineCap(ctx,kCGLineCapRound); 17 //对线条进行渲染 18 CGContextStrokePath(ctx); 19 20 //第二条线 21 CGContextMoveToPoint(ctx, 40, 200); 22 CGContextAddLineToPoint(ctx, 80, 100); 23 //渲染 24 CGContextStrokePath(ctx); 25 26 }
效果图:
新的需求:要让两条线的颜色不一样,要求第二条线变成原版的样子。要达到上面的要求,有以下几种做法:
1 - (void)drawRect:(CGRect)rect 2 { 3 //获取上下文 4 CGContextRef ctx=UIGraphicsGetCurrentContext(); 5 //绘图 6 //第一条线 7 CGContextMoveToPoint(ctx, 20, 100); 8 CGContextAddLineToPoint(ctx, 100, 320); 9 10 //设置第一条线的状态 11 //设置线条的宽度 12 CGContextSetLineWidth(ctx, 12); 13 //设置线条的颜色 14 [[UIColor brownColor]set]; 15 //设置线条两端的样式为圆角 16 CGContextSetLineCap(ctx,kCGLineCapRound); 17 //对线条进行渲染 18 CGContextStrokePath(ctx); 19 20 //第二条线 21 CGContextMoveToPoint(ctx, 40, 200); 22 CGContextAddLineToPoint(ctx, 80, 100); 23 24 //清空状态 25 CGContextSetLineWidth(ctx, 1); 26 [[UIColor blackColor]set]; 27 CGContextSetLineCap(ctx,kCGLineCapButt); 28 29 //渲染 30 CGContextStrokePath(ctx); 31 32 }
1 - (void)drawRect:(CGRect)rect 2 { 3 //获取上下文 4 CGContextRef ctx=UIGraphicsGetCurrentContext(); 5 //绘图 6 7 //第二条线 8 CGContextMoveToPoint(ctx, 40, 200); 9 CGContextAddLineToPoint(ctx, 80, 100); 10 11 //清空状态 12 // CGContextSetLineWidth(ctx, 1); 13 // [[UIColor blackColor]set]; 14 15 // CGContextSetLineCap(ctx,kCGLineCapButt); 16 17 //渲染 18 CGContextStrokePath(ctx); 19 20 //第一条线 21 CGContextMoveToPoint(ctx, 20, 100); 22 CGContextAddLineToPoint(ctx, 100, 320); 23 24 //设置第一条线的状态 25 //设置线条的宽度 26 CGContextSetLineWidth(ctx, 12); 27 //设置线条的颜色 28 [[UIColor brownColor]set]; 29 //设置线条两端的样式为圆角 30 CGContextSetLineCap(ctx,kCGLineCapRound); 31 //对线条进行渲染 32 CGContextStrokePath(ctx); 33 }
两种方式完成的效果相同:
1 - (void)drawRect:(CGRect)rect 2 { 3 //获取上下文 4 CGContextRef ctx=UIGraphicsGetCurrentContext(); 5 //绘图 6 //第一条线 7 CGContextMoveToPoint(ctx, 20, 100); 8 CGContextAddLineToPoint(ctx, 100, 320); 9 10 //设置第一条线的状态 11 //设置线条的宽度 12 CGContextSetLineWidth(ctx, 12); 13 //设置线条的颜色 14 [[UIColor brownColor]set]; 15 //设置线条两端的样式为圆角 16 CGContextSetLineCap(ctx,kCGLineCapRound); 17 //对线条进行渲染 18 CGContextStrokePath(ctx); 19 20 //第二条线 21 CGContextMoveToPoint(ctx, 40, 200); 22 CGContextAddLineToPoint(ctx, 80, 100); 23 //渲染 24 CGContextStrokePath(ctx); 25 }
1 - (void)drawRect:(CGRect)rect 2 { 3 //获取上下文 4 CGContextRef ctx=UIGraphicsGetCurrentContext(); 5 //绘图 6 //第一条线 7 CGContextMoveToPoint(ctx, 20, 100); 8 CGContextAddLineToPoint(ctx, 100, 320); 9 10 //设置第一条线的状态 11 //设置线条的宽度 12 CGContextSetLineWidth(ctx, 12); 13 //设置线条的颜色 14 [[UIColor brownColor]set]; 15 //设置线条两端的样式为圆角 16 CGContextSetLineCap(ctx,kCGLineCapRound); 17 //对线条进行渲染 18 CGContextStrokePath(ctx); 19 20 //第二条线 21 CGContextMoveToPoint(ctx, 40, 200); 22 CGContextAddLineToPoint(ctx, 80, 100); 23 24 //清空状态 25 CGContextSetLineWidth(ctx, 1); 26 [[UIColor blackColor]set]; 27 CGContextSetLineCap(ctx,kCGLineCapButt); 28 29 //渲染 30 CGContextStrokePath(ctx); 31 }
CGContextSaveGState(ctx);
方法,把当前获取的上下文拷贝一份,保存一份最纯洁的图形上下文。 1 - (void)drawRect:(CGRect)rect 2 { 3 //获取上下文 4 CGContextRef ctx=UIGraphicsGetCurrentContext(); 5 //保存一份最初的图形上下文 6 CGContextSaveGState(ctx); 7 8 //绘图 9 //第一条线 10 CGContextMoveToPoint(ctx, 20, 100); 11 CGContextAddLineToPoint(ctx, 100, 320); 12 13 //设置第一条线的状态 14 //设置线条的宽度 15 CGContextSetLineWidth(ctx, 12); 16 //设置线条的颜色 17 [[UIColor brownColor]set]; 18 //设置线条两端的样式为圆角 19 CGContextSetLineCap(ctx,kCGLineCapRound); 20 //对线条进行渲染 21 CGContextStrokePath(ctx); 22 23 //还原开始的时候保存的那份最纯洁的图形上下文 24 CGContextRestoreGState(ctx); 25 //第二条线 26 CGContextMoveToPoint(ctx, 40, 200); 27 CGContextAddLineToPoint(ctx, 80, 100); 28 29 //清空状态 30 // CGContextSetLineWidth(ctx, 1); 31 // [[UIColor blackColor]set]; 32 // CGContextSetLineCap(ctx,kCGLineCapButt); 33 34 //渲染 35 CGContextStrokePath(ctx); 36 }
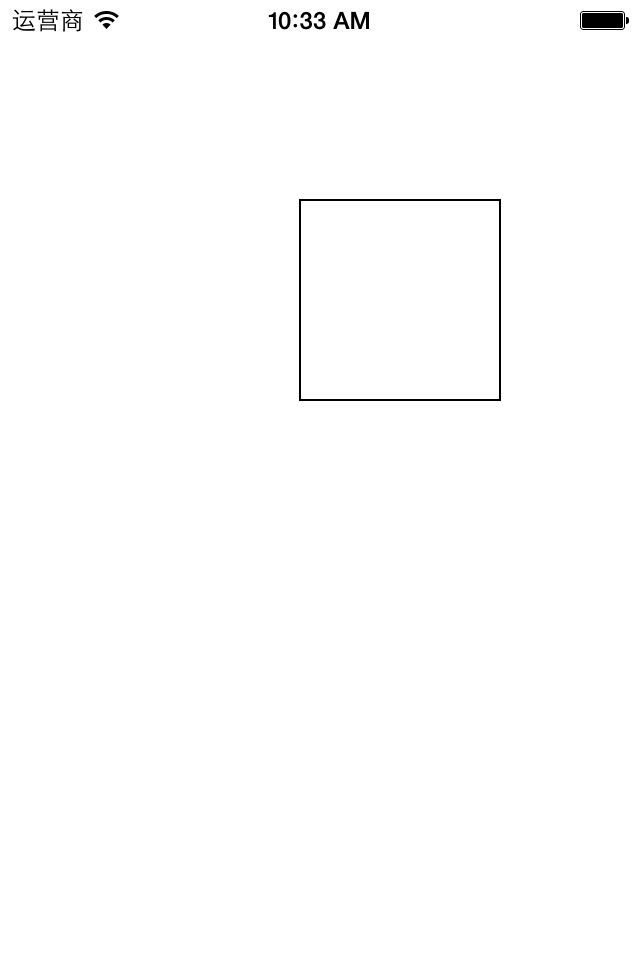
1 - (void)drawRect:(CGRect)rect 2 { 3 //画四边形 4 //获取图形上下文 5 CGContextRef ctx=UIGraphicsGetCurrentContext(); 6 //绘图 7 CGContextAddRect(ctx, CGRectMake(20, 50, 100, 100)); 8 //渲染 9 CGContextStrokePath(ctx); 10 }
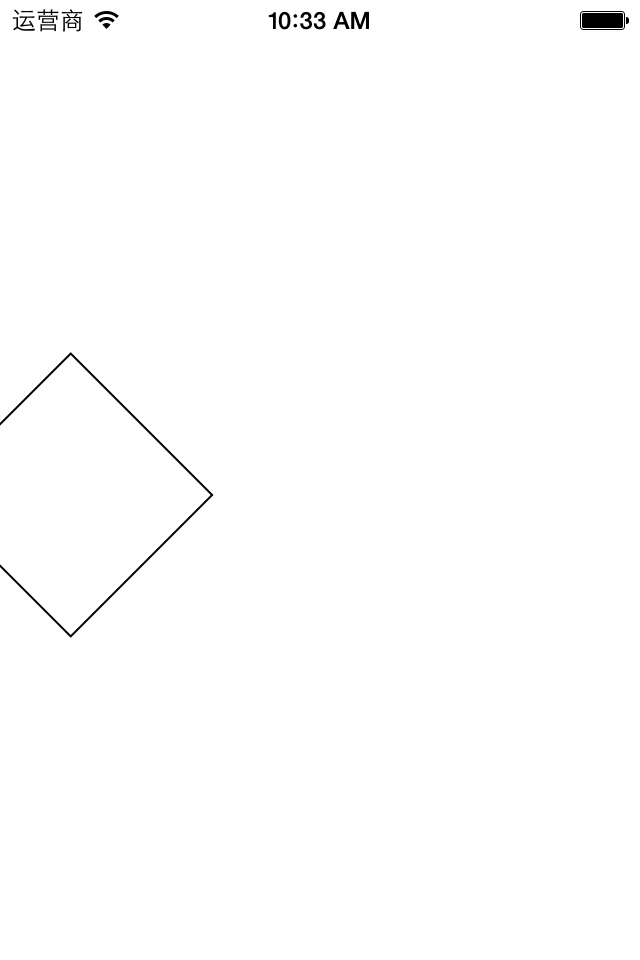
1 - (void)drawRect:(CGRect)rect 2 { 3 //画四边形 4 //获取图形上下文 5 CGContextRef ctx=UIGraphicsGetCurrentContext(); 6 //矩阵操作 7 //注意点:设置矩阵操作必须要在添加绘图信息之前 8 //旋转45度 9 CGContextRotateCTM(ctx, M_PI_4); 10 11 //绘图 12 CGContextAddRect(ctx, CGRectMake(150, 100, 100, 100)); 13 //渲染 14 CGContextStrokePath(ctx); 15 }
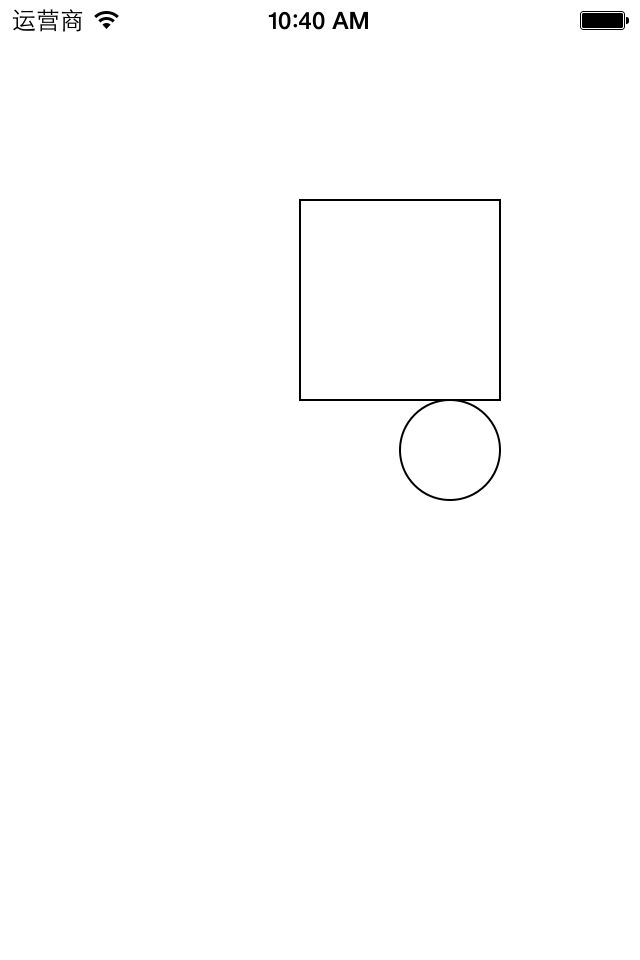
1 - (void)drawRect:(CGRect)rect 2 { 3 //获取图形上下文 4 CGContextRef ctx=UIGraphicsGetCurrentContext(); 5 //矩阵操作 6 //注意点:设置矩阵操作必须要在添加绘图信息之前 7 //旋转45度 8 // CGContextRotateCTM(ctx, M_PI_4); 9 10 //绘图 11 //画四边形 12 CGContextAddRect(ctx, CGRectMake(150, 100, 100, 100)); 13 //画一个圆 14 CGContextAddEllipseInRect(ctx, CGRectMake(200, 200, 50, 50)); 15 //渲染 16 CGContextStrokePath(ctx); 17 }
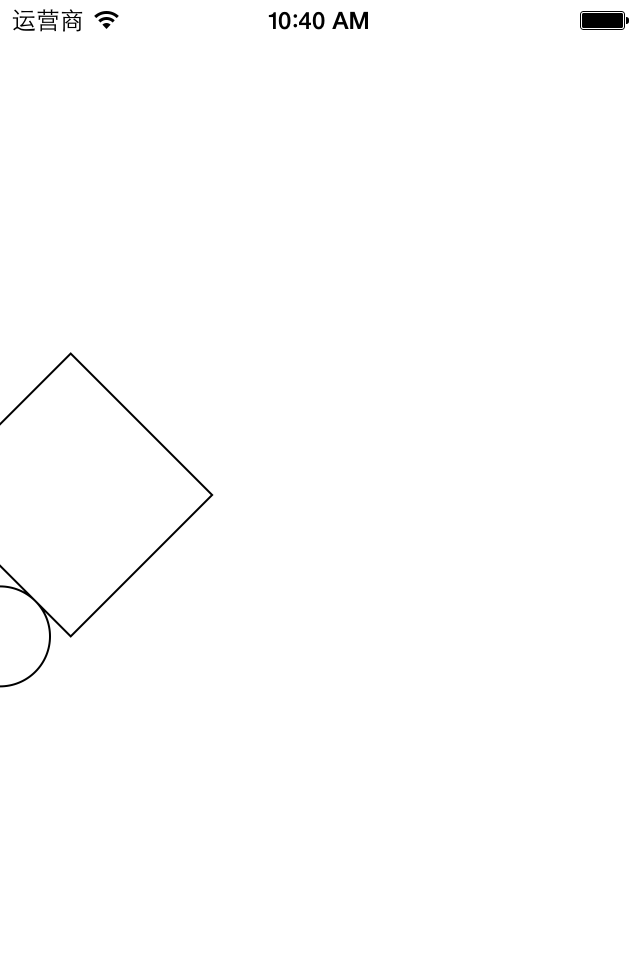
1 - (void)drawRect:(CGRect)rect 2 { 3 //获取图形上下文 4 CGContextRef ctx=UIGraphicsGetCurrentContext(); 5 //矩阵操作 6 //注意点:设置矩阵操作必须要在添加绘图信息之前 7 //旋转45度 8 CGContextRotateCTM(ctx, M_PI_4); 9 10 //绘图 11 //画四边形 12 CGContextAddRect(ctx, CGRectMake(150, 100, 100, 100)); 13 //画一个圆 14 CGContextAddEllipseInRect(ctx, CGRectMake(200, 200, 50, 50)); 15 //渲染 16 CGContextStrokePath(ctx); 17 }
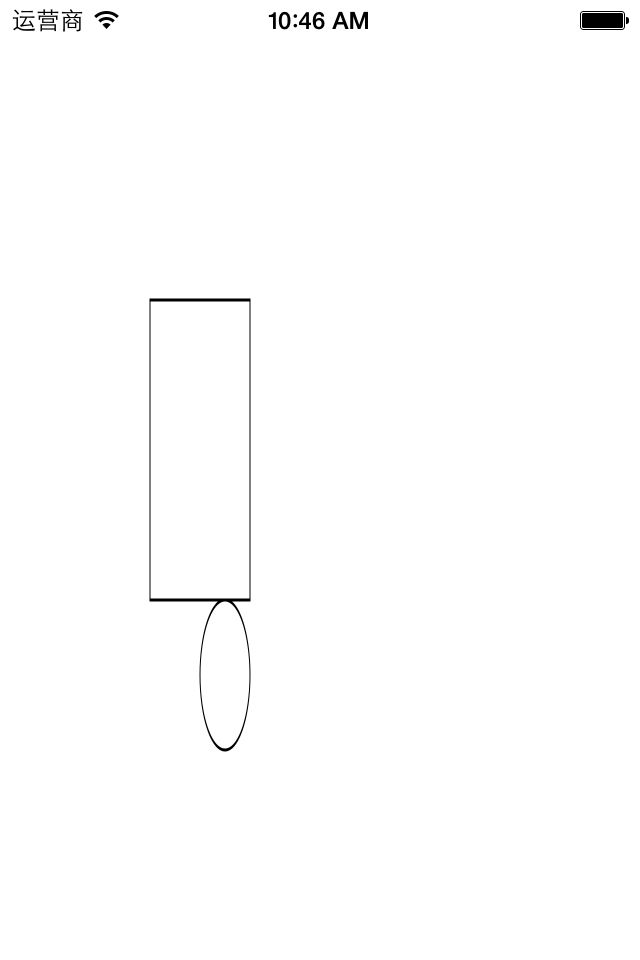
效果:
1 - (void)drawRect:(CGRect)rect 2 { 3 //获取图形上下文 4 CGContextRef ctx=UIGraphicsGetCurrentContext(); 5 //矩阵操作 6 //注意点:设置矩阵操作必须要在添加绘图信息之前 7 //缩放,x方向缩放0.5倍,y方向缩放1.5倍 8 CGContextScaleCTM(ctx, 0.5, 1.5); 9 10 //绘图 11 //画四边形 12 CGContextAddRect(ctx, CGRectMake(150, 100, 100, 100)); 13 //画一个圆 14 CGContextAddEllipseInRect(ctx, CGRectMake(200, 200, 50, 50)); 15 //渲染 16 CGContextStrokePath(ctx); 17 }
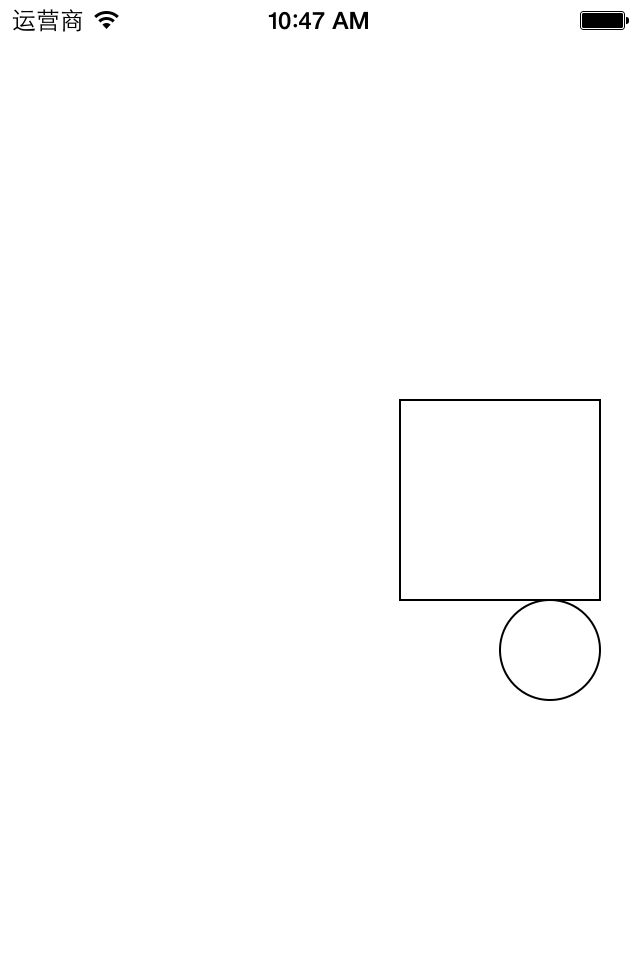
1 - (void)drawRect:(CGRect)rect 2 { 3 //获取图形上下文 4 CGContextRef ctx=UIGraphicsGetCurrentContext(); 5 //矩阵操作 6 //注意点:设置矩阵操作必须要在添加绘图信息之前 7 //平移,x方向移动50,y方向移动100 8 CGContextTranslateCTM(ctx, 50, 100); 9 10 //绘图 11 //画四边形 12 CGContextAddRect(ctx, CGRectMake(150, 100, 100, 100)); 13 //画一个圆 14 CGContextAddEllipseInRect(ctx, CGRectMake(200, 200, 50, 50)); 15 //渲染 16 CGContextStrokePath(ctx); 17 }
效果:
提示:坐标原点为view的左上角。
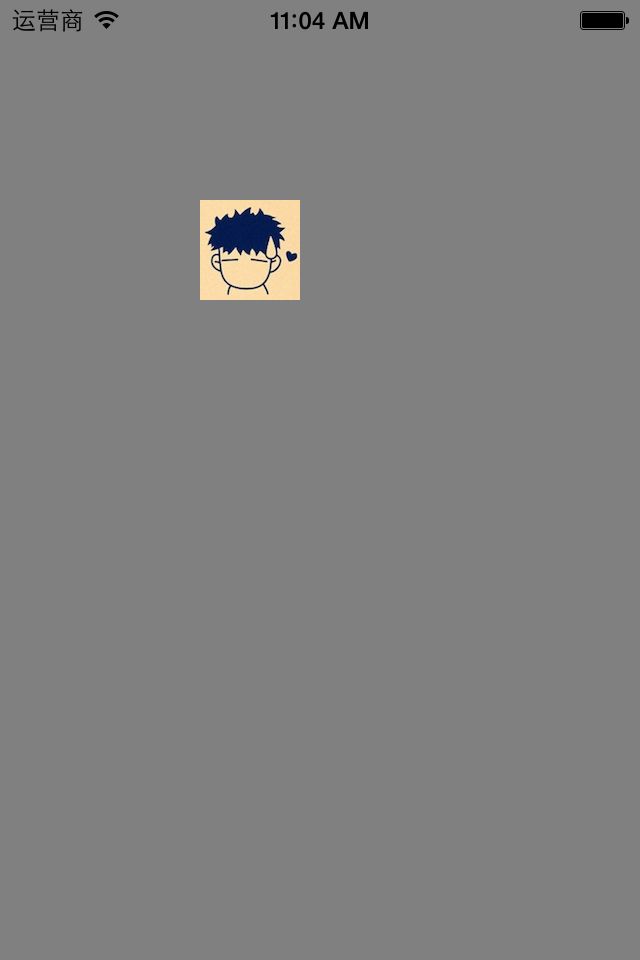
1 - (void)drawRect:(CGRect)rect 2 { 3 UIImage *image2=[UIImage imageNamed:@"me"]; 4 [image2 drawAtPoint:CGPointMake(100, 100)]; 5 }
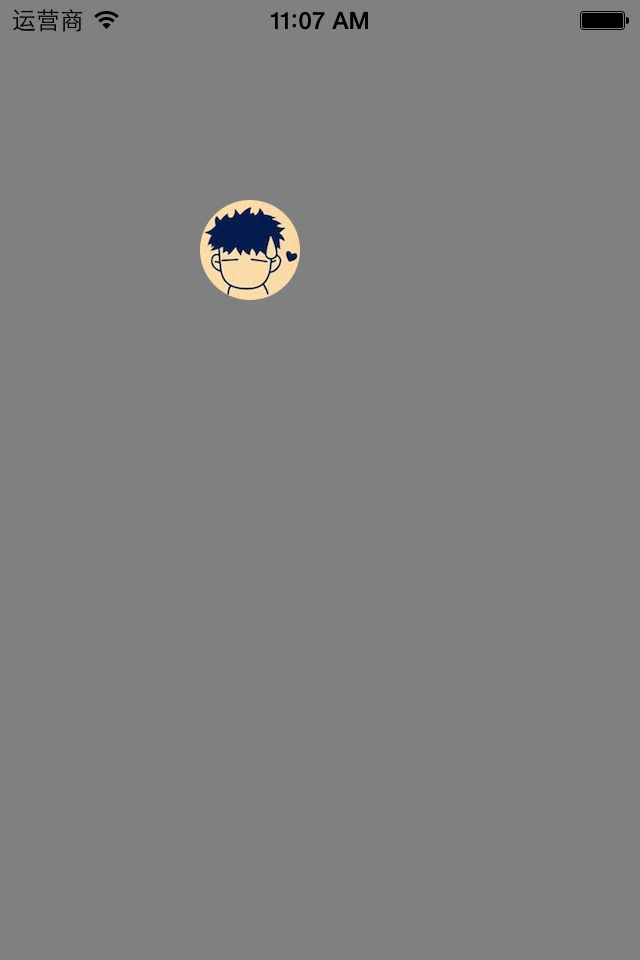
显示:
1 - (void)drawRect:(CGRect)rect 2 { 3 //画圆,以便以后指定可以显示图片的范围 4 //获取图形上下文 5 CGContextRef ctx=UIGraphicsGetCurrentContext(); 6 CGContextAddEllipseInRect(ctx, CGRectMake(100, 100, 50, 50)); 7 8 //指定上下文中可以显示内容的范围就是圆的范围 9 CGContextClip(ctx); 10 UIImage *image2=[UIImage imageNamed:@"me"]; 11 [image2 drawAtPoint:CGPointMake(100, 100)]; 12 }
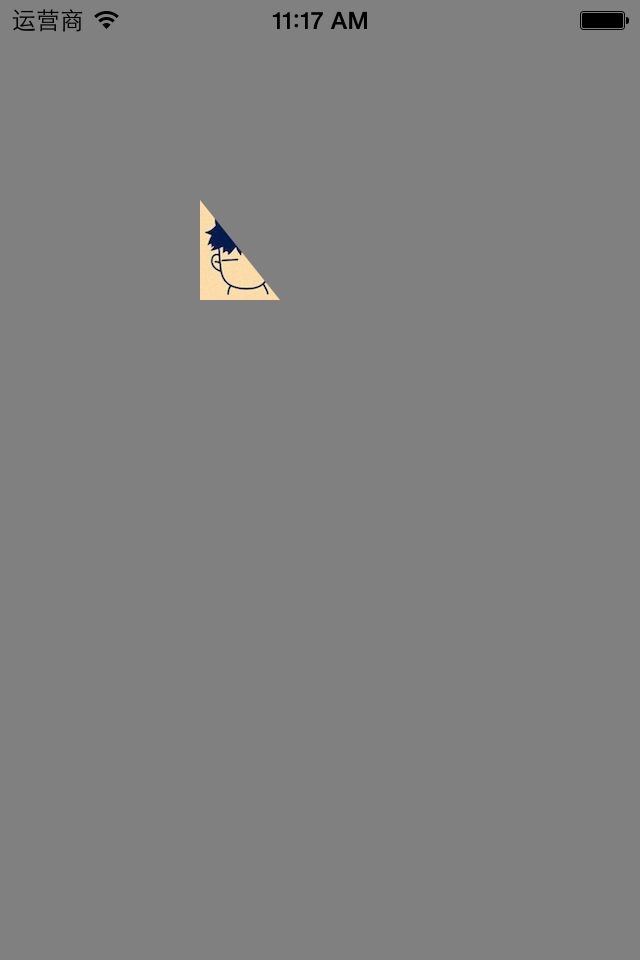
1 - (void)drawRect:(CGRect)rect 2 { 3 4 //画三角形,以便以后指定可以显示图片的范围 5 //获取图形上下文 6 CGContextRef ctx=UIGraphicsGetCurrentContext(); 7 // CGContextAddEllipseInRect(ctx, CGRectMake(100, 100, 50, 50)); 8 CGContextMoveToPoint(ctx, 100, 100); 9 CGContextAddLineToPoint(ctx, 60, 150); 10 CGContextAddLineToPoint(ctx, 140, 150); 11 CGContextClosePath(ctx); 12 13 14 //注意:指定范围(也就是指定剪切的方法一定要在绘制范围之前进行调用) 15 //指定上下文中可以显示内容的范围就是圆的范围 16 CGContextClip(ctx); 17 UIImage *image2=[UIImage imageNamed:@"me"]; 18 [image2 drawAtPoint:CGPointMake(100, 100)]; 19 }
显示:
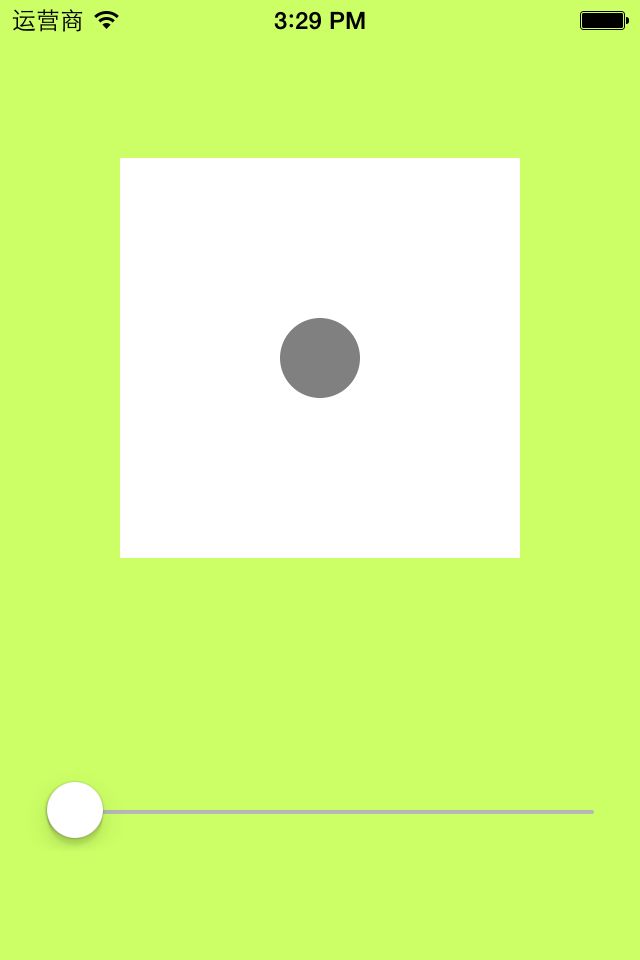
九、通过slider控制圆的缩放
1.实现过程
新建一个项目,新建一个继承自UIview的类,并和storyboard中自定义的view进行关联。
界面搭建,如图:
代码示例:
YYViewController.m文件
1 // 2 // YYViewController.m 3 // 04-对圆进行缩放 4 // 5 // Created by apple on 14-6-11. 6 // Copyright (c) 2014年 itcase. All rights reserved. 7 // 8 9 #import "YYViewController.h" 10 #import "YYview.h" 11 12 @interface YYViewController () 13 @property (weak, nonatomic) IBOutlet YYview *circleView; 14 - (IBAction)valueChange:(UISlider *)sender; 15 16 @end 17 18 @implementation YYViewController 19 20 - (void)viewDidLoad 21 { 22 [super viewDidLoad]; 23 // Do any additional setup after loading the view, typically from a nib. 24 } 25 26 27 - (IBAction)valueChange:(UISlider *)sender { 28 //当值改变的时候,把值传递给view,改变圆的半径 29 NSLog(@"%f",sender.value); 30 //把sender的值传递给自定义view,设置圆的半径 31 self.circleView.radius=sender.value; 32 } 33 @end
YYview.h文件
1 // 2 // YYview.h 3 // 04-对圆进行缩放 4 // 5 // Created by apple on 14-6-11. 6 // Copyright (c) 2014年 itcase. All rights reserved. 7 // 8 9 #import <UIKit/UIKit.h> 10 11 @interface YYview : UIView 12 //提供一个属性来接收外界传入的半径 13 @property(nonatomic,assign)float radius; 14 @end
YYview.m文件
1 // 2 // YYview.m 3 // 04-对圆进行缩放 4 // 5 // Created by apple on 14-6-11. 6 // Copyright (c) 2014年 itcase. All rights reserved. 7 // 8 9 #import "YYview.h" 10 11 @implementation YYview 12 //自定义view中的圆不显示 13 //重写set方法,为半径赋值 14 -(void)setRadius:(float)radius 15 { 16 _radius=radius; 17 //通知自定义的view重新绘制图形 18 [self setNeedsDisplay]; 19 } 20 21 //如果view是从xib或storyboard中创建出来的会先调用awakefromnib方法 22 - (void)awakeFromNib 23 { 24 //在这里为圆的半径设定一个初始的值 25 self.radius = 20; 26 } 27 28 - (void)drawRect:(CGRect)rect 29 { 30 //1.获取图形上下文 31 CGContextRef ctx=UIGraphicsGetCurrentContext(); 32 //2.绘图 33 //在自定义的view中画一个圆 34 CGContextAddArc(ctx, 100, 100, self.radius, 0, 2*M_PI, 0); 35 //设置圆的填充颜色 36 [[UIColor grayColor]set]; 37 38 //3.渲染 39 // CGContextStrokePath(ctx); 40 CGContextFillPath(ctx); 41 } 42 43 44 @end
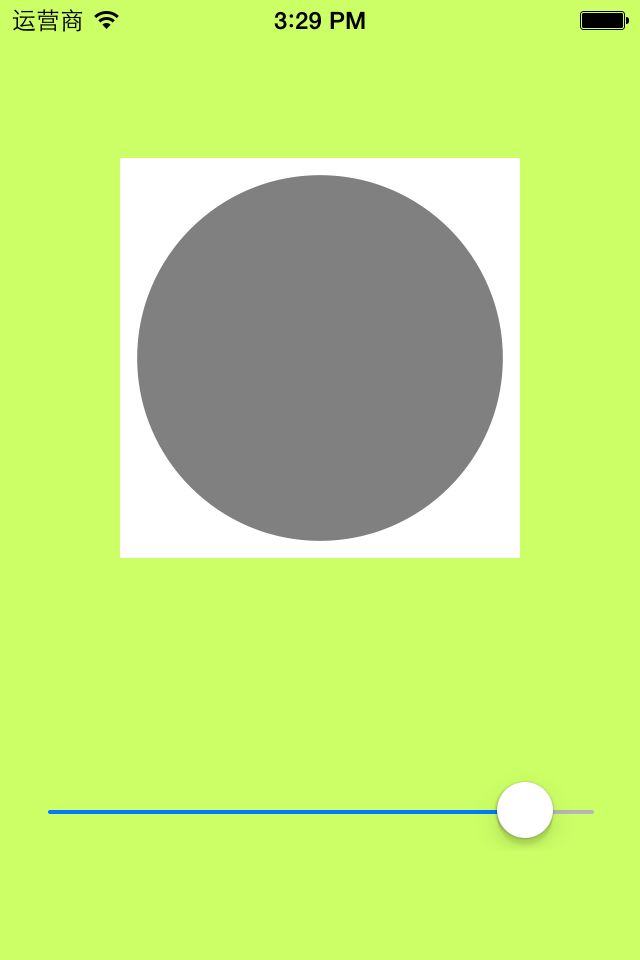
效果:
2.注意点:
1 // 2 // YYview.m 3 // 05-刷帧动画 4 // 5 // Created by apple on 14-6-11. 6 // Copyright (c) 2014年 itcase. All rights reserved. 7 // 8 9 #import "YYview.h" 10 11 //私有扩展 12 @interface YYview () 13 @property(nonatomic,assign)float imageY; 14 15 @end 16 @implementation YYview 17 18 19 -(id)initWithCoder:(NSCoder *)aDecoder 20 { 21 //请注意这里一定要先初始化父类的构造方法 22 if (self=[super initWithCoder:aDecoder]) { 23 NSLog(@"initWithCoder:"); 24 25 //NSTimer一般用于定时的更新一些非界面上的数据,告诉多久调用一次 26 //使用定时器,使用该定时器会出现卡顿的现象 27 // [NSTimer scheduledTimerWithTimeInterval:0.1 target:self selector:@selector(updateImage) userInfo:nil repeats:YES]; 28 29 // CADisplayLink刷帧,默认每秒刷新60次 30 //该定时器创建之后,默认是不会执行的,需要把它加载到消息循环中 31 CADisplayLink *display= [CADisplayLink displayLinkWithTarget:self selector:@selector(updateImage)]; 32 [display addToRunLoop:[NSRunLoop mainRunLoop] forMode:NSDefaultRunLoopMode]; 33 34 } 35 return self; 36 } 37 38 -(void)updateImage 39 { 40 //调用该方法重绘画面 41 [self setNeedsDisplay]; 42 } 43 -(void)awakeFromNib 44 { 45 NSLog(@"awakeFromNib"); 46 } 47 48 - (void)drawRect:(CGRect)rect 49 { 50 //把图片绘制到view上 51 52 //每次调用该方法对画面进行重绘时,imageY的值就+5 53 self.imageY+=5; 54 //判断,当雪花超出屏幕的时候,让图片从头开始降落 55 if (self.imageY>rect.size.height) { 56 self.imageY=0; 57 } 58 UIImage *image=[UIImage imageNamed:@"snow"]; 59 [image drawAtPoint:CGPointMake(0, self.imageY)]; 60 61 UIImage *image2=[UIImage imageNamed:@"me"]; 62 [image2 drawAtPoint:CGPointMake(80, self.imageY)]; 63 64 } 65 66 @end
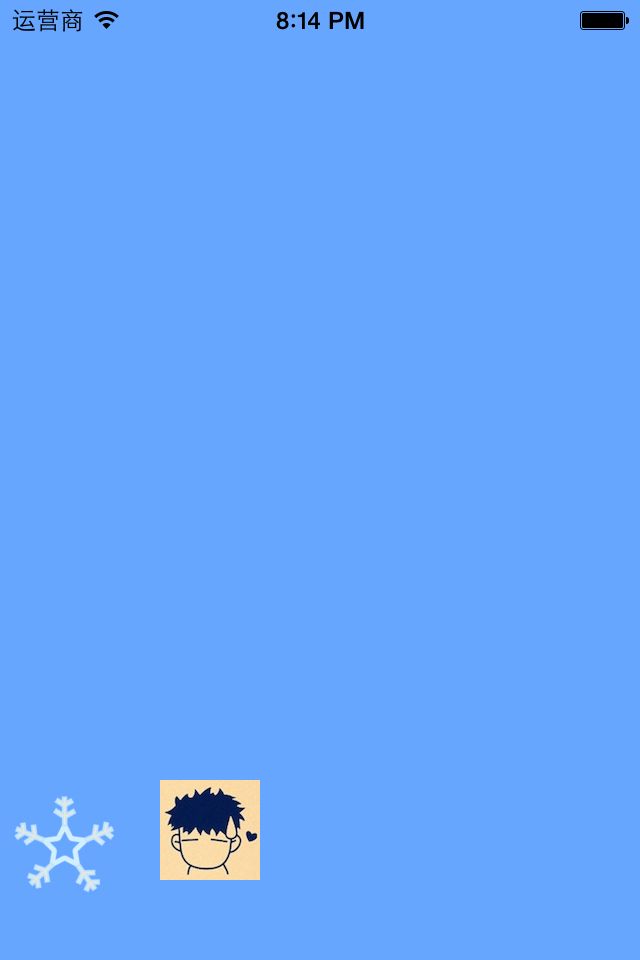
实现效果
2.重要说明
(1)下面两个方法的调用顺序
-(void)awakeFromNib
-(id)initWithCoder:(NSCoder *)aDecoder
提示:如果view是从xib或storyboard中创建可以调用awakefromnib方法,归档。从文件创建view,其实会先调用initwithcoder这个方法。xib和storyboard也是文件。
上面两个方法,-(id)initWithCoder:(NSCoder *)aDecoder会先调用。实现该方法需要实现NSCoding协议,由于创建的UIView默认就已经实现了该协议。
可以进入到头文件查看:
运行新建的程序,通过打印可以验证上面两个方法的调用顺序。
(2)两个定时器
第一个:
[NSTimer scheduledTimerWithTimeInterval:0.1 target:self selector:@selector(updateImage) userInfo:nil repeats:YES];
说明: NSTimer一般用于定时的更新一些非界面上的数据,告诉多久调用一次
第二个:
CADisplayLink *display= [CADisplayLink displayLinkWithTarget:self selector:@selector(updateImage)];
[display addToRunLoop:[NSRunLoopmainRunLoop] forMode:NSDefaultRunLoopMode];
说明: CADisplayLink刷帧,默认每秒刷新60次。该定时器创建之后,默认是不会执行的,需要把它加载到消息循环中
