b站视频-尚硅谷Web前端axios从入门到源码分析-笔记
目录
- 前言
- 一、课程介绍
- 二、json-server的介绍与服务搭建
- 三、axios的介绍与页面配置
- 四、axios的基本使用
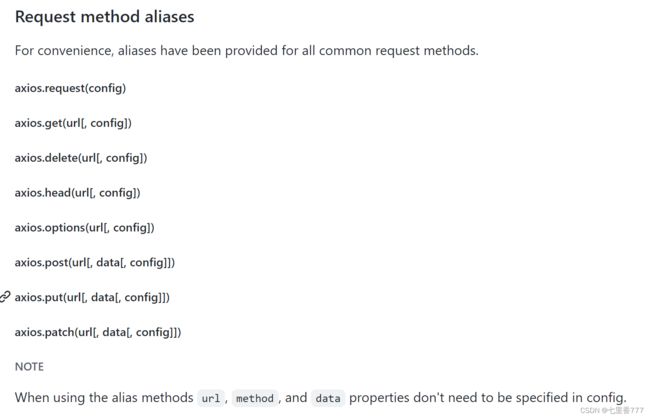
- 五、axios其他方式发送请求
- 六、axios请求响应结果的结构
- 七、axios配置对象详细说明
- 八、axios的默认配置
- 九、axios创建实例对象发送请求
- 十、axios拦截器
- 十一、axios取消请求
- 十二、axios文件结构说明
- 十三、axios的创建过程
- 十四、axios对象创建过程模拟实现
- 十五、axios发送请求过程详解
- 十六、模拟实现axios发送请求
- 十七、axios拦截器工作原理
- 十八、模拟实现axios拦截器功能
- 十九、axios取消请求工作原理
- 二十、模拟实现axios取消请求功能
- 二十一、axios源码分析总结
- 写在后面
前言
在继续学习React-ajax之前,学完了Promise,再来学习axios
看的是b站尚硅谷李强老师的视频:axios从入门到源码分析
上一篇:Promise视频笔记
axios是目前前端最热门的ajax请求库,Vue和React官方都推荐使用axios进行ajax请求
一、课程介绍
内容包括三大部分:
- axios API 怎么安装怎么用
- 源码分析
- 源码仿写
二、json-server的介绍与服务搭建
github—json-server
全局安装json-server:npm install -g json-server
创建json文件,内容是:
{
  "posts": [
    { "id": 1, "title": "json-server", "author": "typicode" }
  ],
  "comments": [
    { "id": 1, "body": "some comment", "postId": 1 }
  ],
  "profile": { "name": "typicode" }
}
在该文件目录下运行:json-server --watch db.json
这是对数据的获取
三、axios的介绍与页面配置
github—axios
axios是基于HTTP的客户端,可以在浏览器和node.js两个环境中运行:Promise based HTTP client for the browser and node.js

安装:npm install axios
四、axios的基本使用
<div>
        <h2>axios基本使用</h2>
        <button> 发送GET请求 </button>
        <button> 发送POST请求 </button>
        <button> 发送 PUT 请求 </button>
        <button> 发送 DELETE 请求 </button>
    </div>
// 获取按钮
    const btns=document.querySelectorAll('button');

    // 第一个按钮 发送GET请求
    btns[0].onclick=function(){
        // 发送AJAX请求
        axios({
            // 请求类型
            method:'GET',
            // URL
            url:'http://localhost:3000/posts/2',
        }).then(response=>{
            console.log(response);
        });
    }

    // 第二个按钮 发送POST请求 添加一篇新的文章
    btns[1].onclick=function(){
        // 发送AJAX请求
        axios({
            // 请求类型
            method:'POST',
            // URL
            url:'http://localhost:3000/posts',
            // 设置请求体
            data:{
                title: "今天天气很好",
                author: "王五"
            }
        }).then(response=>{
            console.log(response);
        });
    }

    // 第三个按钮 发送PUT请求 更新数据
    btns[2].onclick=function(){
        // 发送AJAX请求
        axios({
            // 请求类型
            method:'PUT',
            // URL
            url:'http://localhost:3000/posts/3',
            // 设置请求体
            data:{
                title: "今天天气很好",
                author: "赵六"
            }
        }).then(response=>{
            console.log(response);
        });
    }

    // 第四个按钮 发送DELETE请求 删除数据
    btns[3].onclick=function(){
        // 发送AJAX请求
        axios({
            // 请求类型
            method:'delete',  // 大小写都可以
            // URL
            url:'http://localhost:3000/posts/3',
        }).then(response=>{
            console.log(response);
        });
    }
五、axios其他方式发送请求
// 获取按钮
    const btns=document.querySelectorAll('button');

    // 第一个按钮 发送GET请求
    btns[0].onclick=function(){
        // 与axios()使用方式一样
        axios.request({
            method:'GET',
            url:'http://localhost:3000/comments'
        }).then(response=>{
            console.log(response);
        });
    }

    // 第二个按钮 发送POST请求 添加一个新的评论
    btns[1].onclick=function(){
        axios.post('http://localhost:3000/comments',
            {
                "body": "我是一条评论",
                "postId": 2
            }).then(response=>{
            console.log(response);
        });
    }
六、axios请求响应结果的结构
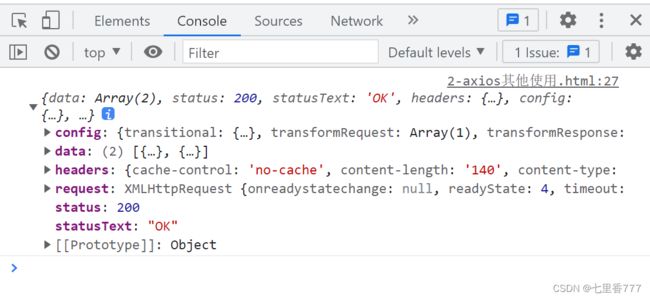
config:配置对象
data:响应体的结果
headers:响应头的信息
request:原生的AJAX请求对象
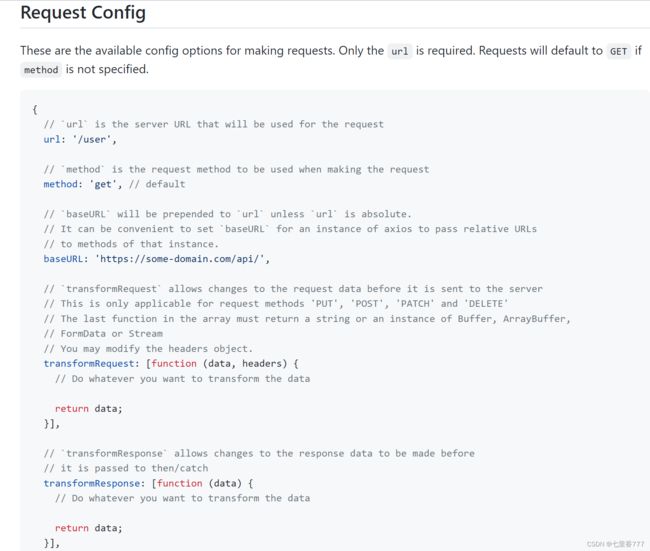
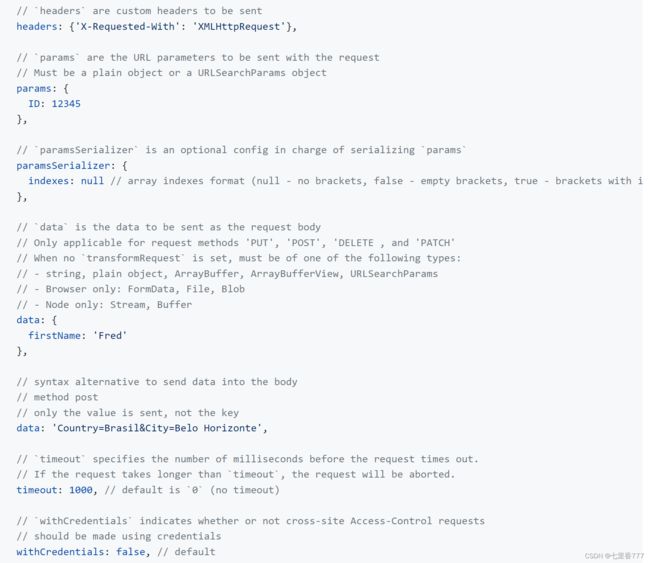
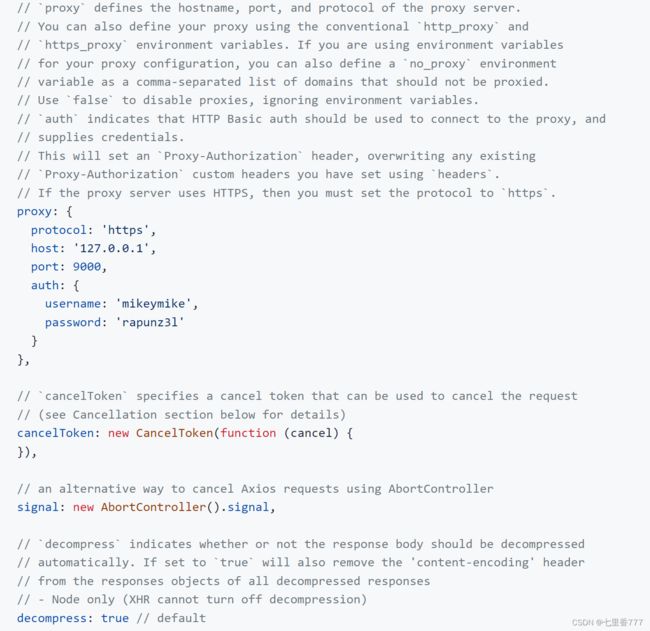
七、axios配置对象详细说明
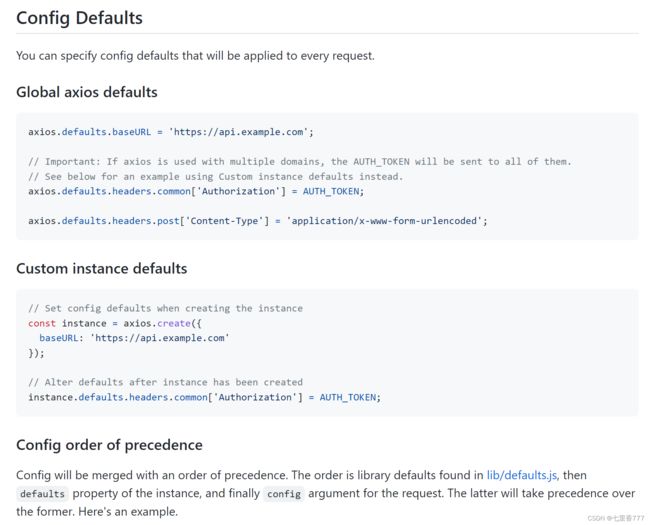
八、axios的默认配置
 // 获取按钮
  const btns=document.querySelectorAll('button');

  //默认配置
  axios.defaults.method='GET'; // 设置默认的请求类型为GET
  axios.defaults.baseURL='http://localhost:3000'; // 设置基础URL
  axios.defaults.params={id:100};
  axios.defaults.timeout=3000; // 超时时间

  btns[0].onclick=function(){
      axios({
          url:'/posts',
      }).then(response=>{
          console.log(response);
      });
  }
九、axios创建实例对象发送请求
//创建实例对象
    const duanzi = axios.create({
        baseURL:'http://api.apiopen.top',
        timeout:2000
    });

    // 给另一个协议、域名或端口不同的服务器发请求
    const another = axios.create({
        baseURL:'http://b.com',
        timeout:2000
    });

    // 这里duanzi与axios对象的功能几近是一样的
    // duanzi({
    //     url:'getJoke',
    // }).then(response=>{
    //     console.log(response);
    // });

    duanzi.get('/getJoke').then(response=>{
        console.log(response);
    });
十、axios拦截器
十一、axios取消请求
// 获取按钮
    const btns=document.querySelectorAll('button');

    // 2. 声明全局变量
    let cancel=null;

    // 发送请求
    btn[0].onclick=function(){
        axios({
            method:'GET',
            url:'http://localhost:3000/posts',
            // 1. 添加配置对象的属性
            cancelToken:new axios.CancelToken(function(c){
                // 3. 将c的值赋给cancel
                cancel=c;
            })
        }).then(response=>{
            console.log(response);
        })
    }

    // 取消请求
    btn[1].onclick=function(){
        cancel();
    }
上述方法,每次点击取消请求时,都没什么反应。因为服务器在本都,每次点击取消,请求都已经回来了。
解决方法:
①服务端做延时响应:json-server --watch db.json -d 2000
②在发送请求时,看上个请求是否还在继续发送,若还在继续,就把它取消
// 发送请求
    btn[0].onclick=function(){
        // 检测上一次的请求是否已经完成
        if(cancel!==null){
            // 取消上一次的请求
            cancel();
        }
        axios({
            method:'GET',
            url:'http://localhost:3000/posts',
            // 1. 添加配置对象的属性
            cancelToken:new axios.CancelToken(function(c){
                // 3. 将c的值赋给cancel
                cancel=c;
            })
        }).then(response=>{
            console.log(response);
            // 将cancel值复原
            cancel=null;
        })
    }
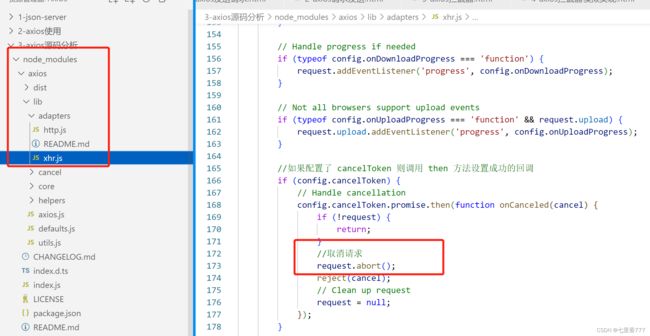
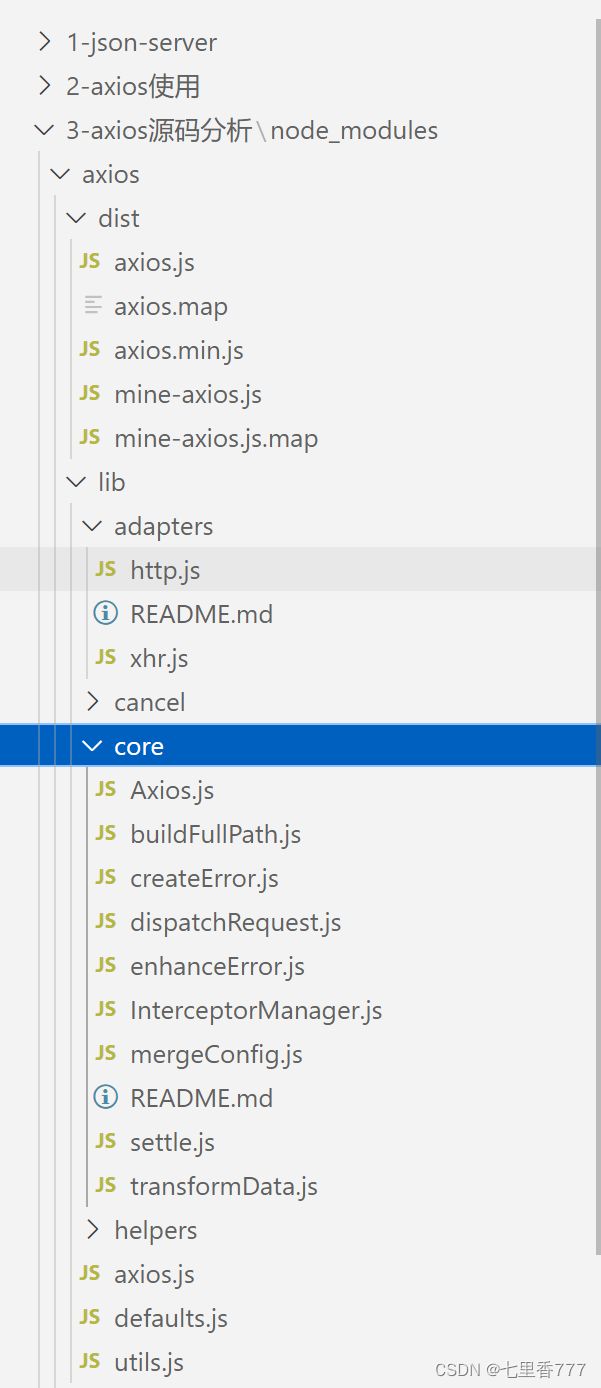
十二、axios文件结构说明
十三、axios的创建过程
分析源码:
axios既可以当函数使用,又可以调用方法
  axios();
  axios.get();
  axios,post();
十四、axios对象创建过程模拟实现
 //构造函数
        function Axios(config){
            //初始化
            this.defaults = config;//为了创建 default 默认属性
            this.intercepters = {
                request: {},
                response: {}
            }
        }
        //原型添加相关的方法
        Axios.prototype.request = function(config){
            console.log('发送 AJAX 请求 请求的类型为 '+ config.method);
        }
        Axios.prototype.get = function(config){
            return this.request({method: 'GET'});
        }
        Axios.prototype.post = function(config){
            return this.request({method: 'POST'});
        }

        //声明函数
        function createInstance(config){
            //实例化一个对象
            let context = new Axios(config);// context.get()  context.post()  但是不能当做函数使用 context() X
            //创建请求函数
            let instance = Axios.prototype.request.bind(context);// instance 是一个函数 并且可以 instance({})  此时 instance 不能 instance.get X
            //将 Axios.prototype 对象中的方法添加到instance函数对象中
            Object.keys(Axios.prototype).forEach(key => {
                instance[key] = Axios.prototype[key].bind(context);// this.default  this.interceptors
            });
            //为 instance 函数对象添加属性 default 与 interceptors
            Object.keys(context).forEach(key => {
                instance[key] = context[key];
            });
            return instance;
        }

        let axios = createInstance();
        //发送请求
        // axios({method:'POST'});
        axios.get({});
        axios.post({});
十五、axios发送请求过程详解
request–>dispatch–>xhr
十六、模拟实现axios发送请求
//1. 声明构造函数
        function Axios(config){
            this.config = config;
        }
        Axios.prototype.request = function(config){
            //发送请求

            //创建一个 promise 对象
            let promise = Promise.resolve(config);
            //声明一个数组
            let chains = [dispatchRequest, undefined];// undefined 占位
            //调用 then 方法指定回调
            let result = promise.then(chains[0], chains[1]);
            //返回 promise 的结果
            return result;
        }

        //2. dispatchRequest 函数
        function dispatchRequest(config){
            //调用适配器发送请求
            return xhrAdapter(config).then(response => {
                //响应的结果进行转换处理
                //....
                return response;
            }, error => {
                throw error;
            });
        }

        //3. adapter 适配器
        function xhrAdapter(config){
            console.log('xhrAdapter 函数执行');
            return new Promise((resolve, reject) => {
                //发送 AJAX 请求
                let xhr = new XMLHttpRequest();
                //初始化
                xhr.open(config.method, config.url);
                //发送
                xhr.send();
                //绑定事件
                xhr.onreadystatechange = function(){
                    if(xhr.readyState === 4){
                        //判断成功的条件
                        if(xhr.status >= 200 && xhr.status < 300){
                            //成功的状态
                            resolve({
                                //配置对象
                                config: config,
                                //响应体
                                data: xhr.response,
                                //响应头
                                headers: xhr.getAllResponseHeaders(), //字符串  parseHeaders
                                // xhr 请求对象
                                request: xhr,
                                //响应状态码
                                status: xhr.status,
                                //响应状态字符串
                                statusText: xhr.statusText
                            });
                        }else{
                            //失败的状态
                            reject(new Error('请求失败 失败的状态码为' + xhr.status));
                        }
                    }
                }
            });
        }


        //4. 创建 axios 函数
        let axios = Axios.prototype.request.bind(null);
        axios({
            method:'GET',
            url:'http://localhost:3000/posts'
        }).then(response => {
            console.log(response);
        });
十七、axios拦截器工作原理
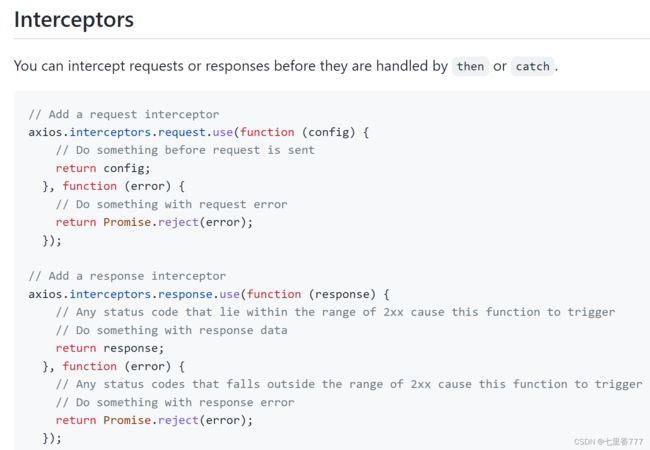
// 设置请求拦截器
        // config:配置对象,在请求拦截器中我们可以对config进行调整、修改
    axios.interceptors.request.use(function (config) {
        console.log('请求拦截器 成功 - 1号')
        // 修改config中的参数
        config.params={a:100}
        config.timeout=2000

        return config;
        //throw '参数出了问题'
      }, function (error) {
        console.log('请求拦截器 失败 - 1号')
        return Promise.reject(error);
      });

      axios.interceptors.request.use(function (config) {
        console.log('请求拦截器 成功 - 2号')
        // return config;
        throw '参数出了问题'
      }, function (error) {
        console.log('请求拦截器 失败 - 2号')
        return Promise.reject(error);
      });

    // 设置响应拦截器
    // response 我们可以对响应结果做一些处理
    axios.interceptors.response.use(function (response) {
        console.log('响应拦截器 成功 - 1号')
        // 我们可以对响应结果做一些处理
        return response.data;
        // return response;
      }, function (error) {
        console.log('响应拦截器 失败 - 1号')
      });

      axios.interceptors.response.use(function (response) {
        console.log('响应拦截器 成功 - 2号')
        return response;
      }, function (error) {
        console.log('响应拦截器 失败 - 2号')
      });

      // 发送请求
      axios({
        method:'GET',
        url:'http://localhost:3000/posts'
      }).then(response=>{
        console.log('自定义回调处理成功的结果');
        // console.log(response);
      }).catch(response=>{
        console.log('自定义失败回调');
        // console.log(response);
      });
运行结果:

node_modules/axios/lib/core/Axios.js文件中:

十八、模拟实现axios拦截器功能
//构造函数
        function Axios(config){
            this.config = config;
            this.interceptors = {
                request: new InterceptorManager(),
                response: new InterceptorManager(),
            }
        }
        //发送请求  难点与重点
        Axios.prototype.request = function(config){
            //创建一个 promise 对象
            let promise = Promise.resolve(config);
            //创建一个数组
            const chains = [dispatchRequest, undefined];
            //处理拦截器
            //请求拦截器 将请求拦截器的回调 压入到 chains 的前面  request.handles = []
            // console.log( this.interceptors.request.handlers);
            this.interceptors.request.handlers.forEach(item => {
                chains.unshift(item.fulfilled, item.rejected);
            });
            //响应拦截器
            this.interceptors.response.handlers.forEach(item => {
                chains.push(item.fulfilled, item.rejected);
            });

            // console.log(chains);
            //遍历
            while(chains.length > 0){
                promise = promise.then(chains.shift(), chains.shift());
            }

            return promise;
        }

        //发送请求
        function dispatchRequest(config){
            //返回一个promise 队形
            return new Promise((resolve, reject) => {
                resolve({
                    status: 200,
                    statusText: 'OK'
                });
            });
        }

        //创建实例
        let context = new Axios({});
        //创建axios函数
        let axios = Axios.prototype.request.bind(context);
        //将 context 属性 config interceptors 添加至 axios 函数对象身上
        Object.keys(context).forEach(key => {
            axios[key] = context[key];
        });
        // console.dir(axios);

        //拦截器管理器构造函数
        function InterceptorManager(){
            this.handlers = [];
        }
        InterceptorManager.prototype.use = function(fulfilled, rejected){
            this.handlers.push({
                fulfilled,
                rejected
            })
        }


        //以下为功能测试代码
        // 设置请求拦截器  config 配置对象
        axios.interceptors.request.use(function one(config) {
            console.log('请求拦截器 成功 - 1号');
            return config;
        }, function one(error) {
            console.log('请求拦截器 失败 - 1号');
            return Promise.reject(error);
        });

        axios.interceptors.request.use(function two(config) {
            console.log('请求拦截器 成功 - 2号');
            return config;
        }, function two(error) {
            console.log('请求拦截器 失败 - 2号');
            return Promise.reject(error);
        });

        // 设置响应拦截器
        axios.interceptors.response.use(function (response) {
            console.log('响应拦截器 成功 1号');
            return response;
        }, function (error) {
            console.log('响应拦截器 失败 1号')
            return Promise.reject(error);
        });

        axios.interceptors.response.use(function (response) {
            console.log('响应拦截器 成功 2号')
            return response;
        }, function (error) {
            console.log('响应拦截器 失败 2号')
            return Promise.reject(error);
        });
        // console.dir(axios);


        //发送请求
        axios({
            method: 'GET',
            url: 'http://localhost:3000/posts'
        }).then(response => {
            console.log(response);
        });
十九、axios取消请求工作原理
二十、模拟实现axios取消请求功能
//构造函数
        function Axios(config){
            this.config = config;
        }
        //原型 request 方法
        Axios.prototype.request = function(config){
            return dispatchRequest(config);
        }
        //dispatchRequest 函数
        function dispatchRequest(config){
            return xhrAdapter(config);
        }
        //xhrAdapter
        function xhrAdapter(config){
            //发送 AJAX 请求
            return new Promise((resolve, reject) => {
                //实例化对象
                const xhr = new XMLHttpRequest();
                //初始化
                xhr.open(config.method, config.url);
                //发送
                xhr.send();
                //处理结果
                xhr.onreadystatechange = function(){
                    if(xhr.readyState === 4){
                        //判断结果
                        if(xhr.status >= 200 && xhr.status < 300){
                            //设置为成功的状态
                            resolve({
                                status: xhr.status,
                                statusText: xhr.statusText
                            });
                        }else{
                            reject(new Error('请求失败'));
                        }
                    }
                }

                //关于取消请求的处理
                if(config.cancelToken){
                    //对 cancelToken 对象身上的 promise 对象指定成功的回调
                    config.cancelToken.promise.then(value => {
                        xhr.abort();
                        //将整体结果设置为失败
                        reject(new Error('请求已经被取消'))
                    });
                }
            })
        }

        //创建 axios 函数
        const context = new Axios({});
        const axios = Axios.prototype.request.bind(context);

        // console.dir(axios);

        //CancelToken 构造函数
        function CancelToken(executor){
            //声明一个变量
            var resolvePromise;
            //为实例对象添加属性
            this.promise = new Promise((resolve) => {
                //将 resolve 赋值给 resolvePromise
                resolvePromise = resolve
            });
            //调用 executor 函数
            executor(function(){
                //执行 resolvePromise 函数
                resolvePromise();
            });
        }

        //获取按钮 以上为模拟实现的代码
        const btns = document.querySelectorAll('button');
        //2.声明全局变量
        let cancel = null;
        //发送请求
        btns[0].onclick = function(){
            //检测上一次的请求是否已经完成
            if(cancel !== null){
                //取消上一次的请求
                cancel();
            }

            //创建 cancelToken 的值
            let cancelToken = new CancelToken(function(c){
                cancel = c;
            });

            axios({
                method: 'GET',
                url: 'http://localhost:3000/posts',
                //1. 添加配置对象的属性
                cancelToken: cancelToken
            }).then(response => {
                console.log(response);
                //将 cancel 的值初始化
                cancel = null;
            })
        }

        //绑定第二个事件取消请求
        btns[1].onclick = function(){
            cancel();
        }
二十一、axios源码分析总结
axios与Axios的关系:
- 从语法上来说,axios不是Axios的实例
- 从功能上来说,axios是Axios的实例
- axios是Axios.prototype.request函数bind()返回的函数
- axios作为对象有Axios原型对象上的所有方法,有Axios对象上所有属性
instance与axios的区别:
- 相同点:都既可以当函数用,又可以当对象去用,而且都有默认配置和拦截器的属性
- 不同点:默认配置很可能不一样,instance没有axios后续添加的一些方法
axios运行的整体流程:
axios的请求/响应拦截器是什么:
axios 的请求/响应数据转换器是什么:
response 的整体结构:
error 的整体结构:
如何取消未完成的请求:
写在后面
看完了这21个视频,完结撒花,强哥还是很强的哈。关于源码分析,也就是12~21,没认真看,如果以后有需要再认真学习一下吧。学完了Promise与axios,继续去学习React了
